
Home » Posts tagged 'Perfectly Plaid'
Tag Archives: Perfectly Plaid
Paper Pumpkin Alternatives & Tailored Tag Quilted Card

Hello Stamping Friends,
This post is for those of you who still have a November Paper Pumpkin kit that you never got a chance to use.
 Kind of like you never got around to posting the cards you made with the kit.
Yes, Sal, it has been a whirlwind of a month. Let me show you how I used the 24 Christmas tags to make cards.
I purchased the Night Before Christmas Memories and More Cards and Envelopes Kit so it really was like a typical Paper Pumpkin with cards and cool matching envelopes.
Snowflake Card
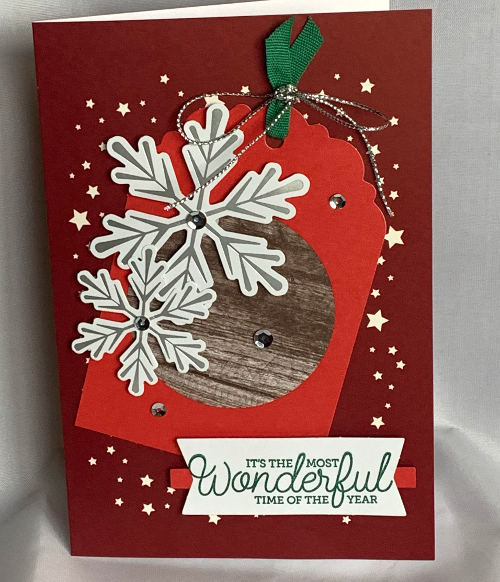
And when I ran out of the cards, I used the snowflake stamp from the PP and heat embossed white snowflakes around the edge of a Merry Merlot layer of card stock:

I have all my Paper Pumpkin stamp sets together and the ‘Wonderful time of year’ greeting was from a prior Paper Pumpkin (PP).
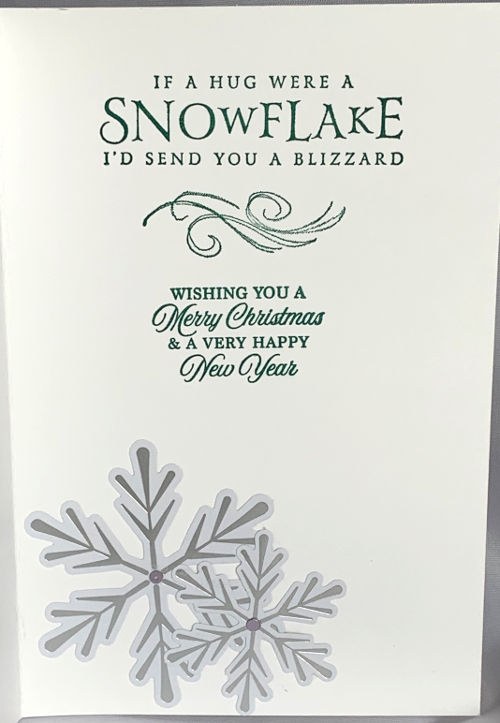
The snowflakes were in the November PP kit, the top greeting is in the retired “Beautiful Blizzard” stamp set and the Merry Christmas is from Octobers PP kit.
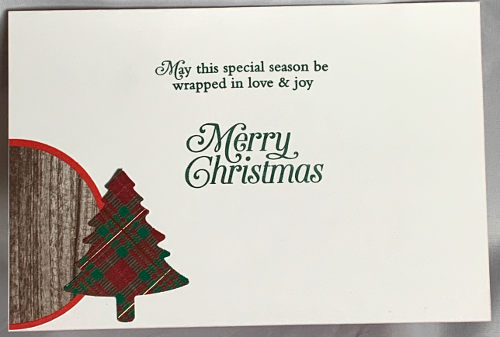
Deer and Tree Card
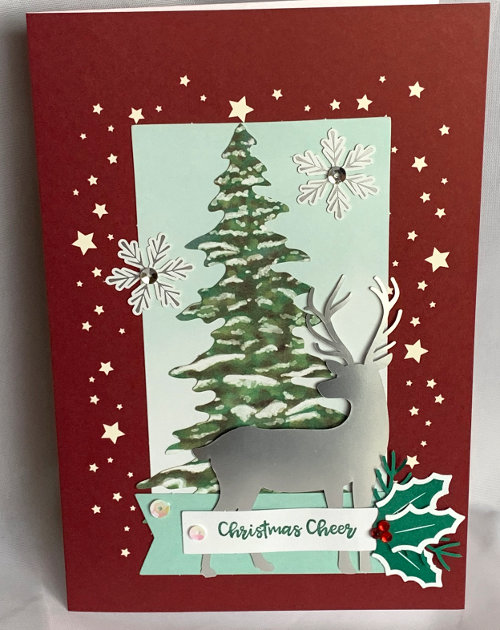
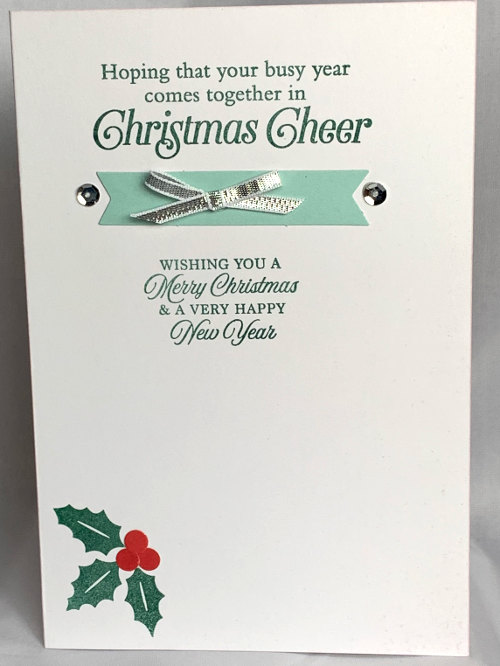
You know how I like to coordinate the greeting on the front with the inside and the “Itty Bitty Christmas” set had Christmas Cheer to match the “Perfectly Plaid” stamp set greeting that is so appropriate for Christmas time when we get so busy.
Sled Card
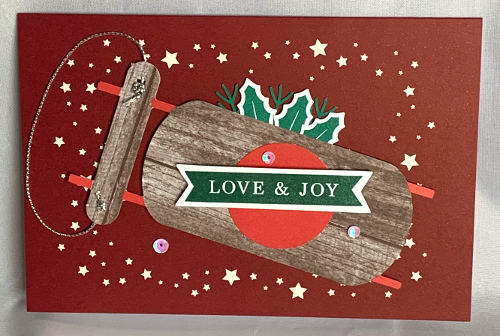
The outside greeting is from the PP stamp set and the inside is the “Perfectly Plaid” stamp set used again.
Birds Christmas Card

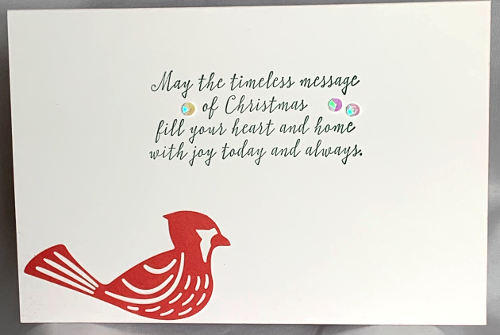
Joy to the world is from “Itty Bitty Christmas” and the inside greeting is from the “Still Scenes” snow globe stamp set.
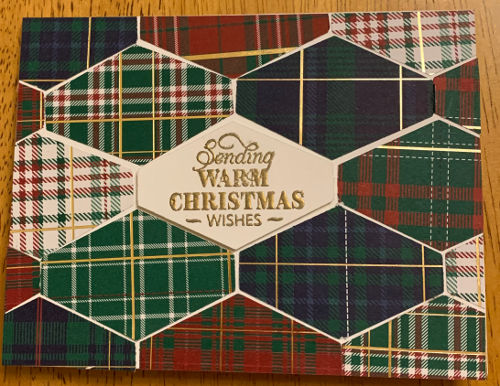
Quilted Christmas Card
One more Christmas card I would love to show you is one my Mother-in-law made using the Tailored Tag punch and the plaid designer series paper with a greeting from the “Rustic Retreat” stamp set. Mom makes gorgeous quilts but has never tried her hand at cards so it was fun to show her that the two talents of quilting and cardmaking could be one.

We started by cutting a piece of copy paper to the size of the front and then folding it in half and then half again to find the exact center so we could punch a template for placement of the middle greeting.
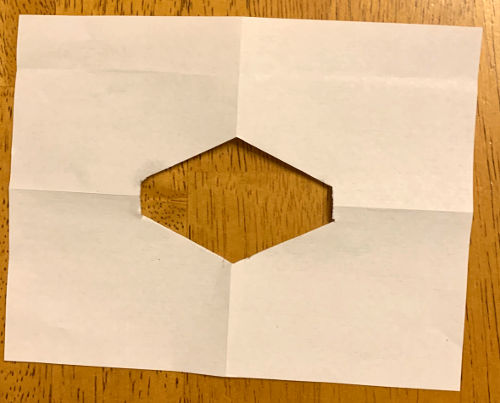
From there it was like building a quilt:
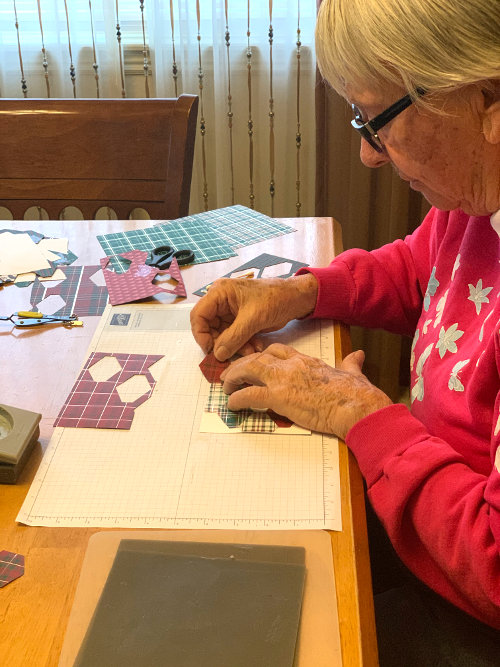
The following card is one I had started with using all the plaids but Mom’s eye for colors made the coordination much better than my collage of colors with a white border. Just think what we could do with all our left over DSP!
Thanks Mom!
SAL, Share A Lot – Only 356 days until next Christmas!!
Karen

#Elfie Diorama Card
Hostess Code: FPDMJ4X9
Hello Stamping Friends,
It’s an Elfie day in the neighborhood, an Elfie day in the neighborhood, won’t you be my neighbor!


Yup! Elfie from my head to my toes! Ruger was the cutest elf of all!

‘#Elfie’ is a super cute stamp set (page 22 of the 2019 Holiday catalog). I am casing Michelle Andrews and the diorama card she posted on her blog: www.stamppraylove.blogspot.com. I changed the coloring and positioning and added puff paint to the bobbles on their shoes and hat. I used the ‘Birch’ background stamp set to add a faux wood frame look. The little elf in the stocking would be great on the back of the card but I can only expect my club to do so much fussy cutting.


The greetings on the front and back come from the ‘Perfectly Plaid’ stamp set on page 14 of the 2019 Holiday catalog.
- Base: Crumb Cake 4 1/4 X 11; Score at 5/8, 5 3/8, 6, 10 3/4, Use 3rd largest rectangle framelit to cut the front. Mask each section of the base and stamp with Soft Suede ink using the ‘Birch’ background stamp. Stamp the front and back greetings using Shaded Spruce ink. The Stamparatus helps you stamp the greetings and restamp them to get nice dark green images. Burnish all the score lines really well to assure the card moves well and lays flat.
- Back of the Diorama: Pool Party, 4 3/4 minus 1/16 (4 11/16) to allow for score lines X 4 1/4, stamp snowflakes in Pool Party Ink and adhere snowflake sequins.
- Elves: Whisper White, 4 1/4 X 5 1/2, Stamp in Memento Ink and color with Stampin’ Blends. Fussy Cut. Use a blender pen to dip in Pool Party ink and color the area between the elf and the Christmas ornament. Glue a strip of whisper white on the back of the two tall pieces for stability.
- Snow Mounds: Thick Whisper White, Make 2: 5 1/4 X 2 1/4; creatively cut a large right hand mound and a smaller left hand mound. Score each side of the mounds 1/4″ . Make a template and you can quickly cut out the snow mounds for each card kit.

The rectangle cutout uses the 3rd largest die in the Rectangle Stitched Framelits. It is 1/2″ down from the top leaving about 3/4″ on the bottom for your greeting. I was able to stamp the three elves and the package on one 4 1/4 X 5 1/2 ( 1/4 of a sheet) whisper white. I cut two little strips 1/4 X 4 to adhere to the back of the long elf images for a bit more stability. The snow mound on the left is 1 3/4″ at the peak and goes in front of the right hand snow mound which measures 2″ at the peak.


The snow mounds are glued together to make a box of sorts.

The snow mound “box” is decorated with elves and snow. Glue the elves to the snow mounds before adding snow. Make sure nothing is adhered to the pool party background or the card will not lie flat to go in an envelope. Burnish each fold really well to help the card move. Cut around the elbows of the ‘No Peeking’ elf and don’t cut off the words. The elbows go over the front frame and the words give you a tab to glue to the back of the frame. Likewise with the package – cut a little tab at the bottom to use for gluing to the front of the frame.
The Holiday catalog has ‘Shimmery Crystal Effects’ on page 41 which you will use to adhere the ‘Ice Stampin’ Glitter’ (same page). It is most remarkable how the Crystal Effects holds the glitter and so cool how sparkly the ice glitter looks! The puff paint (page 19) is so fun to add to the hats and shoes of the elves! We learned to hold the bottle almost horizontally and let gravity do as much of the work as possible instead of squeezing the bottle. The background is pool party stamped in pool party ink with the snowflake stamp set in ‘#Elfie’. The little teensy tiny snowflakes are from the ‘Snowflake Sequins’ on page 43 of the 2019 Holiday Catalog. (Or you may have some left from the October Paper Pumpkin).
Place ‘Tear and Tape’ on the outside edges of your snow mound box and adhere to the base in the middle on the right side. This leaves about 1/8″ on each side of the base. When you adhere the other side which has the seam, place tear and tape on the seam and then fold the right hand side over the tape to insure the box will lie flat. This is a view from the bottom:

That was a lot of directions. This is when I wish I made Youtube videos. Maybe next year……

Now that we know how to make diorama cards just imagine what other stamp sets we can use. My inspiration came from Lucille who had the absolute cutest little diorama card with doggies. Hmmm…….snowmen next – or deer??
The new hostess code is FPDMJ4X9 and Stampin’ Up! is going to have a three day Extravaganza sale November 20-22.

Click HERE if you would like a printable pdf.


 It’s an Elfie day in the neighborhood – won’t you be my customer? Contact me if you have questions or need a catalog. You can also go to the catalog tab at the top of the blog to see all the catalogs.
SAL, Silly And Loving it
Karen


Welcome to my blog!

Sal Window to Products


