
Home » Posts tagged 'Detailed Bands Dies'
Tag Archives: Detailed Bands Dies
CTC #1 Pocket Card
Good morning, Stamping Friends,
Here is a walk down memory lane for a swiper St. Patrick’s Day card. When you pull the card side to side the pot of gold pops up:

You can click on the image to go to the post for detailed pictured instructions! We can change the images to a current product while maintaining rainbows, shamrocks and a pot of gold!
Now there’s a thought! And we could add a pepper shaker to be your friend!
Ann Hausmann cased Kirsteen Gill and made the cutest St. Patrick’s Day favor:
 .
.  .
.
Thank you, Ann!
February Case The Creator #1 printable pdf file (click on the blue)
 Lynn Dunn of Stamptastic Designs is our creator! Thank you, Lynn.

I made a Valentines Day card since I had all those supplies sitting at my work table, and then I used the same design for February thank you cards. Another sincere thank you to all those who ordered in February! Oops…. That’s why I have you!
I used the ‘Always In My Heart’ stamp set for Be My Valentine on a banner die cut from the Floral Heart Dies. The paper is the ‘Sweet Talk’ Designer Series Paper in the mini catalog. I fussy cut candies for the inside. The Happy Valentine’s Day fits so perfectly in the opening and is from the retired ‘Heartfelt’ stamp set. The ribbon is the Faux Linen Real Red ribbon from the mini catalog.


For the Thank You card and a card for Mom I made these:
 .
.  .
.
The paper is from the ‘Flowering Fields’ designer series paper, also in the mini catalog and I used the ‘Jar of Flowers’ stamp set to make a bouquet the perfect size for the pocket opening. I had a stack of products by the time I finished:
- Delivering Cheer stamp set – shadow under the jar
- Positve Thoughts stamp set – Hugs, Prayers, Love
- Forever Blossoms stamp set – All of me loves all of you
- Prized Peony stamp set – Love & thanks to a dear friend
- Jar of Flowers stamp set – Tulips & stems, jar stamped on a window sheet with stazon ink
- Detailed Bands Dies – cut once in Basic White and once in Fresh Freesia
- Stampin’ Blends – Lt Fresh Freesia, Dk & Lt Soft Succulent, Dk Rich Razzleberry, Lt Highland Heather, Pineapple Punch
To the above CTC instructions I added a Gorgeous Grape belly band permanently attached – 1″ X 8 1/4″, score at 1/4″ and then gently fold to determine where it will wrap on the side, then score that fold.
For the bow on the jar I used a 1/8″ X 4″ strip of Gorgeous Grape and folded in a 45 degree fold to which I added a second 1/8″ X 1 1/2″ strip tucked in at the fold.
I also added a 3 X 4 Basic White piece to go on back of the insert for writing a message, a doily and three little brass butterflies.
 . I love the little fussy cut flower laying on the ground in the insert! Nice touch.
Thank you, Sal! Let’s look at the cards from those who participated and sent me pictures.
Joy used the cut off for the pocket to make a second card and the Layering Ovals punch for two different greetings. She’s using products from the Art Gallery suite.

Sharon did three different cards – the pocket card and then used the pieces for two others. She used the ‘Expressions In Ink’ designer series paper and a paper bow from the ‘Pierced Blooms Dies’.
 .
. 

Ann used the hostess ‘Pattern Party’ designer series paper and the ‘Pierced Blooms Dies’. I love the stripes that peek out from the back:
 .
. 
Heather used the Poppy set in Pool Party for a lovely card:
 .
.  .
. Thank you, dear stampers, for participating and helping others see the variety of creations from one fun fold pocket card! We have a large flower in the opening, a whole bouquet in the opening, a lovely paper bow or even a heart in the opening!
SAL, Spring At Last
Karen
Click on Sal in the computer to go to my store:’

Christmas Stamp A Stack
Hello Stamping Friends,
October Stamp A Stack:
Here are pictures of the cards we made at the October Stamp A Stack. If you have questions leave your requests in the comment section.
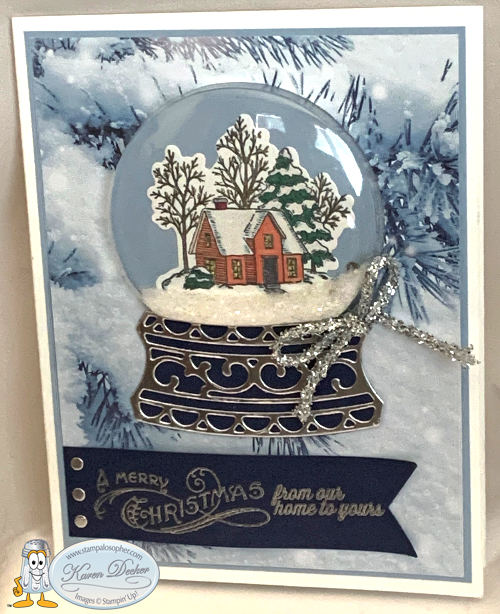
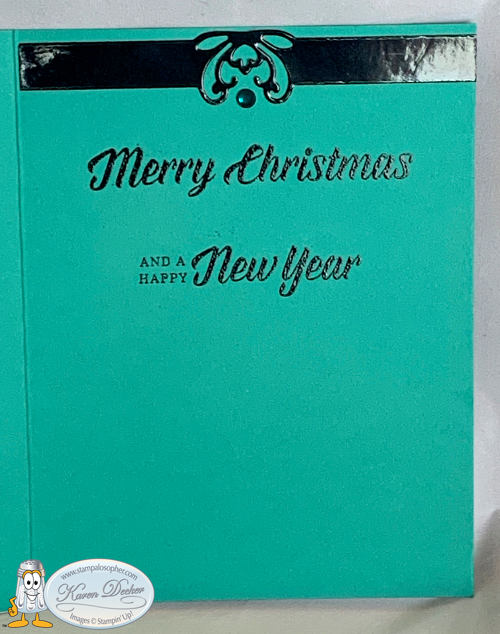
Still Scenes Snow Globe
Still Scenes Snow Globe with Feels Like Frost Designer Series Paper on a layer of Seaside Spray and a cardbase of Thick Whisper White. The banner and base background are Night of Navy. The greetings are from the Bells and Boughs stamp set and the Farmhouse Christmas.


TIP: Make yourself a template out of cardstock and you can cut multiples quickly:

- Base: Whisper White 5 1/2 X 8 1/2 Scored at 4 1/4
- 1st Layer and inside: Make 2; Seaside Spray 5 1/4 X 4
- 2nd Layer: Frost DSP 5 1/8 X 3 7/8
- Inside Top Layer: Whisper White 5 1/8 X 3 7/8
- House: Whisper White 2 1/2 X 2 1/2, Stamp in Memento ink and color with Stampin’ Blends
- Snow Globe Base: Night of Navy 3 X 1 3/4
- Snow Globe Base top layer: Silver Foil 3 X 1 3/4, Tip: attach to adhesive sheet then run through Big Shot
- Banner: Night of Navy 1″ (minus a hair) X 4″ Punch with Banner Triple Punch
- Embellishments: 8″ ribbon and three silver foil punch dots punched with hand held punch
- Snow: A little bit of Ice Stampin’ Glitter with a few of the Snowflake Sequins
Shrinky Dink Cardinal on Seasonal Wreath
Seasonal Wreath 3D embossing folder with Shrinky Dink Cardinal from Toile Christmas stamp set & Christmas Cardinal Dies. Strips of Red Glimmer Paper are scotch taped to the back of the top layer and the entire top layer is popped up on a Thick Whisper White base.


- Base: Thick Whisper White 4 1/4 X 11 scored at 5 1/2
- Wreath: Whisper White, 3 15/16 (4″ minus a hair) X 5 1/2, emboss with Seasonal Wreath Embossing Folder
- Strips of Red Glimmer Paper: Make 2; 3/8 X 5 1/2; use scotch tape to adhere to the back of the embossed wreath
- Cardinal: Clear Shrinky Dink paper, 2 5/8 X 5; Stamp cardinal with Staz On ink and color the back with alcohol markers
- Banner: Whisper White 1 1/2 X 3 1/2 Stamp greeting with Real Red Ink
- Inside Frame: Red Glimmer Paper, 3 1/8 X 3 1/8, Use circle framelit to cut circle. The two Christmas Cardinal Scrolly dies can be cut from the inside of the red glimmer paper circle
- Inside top greeting: 2 3/4 X 2 3/4 cut with one size smaller circle. I used circles 5 & 6 in the retired circles.
- Branches: Whisper White 3 X 3, Cut two large and two small branches. Place 4 glue dots in the bottom middle of the wreath and layer: one large to right, one to left, one glimmer paper scrolly die to left, one scrolly die to right touching in the middle to look like one, one small branch to the left and one small branch right about the middle to cover all the glue dots. Use glue dots to place the cardinal above the branches so he looks like he is sitting on the red glimmer scrolly.
- Embellish the wreath with red glimmer dots.
Noble Peacock Foil Christmas
This card uses the Noble Peacock Specialty Designer Series Paper with Noble Peacock Foil Sheets cut with the Detailed Bands dies and layered on an oval of Bermuda Bay. The top layer of DSP is bordered with a strip of black foil paper and another black foil strip is cut out with one of the Detailed Bands dies for the inside. The Merry Christmas is a separate piece that is popped up with dimensionals. The card base is Bermuda Bay. The outside Merry Christmas is actually a sticker I picked up from a Krazy Creations craft booth several years ago. The inside greeting is from the “Timeless Tidings” stamp set.


For those who felt the colors were better for a birthday card, the “Band Together” stamp set that is bundled with the “Detailed Bands Dies” (page 121) has a perfect birthday greeting that fits perfectly on the cut out center and was easily embossed with black embossing powder to tie to the overall shiny look of the foils. The inside greeting is from the current “Country Home” stamp set.


- Base: Bermuda Bay 5 1/2 X 8 1/2, scored at 4 1/4
- 1st Layer: Peacock DSP 3 7/8 X 5 1/2
- Strip to border 1st Layer: Black Foil 1/2 X 5 1/2
- Strip at top of inside: Black Foil 1 X 5 1/2 , cut with Detailed Bands Die
- Greeting Layer 1: Bermuda Bay die cut oval 2 1/2 X 3 1/2
- Greeting Layer 2: Turquoise Peacock Foil die cut with Detailed Bands die, trim edges so it covers from the black to the right edge, adhere directly to oval
- Greeting Layer 3: The Detailed Bands Die gives a great cut out to stamp a greeting and pop up with dimensionals
- Embellish: I used 9″ of turquoise sequin ribbon and loops of black thread to adhere behind the oval before gluing the oval directly to the DSP. Two Noble Peacock Rhinestones completed the card.
K-Cup Thank You Gift
For a little thank you gift I made a K-cup holder sitting on top of a pumpkin spice latte mix, the little squiggle below the thank you is in the “A Big Thank You” stamp set:

- Long Strip: Pumpkin Pie, 2″ X 12″ Score at 5″ and 7″ ( Tip: score at 5″ and turn and score other side at 5″), punch each end with Scalloped Tag Topper Punch.
- Inside Box: Early Espresso 3 15/16 X 3 15/16 ( 4 X 4 minus a hair on each side)
- Score each side at 1” and then make tabs at every other corner by cutting 1″ from the corner to the score line. Cut the tabs at an angle to make them easier to adhere. Use Tear and Tape to adhere sides.
- DSP: Make 2: 1 3/4 X 4 1/4
- DSP: Make 2: 1 3/4 X 7/8 (sides of the box)
SAL, Stamp A Lot of Christmas Cards
Karen

Welcome to my blog!

Sal Window to Products


