
Home » Posts tagged 'Bridge Fold Card'
Tag Archives: Bridge Fold Card
June Mystery Card #14, June Swaps and more
Hello Stamping Friends,
Hostess Code: ZBP7XPBT

For 24 hours only 12:00 AM to 11:59 PM on tomorrow June 24 you can get free shipping on orders $50 and more. Running out of Basic White cardstock, glue dots, stampin dimensionals, …… ?? Order now and if your order totals $50 or more you won’t pay the shipping. Of course the JJ (Jan-June) mini has some amazing items that are retiring and some are even up to 50% off. You can order all you want and not pay the shipping. Click in the Last Chance Box to visit the store and see what is left:

And remember, Stampin’ Up! has a new line of kits and as they sell out, new ones are added so check back often to:

 Wow – there is a lot going on!
Yes, Sal, and it just gets better! July 1 Stampin’ Up! will have a sale on select Designer Series Papers (DSP), and in August the new mini catalog and second Sale A Bration (SAB) promotion go live! If you ordered from me this past year, or are a member of club, you will receive both the mini catalog and the SAB brochure in your mailbox! Or contact me if you would like the catalogs and I will send you one. Email: [email protected] or text to 303-815-0838
Let’s look at Mystery Card Challenge #14:
Mystery Card Challenge #14 printable pdf file

Whoo hoo – it’s a Faux Pinwheel Card!!
Well, the true pinwheel cards are made with triangles and one edge folds in to the middle for a fancy fold. Our’s lies flat.
I made one just to make sure the dimensions worked:
 .
. 
I used the Dandy Garden DSP (retiring in 7 days-just saying). The greeting and the inside vine are from Very Versailles and I embossed the front with the Ornate Floral Embossing Folder. I used a 3/4″ circle punch for a scrap embossed piece. Can you guess where the stitched shape for the greeting comes from? No? Well, it is one of the shapes that you die cut with the Messages die. I cut several for use with other greetings like this one! I had truly overlooked this greeting in the Very Versailles set. I love scrolly images and this one is so nice!
Here is the second faux pinwheel card that I made during the Zoom as I instructed others how to construct the card:


I used the True Love DSP which is also retiring with the JJ Mini Catalog. The greeting is from Many Messages which was introduced in the JJ Mini Catalog and carries over to the new Annual Catalog – but wait — it has a second set of greetings in the new catalog:
 .
. Think how nice it would be to have all those shapes cut out blank or stamped to use!
Check out Ann’s bright and pretty faux pinwheel using DSP from Sale A Bration and the Tasteful Textile 3D Embossing Folder. The greeting is another in the Many Messages stamp set.

Sharon’s Pinwheel is unique with amazing trinkets and an embossing folder with anchors!

Jo’s pinwheel card uses the birds from a previous DSP and pool party for a soft subtle look! Her greeting is one I know I will use often; it comes from the Welcoming Window stamp set.

Joy’s card uses black and white DSP from the hostess Pattern Party DSP with a pop of yellow to brighten it up! She embossed the yellow with the Ornate Floral embossing folder

Such fun cards! Thank you Ann, Sharon, Jo and Joy for participating. Send me a picture if you make one yourself and I can add it to this collection of Faux Pinwheel Cards.
June 2021 Swaps
I made my June swap using the Curvy Dies and the Quite Curvy Stamp Set. If I were in charge this set would carry over for years like the Lovely As A Tree set that was in for many years. But it isn’t; it retires June 30 with the JJ Mini. The dies are on sale for 50% off and you would get free shipping tomorrow- ju..
So sorry, I do repeat myself! This card is a case of one that Jenny Moore of Stamping Moments made except I changed the flowers and the DSP. The DSP is from the hostess Pattern Party paper in Misty Moonlight layered on a Just Jade base with a bridge fold design. The yellow flowers and inside greeting are from Hand Drawn Blooms and the daisy is the medium daisy punch.


Recipe for Curvy Bridge Fold Swap Card
- Base: Just Jade, 8 1/2 X 5 1/2, Score at 2 1/8 on each end of the 8 1/2 side
- Right hand side Layer: Pattern Party DSP, 5 1/4 X 1 7/8
- Inside Layer: Basic White, 5 1/4 X 4
- Curvy Cut Left Layer: Basic White, 3 1/2 X 5 1/4, die is placed about 1″ from right hand side with flourish facing left
- Vine, bird, & 2 medium daisy punches: Basic White, 4 1/4 X 5 1/2, stamp then die cut the vine and bird
- Yellow Flowers: Bumblebee, 3 X4, stamp six with Memento Ink and flower in Hand Drawn Blooms; cut the middle out of three of the six and layer on top of the other six with a folded glue dot, ( when you roll a glue dot on itself to use, you get a slight pop up a little less than the depth of a Stampin’ Dimensional.
- Branches of leaves: Just Jade, 3 X 2 1/2, Cut three full branches with the Curvy die and one partial branch for the right hand flower
- Greeting: Misty Moonlight, 3 1/4 X 1 3/4 die cut with a Tasteful Label Die
- Bling on flowers: Ephemera pack sequins
- Faux Felt for Middle of Daisy: Use a scrap of Bumblebee and use a bone folder over and over to distress the cardstock and break the fibers until you can pull apart the two layers of the cardstock. Voila – faux felt.
- Stamp sets: Quite Curvy, Hand Drawn Blooms
- Ink: Versa Mark with white embossing powder for front greeting, Misty Moonlight for inside greeting
- Dies: Curvy Dies, Banner Bloom Dies (yellow flowers) Tasteful Labels Dies
- Punch: Medium Daisy Punch
- Stampin’ Blends: Light and Dark Shaded Spruce for vine and Light and Dark Seaside Spray for birds
Jo’s swap card was so delightful! She used the Dressed To Impress stamp set with a Melon Mambo ‘compact’ on a layer of diamond embossed Basic White on a Basic White base. For the mirror she used silver foil and she used the Layering Circle Dies to cut the folded Melon Mambo, and then sparkled it up with Bright Enamel Shapes.

 .
. Ann used the Back On Your Feet stamp set with Paper Blooms DSP and Old Olive cardstock embossed with the Checks and Dots embossing folder on a Basic Black base. She die cut the scalloped square with the Layering Square die and Crumb Cake card stock. The greeting uses the Double Oval Punch. She has Opal Rounds and Black Matte Dots for bling. She colored the turtle with Old Olive and Soft Suede blends- for a truly perfect ‘blend’ of colors.

Joy made an arrow fun fold card for a striking card-pun intended. She even made specially sized envelopes to mail them. Wow! She used the Expressions in Ink DSP, Artistically Inked Stamps & Dies, Soft Succulent Ink, and Pale Papaya Cardstock. I love that large die cut and the gold foil in the DSP. This card took my breath away!
 .
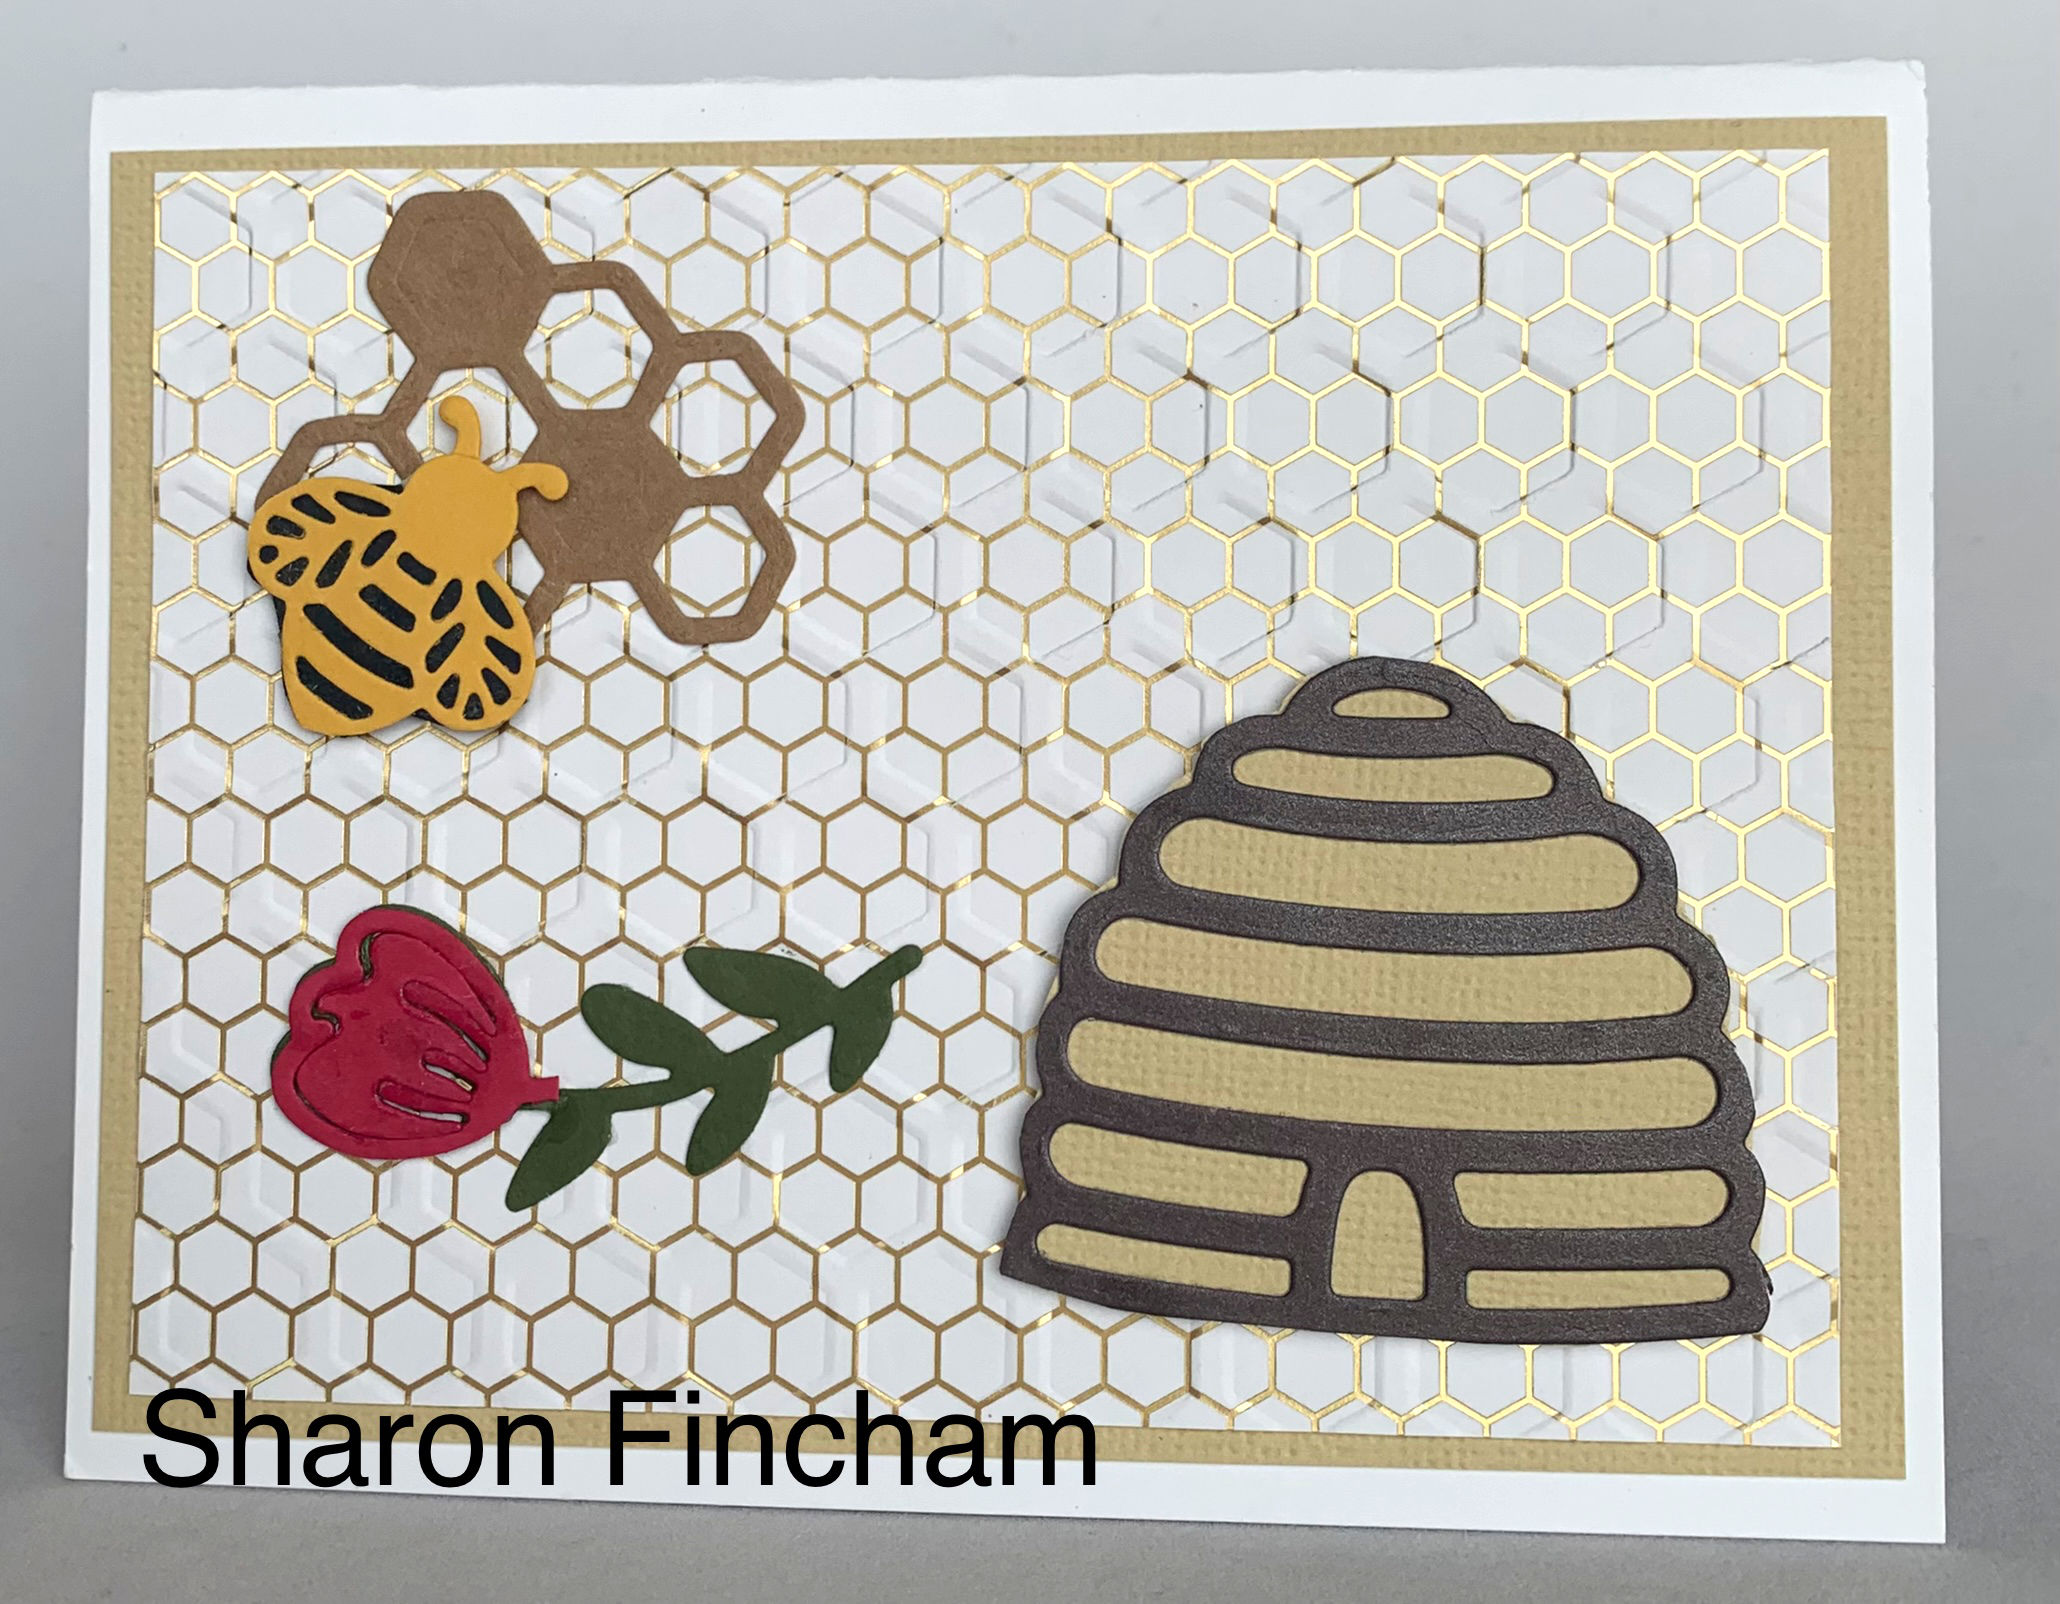
. Sharon’s card uses the Honey Bee stamp set and the Hey Girlfriend stamp set with the Honey Bee DSP and a Honeycomb embossing folder and Bumble Bee dies. So darn cute!!


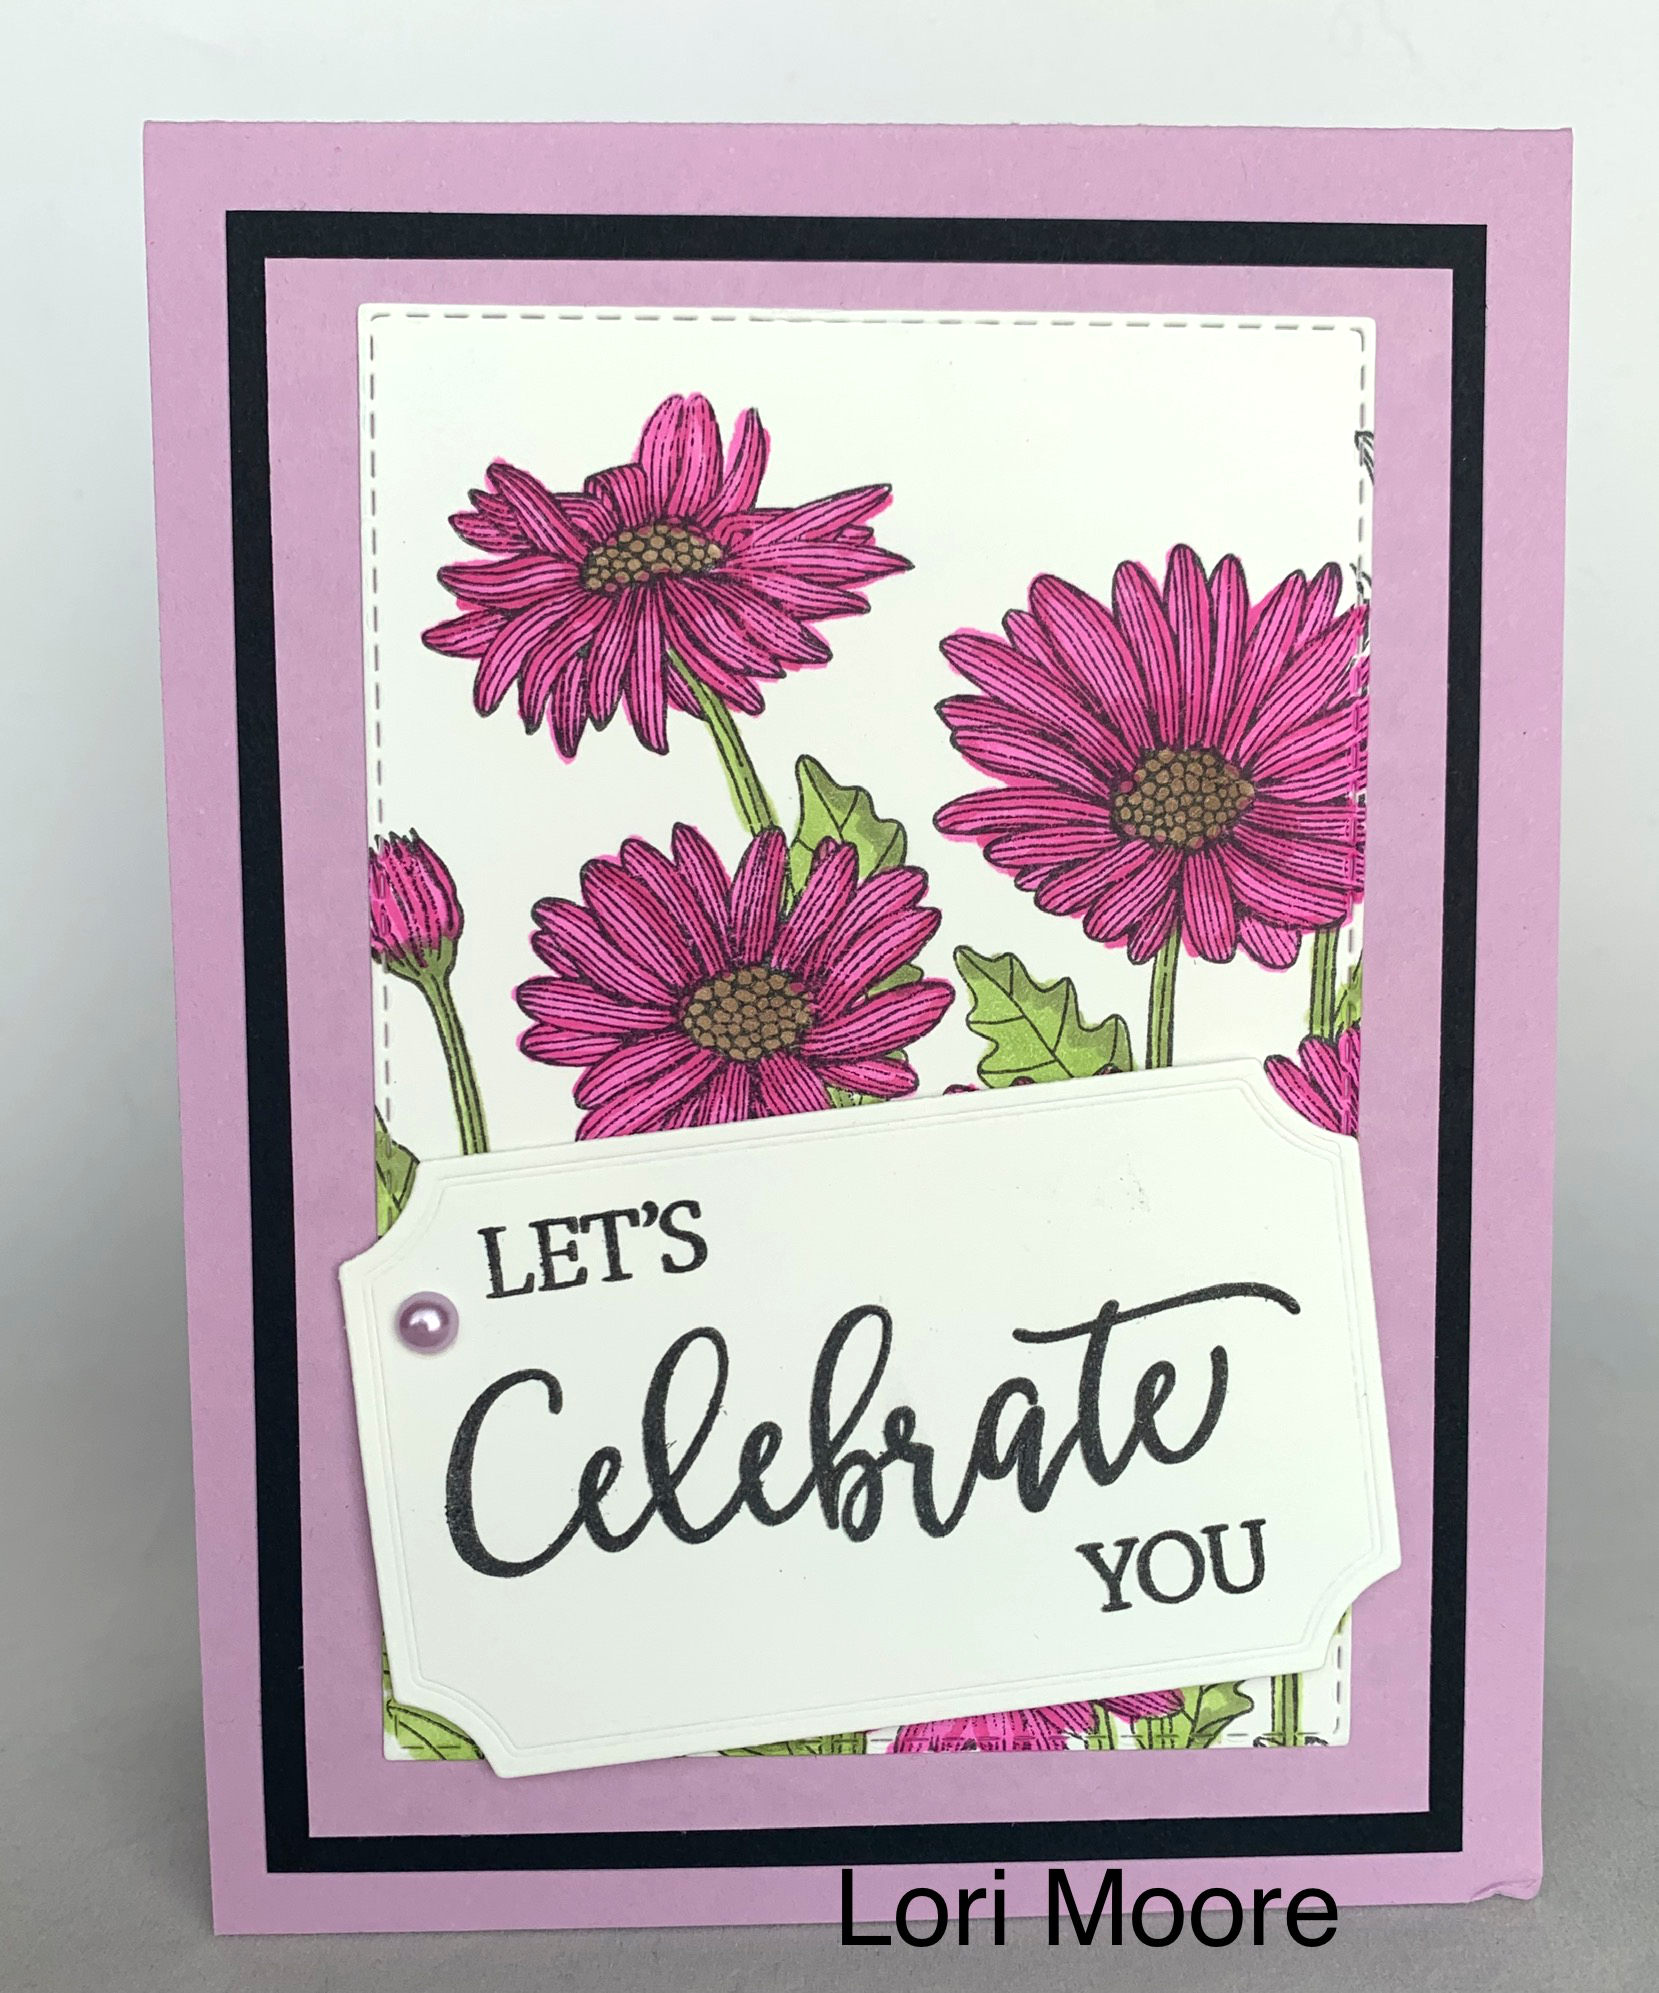
Lori’s card is another beautifully colored card using the Daisy Garden stamp set, the Create With Friends outside sentiment and the Best Year stamp set for the inside sentiment. Her layers are Fresh Freesia, Basic Balck and Whisper White with the top layer cut with the Rectangle Stitched Framelit Die. She colored with Magenta Madness, Mossy Meadow, Bronze and Granny Apple Green Blender Pens. Gorgeous card! I love black as an accent and daisies – ahh be still my heart.


It is a good thing that our cards aren’t in a contest. It would be impossible to pick a winner!
I had three other cards that I wanted to show you just for fun.
Sharon was in a seaside mood and made this additional card:

Joy was using more black and white and made a beautiful card:

And Lucille gave me this thank you card after spending a weekend with me as her house was being shown:

Amazingly talented stampers- each and every one!
That is it for today! Tomorrow Stampin’ Up! will let demonstrators know what DSP will be 15% off starting July 1 so stay tuned.
July we will be traveling to Glacier National Park for a long vacation so there will be no event on my standard second Tuesday of the month but we are swapping in July and I will have those cards at the end of the month.
You told everyone you would be posting the cards from the pansy product class. Yes?
I did say that and yes, I will post those sometime soon!
In the meantime, stock up with free shipping and check out the retiring items.
Hostess Code: ZBP7XPBT
SAL, Still A Lot of items in the sales
Karen

Grace’s Garden & Garden Gateway Dies & Bookmark
Hello Stamping Friends, (Click on the title to go to the full blog if you are viewing this on your mobile device)
Today’s card is a bridge fold card using Grace’s Garden Stamp Set and Garden Gateway dies.
I used the Forever Greenery DSP (designer series paper) for the background. I thought the ferns looked like evergreen trees and made a great background. Remember that movie ‘Secret Garden’ where the children find the gate to a beautiful garden?
Here is the card with a large evergreen tree and then the card with a small evergreen tree (fern).


Do you feel like you are in a forest?
I put the greeting on the back.
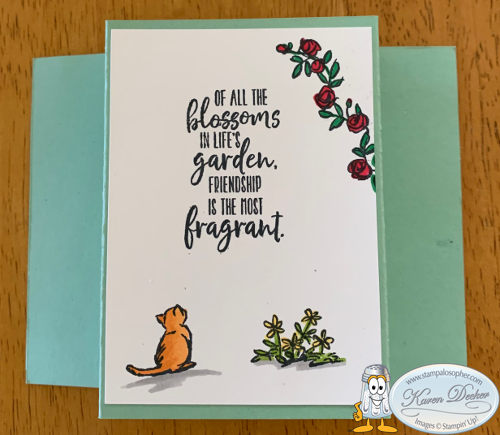
And more flowers and a sun in the middle of the front.

I taught a little bit about using the Stamparatus to save time by mounting three of the stamps on the plate and then moving the plate down two counts on the hinge and stamping again. The stamps I only wanted to stamp once, the bird, kitty cat and little flower were on the second plate and the gate and lupines on a third plate. I used three plates instead of 9 blocks when you count the greeting on the back!!

I stamped everything with Memento Tuxedo ink and then colored with Stampin’ Blends, except for the edging on the arch which I used a black Stampin’ Marker to color the edge so the arch looked very much like the gate and not so stark white. I just held the marker so I could rub the edge of the arch on the side of the marker, similar to sponging. Compare the arch on the first card without the edges colored to the arch on the second card with the coloring. Huge difference – yes? Little details like that make us artists not just crafters.
Grace’s Garden Stamp Set & Garden Gateway Dies Bridge Card Recipe
Base: Mint Macaron 8 X 4 1/4
Score the base at: 1 1/4, 2 1/2, 5 1/2, 6 3/4
Bridge Strip: Mint Macaron 5 1/2 X 1/2
Back for greeting: Whisper White 4 x 2 7/8
Front Garden Back: DSP 4 X 2 7/8
Sides and front: DSP Make 4- 4 X 1 1/8
Thick Whisper White for arch: 3 X 4 1/4, die cut with Garden Gateway Dies
Sun: 1″ punch of Daffodil Delight scrap, sponge the edge
Vines at corners: Mint Macaron 2 1/2 X 2 , die cut with Garden Gateway Dies
Cardstock for Stamped Images: Whisper White 5 1/2 X 4 1/4 make 2
Stamp two of each of the 3 flower images, die cut with Garden Gateway Dies
Stamp two fence posts and two rose vines, die cut with Garden Gateway Dies
Stamp one gate, one cat, one bird, die cut with Garden Gateway Dies
Note: 5 X 7 1/4 magnet sheet to hold the dies in place in your plastic pouch
Stampin’ Blends Coloring
Arch, Gate and Posts: Light Smoky Slate; also used the black Stampin’ Marker to color the edge of the arch.
Note: I colored with the Stampin’ Marker on the edge because the Stampin’ Blends will bleed.
Grass: Dk Old Olive
Lupine: Dk Highland Heather and Dk Granny Apple Green
Smallest flowers: Lt Mango Melody and Dk Granny Apple Green
Medium flowers: Lt Daffodil Delight, Lt Old Olive and a touch of Dk Mango melody in the center
Large hollyhock flowers: Dk Night of Navy and Lt Call Me Clover
Rose vine: Dk Real Red and Dk Shaded Spruce
Bird: Dk Daffodil Delight
Kitty Cat: Dk and Lt Pumpkin Pie
Remember to add a Lt Smoky Slate shadow below the cat and flowers on your back greeting
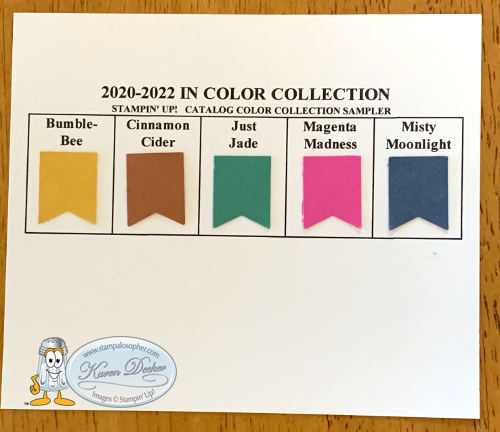
We made two other projects together – the In Color Sampler sheet and the In Color bookmark. It is tradition you know!
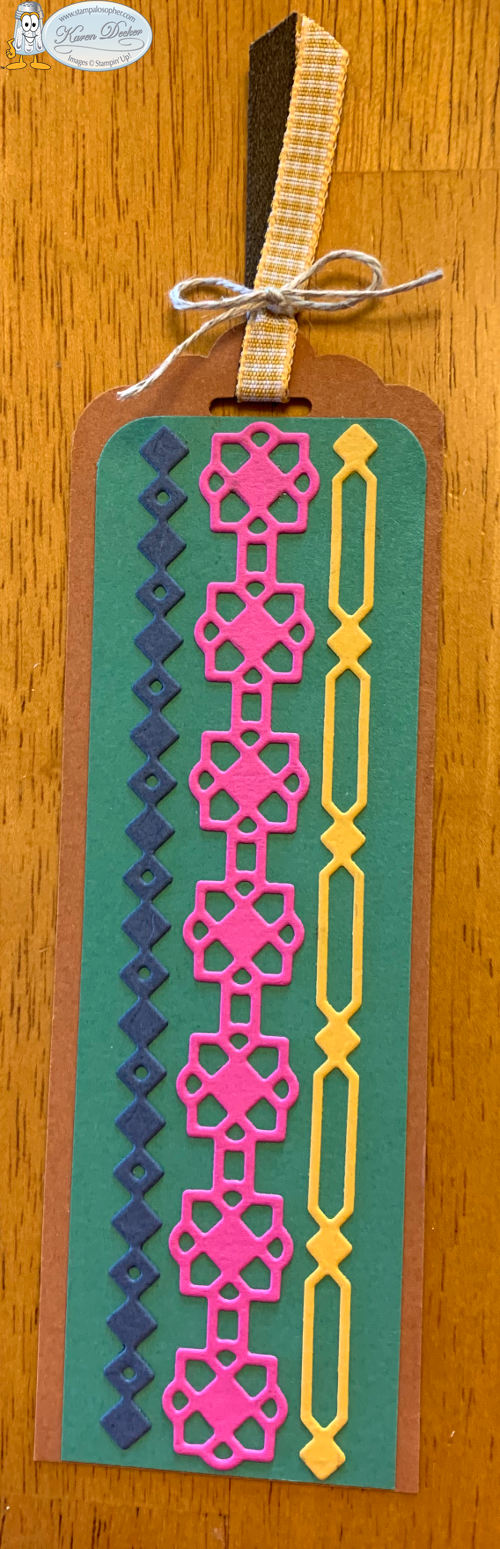
Bookmark Recipe
Base: Cinnamon Cider 6 X 2 (minus a hair) Punch with the Scalloped Tag Topper Punch
Layer: Just Jade 5 3/8 X 1 3/4 Corner round the top with the Detailed Trio Punch
Medallions: Many Medallions Dies in 1 X 5 1/2 strip Magenta Madness, 1/2 X 5 1/2 Misty Moonlight and Bumblebee.
Ribbon: 4″ of Faux Suede and Bumblebee Gingham; 6″ of Linen Thread
Magnet Insert to store Medallion Dies 6 1/2 X 6 1/4
See you soon!
SAL, Sharing A Lot
Karen

Peaceful Place Bridge Fold Card
Hello Stamping Friends,
The new hostess code is: TJPDW3JC, use this code if your order is under $150 and we won’t lose the hostess benefits. If your order is $150 or more you earn the hostess rewards yourself!
I have a Bridge Fold Card for you today using:
- Peaceful Place Stamp set, page 59 of the annual catalog, item #146689 in clear, #146686 in wood
- Nature’s Poem Designer Series Paper, page 189, #146338
- Botanical Tags Thinlits, page 20, #146824 or bundle with the stamp set in clear or wood.
- Leaf Ribbon, page 200, #146905
- Linen Thread, page 201, #104199
- Whisper White Baker’s Twine, page 201, #124262
- Tranquil Tide 1/4″ Velvet Ribbon, page 37 of the Holiday Catalog, #147802
- Tools: Big Shot, Versa Mark and White Embossing Powder, Tranquil Tide Paper and Ink, Adhesives & scissors


The green is the rich Tranquil Tide and so much better in real life. The card folds down either to the left or right to fit perfectly in our envelopes.
- Base, Gray Granite, 8″ X 4 1/4″, scored at 1 1/4″, 2 1/2″, 5 1/2″, 6 3/4″
- Middle Layer, Tranquil Tide, 4″ X 2 3/4″
- Panels, Nature’s Poem Designer Series Paper, 4″ X 1″ make 4
- Bridge Base, Tranquil Tide, 5 1/2″ X 1 1/4″
- Bridge Top Layer, Gray Granite, 5 1/4″ X 1″
- Bird Cut Out, 2 1/2″ X 2 1/2″
- Scrap of Gray Granite to cut out birds
- Tranquil Tide Velvet Ribbon, 6 1/2″, this gives you 1/2″ to lap on each side
- Leaf Ribbon, 8 leaves cut out and 4 layered on each side of greeting with glue dots
- Linen Thread, 12″, 6″ for each side
- Baker’s Twine, Whisper White, 12″, 6″ for each side, Tie a bow together with the linen thread
Stamp the tree scene in Versa Mark, apply white embossing powder and heat. I used Tranquil Tide ink for the greeting and set up the Stamparatus so I could stamp it, reink and stamp again to get a nice dark image. I am loving this tool! Attach one side of the bridge to the very edge using double back tape and then fold over that side to apply the other side of the bridge to the opposite edge with your double back tape.
I see lots of potential for Christmas cards using our lovely Designer Series Paper. The birds could have a tiny ornament on a metallic thread hanging from their beaks. Hmmmm……. it’s fun to get in the design mode! I would love to see what bridge fold cards you make!
Stampin’ Up! had a special announcement for us at last week’s convention in Orlando. They are introducing “Cling Stamps” and they are no longer going to carry the wood stamps or the clear stamps as we used to know them. The cling stamps look just like the clear stamps with the nice red rubber and the labels all look the same – until you attach them. The label is made of a new product which clings really well to the blocks! No more putting two way glue on the back of our stamps! They warned us, though, that both sides are very “clingy” so you need to be extra careful in putting the label on since you won’t be able to pull it up and reposition it. Wood will still be used on the large background stamps, otherwise our options will be ‘cling’ or ‘photopolymer’.
They also had another announcement. They have a Stamparatus bag! It will be available for you to purchase December 5! It could be under the Christmas tree for you; just have that special someone call me and I will order it (secretly)!

While you are thinking Christmas gifts, you might want to consider gifting Paper Pumpkin. You can order Paper Pumpkin in the online store and you will be emailed a code and a link to Paper Pumpkin. You will give the very fortunate recipient the code and they will go online to enter their Paper Pumpkin gift under their own email. Be sure they know that they do not enter their payment information since you have already paid for it.

1-month, item # 137858; 3-month, #137859; 6-month, #137860; 12 month, #137861
You could make a Christmas card with an insert for a gift card and your shopping for them is done- and you have the fun of creating a card instead of braving the crowded mall!
SAL, Stamp A Lot of Christmas cards (the Stamparatus will simplify the process)
Karen Click on SAL to go to the online store.

Welcome to my blog!

Sal Window to Products


