
Home » Posts tagged 'Sprinkles of Life'
Tag Archives: Sprinkles of Life
Father’s Day Fun Cards
Punch art is our fun for today as we punch away to make a hamburger with chips and a pickle!


Recipe
- Base: Thick White, 5 1/2 X 8 1/2, scored at 4 1/4
- Layer 1 (X2): Merry Merlot, 5 1/4 X 4
- Tablecloth: Designer Series Paper in red plaid, 5 X 3 3/4; note: with a 6X6 DSP, cut the 5″ first and then the 3 3/4
- Inside: DSP red plaid leftover from cutting the layer, cut to 1″ X 5″
- Plate: Basic White, 4 X 3, die cut with 4th largest oval die, emboss with Tasteful Textile 3D embossing folder
- Greeting: Basic White, 2 1/2 X 5 1/2,
- stamp in memento black ink with greeting from Sprinkles Of Life stamp set
- die cut with Beautiful Shapes Die
- adhere with dimensionals
- Hamburger
- Bun: Crumb Cake, 2 X 6, run crosswise in Raindrop Embossing Folder so half the strip is embossed for the top and half is not for the bottom of the bun to glue directly to the plate

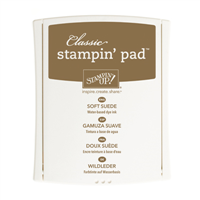
- Punch 2 from large oval punch, sponge edge with soft suede
- Meat: Soft Suede, 2 1/4 X 1 1/2, punch with Large Oval Punch, dob straight down using sponge and Early Espresso to create speckled texture; use dimensionals to pop up on bottom bun slightly offset, all other layers are glued directly to previous layer
- Cheese: Daffodil Delight, 1″ Square punched from scrap, don’t sponge;
- Lettuce: Granny Apple Green, 1 3/4 X 2 3/4, punched with Pretty Label Punch, sponge edge w/green
- Tomatoes (2): Real Red, 2 X 1 1/4, punch with 1″ Circle Punch, sponge edge w/real red
- Onion: Designer Series Paper w/purple, use 1″ circle punch- cut one full circle, then punch along that cutout’s edge with just part of the punch
- Note: When adhering the hamburger to the plate, use two dimensionals on top of each other to be able to have the right depth for attaching the hamburger at the back side, the front just needs a one dimensional layer
- Potato Chips: 1 1/4 X 11 strip of very vanilla envelope paper; run through crimper, use 3/4″ X 15/16″ oval punch to punch 7 potato chips, adhere randomly on plate
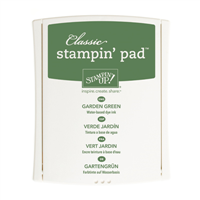
- Pickle: Garden Green Scrap, Granny Apple Green Scrap, punch each color with Word Window Punch lining up on a straight edge and punching only half, or punch a full one and cut it in half, then use your scissors to make tiny divots on the edges and then use a Garden Green Marker to add dots for texture
- Embellish with a bee or a dragonfly or an ant; my little bee is from the So Hoppy Together stamp set

Inside Greeting: Basic White, 2 X 2, stamp using Black Memento Ink with greeting from Guy Greetings, cut with another of the Beautiful Shapes Dies
 You used a die that isn’t symmetrical – that’s outside the ‘box’ for you
Sure enough! Another of those dies that I said I would never use! Ha
Summer has finally arrived in Castle Rock so I had better go water my plants! Have a wonderful day and thank you for spending part of it with Sal and I!
SAL, Stamp A Lot if you need to get out of the heat
Karen
Copyright
Unless otherwise indicated, all stamped images are 2009-2023 Stampin’ Up! The projects shown are to spice up your personal creativity and may not be copied for publication or contest submission. The content of this website is my sole responsibility and the use of and content of classes, services or products offered are not endorsed by Stampin’ Up!
Fall Warm Wishes Card with Leaves Acrostic
Hello Stamping Friends,
Thank you to all who were able to take part in the online extravaganza! Now that December is here Stampin’ Up! has closeout specials with some, not all, products on sale for a great price! They have a new category in the online store:

The Year-End Closeout contains the Clearance Rack Items, Holiday Retiring Items, and excess inventory items. Here is a list in an excel file which shows which category each product falls in: clearance, excess or retiring. However, bundles that retire do not mean the stamp and framelits retire, just the bundle with its discount.
year-end-closeout-list
or click on the picture above to go directly to the store where you can see pictures of the products.
While sales are fun, card examples are even more inspiring and I have been slack in posting all the fun cards and techniques we have been doing.
October Club:


I know October seems so long ago and though the card we made is for fall, imagine doing the same Watercolor Wash technique with Christmas colors and making ornaments instead of leaves. Send me an example if you do!
The Watercolor Wash technique comes from a video by Patty Bennett on pattystamps.com
I did a few things differently than Patty. I used the retired spider web embossing folder to emboss the leaves after cutting them out, you could get the same effect by scoring, and I used the retired “Think Happy” stamp set for the little smiles on the leaves, though it would be quite easy to draw them in.
The acrostic was one I wrote when teaching poetry to my third graders one lovely fall afternoon. I wrote the above for the example and then had them all sit outside and write their own acrostic from something they saw, or smelled, or touched, or heard – hopefully not tasted! What a fun memory!
Stampin’ Up’s Watercolor Paper #122959 is 6″ X 9″ and makes enough leaves for two cards. You could also use Shimmery White cardstock #101910. Remember to leave enough room to stamp and punch out your greeting from the paper.
Watercolor Wash Technique
Step 1) Put 4 drops of various reinkers in a paint palette (or a cool whip lid)
I used Daffodil Delight, Tangerine Tango, Cajun Craze, Pear Pizzaz
Step 2) Wet one side of the paper and then the other side so it lies flat
Step 3) Dip a paintbrush in the ink and then dab it on your paper, wash out the brush and apply a different color,
repeat until the watercolor paper is covered. Let dry.
Step 4) Using Gold Wink of Stella Glitter Brush #141898 flick gold flecks on your dried sheet by flicking the brush against the edge of its case
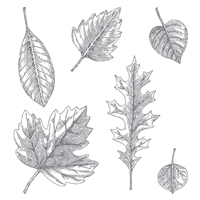
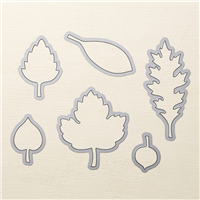
Step 5) Cut out your leaves with the Leaflets Framelits #138283 and cut out one leaf with the Pumpkin Pie Glimmer Paper #142029
-note, cut the leaf with the glimmer side of the paper facing down so the framelit cuts into the white backside to protect your framelit.
The base of the card is Cajun Craze 4 1/4 X 11 Scored at 5 1/2
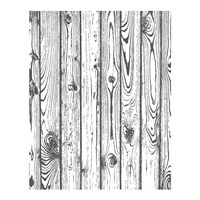
The Woodland Embossing Folder is used with Very Vanilla card stock 4 X 5 1/4 for a great background to the leaves. I typed the acrostic on Word, making four card insides from one sheet of Very Vanilla.
The greeting is from the Butterfly Basics stamp set (pg. 113) and is punched out of the watercolored paper with the Decorative Label Punch #120907. Remember, stamp first -then punch. A small dab of glue is run around the edges and then the label is dipped in Pumpkin Pie glitter.
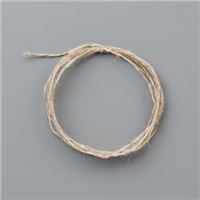
A little piece of burlap ribbon #141487 is glued on the Very Vanilla, the leaves are added with glue dots, and a gold ribbon tied on top.
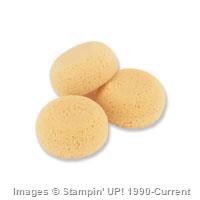
Faux Icing/Snow Technique
The Technique I taught at club came from last spring’s Stampin’ Up! convention where we learned how to make faux icing.


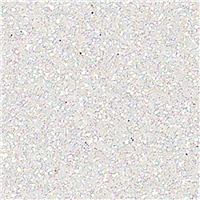
My glitter was not Dazzling Diamonds #133751 so it has a rose tint. Lesson learned! Stay with the best! The cupcake and the tree are from the Sprinkles of Life stamp set, pg. 106. I loved how the ink from the stamped image bled through the ‘icing’ to give the shadowed effect. Be careful that your mixture isn’t too thick or you won’t get that result. If you store the leftover mixture in a jar be sure and add a bit of water to make up for what has evaporated. The Tree Builder Punch #138295 was used for the birds and the cherry on top. I wish you could see the 3D effect of the snowman built from the Owl Punch 5/16″ circle on top of the 3/8″ circle punch.
And finally, I must put in a plug for Paper Pumpkin, the October kit was a set of 8 shaker cards and the kit was exceptional!

Go to paperpumpkin.com to sign up before December 10 and you will receive your kit around Christmas. Last year the December kit was a calendar for each month of the new year with a gold display stand. It was an exceptional kit. Hmmmm…I think I am saying that about all of them!
I will be posting again soon with the details of the Magic Christmas class I held at the first of November and then the Stamp A Stacks held in Elizabeth.
Stay tuned for more….
SAL,
Karen

Grateful For You, Thinking of You
(Click on the little Sal Pal image to go to the main blog)
Hello Stamping Friends,
It isn’t too early to start thinking about the holidays! Accordingly, our September club was all about Thanksgiving… sort of…..
The new Holiday catalog is so full of yummy stamp sets and tools that I was tempted to jump straight to Christmas cards but I didn’t….not exactly….. My first card is the standard for a Thanksgiving card but my second card could actually be used for either Thanksgiving or Christmas. My daughter, Stacia, lives in Steamboat Springs and the snow will be falling at Thanksgiving so the snowy card is perfect for that mountainous world.
Card 1: Grateful For You

And for the inside:

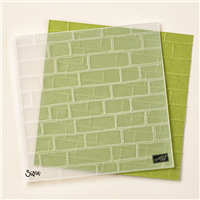
The base of the card is Cajun Craze. The Brick Embossing Folder was used to emboss Very Vanilla paper and then sponged with Crumb Cake, Baked Brown Sugar, and Cajun Craze. I sponged and responged until I reached the deep rich color I was after.
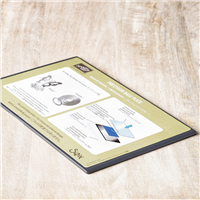
The leaves were stamped with the Vintage Leaves on Always Artichoke, Cajun Craze, and Crushed Curry and then cut with the Leaflets Framelits. The “You” comes from the Hello You Thinlits using Early Espresso Card stock and the new Precision Base Plate! No more running the card stock back and forth several times to get a good cut. The plate is a wonderful tool!
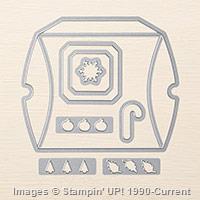
The Happy Thanksgiving is from Teeny Tiny Wishes and punched out with the Word Window punch. The garland is from Thankful Forest Friends and the little leaves are punched out with one of many thinlits in the Square Pillow Box Thinlit Die set. An Early Espresso Candy Dot ties all the colors from the front into the inside. Here are the supplies I used; click on any image to go straight to the store!


Built for Free Using:My Stampin Blog
Card 2: Thinking of You

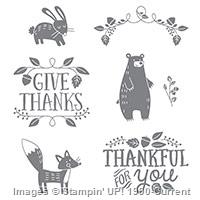
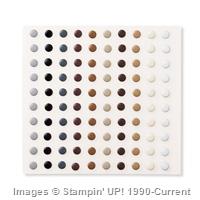
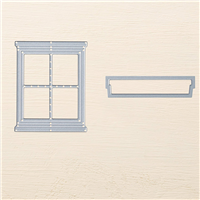
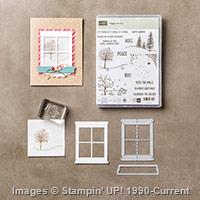
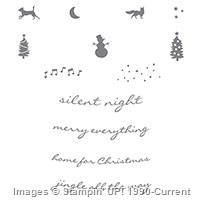
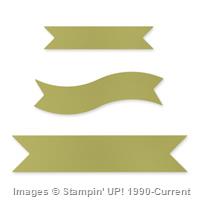
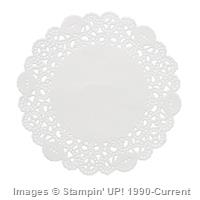
This was a fun card and a great introduction to the new holiday catalog. The stamp set with both types of trees is the Happy Scenes stamp set on page 11 of the catalog. It can be bundled with the Hearth and Home Thinlits Dies that I used for the window. (Bundling saves you 15% over buying each separately.) I cut out two windows and glued them in the middle to make a nice big picture window. The little dog comes from the Jingle All The Way stamp set on page 12. One of my stampers used the fox from that set for a wild look. The greeting is from the Happy Scenes set and bordered with dazzling diamonds glimmer paper cut out with the Bitty Banners Framelits. The glimmer paper is a full size banner cut out. The greeting is cut with the same framelit twice to shorten it. I am sure you recognize those apples from the Sprinkles of Life stamp set with its matching Tree Builder punch, and the cupcake base in the stamp set makes a perfect basket when bordered with a tiny bit of Tea Lace Paper Doilies. The little bow is Crushed Curry Baker’s Twine. The scene is stamped on our dotted specialty designer paper to give the look of falling snow. This card uses the symmetrical embossed dotted paper from Sale A Bration but we have a more snowy looking paper on page 142 of the big catalog called the Color Me Irresistible Specialty Designer Paper.
For the inside I just had to play with more products from the catalog:
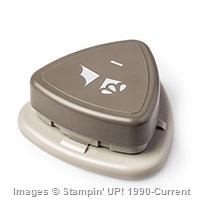
 The greeting is the Six Sayings host set in the holiday catalog (you host and earn the stamp set, I’ll do the work)! See page 51. The snow flakes are from the Flurry of Wishes stamp set, page 25, and punched with the Snow Flurry Punch-another pair you can bundle and save 15%! The Curvy Corner Trio punch is on page 18 and another must have. We were so sad when our little ribbon slide punch retired but now we have it back with two other punches all in one.


Built for Free Using: My Stampin Blog
Date Change: The next card buffet will be October 17 starting at 10:00.
Get Well Soup, Bohemian Birthday, Bohemian Thank You, Beautiful Birthday, Thank You, Card Box
(Click on the little SAL PAL icon to go to the blog, this is just a post.)
Hello Stamping Friends,
Where did summer go? Paul can’t wait for hunting season and I am already thinking about all those Christmas cards we will make together!
Let me show you what we did at the August card buffet:
Get Well Soup-printable pdf instructions
Card #1: Bohemian Get Well:


Isn’t the Bohemian Designer Series Paper (DSP for short) just beautiful. The first card uses the left over Very Vanilla paper from cutting the oval to make an additional layer. My stampers at the card buffet made that creative change.
How did you make that soup bowl? I am so glad you asked.
 You start by stamping the Very Vanilla layer with the whole image.
Then mask the little heart on the soup bowl with a sticky note and ink up the bowl part of your stamp.
Remove the sticky note! (That was the hardest thing to remember) and then stamp your bowl on the DSP.
 Make a little cut at the right side of the bowl to cut out the soup section.
 When you glue the bowl on top of your full image it will blend perfectly. Be sure and use Tombow liquid glue so you can get it perfectly aligned.
Then color the soup section. I used the fine tip end of my Crushed Curry marker and it gave a nice “soupy” look. For the inside I used a strip of DSP and a stamp from the Thoughts and Prayers stamp set:

Full directions and all the sizing are on the printable pdf file at the top of the first picture.
Envelope Card Box printable pdf instructions
As a thank you gift for attending, each stamper received this Envelope Card Box. Three of the cards at the card buffet used the Bohemian DSP and the card box used the same DSP so the stampers could have a lovely gift for themselves or have a gift to give with matching Get Well, Happy Birthday, and Thank You cards.
 I love the new Lots of Labels Framelits with its straight sides used for the buckle of the belly band, and there are seven sizes so truly LOTS of labels. The greeting is from Watercolor Wings.
Card #2: Bohemian Happy Birthday:
 This was the Happy Birthday with the Bohemian Designer Paper on Blackberry Bliss with the new Boho Chic Embossing Folder. I used a framelit from the Project Life Cards and Labels framelits to punch out the middle of the DSP where I stamped the Happy Birthday from the Birthday Blossoms stamp set.
The Bohemian DSP measures 3 5/8″ X 2 7/8″ and is on a Very Vanilla layer that measures 3 3/4″ X 3″. Not much else tricky on this card. It takes 23″ of twine to go around twice. The embossed layer is the same color as the main card stock and a full size of 5 1/2″ X 4 1/4″. The DSP cut out makes a perfect border for the inside of the card which uses another greeting from the Birthday Blossoms stamp set:
 Card #3: Bohemian Thank You:
 This card comes straight from an example in the catalog. It is white embossing on the DSP with a base card stock of Rich Razzleberry and a Bermuda Bay Banner. The stamp set used is Another Thank You. For the inside, I stayed simple and used a greeting from the Crazy About You stamp set:

Card #4: Sprinkles of Life friend card
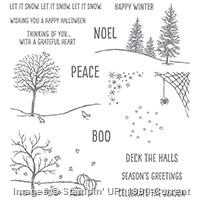
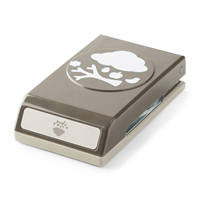
I couldn’t wait to play with the Sprinkles of Life stamp set inside the back cover of the catalog. It is this years Make A Difference stamp set. Stampin’ Up! donates $3 to the Ronald McDonald House Charities for each set they sell. But there’s more fun….. they have a punch that goes with the set! It is the Tree Builder Punch and punches out the clouds and tree leaves and the bird and the apple and the tree trunk! Here is my take on the set using Garden Green and Soft Suede:
 Kinda Eclectic is the stamp set with the sunshine and a Work of Art stamp makes quick work of adding green to the bottom. For the inside I broke my own rule and used a retired set from Sale A Bration called See Ya Later, it was just sooooo perfect for the card…..
 Nothing much you need help with on this card. The stamp sets do it all and the layers are the standard. What? You don’t have my Standard Layers worksheet? Let’s fix that:
Standard Layers-printable pdf file
Card #5: A Whole Lot of Lovely Thank You Card:
 This uses a hostess stamp set so now you really do want to have a party and earn this set – right?
There are only a couple tricky things to know on this card. The banner is the #4 banner framelit. Cut two of the same color and then cut 1/8″ off the top and the sides for a nice layered look. I used Versa Mark to add flowers to the top banner, glued it to the larger banner and then cut it in half, moved the halves 3/4″ apart, and glued the circle on top to lengthen the banner. You could also cut the paper exactly the width of the framelit, 1 7/8 “, and then run the banners only part way through the Big Shot to just cut the edges. We will do that with the next card but since this was behind a nice big circle I took the easy way. The stamped (colored with markers) Thank You is cut out with the Circle Framelit # 5 and the black border is punched with the 2 1/2 ” circle punch. This card was on Pinterest with Watermelon Wonder and Mint Macaron and looked great. This card uses Calypso Coral and last years In Color of Coastal Cabana. The inside used the same hostess stamp set:

Card #6: Birthday Blossoms:
 Hard as I tried to adjust the color this card looks blue but it is really a beautiful purple -Wisteria Wonder. It is also an example straight from the catalog with just a different card base and different ribbon and different twine. Okay, so it started out with an example from the catalog.
The tricky part is making the top layer longer than the largest framelit – easy peasy – if you remember to go through the Big Shot only part way to cut just the lovely curves and then back it out. You start with a Whisper White strip 2 13/16″ X 5 1/4″ to run just part way through the Big Shot using the largest of the new Lots of Labels framelits #7. The straight edges of this new set of framelits are perfect for adding ribbon. I put a strip of sticky tape on the back of each side of the label and used 4 1/2 ” White Organza ribbon which I trimmed after adhering. 12″ of Baker’s Twine gathered the ribbon nicely on the sides for a unique look. The stamps are all from the Birthday Blossoms stamp set, (we used two word stamps from that set on the Bohemian Happy Birthday) and the set is made for the pansy punch so no fussy cutting!

I won’t overwhelm you (or me) by listing every single item used in the six cards and the envelope box but please call or email me if there is something you can’t figure out. I would be glad to help, and if you don’t have a demonstrator I would love to earn your business!
As Always, SAL Stamp A Lot, Smile A Little, Share A Love
(and always be Salt And Light in your world!)
Karen
Welcome to my blog!

Sal Window to Products


