
Home » Posts tagged 'Pocket Card'
Tag Archives: Pocket Card
CTC #1 Pocket Card
Good morning, Stamping Friends,
Here is a walk down memory lane for a swiper St. Patrick’s Day card. When you pull the card side to side the pot of gold pops up:

You can click on the image to go to the post for detailed pictured instructions! We can change the images to a current product while maintaining rainbows, shamrocks and a pot of gold!
Now there’s a thought! And we could add a pepper shaker to be your friend!
Ann Hausmann cased Kirsteen Gill and made the cutest St. Patrick’s Day favor:
 .
.  .
.
Thank you, Ann!
February Case The Creator #1 printable pdf file (click on the blue)
 Lynn Dunn of Stamptastic Designs is our creator! Thank you, Lynn.

I made a Valentines Day card since I had all those supplies sitting at my work table, and then I used the same design for February thank you cards. Another sincere thank you to all those who ordered in February! Oops…. That’s why I have you!
I used the ‘Always In My Heart’ stamp set for Be My Valentine on a banner die cut from the Floral Heart Dies. The paper is the ‘Sweet Talk’ Designer Series Paper in the mini catalog. I fussy cut candies for the inside. The Happy Valentine’s Day fits so perfectly in the opening and is from the retired ‘Heartfelt’ stamp set. The ribbon is the Faux Linen Real Red ribbon from the mini catalog.


For the Thank You card and a card for Mom I made these:
 .
.  .
.
The paper is from the ‘Flowering Fields’ designer series paper, also in the mini catalog and I used the ‘Jar of Flowers’ stamp set to make a bouquet the perfect size for the pocket opening. I had a stack of products by the time I finished:
- Delivering Cheer stamp set – shadow under the jar
- Positve Thoughts stamp set – Hugs, Prayers, Love
- Forever Blossoms stamp set – All of me loves all of you
- Prized Peony stamp set – Love & thanks to a dear friend
- Jar of Flowers stamp set – Tulips & stems, jar stamped on a window sheet with stazon ink
- Detailed Bands Dies – cut once in Basic White and once in Fresh Freesia
- Stampin’ Blends – Lt Fresh Freesia, Dk & Lt Soft Succulent, Dk Rich Razzleberry, Lt Highland Heather, Pineapple Punch
To the above CTC instructions I added a Gorgeous Grape belly band permanently attached – 1″ X 8 1/4″, score at 1/4″ and then gently fold to determine where it will wrap on the side, then score that fold.
For the bow on the jar I used a 1/8″ X 4″ strip of Gorgeous Grape and folded in a 45 degree fold to which I added a second 1/8″ X 1 1/2″ strip tucked in at the fold.
I also added a 3 X 4 Basic White piece to go on back of the insert for writing a message, a doily and three little brass butterflies.
 . I love the little fussy cut flower laying on the ground in the insert! Nice touch.
Thank you, Sal! Let’s look at the cards from those who participated and sent me pictures.
Joy used the cut off for the pocket to make a second card and the Layering Ovals punch for two different greetings. She’s using products from the Art Gallery suite.

Sharon did three different cards – the pocket card and then used the pieces for two others. She used the ‘Expressions In Ink’ designer series paper and a paper bow from the ‘Pierced Blooms Dies’.
 .
. 

Ann used the hostess ‘Pattern Party’ designer series paper and the ‘Pierced Blooms Dies’. I love the stripes that peek out from the back:
 .
. 
Heather used the Poppy set in Pool Party for a lovely card:
 .
.  .
. Thank you, dear stampers, for participating and helping others see the variety of creations from one fun fold pocket card! We have a large flower in the opening, a whole bouquet in the opening, a lovely paper bow or even a heart in the opening!
SAL, Spring At Last
Karen
Click on Sal in the computer to go to my store:’

Mystery Card Challenge #11
Hello Stamping Friends,
New hostess code starting March 31: DJRYFBKM
I have another Mystery Card for you today. Our club members (and guests) meet by Zoom on the last Tuesday of each month and share the cards we have been making along with the swaps we have received, and then some choose to do a Mystery Card challenge. I send out the card cuts ahead of time, everyone chooses colors and papers and greetings and then I walk them through how to put the Mystery Card together.
Mystery Card Challenge #11 click on the blue for a printable pdf

It is a pocket card!
Here are the ones I made followed by the cards made by those who joined me on Zoom!
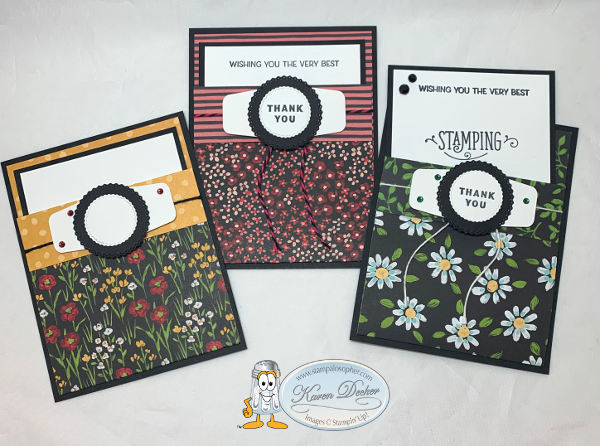
I used the Tasteful Labels Dies for the front greeting layers with a Thank You from the ‘Handsomely Suited’ stamp set. The Wishing You The Very Best greeting is in the ‘Friends Are Like Seashells’ stamp set and the STAMPING sentiment is in the ‘Stamping Your Way To The Top’ stamp set. The Designer Series Paper is from a Sale A Bration (SAB) 12 X 12 paper pack. The papers were just beautiful this year. I hope you have more than one pack in your stash!
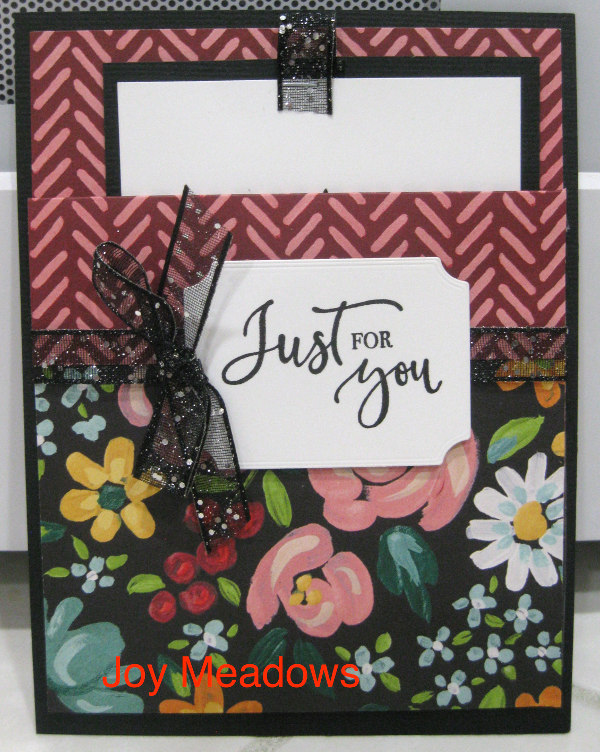
Joy Meadows used a different DSP from the same 12 X 12 SAB pack and used Glittered Organdy Ribbon. I like how she put a little piece of the ribbon on the top of the insert!
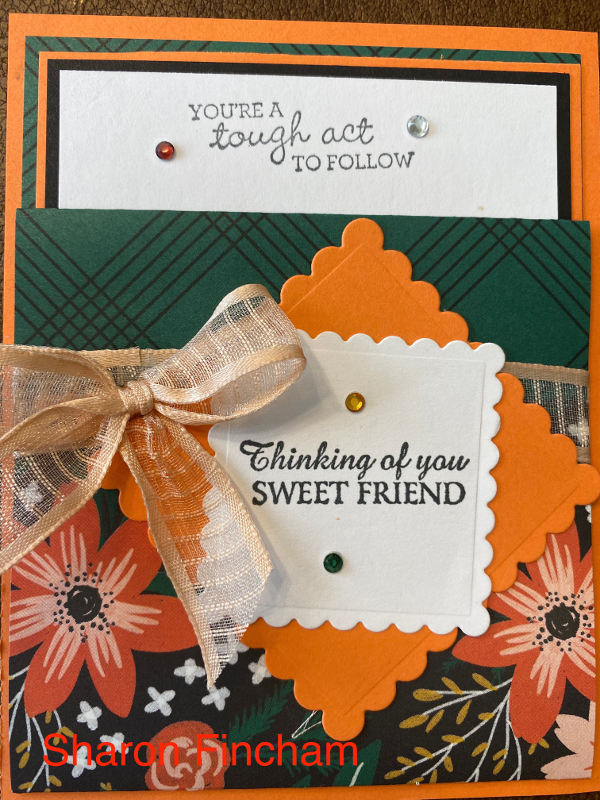
Sharon Fincham added extra layers and used the greeting from ‘Hey Girlfriend’ with beautiful Organdy Striped Ribbon!
 .
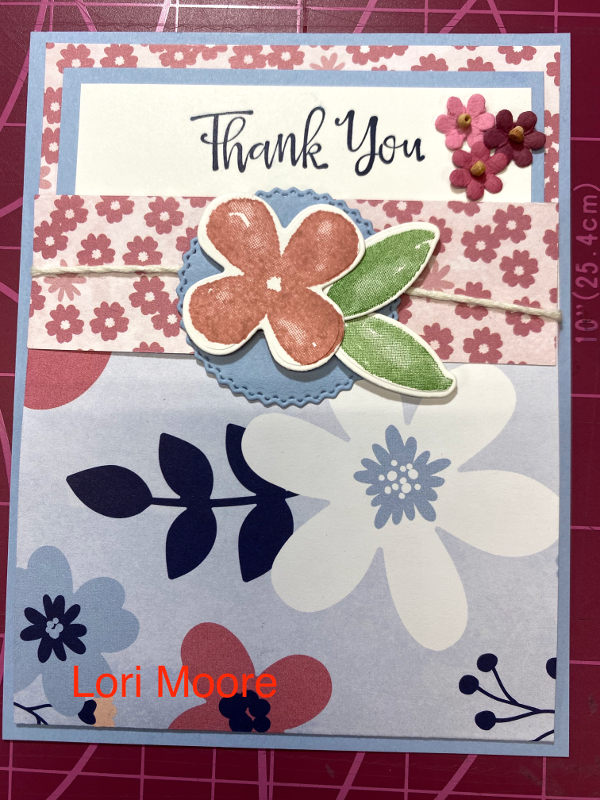
. Lori Moore used paper from a different pack of Sale A Bration DSP and cut flowers from the Pretty Perennials stamp set (with dies) in the Jan-June mini catalog and layered the flowers on a Tasteful Labels die.
 .
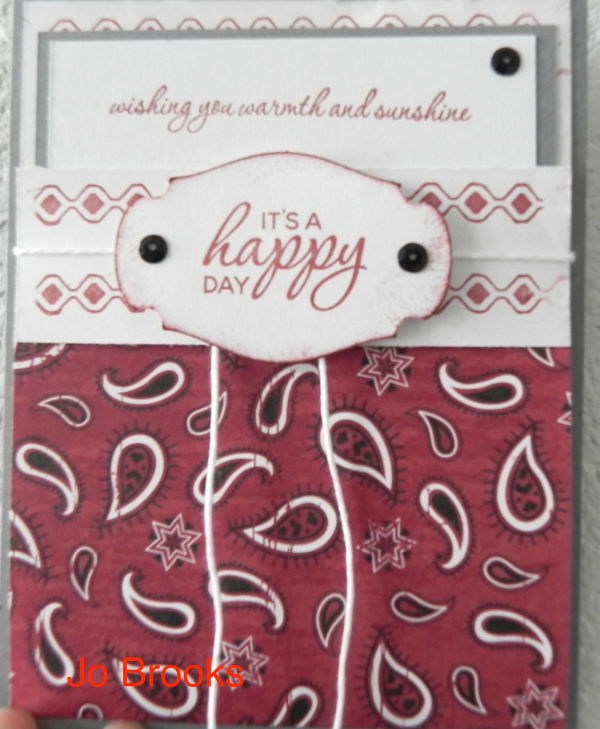
. Jo Brooks had a designer series paper with a white back so she stamped a design to add beauty! She used the Story Label punch for the greeting.
 Do we sell those pretty ribbons?
Yes, Sal, we do and they are carrying forward in the new catalog that starts May 4! There is a wonderful pack of Baker’s Twine in the new catalog as well.
Yes, again! It is a privilege of being a demonstrator and we will be able to preorder from the new annual catalog April 1 so we can prepare for our events.
Would any of you like to join our team of ‘Carin Crafters’ and get all your supplies at a discounted price plus enjoy the many other benefits of being a demonstrator – like being the first to see the new catalogs and being able to attend special events put on by Stampin’ Up! (virtual this year but fun travels in the past!). You will have access to the demonstrator website where Stampin’ Up! gives you all the information you need to be a successful business demonstrator or a well informed hobby demonstrator.
Also, contact me if you would like to be part of a club. Text 303-815-0838 or email [email protected]. We start a new rotation in May for the current club and there are openings, or you can start a club with your own group of friends. I design cards for each of your parties and we meet virtually or in person to make the cards together.
Thank you for giving me a bit of your time. I hope the cards have inspired you to start creating!
New hostess code starting March 31: DJRYFBKM. Use this code if your order is under $150 and we won’t leave free dollars on the table. If your order is $150 or more you will earn the free hostess dollars yourself so you don’t need a hostess code.
Have a wonderful day!
SAL, Singing A Lullaby to put winter to bed!
Karen
Click to order:

Mosaic Mood Pocket Card

Happy Halloween!!
Sorry – no Halloween cards this year from me. I ordered “Trick or Tweet” from the clearance rack but it sits unopened and unused for this year! Sigh…… A cold knocked me for a loop this week. Maybe if I get some energy and quit coughing I could make tags for tonight like Lisa Curcio posted on Pinterest:

I could make the doggy look like Ruger by elongating the ears and body!
This past summer I made a Mosaic Mood Hummingbird card for a Stamp A Stack; it is a case of Michele Reynolds at inspirationink.typepad.com with the addition of a different greeting that fit perfectly in the ‘V” fold and a different top and tab:


You could make it a celebration card or a birthday card or …..
Directions:
- Base X2 in Mint Macaron: 4 1/4 X 11 score each at 5 1/2; Cut one piece diagonally from center top at the score line to bottom right. Cut the second piece from the score line to bottom left. Glue the two pieces together with Tombow.
- Mosaic Designer Series Paper: 5 X 3 3/4 (plus a hair) 3 13/16 to be exact. Cut in half diagonally. Be careful with your cut cutting from right to left for right hand side and left to right for the left side. Adhere these pieces to the front flaps and then decide which side you want to be the main flap on the front. Some of the hummingbirds face right and some left so select your hummingbird to determine which DSP to use on which side of the flaps. Fussy cut him out and fussy cut a flower and two leaves. If you don’t mind fussy cutting, the paper has cute bumble bees and butterflies so they make a great addition to the inside or to put on a leaf.
- Use Tear and Tape to carefully adhere the first flap to the inside base nice and straight. Use 1/8″ tape or cut the 1/4″ in half. Then adhere the second flap over the first flap at the bottom. With Tear and Tape you can get a nice even bottom for your slider insert to stop on. Place a glue dot on the ‘V’ where the flaps meet making sure not to have any glue exposed to the base.
- Adhere the leaves to the back of the rose and then pop up the rose and leaves on the front. First place a large dimensional at the intersection of the flaps but not exposed to the slider, add several more dimensionals to the flower and place it on top of the dimensional you put at the intersection of the flaps. Pop up the hummingbird as well. I added a touch of Tombow to adhere his beak to the rose to prevent it from getting torn off.
- Slider: Very Vanilla 5 1/4 X 3 5/8, the middle is 2 5/8, mark the backside with a pencil to center the circle tab. The stamparatus worked beautifully to line up the greeting. I marked a grid sheet with the diagonals and where I needed to place the slider for stamping. I recommend saving these grid sheets for future use.
- Strip of Designer Series Paper for the top of the slider: 5/8 X 5 1/4. (One of the DSP designs was almost the 5/8″)
- Circle Tab: 1 1/4″ punch of the Designer Series Paper, glue this on the back of the slider with only the amount showing to reach the top of the base (1/4″) so the card will fit in the envelope.
The greeting is from the “Beautiful You” stamp set. It is in the annual catalog.
Note: The ‘Happy Birthday’ in the ‘Botanical Bliss’ stamp set matches this font pretty well to add to the slider.


I wish you could see the shiny parts on the paper. It is just beautiful! Here is a left facing hummingbird and garden green for the base with the “Botanical Bliss” happy birthday that matches the “Beautiful You” font.

When you run out of big flowers on the designer series paper, it is just as beautiful with two of the little ones!

Wouldn’t this make a fun Christmas pocket card using the Let It Snow Specialty Designer Series Paper and the Snowman Season stamp set? Send me a picture if you make a pocket card!!
Check out this lovely card made by the awesome Lucille Kearin:

The home office also announced this week that they are making available to everyone – not just demonstrators – the bulk Magnolia Lane Designer Series Paper:

At my Christmas Stamp A Stacks, December 4th and December 7th, we will be turning these magnolias into poinsettias to make a regal Christmas card. You won’t want to miss this one! RSVP by November 25th.
SAL, Share A Lot of treats with the little ones!
Karen


# 5 of Twelve Cards of Christmas
Hello Stamping Friends,
Thank you for visiting/following. I would love to hear if any of the cards has inspired you! I am calling today’s card the Rejoicing Pocket Card. It is one that would be easy to mass produce and is the fourth card using the Versatile Christmas stamp set. The Designer Series Paper (DSP) that I used in the pictured card is retired but the new “Home For Christmas” paper on page 9 of the Holiday catalog has a red and white striped paper that would look really awesome with the red and white striped ribbon. The directions are in a blue link right after the pictures in a printable PDF file. Just click on the blue link and the file will download for you. The card and directions will also be in the recipe box so you have the measurements and can make pocket cards for birthdays, get well, or other times when you need a quick card. I first saw it on Dawn Olchefske’s blog. Thank you, Dawn!


Rejoicing – Pocket Card Printable PDF Instruction Sheet
I think I need a new camera, (or new glasses?). Yesterday’s post looked like I spritzed it with Crumb Cake instead of sparkly white and today’s very vanilla looks a tint of red. Sigh A Loud! (Can’t resist playing with SAL acronyms.)
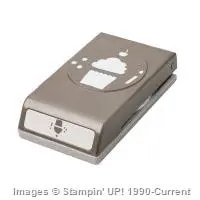
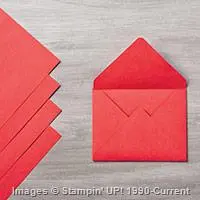
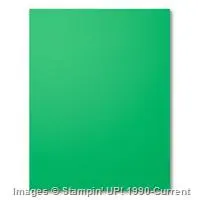
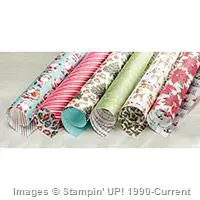
So here are the supplies you need. Just click on any product image to go directly to the online store.


Built for Free Using: My Stampin Blog

Welcome to my blog!

Sal Window to Products


