
Home » Christmas
Category Archives: Christmas
Snowflake Birthday Card by Joy Meadows
December’s Shoebox Event spotlighted Joy Meadows as our hostess, after which we played Christmas games and ate pizza!
Joy had a snowflake birthday card for us to make. The snowflake was glued at the very top and opened up for even more ‘sparkle’! It fits a 6 X 6 envelope.


Here is a picture of the back so you can see the fold lines.

These are two of the products Joy used:

“This 12 piece thin metal etched die set, Snowflake Card Creator is designed by BiBi Cameron and is part of the BiBi’s Snowflakes Collection from Spellbinders. This die set features a large snowflake and its shadow that will cover a 6″ x 6″ card front. There is also a poinsettia, small blossoms, Holly, Fir, berries, and more.”

“This 31 piece etched die and clear photopolymer stamp set, Snowflake Wishes, is designed by BiBi Cameron and is part of BiBi’s Snowflakes Collection from Spellbinders. The stamp set features 27 stamps with a variety of sentiments that coordinate with the die sentiments and banners, believe, wishing, and sending. There is also an extra blank banner if you do not want the word above it.”
The top snowflake was cut from sparkly white glimmer paper and the blue (Joy’s favorite color) was another glimmer paper with a silver glimmer paper to cut accent pieces. Just lovely! Thank you, Joy.
Little Sal has a link to Spellbinders but these sets are also sold at Scrapbook.com for the same price.
SAL Share A Lot of warmth
Karen

 . Why can’t a nose grow to be 12 inches long?
Because then it would be a foot!
Light Up Candles Christmas Card
Take a look at one more Christmas card that I would like to journal before moving on to birthday cards!

And it lights up when you press the little snowflake!


This was a kit that I ordered from…
Let me guess….. Teaspoon of Fun?
Yes, Sal! They offered a kit which included the stamp set, the light mechanism and the little jewels on the front. I purchased the ovals from them separately.
 .
. 
Hero Arts for the stamp set and Pinkfresh studio for the ovals!
 . “Combo also includes an EZ Press triple light (no wiring needed) and 3 candle gem light toppers. Each unit includes a CR2016 coin cell battery…”
Recipe
- Base: Thick Basic White, 4 1/4 X 11, scored at 5 1/2
- Layer: Poinsettia Designer Series Paper, 4 X 5 1/4
- Outside Oval: Basic White, 4 X 5 1/4, Stamp then die cut with the large oval die
- Inside Oval: Basic White, 3 X 4
- Inside Strip: Poinsettia Designer Series Paper, 1 X 4
- Greeting: From the Stampin’ Up! ‘Itty Bitty Christmas’ stamp set, Stamped in Memento black ink
- Bow: Red glitter ribbon, 6″
- Small snowflake mounted above the battery on the backside of the oval
- Adhesive strips: you will need adhesive strips on the back of the oval
Note: In the video Deb Valder used extra layers of adhesive strips for the oval to have room for the light mechanism. I used Stampin’ Up! adhesive strips and only needed the one layer, so hers must have been narrower in width.
It really helps, even if I just want to refresh my memory on how the EZ lights are mounted.
Click on little Sal in the computer to go to Teaspoon of Fun. The kit showed that it was out of stock but I called and talked to them since I wanted to have a class and they were able to order me two kits, extra EZ lights and the candle gem light toppers for those in the class that didn’t want the stamp set. They have excellent customer service!!
SAL, Stamp A Lot
Karen
So why do you always call me ‘little Sal”?
Well, Sal, ‘little Sal’, you are my gravatar, Big SAL is my closing greeting that I use for word play with an S an A and an L.
Silver Bell Ornament
It’s snowing this morning but I am not going walking in this winter wonderland. It is -7 outside and the wind is blowing so I will start the fireplace and post another Christmas card. Today’s card is a Silver Bell Ornament.


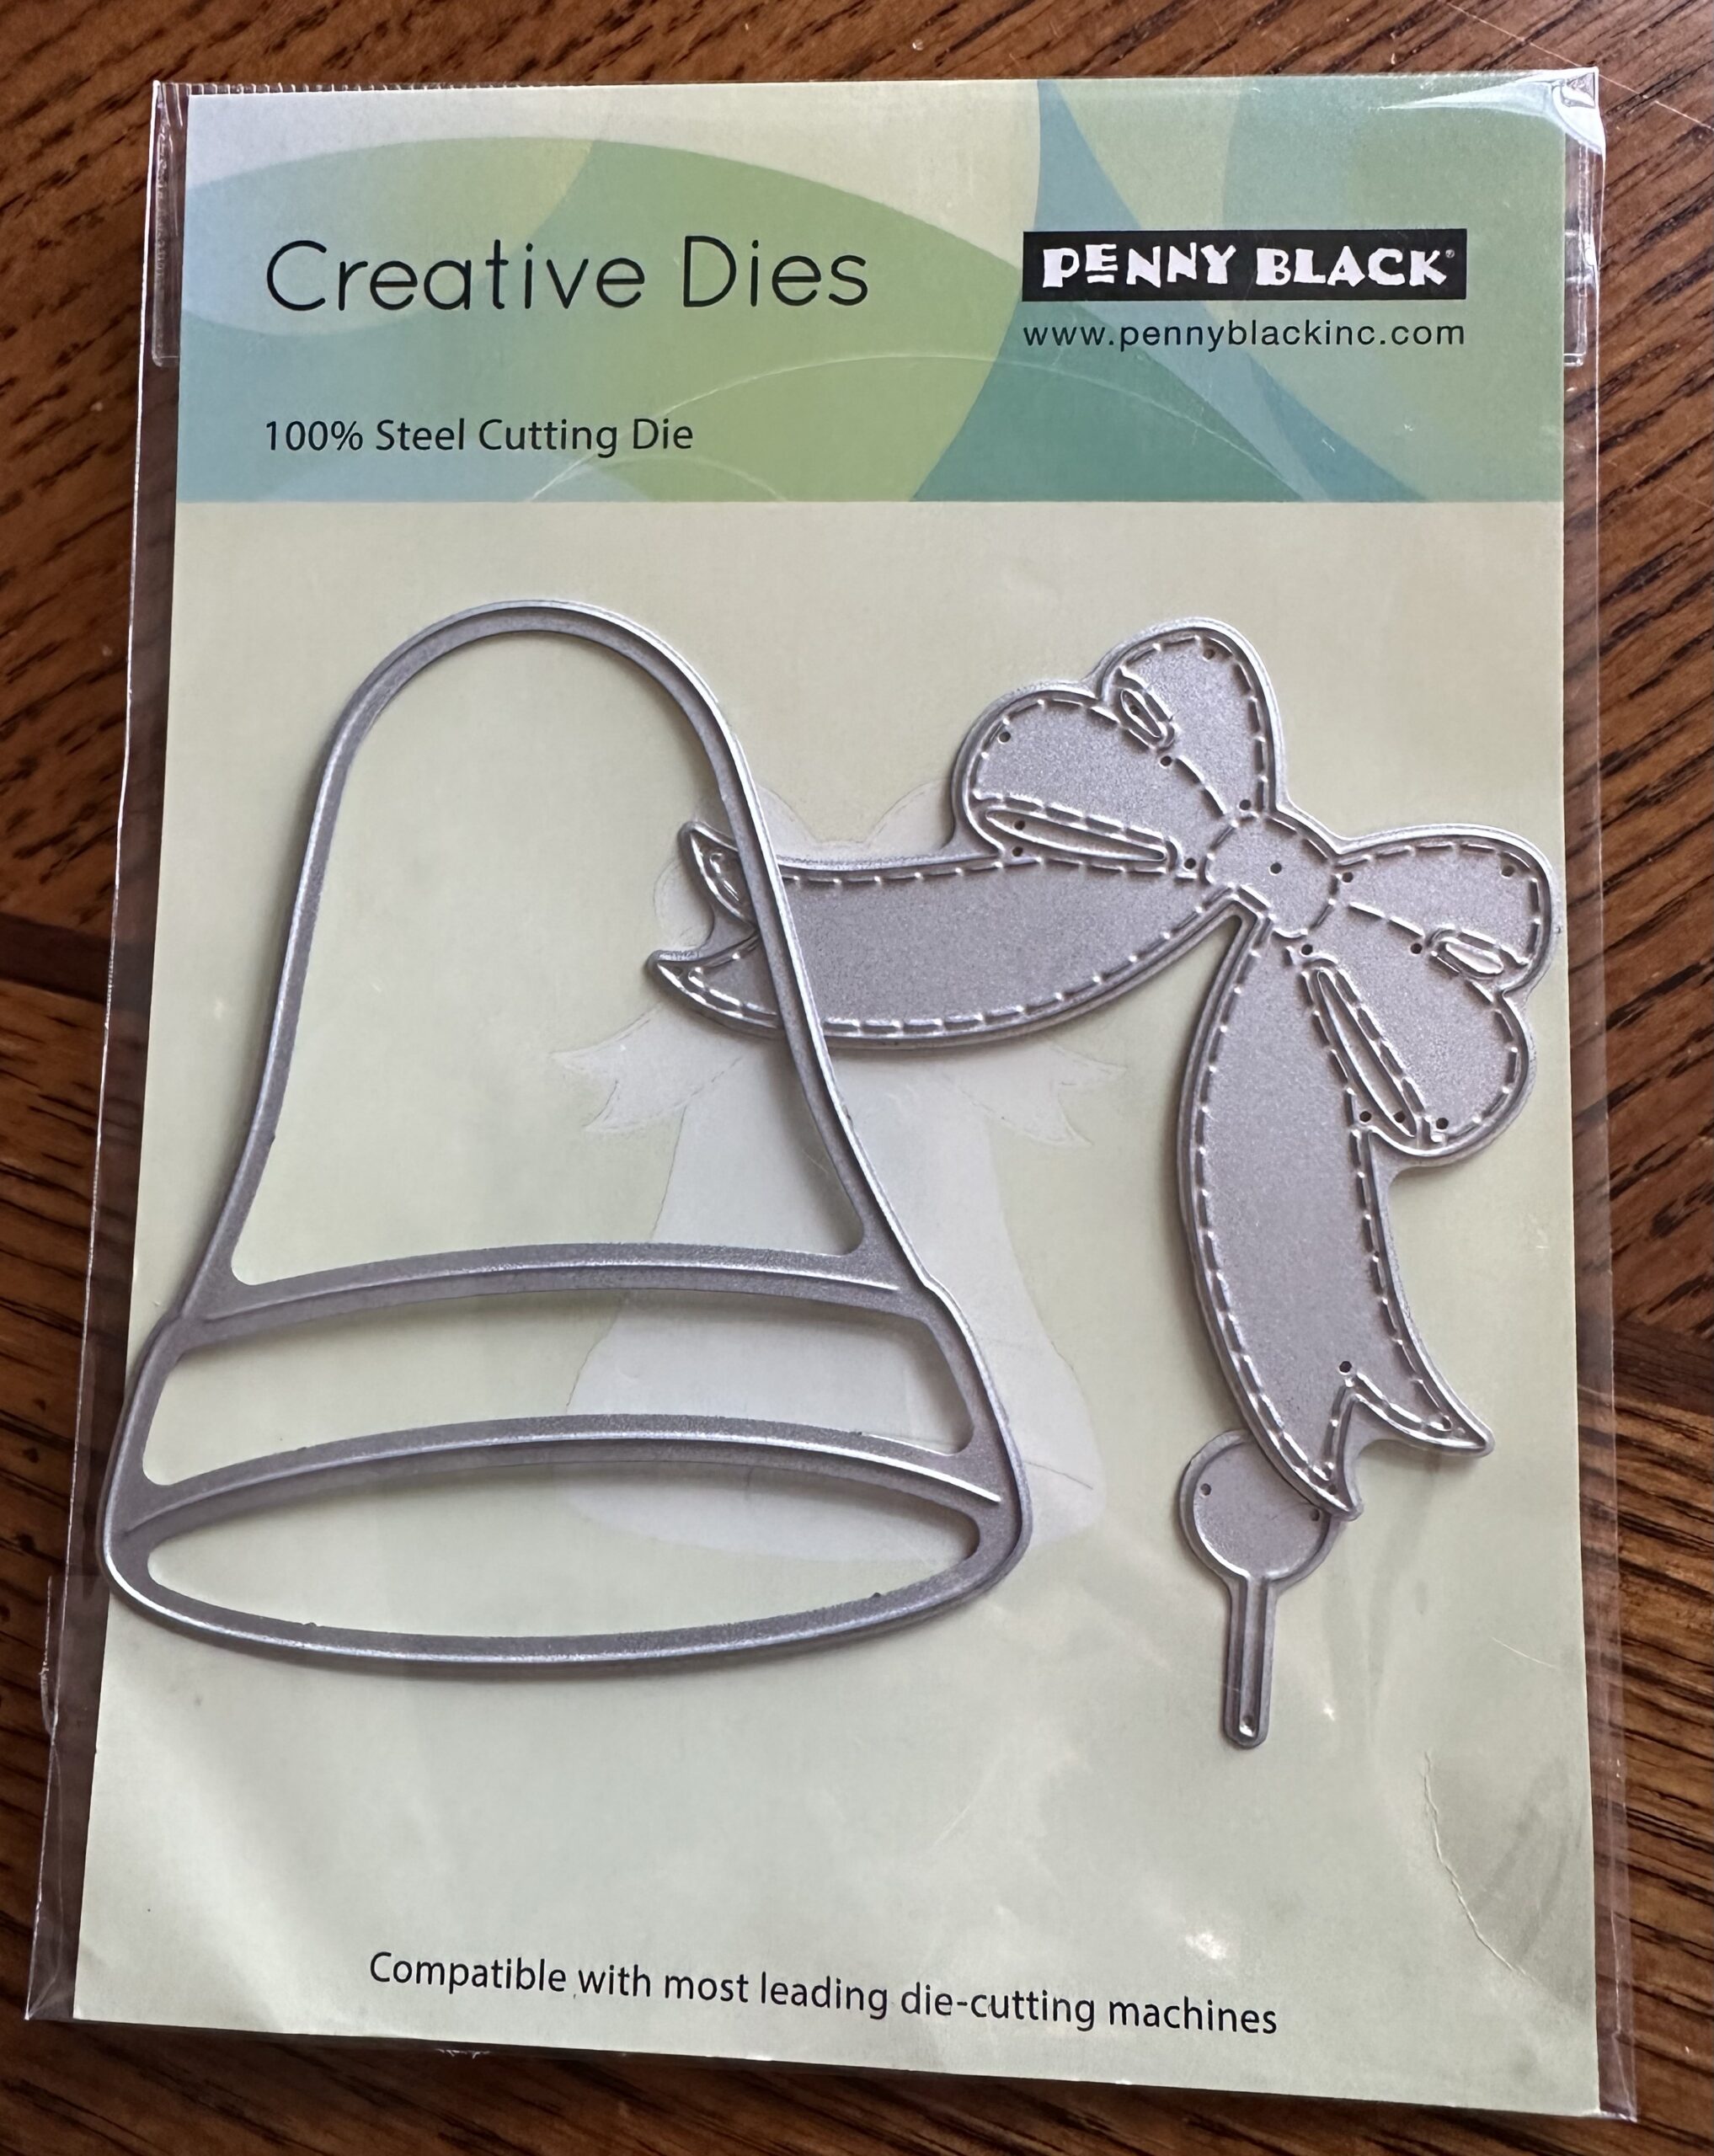
The dies are from Penny Black and Creative Expressions purchased at Teaspoon of Fun.
 .
. 
I used brushed silver cardstock and red velvet cardstock.

Die cut your bell out of the middle of your 1st layer and you won’t waste the paper, though I did two bells and ringers so I could adhere them back to back for an ornament. I used a red sharpie to add the date on the ringer.


The layer on top of the silver layer is a foiled piece of DSP (designer series paper) from my stash of mostly Stampin’ Up! paper. It’s rather pretty even without the bell.

I put a small strip of snail adhesive runner on the layer and then patted it several times with my fingers so the oil in my fingers would make the adhesive less sticky and the bell would be easy to release from the card.

Recipe
- Base: 4 1/4 X 11, Score at 5 1/2
- Border: Brushed Silver Cardstock, 5 1/4 X 4, Cut the bell and ringer from the middle
- Layer: Foiled DSP, Designer Series Paper, 5 X 3 3/4
- Bell by itself: Brushed Silver, 3 1/4 X 3 3/4
- Inside Border Strip: Brushed Silver, 5/8 X 5 1/4
- Inside Layer Strip: Foil DSP, 3/8 X 5
- Bow (X2): Red Velvet Cardstock, 2 1/4 X 3 1/2
- Joy Greeting: Red Velvet Cardstock, 1 3/4 X 2, use double back adhesive before die cutting
- Greetings
- Outside Blessed Christmas Wishes, SU ‘Itty Bitty Christmas’
- Inside Rejoicing….., SU ‘Versatile Christmas’
- 8″ of silver thread for the ornament hanger
Thanks for joining me! Stay warm.
SAL, Snowing A Lot
Karen
With a Cow-culator!
Cuppa Love Christmas Card
It’s freezing cold here in Colorado and a perfect time for a warm cup of tea!


Your followers just left to go get a cuppa!
Maybe I should as well. We had snow yesterday, but today it is just clear and cold.
This card uses a lot of products. The focal point is from ‘Memory Box’. Memory Box is like a wholesale distributor, available to businesses not personal folks like me, so you have to find someone who sells their products. I purchased mine through Teaspoon of Fun.


There are two dies which cut out three images. At first I thought I had to cut out the ‘liquid’ in a separate cut and paper piece it in the cut but the second die cuts out the image to go behind the cup and the base of the teacup can be used as the ‘liquid’. I didn’t use the base in this card.
Ahhhh……. working smarter instead of harder.
For sure, Sal, and with creating numerous Christmas cards we need all the help we can get.
Last year your New Year’s resolution was to make Christmas cards each month. How did that go?
The usual! But maybe this year…….
Let me just list the crafting details in the recipe instead of explaining what I did and then putting in the recipe.
Recipe
- Base: Thick Basic White, 5 1/2 X 8 1/2, Score at 4 1/4
- Layer (X2): Early Espresso, 5 1/8 X 3 7/8
- Top (X2): Basic White, 5 X 3 3/4; emboss with ‘Snowflake Embossing Folder’, lightly sponge yellow around top of where the teacup will be placed
- Teacup:
- Basic White, 2 1/2 X 3, die cut main image
- Early Espresso ‘Liquid’, 3/4 X 2
- Real Red, 1 1/2 X 2, sponge the middle with white ink and cut out a snowflake in Basic White, 1 X 1, from Stampin’ Up! ‘Snowfall Thinlits Dies’ and adhere with a glue dot.
- Greenery:
- Pine Boughs, Garden Green, 3 X 2 1/2, die cut 2 with largest bough in ‘Christmas Staircase Thinlits Dies’; use one full bough on the left and just the two ends on the right. Tip: It is good to work backwards adhering the pieces on the front, starting with the greeting, then the sending and finally the teacup.
- Holly Leaf, Garden Green, 1 1/4 X 1 1/4, use the smallest poinsettia in the ‘Poinsettia Dies’ Stampin’ Up! set and cut off two of the petals to make a leaf. Adhere to the teacup and add a red jewel for a holly berry.
- Sending: Real Red, 1 5/8 X 3 3/4, apply double back adhesive sheet to the cardstock and then die cut with the Stampin’ Up! ‘Sending Dies’. I used the cut out for the ‘e’ in sending to dot the ‘i’ so it was larger.
- Greeting: Early Espresso, 2 1/2 X 3/4, punched with Stampin’ Up! ‘Word Window’ punch and stamped in Versa Mark with greeting from Stampin’ Up! ‘Poinsettia Petals’ and heat embossed with white embossing powder.
- Heart: Glitter Paper, 1 X 1, die cut with teacup die and paper pieced inside heart above the teacup.
- Inside Greetings:
- Verse is from Stampin’ Up! ‘Holly Berry Happiness’ stamped in Garden Green ink
- Merry Christmas is from Stampin’ Up! ‘Poinsettia Petals’ stamped in Real Red ink
- Flourish at the bottom is from Stampin’ Up! ‘Dashing Deer’ and colored with water color markers (NOT alcohol markers) in green, red, and brown to tie in all the colors. Color the back of your stamp, huff, then stamp.
Just in case you are frustrated with my Christmas card posts well past Christmas, think of how you can make this cup a Valentine card. Click on little Sal in the computer to see what Teaspoon of Fun shows on their site-(their site takes a few seconds to load so don’t think it isn’t linked).
SAL, Smile A Little
Karen
What do you call a lazy kangaroo?
Foiled Christmas Cards
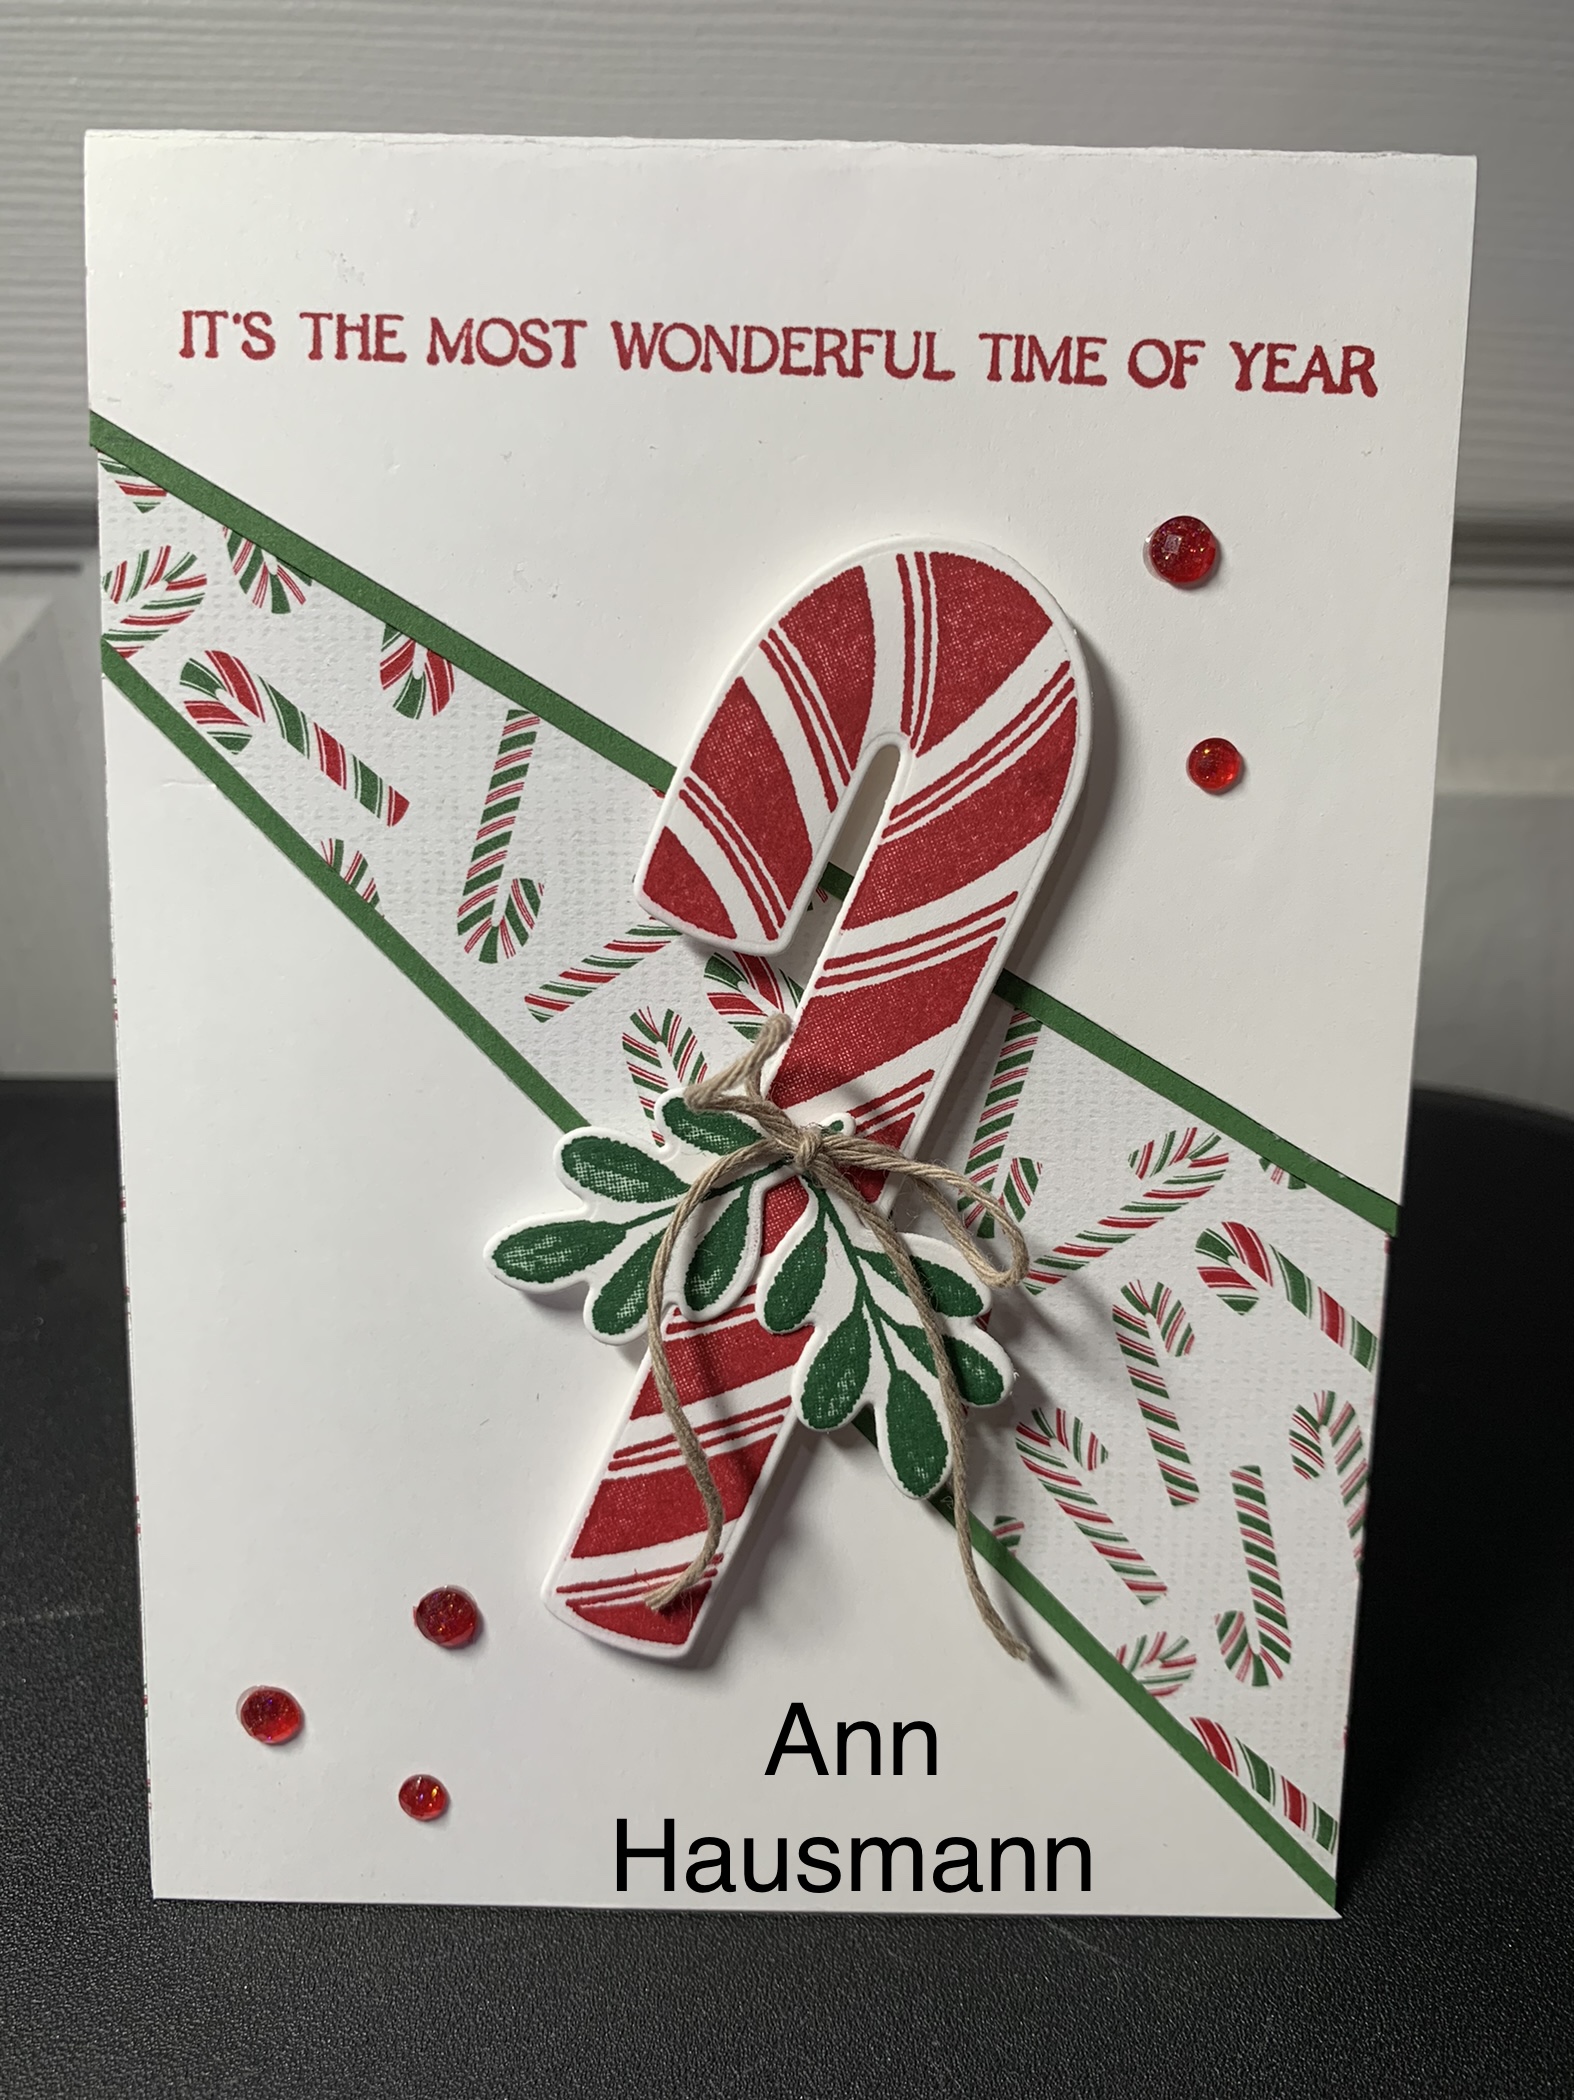
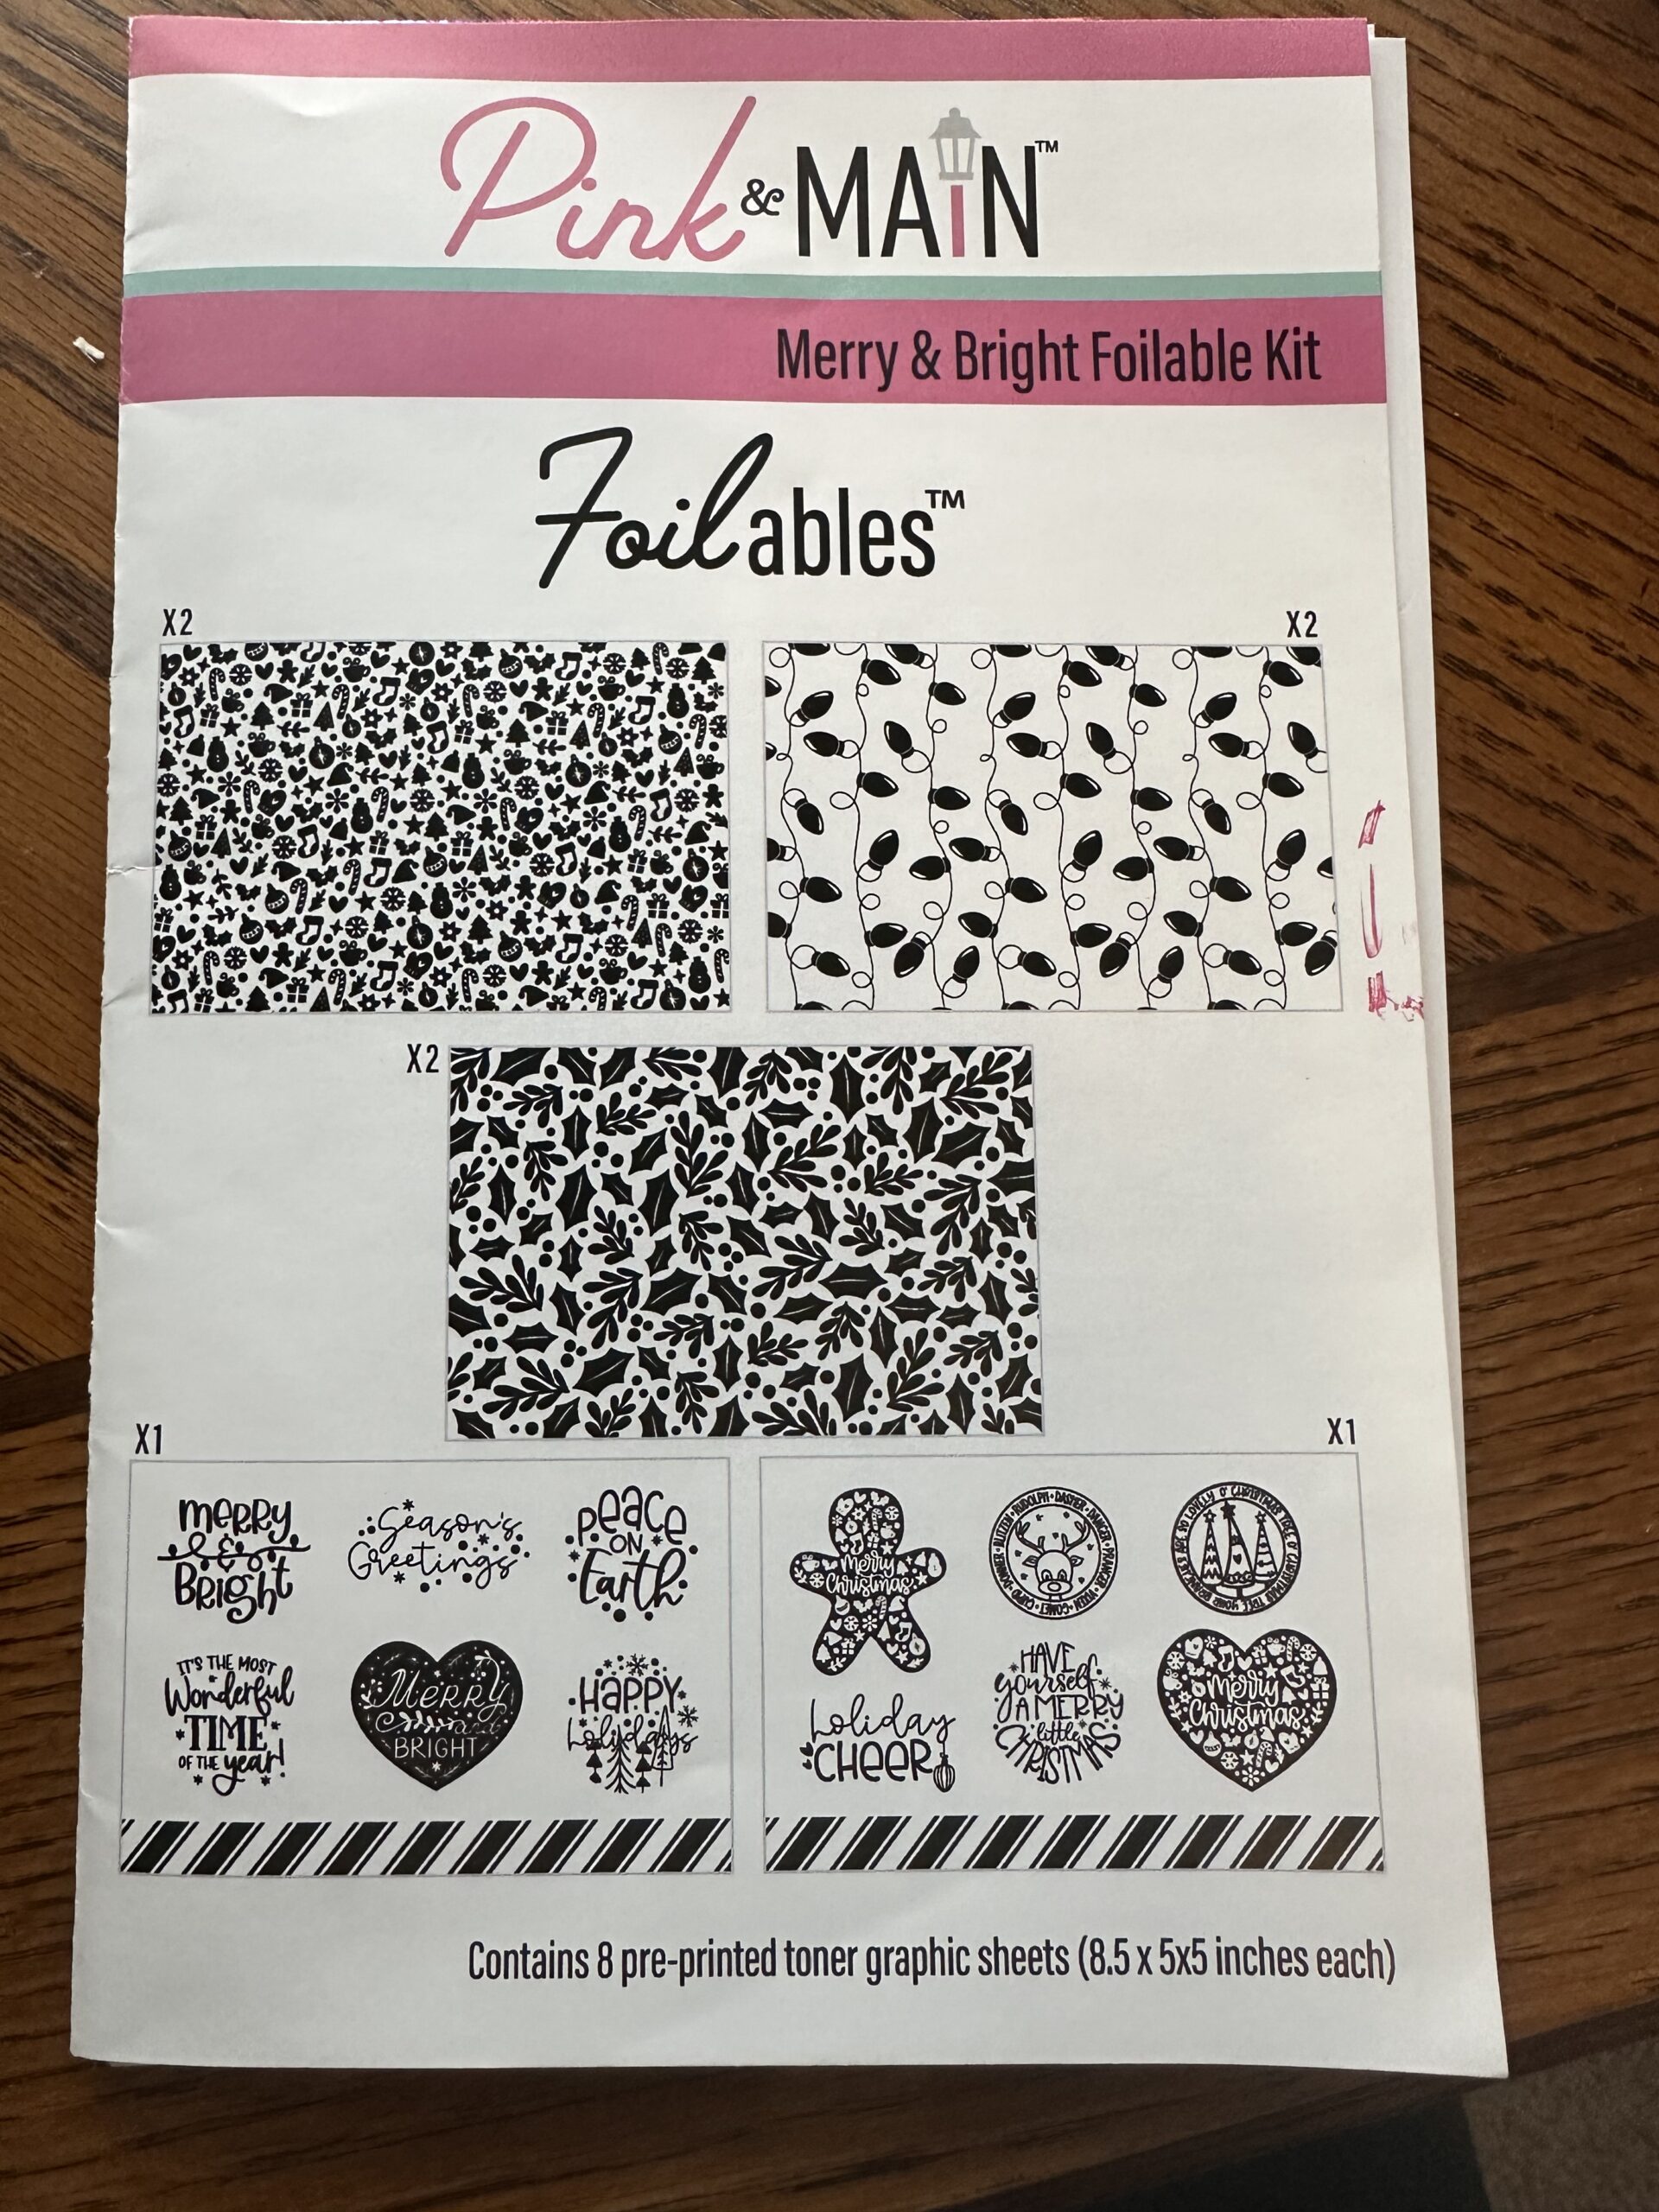
What fun! Using foiling to create Christmas cards! I purchased the ‘Merry & Bright’ foilable kit from Pink & Main which included toner card fronts in three different styles so – of course – I needed to make some of each style! The red foil is Pink & Main’s ‘Shattered Red Cheer Foil’.


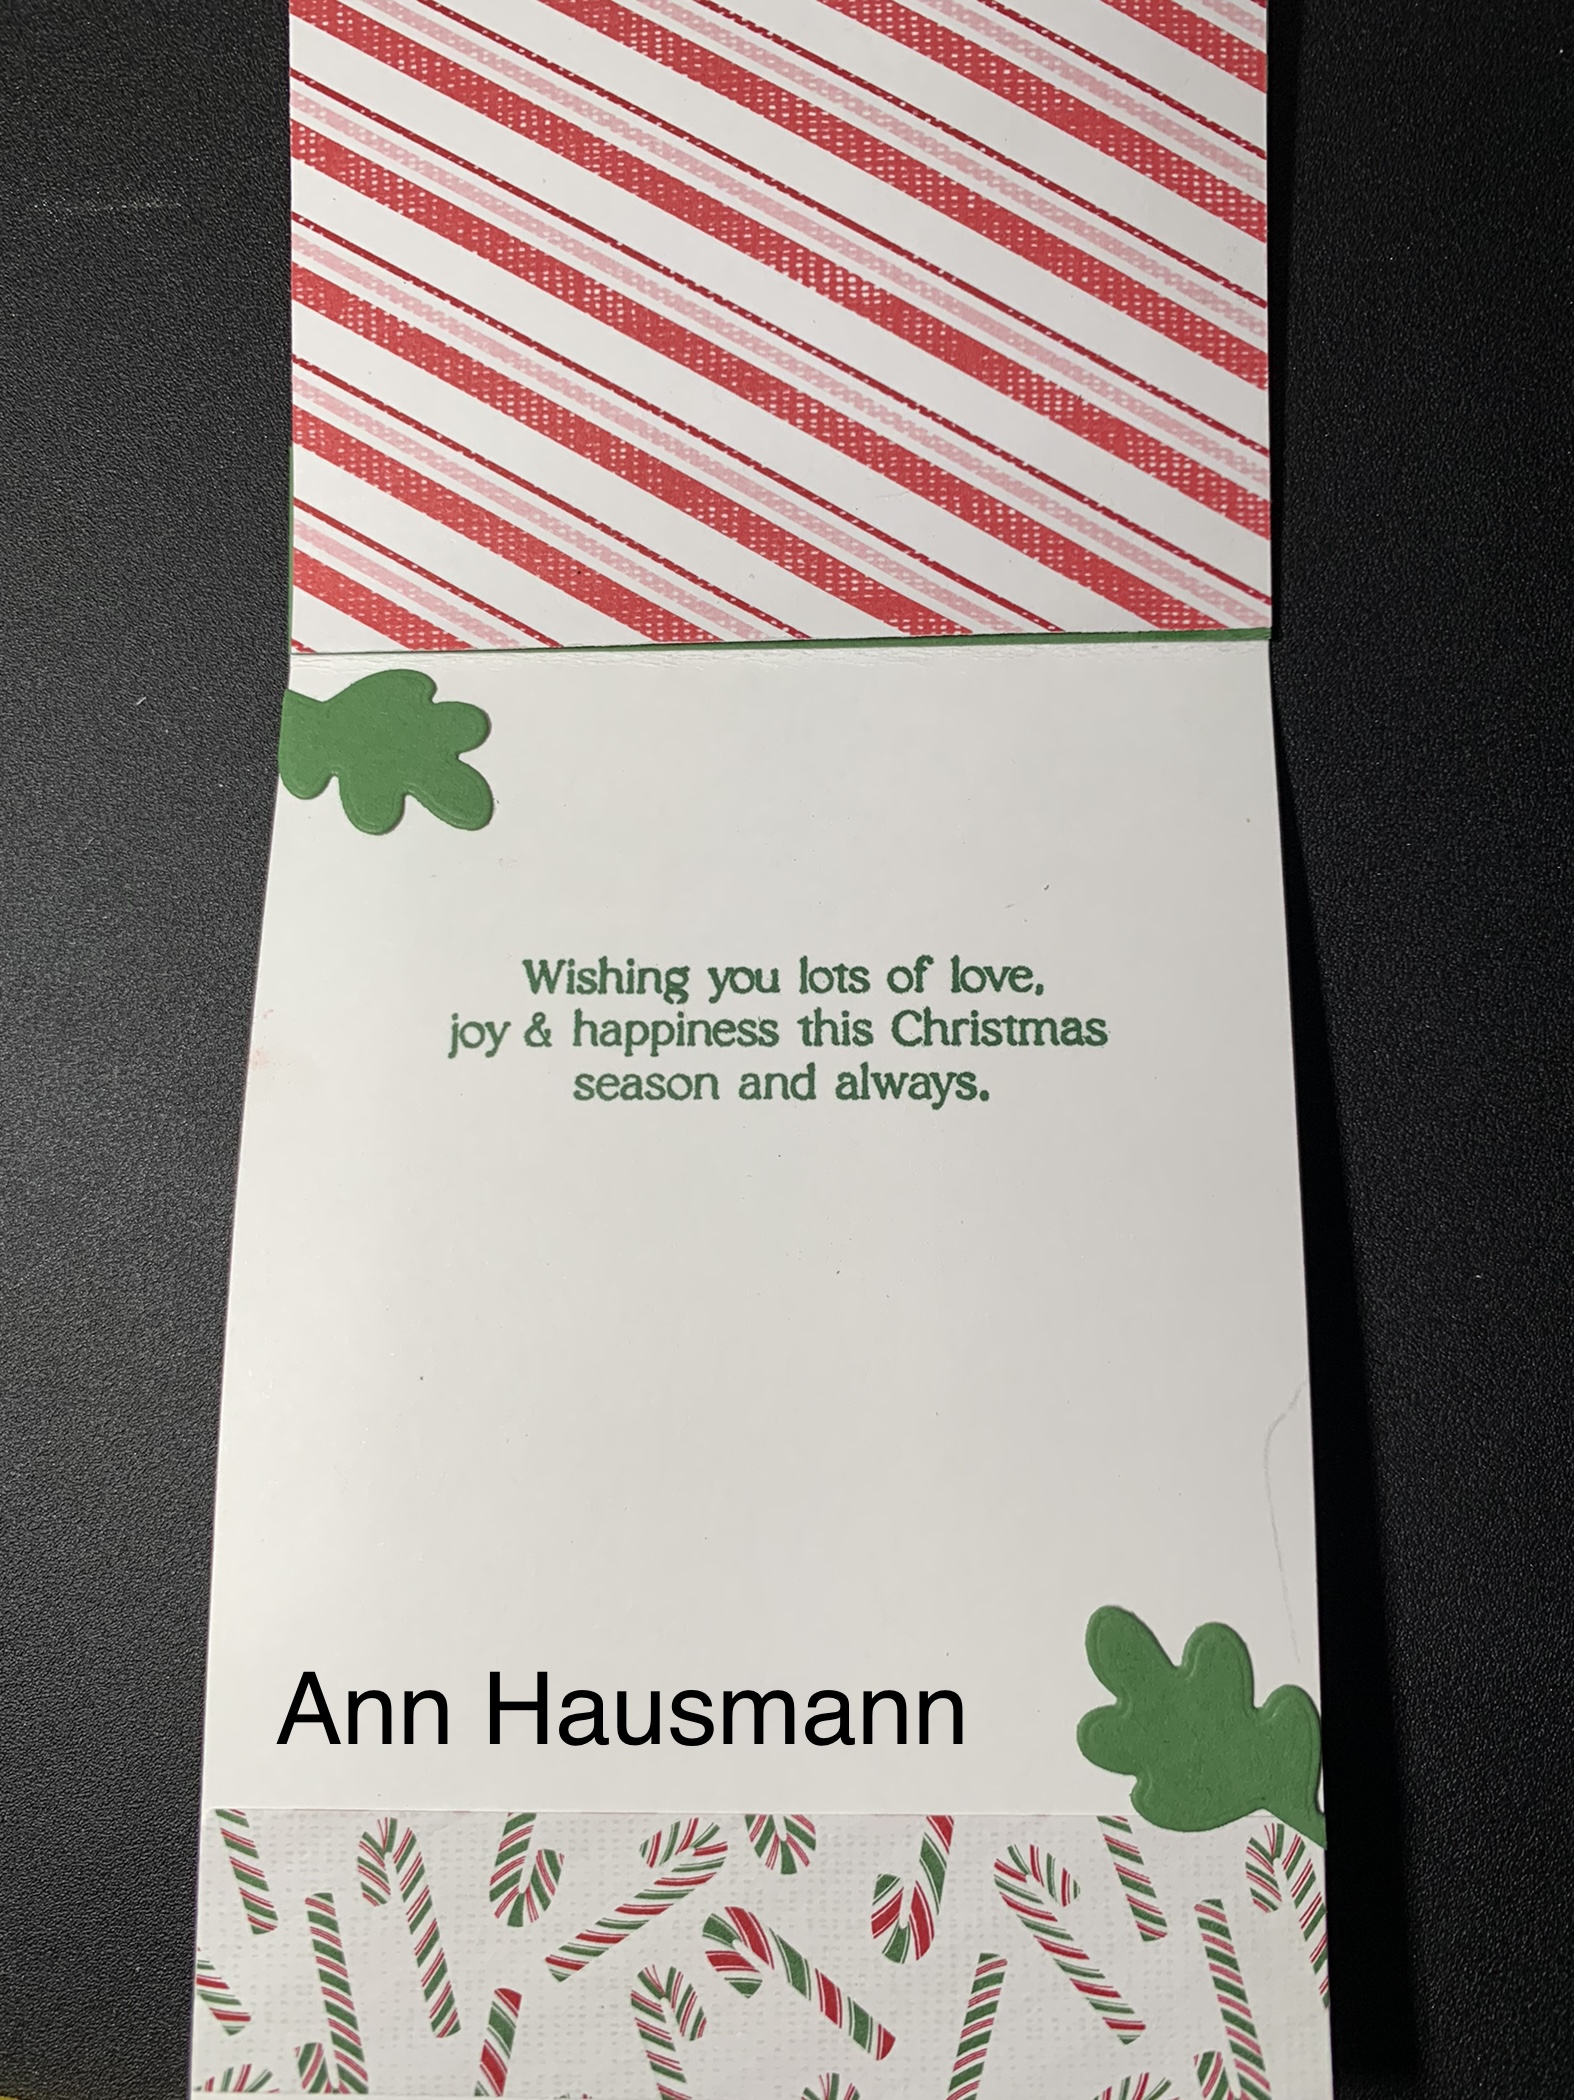
When you foil, you have a left over piece of foil where there was no toner image and I used that leftover sheet and an oval die just a little larger than the inside oval to make a lovely border. If you look closely at the inside of this card you can see that the border around the oval is red foil with white images showing through from the cardstock (using the leftover piece of foil), whereas the strip at the bottom is white cardstock with the red foiled images just like the front. I added a little strip of red foil to match the border on the front. The greeting uses Stampin’ Up! red glitter embossing powder for a bit of extra sparkle with Stampin’ Up!’s ‘Very Best Occasions’ stamp set.
For the Merry Christmas I used a ‘poppy’ die. I cut it out of the red layer that I used on the front under the decorative toner sheet. I cut out two additional Merry Christmas Flourishes to layer with the red, which is so much easier than trying to pop up such tiny little areas.
 .
.One of the toner card fronts was holly leaves so I used some green foil from Heidi Swapp which I ordered when I ordered the Minc machine before I learned about Pink & Main. The green foil is 12 1/4″ wide and more suited to scrapbook pages than small card fronts. The Pink & Main Cheer Foil is 6 1/4″ wide and much easier to use.


I purchased full black toner sheet card fronts to foil a layer to go under the foiled designer toner card front but found out it really wasn’t necessary. If you cut the foil exactly the size of the layer you want and center the toner card front carefully, you have a perfect border for your foiled front. I did that with the following card’s red foil strip at the bottom of the inside.
You can really see the ‘shattered red cheer foil’ in this picture.

and you missed a picture of the front?
Yes, Sal, and that card was mailed before Christmas. Can you imagine calling someone and asking them to take a picture of the front of the Christmas card you mailed them so you could post it on your blog.
This third card really surprised me with how effective the foil turned out. I used Pink & Main ‘Rainbow Cheer Foil’ which has little stars in the foil! It looks so much better than this picture but you get the idea.


In addition to the toner card fronts, the ‘Merry & Bright’ kit comes with several toner greetings and sheets of small greetings in black on white or white on black. The black is the toner so you can choose where you want the foil- a foiled greeting or a white greeting with foil around it. I cut the foil large enough to give a border around the greeting, foiled the greeting, using the black on white,and then glued the left over foil piece behind the foiled greeting for a nice border.


This last foiled card was an experiment. I had purchased Pink & Main colored toner sheets and used the left over foil sheet from foiling the card front with red holly leaves and then ran the left over sheet through the minc machine on top of a green colored toner sheet! It worked! I used regular red foil cardstock for the layer and a green card base. Gold foil card stock was used for the greeting and several gold jewels were used to embellish the front.


The inside greeting is from Stampin’ Up!’s ‘#Elfie’ stamp set. I used circle dies and gold foil cardstock to tie in the gold from the front.
Gotta make that inside match the front somehow!
That’s my stye, Sal!
Recipe Basics
Card 1 & 2-Vertical
- Base: Thick Basic White, 5 1/2 X 8 1/2, scored at 4 1/4
- Black Transfer Sheet: 5 1/4 X 4, Foil in desired color with foil of same size and then die cut Merry Christmas Flourish; to pop up the flourish die cut two additional flourishes in Basic White. You’ll need 4 1/4 X 3 3/4 for die cut.
- Decorative Toner Sheet: 5 1/4 X 4, Foil 5 1/2 X 4 1/4
- Oval Outside: Basic White, 3 1/2 X 4 1/4, Sixth in Stampin’ Up! oval set
- Oval Inside: Basic White, 2 1/4 X 3, Third in Stampin’ Up! set
- Inside Strip: Use what you can form leftover foil
Card 3- Horizontal
- Base: Thick Basic White, 5 1/2 X 8 1/2, scored at 4 1/4
- Decorative Toner Sheet: 5 X 3 3/4, Cut foil at 5 1/2 X 4 1/4, line up carefully to have a perfect border of foil
- Merry & Bright Greeting (3rd card): 2 X 2 cut of the greeting from kit, 2 1/4 X 2 1/4 Starry Rainbow Cheer Foil
- Inside Square: Basic White, 2 1/4 X 2 1/4 , Foil backing 2 1/2 X 2 1/2
- Inside Strip: Toner Sheet, 5 X 1 with foil of 5 1/4 X 1 1/4
Pink & Main has a subscription service for their foilable kits which I signed up for, so you will be seeing more foiled cards in the future! I am impressed with the quality of their products. Click on little Sal in the computer to go to their site.
Thanks for joining me for a foiling adventure!
SAL, Share A Love
Karen
September with Sharon Fincham
I have so much to show you today, so grab a cuppa and a pencil to take notes about the products in the awesome cards that we did at Sharon’s Shoebox Event.

 .
.
Products:
- Garden Green cardstock, Pearlescent paper and gold foil paper
- Merriest Moments bundle with a stamp set, a set of dies and a hybrid embossing folder
- Poinsettia Petals Stamp Set (outside greeting) & Dies, Ornate Layers Dies
- Farmhouse Christmas (inside greeting)
- Pearl bling and gold cord bow
 You were probably glad to do one more Christmas card!
Delighted, Sal!! And she had another Christmas card for us to make!


Just awesome! Thank you, Sharon.
Products:
- Navy Blue and Gold Foil paper, Gold Glimmer Paper for the star and brown for the stable scene
- Night in Bethlehem Edgelits Dies
- Candy Canes Die Set for the front greeting piece which has the ribbon run through each side
- Stitched Seasons Framelits Dies for the inside white background layer
- Star Of Light stamp set
Perfect choice of gold foil which catches the light!
Sure does, Sal! And Sharon had more for us. Check out the Halloween card kit she had for all of us:

So cute! I can’t help you with the products on this one. I loved that paper and needed a fall card before Halloween so I saved her cat for another card and made this one:
 .
.

I used the Nuts About Squirrels stamp set. The funky cut out for the front greeting is the fence post in the Grace’s Garden die set!
That’s thinking outside the box!
Well, so many of the dies were too big and this one fits the words nicely.
Sharon’s birthday was in September so I made her this birthday card:
 .
.
Sharon gave us a set of the flower blings you see in the card and I wanted to use them on her card so I used the die set I recently bought from Inlovearts and some fun fall designer series paper. The greeting is from the Pretty Petities stamp set with a matching punch. This hasn’t sold from the Bake Sale products so I pulled it out to use it.
You’ve pulled more than one set from those you are selling to use so why sell?
I know, Sal; call it sellers remorse but I have run out of room and need to purge.
Then Sharon sent me a thank you card! She loves bees and I found this die set at Simple Pleasures in Colorado Springs and I knew Sharon just ‘had to have it’!! It is a die set from Elizabeth Craft Designs.

Could you have a salt shaker die set made?
Hmmm……… that could be interesting.
Happy fall everyone! I hope you enjoyed the cards and they ..
I will say it… ….bring a pinch of creativity to spice up your crafting world.
Thanks, Sal!
SAL, Shoebox A Love of crafting
Karen
Click here to go to the Bake Sale Tab.
August Shoebox Swap with Lisa Christensen
It is time to catch up on Shoebox Events before next Wednesday when we have another! In August Lisa Christensen was the designer/presenter and she made two beautiful Christmas cards with kits for each of us to make one of our own. We craft, we laugh, we enjoy being together and then we eat! Thank you, Lisa for a fun time and two gorgeous cards!


Are these pictures of her original?
No, Sal, this is my work which isn’t as perfect.
Lisa introduced us to products from http://thegreetery.com. She used the Nordic Frames Die set for the two beautiful layers. Don’t you just love how the dark green layer shows through the die cut? The smaller Nordic Frame die is popped up for added dimension.
The pine boughs and pine cones are from http://thegreetery.com as well. The layers are a superb design and the layered pine cone is to ‘die’ for! Here is a video of the BotaniCuts Pine Bough set.
https://www.youtube.com/watch?v=O_MILHRYUPg
Lisa’s second card:


Isn’t it amazing how designer series paper (DSP)- and a beautiful foil can be the start of a great card?
Tip: Lisa had a white strip the size of the ribbon to put behind the ribbon so the dark background didn’t show through the ribbon.
I will have to do another inside with the greeting stamped straight but I wanted to show you the stamps Lisa used. The Joy To The World goes perfectly with the inside greeting.
When I returned home from Lisa’s, I colored in the Joy To The World with an alcohol marker forgetting that the words were stamped with regular ink instead of Memento ink, so it ran in a couple places and I had to do a quick fix.
Sometimes you should leave well enough alone.
So true, Sal.
Interestingly, I had both cards displayed on my table and the red foil always drew my attention to that card first. I suppose that is why I invested in a Mini Minc machine to add foil to my cards. I just received the August foil kit from Pink & Main so stay tuned for cards with foil accents/backgrounds. The August Pink & Main kit is fall themed with a beautiful orange foil and the September sneak peak of the kit shows that the kit is Christmas themed with red foil. What fun!
Right after you get Emma’s birthday card done with the Karen Berniston castle, right?
Right O’ , Sal! I have two grandchildren and a dear friend with birthday’s in September so I had better hop to it!
Have a wonderful day stamping friends and thank you for spending some of your precious time with us as we seek to
bring a pinch of creativity to spice up your crafting world!
SAL, Stamp A Lot, Smile A Little and always be Salt And Light in your world
Karen
PS Click on little Sal to go to the Greetery
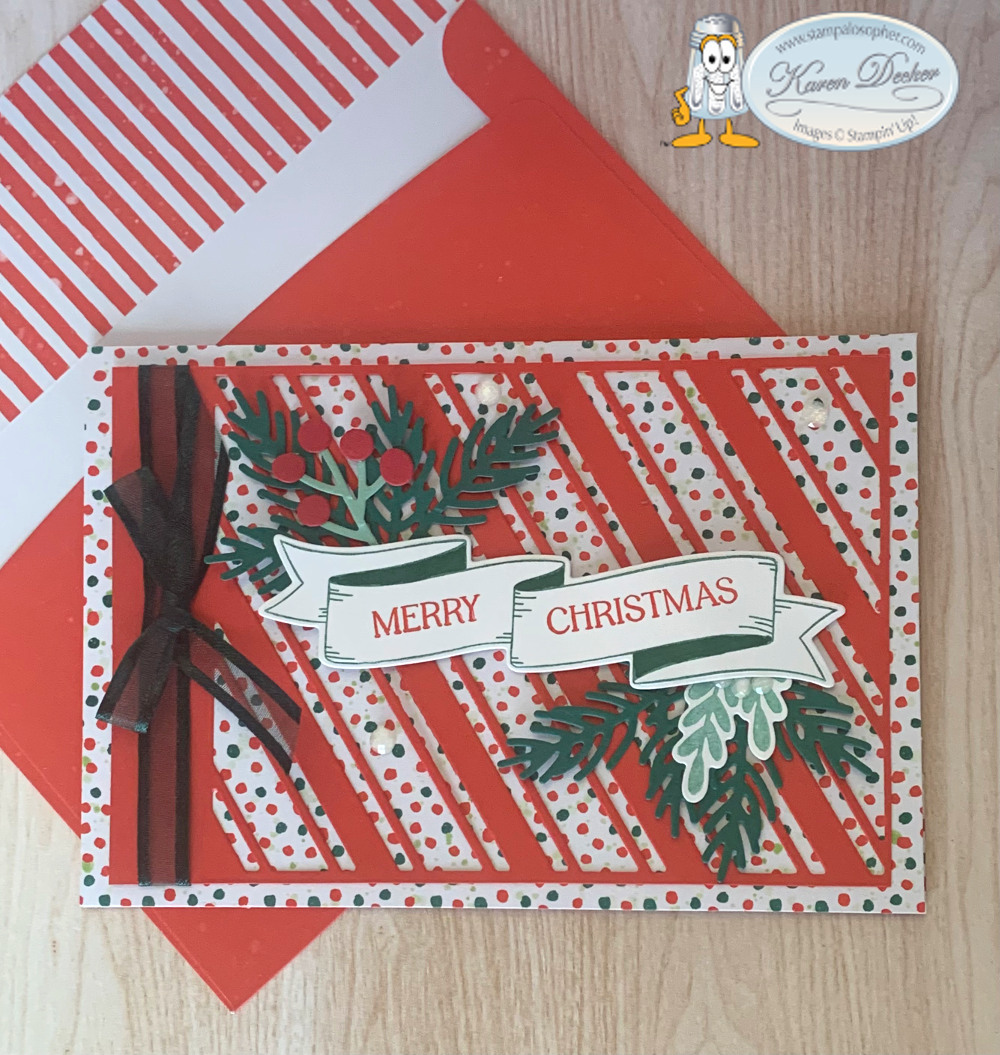
Santa’s Express Christmas Cards
Merry Christmas everyone!
Have you ever started a card design by wanting to match the envelope liner?
 That is really backwards! Were you able to do it or did you give up?
I did succeed! I purchased the Santa Express Memories & More Cards & Envelopes from the mini thinking it would be a great way to save time and make 20 Christmas cards. The cards are a bit bigger than our standard A2 size which I also liked. I know this is blurry but the pictures in the mini were so small!

The Poppy Parade (or Sweet Sorbet) card envelope liner is striped but the card is polka dots, whereas the Shaded Spruce card envelope liner is polka dot but the card has a bit of speckle like snow on a solid green front.
I am going to post these cards for ideas to help those of you who might have just a few, hopefully not 20, Christmas cards yet to make.
Two at a time!! I started by working with one red and one green and I cut off one inch on the right front side of each. I used the polka dots cut off from the red card to make the inside right side of a flap card on the green card with the green strip as its flap. For the inside left side of the red card I used a 1″ X 6 1/4″ strip of polka dots from the Santa Express DSP which matches perfectly. There was no red stripe in the Santa Express DSP paper to match the envelope liner but the Sweetest Christmas DSP had a stripe that I used to tie in the envelope liner.
. You lost me. How about a picture?

 .
. . 
 .
.
Do you see how the polka dot strip on the green card right front comes from the red card base? I used the green cut off strip to make the flap for the card by cutting off 2″ and scoring at 1″ so it glues behind the polka dot strip. The 2″ part I cut off I used on the flap of the red card.
The red card uses a 1″ X 6 1/4″ strip of the striped paper in the Sweetest Christmas DSP for the right side and another strip 1″ X 4 1/4″ scored at 1″ for the flap. Stamp and corner round the flap, and glue it halfway down on the inside strip before gluing that strip down. (I loved that the other side had little candy canes!) The flaps are stamped with Versa Mark and embossed with white embossing powder with the greeting ‘Christmas Cheer’ from Sweet Candy Canes. The ‘Candy Cane Wishes and Mistletoe Kisses’ greeting is also in the Sweet Candy Canes stamp set and cut with the Candy Canes die which has those two larger holes at the side which I used for ribbon. The holes are large enough for a real candy cane to fit through with the greeting stamped vertically.

I cut one candy cane from the Sweetest Christmas Designer Series Paper (DSP) for each card and cut two evergreen boughs from Shaded Spruce using the dies from the Christmas Banners Die set. I cut a So Saffron Stem from the Banners die set and also five red berries in Real Red which I sparkled up with Wink of Stella. I stamped two mistletoe boughs from the Sweet Candy Cane stamp set and cut them out with the Candy Canes Dies. I punched three little white berries with a small hole punch and layered them above the mistletoe.
The layer under the candy cane and greenery is 2 3/4″ X 5 3/4″, one in Poppy Parade and one in Sweetest Christmas DSP.
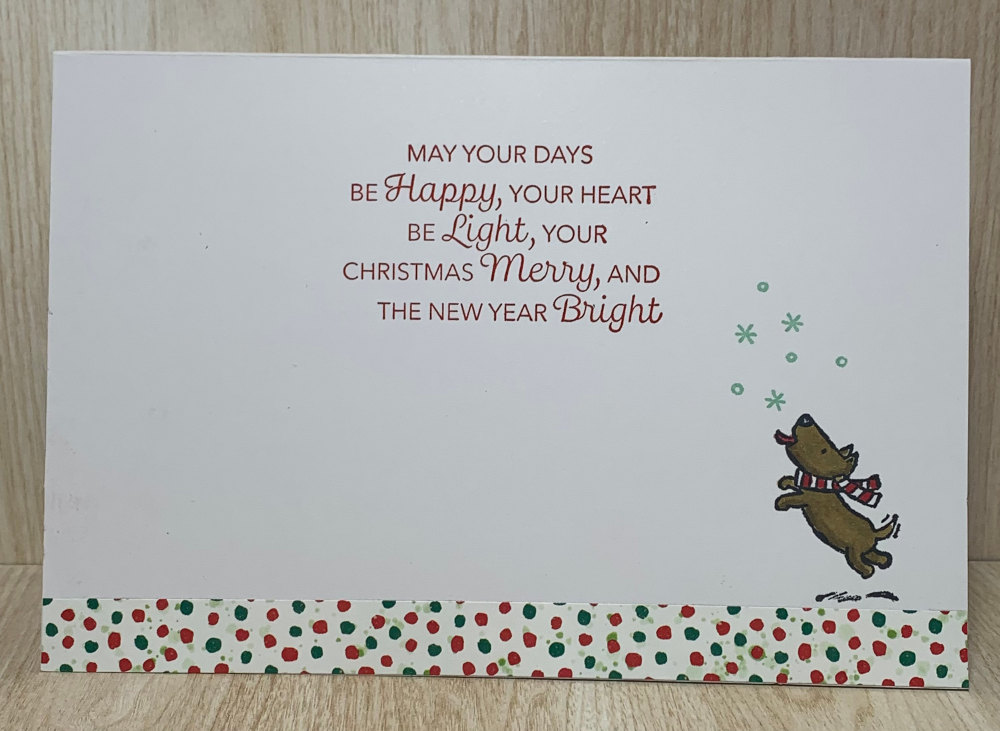
The inside greeting is my favorite for this year-“May your days be happy, your heart be light, your Christmas Merry and the new year bright”- from the Very Best Occasions Stamp Set, a great set for your stamp collection with greetings for birthday, love, gratefulness, thinking of you and Christmas!

These next two cards use the Candy Canes Die that makes stripes!


These card bases are larger than a standard A2 so the cut out wouldn’t cover the full base so start with a piece of DSP for the green card and poppy parade for the red card and cut them at 5 7/8 X 3 7/8 which leaves an uncut left side perfect for wrapping ribbon around. The banner is from the Christmas Banners Die. It is the best banners stamp and die set yet. ( I think I have about three sets from the past.) I did use a Shaded Spruce Stampin’ Blend to color in the green a little darker.
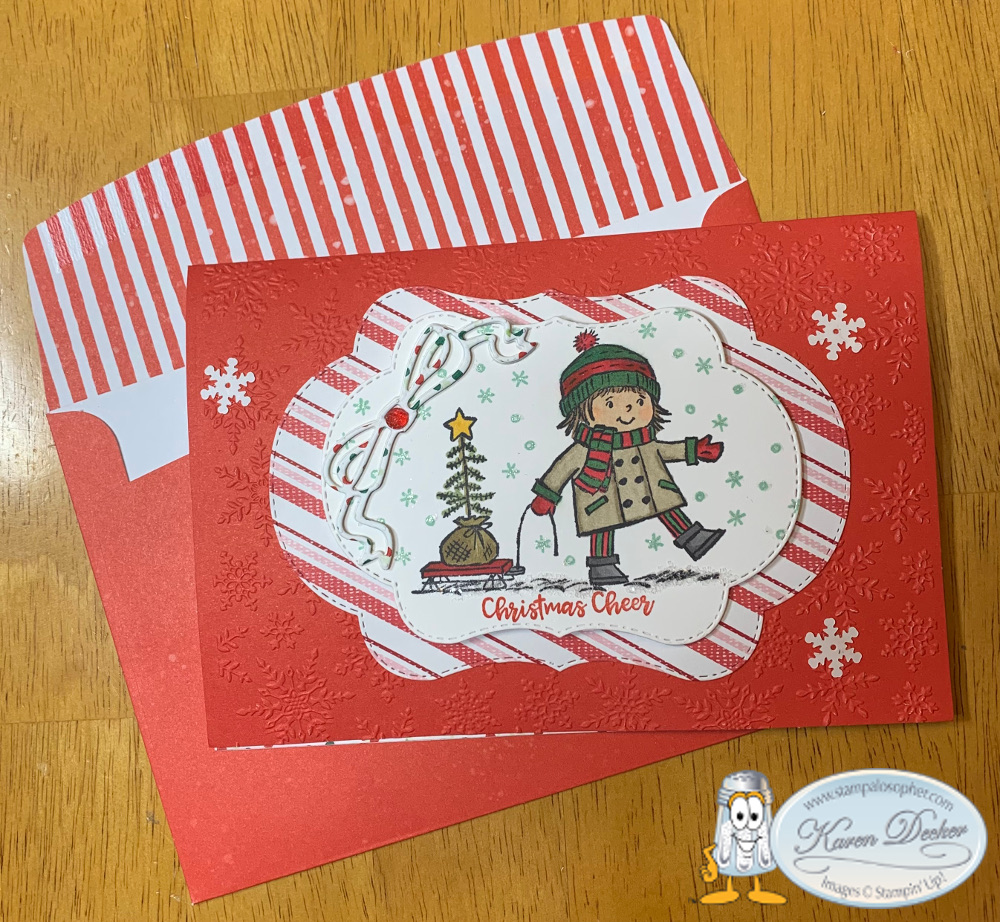
The last cards I want to show you use retired products. The Seasons of Fun set has a little girl pulling a sled and my daughter just sent me a picture of our little granddaughter pulling her baby sister in a sled.

Did you know if you layer Lt Mossy Meadow and Lt Shaded Spruce you get Garden Green?
For the red card, I folded the dotted side to the back and embossed the front with a retired embossing folder. I used the Stitched Seasons Framelits to cut the layers and also to cut the bow in polka dots to match the back. ‘Christmas Cheer’ is in the retired Itty Bitty Christmas stamp set.
And here is the matching green card:

I cut the bow out of the color I wanted and then two other layers of basic white, gluing all three layers together to give the bow a bit more dimension. Be sure and use your double back sticky sheets to do this so you don’t have a mess of glue.
One last example using the same Stitched Seasons Framelits and the matching Blended Seasons stamp set:


And that, my dear stamping friends, is how you start with an envelope and then tie in the card!!
Merry Christmas everyone! Have a wonderful day celebrating the birth of Jesus!
Karen

Christmas Ornament/ Party Favor/Gift Tag

One of the projects we made last December at club was this ornament. It could be used as a party favor or a gift tag or……
It is a case of Sandra Roberts tag on sandrascraftstudio.com.
Recipe
There are six pairs of stars from the Stitched Stars Dies with an Evening Evergreen base and a smaller star die cut layer in the Painted Christmas DSP. The DSP is glued directly to the Evening Evergreen with Tombow adhesive and then the top two pairs are popped up using Stampin’ Dimensionals.
- Largest Star: Evening Evergreen, 5 1/2 X 6, die cut with stitched stars die
- Layer: Painted Christmas DSP, 4 X6, die cut with next smaller stitched stars die
- Note: After gluing on the DSP, punch a small hole for the ornament hanger, down far enough to be covered by the point of next star
- Next Star: Evening Evergreen, die cut with next smaller stitched stars die
- Layer: Painted Christmas DSP, die cut with next smaller stitched stars die
- Top Star: Evening Evergreen, die cut with stitched stars die
- Layer: Painted Christmas DSP, die cut with next smaller stitched stars die
- Gold Stems: Gold Foil, 2 1/2 X 2 1/4, Die Cut with Poinsettia die
- Leaves: Garden Green, 2 1/2 X 2, Merriest Frames Hybrid Embossing Folder and Die
- Poinsettias (X2): Real Red, 1 X 2, die cut with Merriest Frames Die
- Add one large gilded gem to the top
- Greeting: Basic White, 2 1/2 X 1 1/2 stamped with Merry Christmas from Curvy Christmas stamp set in Evening Evergreen. Die cut with Stitched Nested Label die and then sponge the edges with Evening Evergreen.
- Hanger: Red Twine, 12″ for hanger, separate 6″ for bow. Double the 12″ and push the loop through the punched hole from front to back then bring the ends through the loop at the back and tighten pushing the sides down around the point. Tie a double know with the ends. Tie a bow and mount with a glue dot on top of hanger.
That would be a good idea, Sal! I did that one year with a circular ornament that I put in a pocket at the front of the card. I made a longer hanger so it could loop to the inside of the card where I attached it lightly with a note saying the ornament could be removed.
 Are you going to make gift tags this year?
You know, Sal, I have trouble with spending time on gift tags since they are thrown away with the wrapping paper with hardly a second look and they are not recyclable since the name is written on the tag. They are pretty and I love getting them on gifts but I am just not into making them.
So followers, let me know if you make gift tags to dress up your packages each year.
Have a wonderful day and thank you for spending some of it with Sal and I.
Karen
Case The Creator #9, Recessed Panel Card
It’s time for another Case The Creator card!
This time we are creating a Recessed Panel Card.
 .
.
 .
.
The recessed DSP (designer series paper) on the front is a full size piece so when you open to the inside the back of the DSP is the top of the card and quite nice- just be warned to not use directional papers that might be upside down on the inside!
There are many different versions with different placement of the recessed panel. I chose the dimensions used by France Martin of www.frenchiestamps.com. To access her video click on the pdf file not the screen shot of the dimensions – the video won’t work from the screen shot.
Case The Creator #9 printable pdf file
Screen Shot of Directions
 .
. . That’s really cool and I like the picture of the fall card on the directions but what did you use?
That would be helpful, Sal, wouldn’t it?
The Christmas card I made uses the Painted Christmas Paper DSP for the recessed panel. This DSP carried over from last year to the new fall mini catalog, so check your stash, you may have it already!
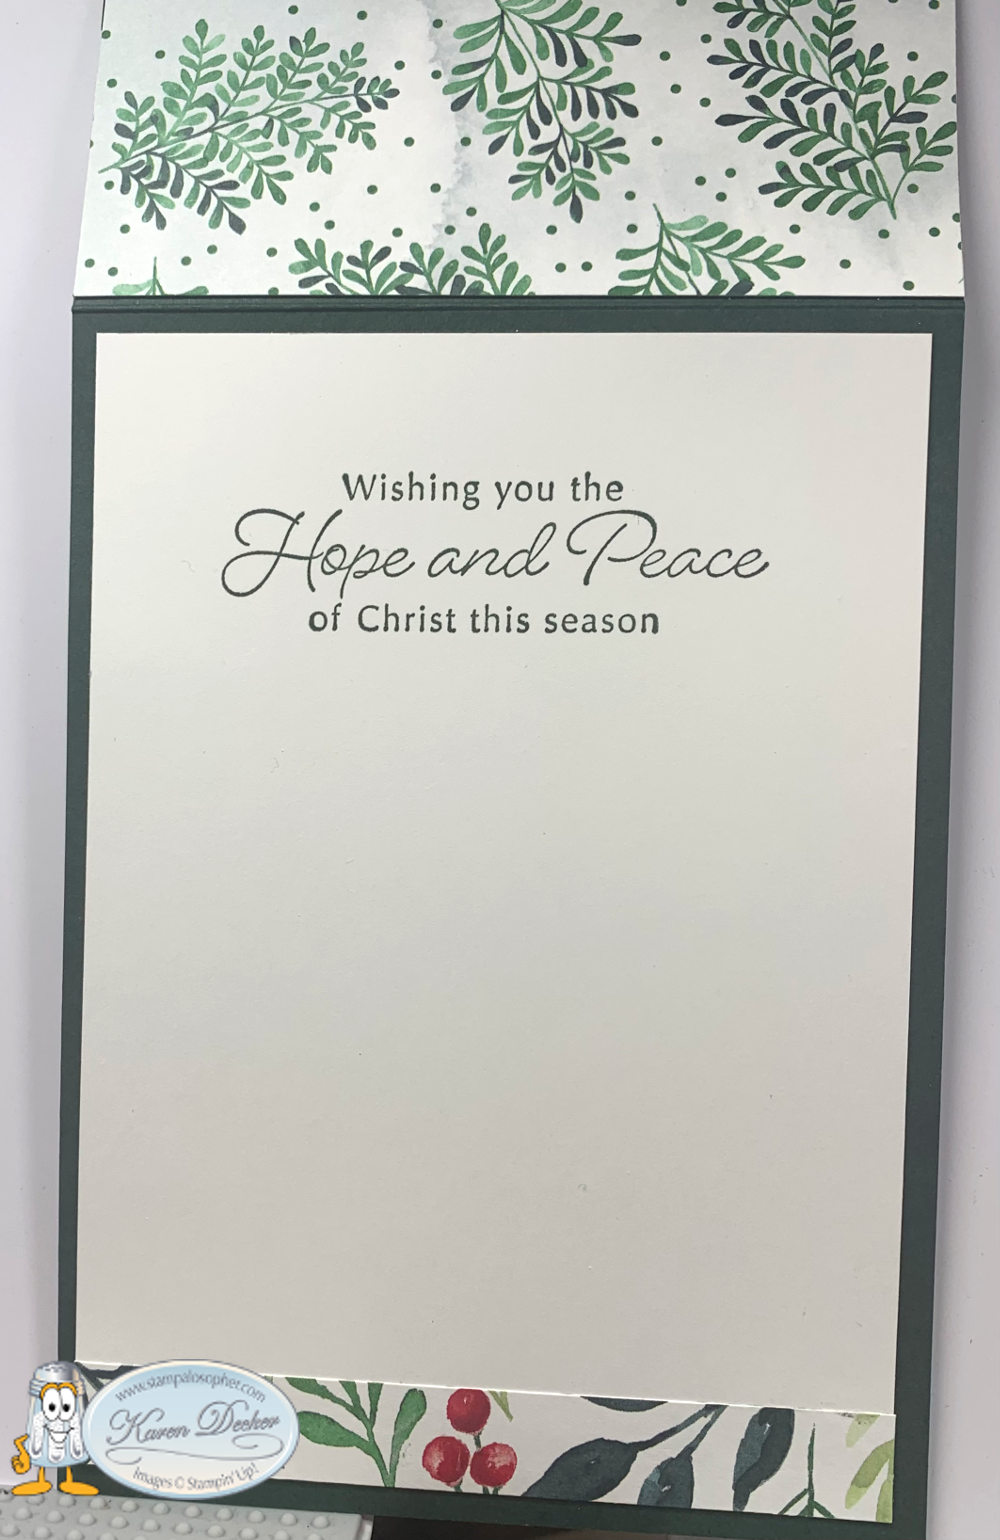
The base is Evening Evergreen and the mat is Basic White. The greetings on the front are from the Hope & Peace stamp set and dry embossed with White Embossing Powder. The inside greeting is from the same set and stamped with Evening Evergreen Ink.
The holly berries, stamped in real red, and leaves, stamped in garden green, are from Merriest Moments stamp set and Merriest Frames Dies, another carryover from last year that is one of my all time favorite sets. The pine boughs are from Christmas Banner Dies cut from Garden Green cardstock.
Very helpful! Did anyone participate in the challenge.
Indeed they did, Sal! Ann used the Sweet Candy Canes stamp set with Candy Canes Dies and the oh- so- cool Sweetest Christmas Designer Series Paper. Her card is just beautiful and the green mat and mistletoe bough are perfect with the candy canes! Such a great job!
 .
. 
Do you see what I mean with the back of the DSP panel? A lovely look!
Jo’s card has a recessed panel of many colored candies! She used a punch to cut out even more candies to embellish her card and added glittery snowflakes! So very fun!


Sharon used the smiley moose from our All Bundled Up stamp set! She turned the panel the other way which looks great. I love how the moose scarf is colored to match the DSP! We don’t have a die to cut out the moose so she fussy cut him and then added an oval of gold behind him. Beautiful work!

. Let’s see…. 50 days left until Christmas and less than that to get those cards mailed.
AAAAHHHHHH……. I better run!
SAL, Stamping A Lot of Christmas cards – (not yet)
Click on little Sal in the computer to go to the online store.
Welcome to my blog!

Sal Window to Products


