
Home » Thank You
Category Archives: Thank You
September with Sharon Fincham
I have so much to show you today, so grab a cuppa and a pencil to take notes about the products in the awesome cards that we did at Sharon’s Shoebox Event.

 .
.
Products:
- Garden Green cardstock, Pearlescent paper and gold foil paper
- Merriest Moments bundle with a stamp set, a set of dies and a hybrid embossing folder
- Poinsettia Petals Stamp Set (outside greeting) & Dies, Ornate Layers Dies
- Farmhouse Christmas (inside greeting)
- Pearl bling and gold cord bow
 You were probably glad to do one more Christmas card!
Delighted, Sal!! And she had another Christmas card for us to make!


Just awesome! Thank you, Sharon.
Products:
- Navy Blue and Gold Foil paper, Gold Glimmer Paper for the star and brown for the stable scene
- Night in Bethlehem Edgelits Dies
- Candy Canes Die Set for the front greeting piece which has the ribbon run through each side
- Stitched Seasons Framelits Dies for the inside white background layer
- Star Of Light stamp set
Perfect choice of gold foil which catches the light!
Sure does, Sal! And Sharon had more for us. Check out the Halloween card kit she had for all of us:

So cute! I can’t help you with the products on this one. I loved that paper and needed a fall card before Halloween so I saved her cat for another card and made this one:
 .
.

I used the Nuts About Squirrels stamp set. The funky cut out for the front greeting is the fence post in the Grace’s Garden die set!
That’s thinking outside the box!
Well, so many of the dies were too big and this one fits the words nicely.
Sharon’s birthday was in September so I made her this birthday card:
 .
.
Sharon gave us a set of the flower blings you see in the card and I wanted to use them on her card so I used the die set I recently bought from Inlovearts and some fun fall designer series paper. The greeting is from the Pretty Petities stamp set with a matching punch. This hasn’t sold from the Bake Sale products so I pulled it out to use it.
You’ve pulled more than one set from those you are selling to use so why sell?
I know, Sal; call it sellers remorse but I have run out of room and need to purge.
Then Sharon sent me a thank you card! She loves bees and I found this die set at Simple Pleasures in Colorado Springs and I knew Sharon just ‘had to have it’!! It is a die set from Elizabeth Craft Designs.

Could you have a salt shaker die set made?
Hmmm……… that could be interesting.
Happy fall everyone! I hope you enjoyed the cards and they ..
I will say it… ….bring a pinch of creativity to spice up your crafting world.
Thanks, Sal!
SAL, Shoebox A Love of crafting
Karen
Click here to go to the Bake Sale Tab. 
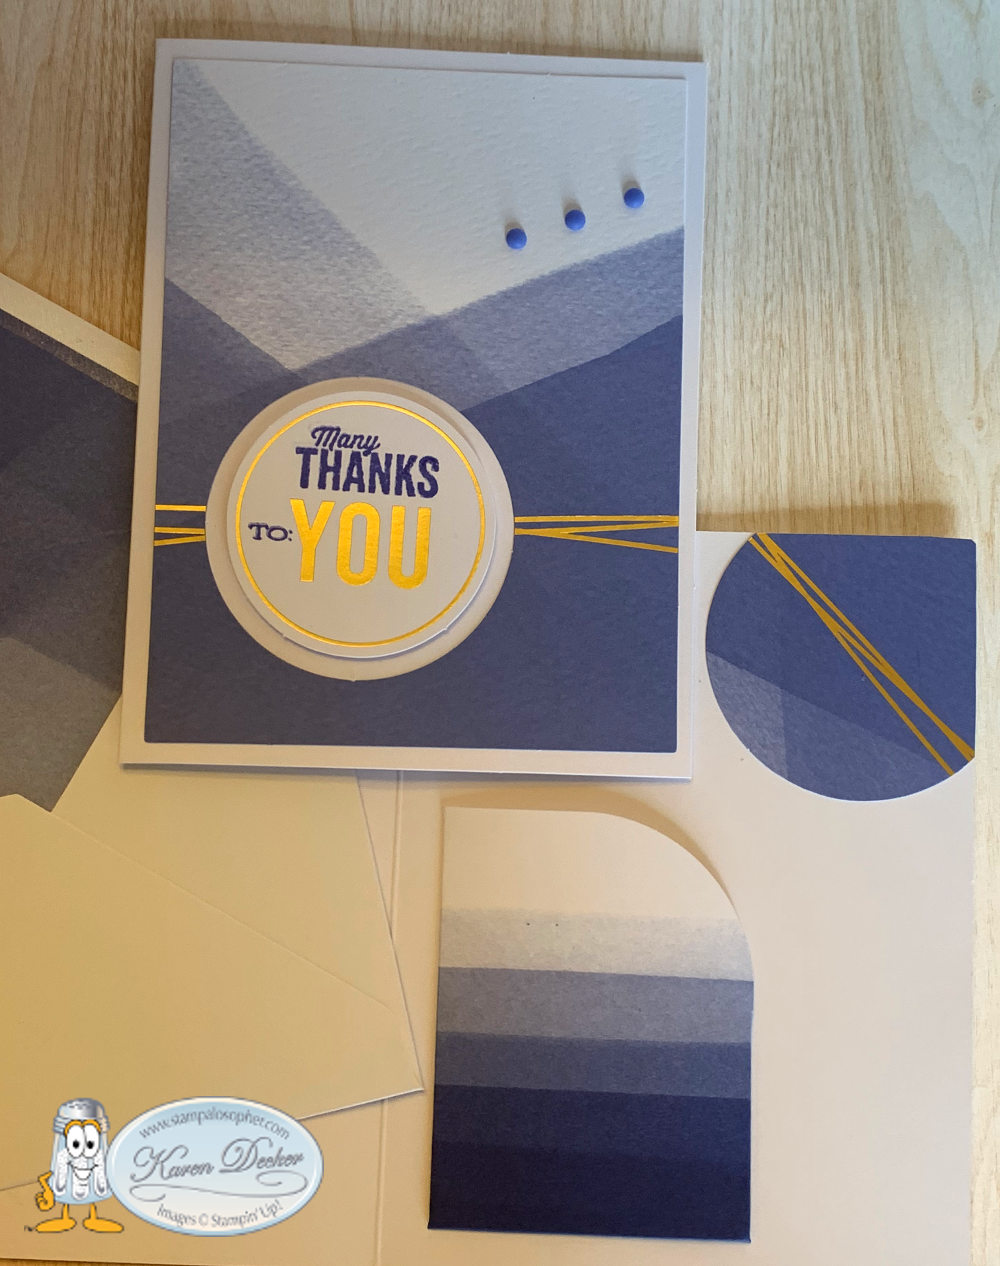
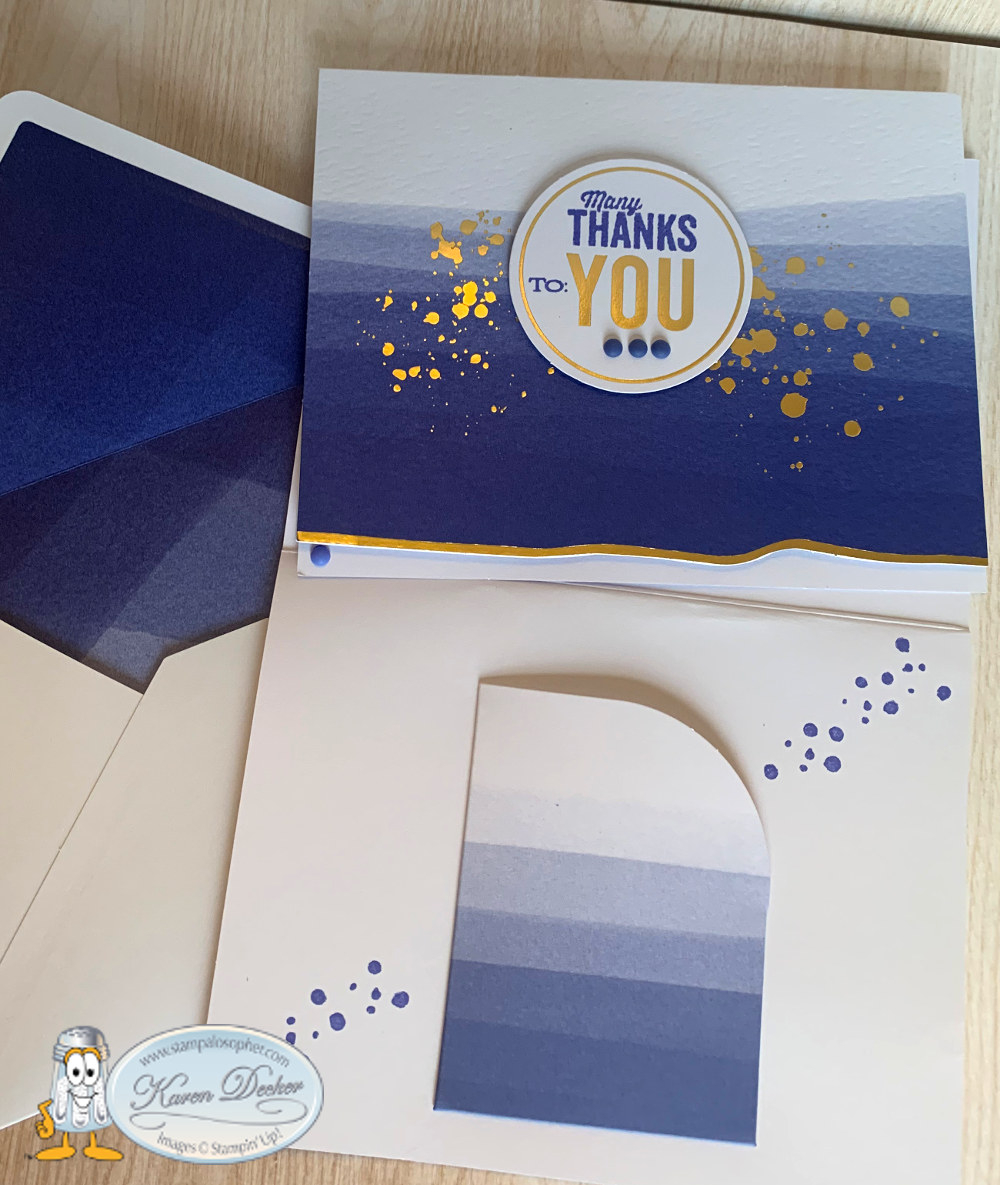
Under The Sea Thank You
When you see something you like, do you analyze and over analyze and then find out it is gone when you go back to get it? That would be me- usually. This time I actually ordered from an ad that popped up on Facebook and I am delighted with this die I purchased through inloveartshop.com. Take a look see:

 .
. 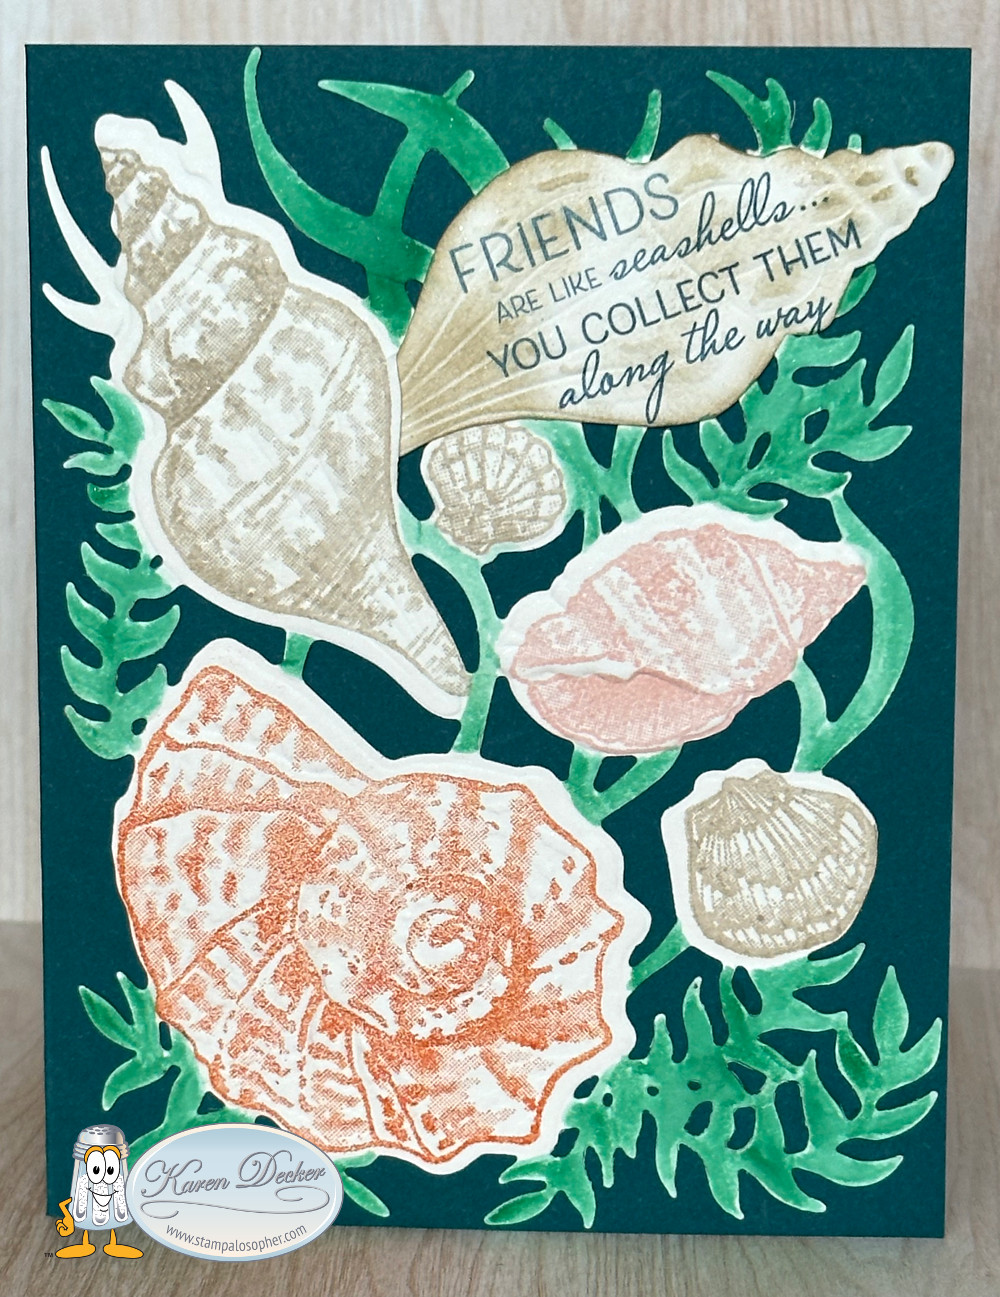
You are looking at a base of Pretty Peacock, with a die cut fancy layer of Just Jade and cut outs from a sea themed 6 X 6 retired DSP (designer series paper) from Stampin’ Up! and embellishments of Sea Glass. The right front side has a strip of the DSP with a greeting from the Veritcal Greetings Stampin’ Up! set. The inside left has a strip of the DSP and a stamp from Happy Hedgehogs. The right side uses the Stampin’ Up! Friends are Like Seashells stamp set with the Seaside Seashells Die and hybrid Embossing Folder. The die does the cutting as the folder embosses in one run through the Big Shot. I cut an extra shell and stamped a greeting on it, adhering it amongst the other shells.
Let’s take another look at the Kokorosa die. It comes with all the pieces attached with little bitty bits of the metal. You need one of the little metal cutters to cut them apart – or a husband like my Paul who cut them apart and then used his grinder to make sure there were no sharp edges. He is so handy and can fix just about anything! Thanks, Paul.
BUT- before you cut the dies apart you want to run your cardstock through to cut out all the pieces. There are layering pieces and inside pieces; those little layering pieces give you perfect placement for the inside pieces.
 I am scratching my head – that didn’t make sense.
Okay, Sal, let’s try some pictures.
This is the die set after Paul so carefully removed the metal connecting pieces.

I die cut it with the Just Jade before Paul cut the dies apart and I had the outer background piece that you see in the top picture and then lots of puzzle pieces-
-a piece for each of the outside borders, and then a piece for each inside die cut.
 .
. 
You could do puzzle piecing and use a different color for the border pieces and then die cut your inside pieces from another color, but I just layered the main background die cut piece on the base of Pretty Peacock and then die cut different scenes from the DSP. What saved me much fiddling, in getting the inside DSP pieces perfectly lined up, was placing the border pieces in the cut out section and then adhering the DSP inside the border. I didn’t even need to glue the border pieces temporarily; the main background cutout kept the border in place, then I removed the border and had a perfectly aligned piece of DSP. I saved those border pieces to use each time I make a card with these dies.
Notice – look back at the first picture – the main background piece in Just Jade fits nicely top to bottom but does not go equally to the edges left to right. In the future I would adhere the background piece close to the left side and either cut off the right side front base, or do as I did here but with a larger strip of DSP for the vertical greeting.
Now that I have taken my Stampin’ Up! blinders off and have allowed myself to use other companies products, it is like a whole new world of crafting.
Are you getting rid of all your Stampin’ Up! products?
No, indeed, Sal! Stampin’ Up! has some amazing products like what I have used on this card, but I am purging to eliminate stamps that I don’t see me using in the future.
Thank you to everyone who has been purchasing items from my stamp stash. Check out the Bake Sale tab here on the blog to see what is left. I listed 67 sets on Saturday and have sold over half of them. Several are still pending payment so I won’t remove them from the BAKE SALE until I receive payment. We call that NIL in the online shopping world. NIL means Next In Line so if someone doesn’t pay the NIL person gets notified. It works really well. People change their mind or find a better deal and then the NIL has a chance to purchase your set.
SAL, Smile A Little and Share A Lovely find
Karen
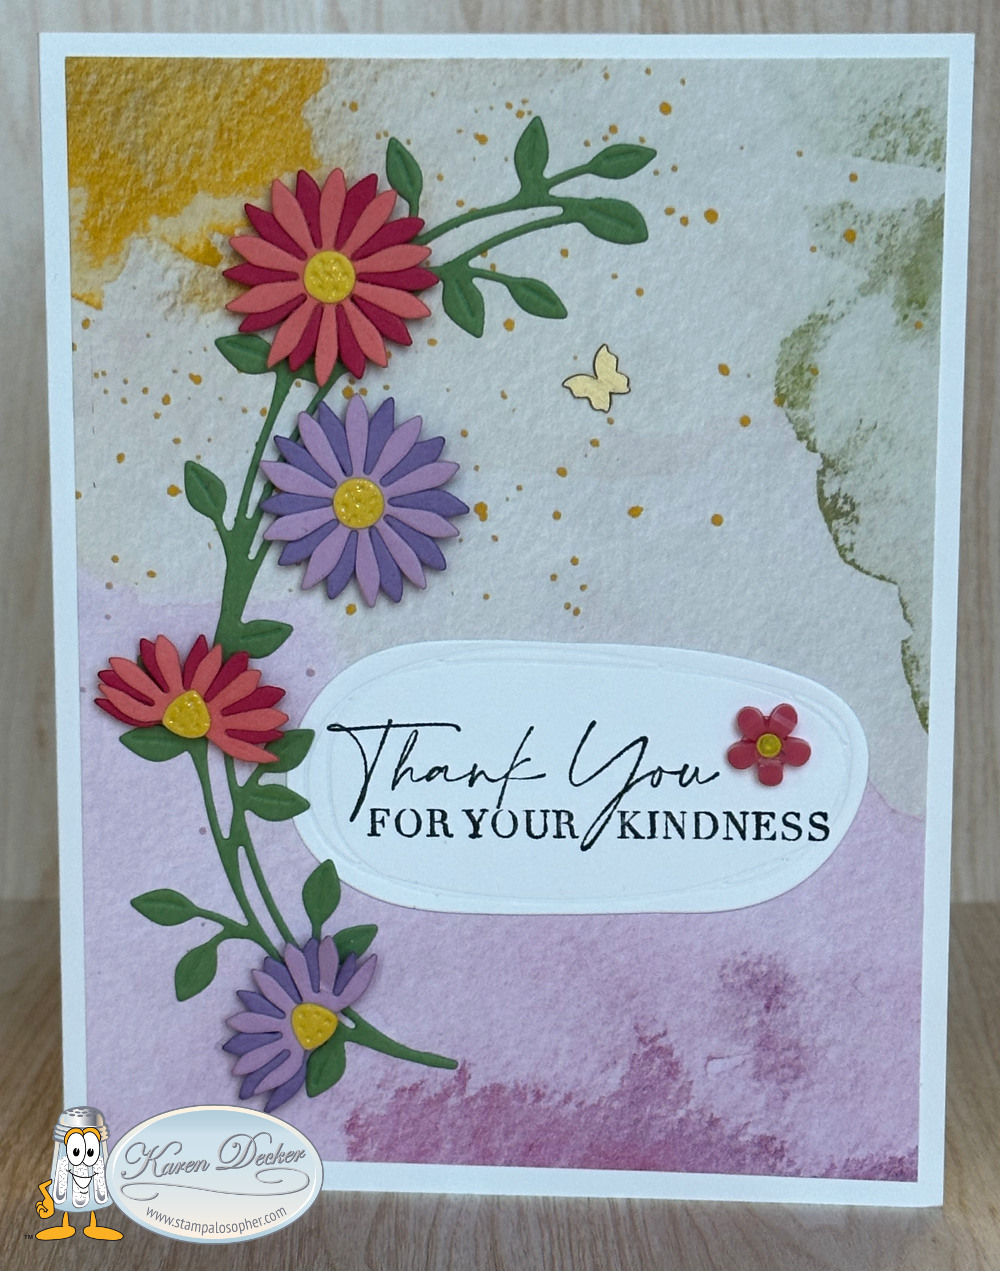
More Dainty Delight Cards
I have two more Dainty Delight cards to share today, one using the Dainty Delight stamps and one using the Dainty Delight Dies! This is a Triple Time Stamping Card where you layer the three white pieces together with temporary glue, stamp the images and color them, then take the three white pieces apart and layer them on the base and two purple pieces.

 .
.
Recipe for Triple Time Stamping Layers
- Stamps: Dainty Delight, Shaded Summer for the Happy Birthday
- Base: Highland Heather; 11 X 4 1/4, scored at 5 1/2
- Mats: same cardstock as bases
- 3 1/4 X 4 1/2
- 2 1/4 X 3 1/2
- Artwork Layers: Basic White, Temporarily adhere together with temp glue or use just a bit of snail and then use your fingers to rub the snail so the oil in your fingers makes the glue less sticky
- 2 X 3 1/4
- 3 X 4 1/4
- 4 X 5 1/4
- Inside Layer: Basic White, 4 X 5 1/4
- Embellishments: Highland Heather Open Weave Ribbon, Brass Butterflies;
- Copic Markers: BV00-flowers, Y06-centers, YG13 for the greenery
- Ink: Highland Heather and Shaded Spruce for front greeting; the flower stems are also stamped in Highland Heather
- Markers: I used Stampin’ Up! watercolor markers for the little inside flowers at the bottom
Which do you like better for triple time- the Dainty, the Color Contour or the butterflies?
Dainty has its place depending on the person. I guess that is why we choose to make cards that we can personalize!
Click HERE to visit the prior post with two other Triple Time Stamping cards! Then vote for your favorite!
This next card uses the dies instead of the stamps:


For this card I cased a card made by Jan Clother of New Zealand!
Recipe
- Base: Thick Basic White, 5 1/2 X 8 1/2, scored at 4 1/4
- Layer (X2): Basic White, 5 1/4 X 4; Use the 3D Brick & Mortar Embossing Folder to emboss the front layer
- Flowers: Die cut with Dainty Delight dies
- Blushing Bride – 1 1/2 X 2, 4 full flower cut, 1 flower bud cut
- Vine: Old Olive, 8 X 2 1/2, die cut 3 with Dainty Delight vine die, use cut off edge of one for the inside
- Butterflies: Blushing Bride, 2 X 1, Butterfly Brilliance Dies, Die cut one tiny and one small
- Front Greeting: Basic White, I reached in my container of greetings from More Messages and then punched two backgrounds in Blushing Bride cutting them and layering them
- The Thank You Greeting on the inside is from Go To Greetings stamped in Old Olive
- Embellish: clear jewels for the inside of the flowers and sparkly jewels for the butterfly and card front
So is the Dainty Delight bundle going to be put in the bake sale since you used it more than most?
Oh my, Sal, that is the best reason to keep it in the stash. So many of the BAKE SALE items I never used or only used for one workshop. Friends, if the item is in bold it is still available at http://stampinup.com
Check out the BAKE SALE today for great deals on products. I am listing the rest of the stamps on Facebook today.
Thank you for checking out my blog!
SAL, Sacrificing A Lot of the stash today
Karen
Copyright
Unless otherwise indicated, all stamped images are 2009-2023 Stampin’ Up! The projects shown are to spice up your personal creativity and may not be copied for publication or contest submission. The content of this website is my sole responsibility and the use of and content of classes, services or products offered are not endorsed by Stampin’ Up!
Dainty Delight Stampin’ Up!
The Dainty Delight bundle at Stampin’ Up! carried over into the new catalog and I am definitely delighted! I am casing a Wyermann’s Whimsey card design and she has a great tip for us on her youtube channel. I will include those links further down the blog.


Here is a thank you card just like Lorraine Weyermann’s with just a few of my own changes:
 .
. 
 Wait! You used a die cut for the greeting that isn’t symmetrical?!
Yes, Sal, it is from the Beautiful Shapes Dies from Stampin’ Up! – retiring May 3!
The stamping on the inside of the birthday card is from the Stampin’ Up! Artistically Inked Stamp Set and it is not retiring. The little flowers and grass at the bottom of the inside of the birthday card are from the Dainty Delight stamp set and I colored the back of the stamp with markers. The front greetings are both from the Dainty Delight stamp set stamped in Memento Black on a Basic White Beautiful Shapes Die- (the one I said I would never use-ha -never say never)!
Recipe
- Base: Basic White, 5 1/2 X 8 1/2, scored at 4 1/4
- Layer (X2): Designer Series Paper (DSP), 5 1/4 X 4 (cut with the yellow at top left for a bit of sunshine)
- Flowers: Die cut with Dainty Delight dies
- Flirty Flamingo – 1 1/2 X 2, 1 full flower cut, 1 half flower cut
- Melon Mambo – 1 1/2 X 2, 1 full flower cut, 1 half flower cut, layer behind Flirty Flamingo
- Fresh Freesia – 1 1/2 X 2, 1 full flower cut, 1 half flower cut
- Highland Heather – 1 1/2 X 2, 1 full flower cut, 1 half flower cut, layer behind Fresh Freesia
- Vine: Old Olive, 5 X 2 1/2, die cut with Dainty Delight vine die
- Centers: Daffodil Delight, 1 X 1, die cut with the center which has four centers together – 2 full and 2 half centers
- Greeting: Basic White, 3 1/4 X 1 1/2, stamp greeting in Memento Black, die cut with Beautiful Shapes die and adhere direct to the DSP
- Embellish: brass butterfly and flower resin shape – retired
The vine is glued direct to the DSP.
Layer the flowers with glue dots and then pop up with dimensionals.
Lorraine Weyermann’s video below shows this presentation of the dies:

And one more video from Melanie Coverston using a background with a brick embossing folder and sunflowers:
Yes, thanks to the ladies who post videos for us to learn from.
My Bake Sale tab now has the products I am selling so let me know if you would like anything. I will eventually post to Facebook and Ebay but I wanted to let my loyal followers have first pick. I accept paypal, so send me your requests and your zip code and I will invoice you. When I receive payment, I will immediatly ship the product(s).
Sal, Stamp A Lot
Karen
Copyright
Unless otherwise indicated, all stamped images are 2009-2023 Stampin’ Up! The projects shown are to spice up your personal creativity and may not be copied for publication or contest submission. The content of this website is my sole responsibility and the use of and content of classes, services or products offered are not endorsed by Stampin’ Up!
Thanksgiving Card with gift card holder
Thank you/ Thanksgiving Card
I used the Handmade Wishes stamp set for the greeting on this card.
I tried several coloring techniques with the Leaf Fall embossing folder but liked the embossed look without coloring the best:
 .
.
 .
.
I used a combination of gold and copper embossing on the greeting. The outside is gold, the inside is copper.
 .
.
. Sorry, I still can’t see the difference.
Sigh…… it’s one of those days! The software I use to add the watermark froze up and the camera isn’t catching the colors. But you need to see the Handmade Wishes stamp set before it goes away and, more importantly, you need to see this die:
 .
.
This Mini Pocket Envelope Die! It is the perfect size for gift cards and look at all the other dies that are included:
 .
.
A miniature oval, branch of leaves die, scalloped rectangle, tags and tiny dies to punch circles or a slot for twine or ribbon! And check out the little bow you can make with two of the dies. You need this die – trust me – no more manually cutting and scoring to make a gift card holder, it is all done with the die.
 .
. Recipe for Thanksgiving Card
- Base: Thick Very Vanilla, 8 1/2 X 5 1/2, scored at 4 1/4
- Layer 1: Thick Very Vanilla, 4 3/4 X 3 1/2, (X2) outside and inside
- Layer 2: Thick Very Vanilla, 4 1/2 X 3 1/4, embossed with Leaf Fall 3D embossing folder
- Inside Gift Card Holder: Designer Series Paper (retired), 4 1/2 X 5, die cut with Mini Pocket Envelope Die; stamp the very top of the gift card holder in Versa Mark with ‘For You’ from Handmade Wishes and emboss with copper embossing powder.
- Greeting: Very Vanilla, Scrap, stamp with border from Handmade Wishes stamp set in Versa Mark and emboss with gold embossing powder. Stamp ‘Endlessly Grateful’ from Very Best Occasions stamp set and the scrolly from the Handmade Wishes stamp set in Versa Mark and emboss with copper embossing powder. Punch with the Handmade Tag Punch
- 7″ of ribbon folded in thirds and attached to the back of the greeting with glue dots
The small leaves I used on the inside are from the retired Square Pilllowbox dies and the front open leaf, die cut in gold, is from the retired Stitched Seasons Framelits dies. The two leaves at the bottom left of the greeting are from the retired Gathered Leaves Dies with the larger leaf die cut in copper foil and the smaller in brushed metallic foil.
SAL, Share A Love
Karen

Sending Smiles, Blossoming Happiness and New Horizons
Click a second time on the header to go to the blog.
The Tea Boutique Cards & Envelopes in the annual catalog use all five of the new In Colors with cards and matching envelopes. I challenged myself to make a card that matched the envelope!
 .
.


I chose the smaller of the flowers in the Blessings of Home stamp set and the long stem flower and greenery from the Sending Smiles stamp set cut out with the Sending Dies which even have a die for that itty bitty flower. The envelope has a Starry Sky little flower on the flap so I replicated that look. The Flowers of Home Dies cut out the flower image and the die set has many other images to add greenery!
Recipe for Sending Smiles Tea Boutique Cards
- Base: Tea Boutique Card in Orchid Oasis, Measures 8 1/2 X 5 1/2 folded at 4 1/4
- Layer 1: Basic White, 3 3/4 X 5
- Layer 2: In Color Designer Series Paper in plaid, 3 5/8 X 4 7/8
- Top for die cut pieces: Basic White, 6 X 4 1/2
- stamp smaller flower in Blessings of Home stamp set with Orchid Oasis ink, color with Stampin’ Blends- Lt Fresh Freesia, Lt Granny Apple Green, Lt Call Me Clover and use a Blender pen & Orchid Oasis ink
- stamp in Fresh Freesia ink 2 long stem flowers from Sending Smiles stamp set (outside & inside flower) and use the blender pen and Orchid Oasis ink to add color on the flowers
- stamp one green leaf for outside in Granny Apple Green and one double green leaf for inside, die cut
- Cut ‘sending’ background from the Basic White
- Stamp ‘Love & Big Hugs’ in Orchid Oasis and cut with die in Sending Dies, cut off right edge even with the DSP layer and leave a little on the left edge for a gem when you line up the greeting die
- ‘Sending’ Top Layer: Use the In Color Designer Series Paper left over from layer 2, 1 5/8 X 3 5/8, and add backing of double back adhesive paper 1 1/2 X 3 1/2
- You should have enough of the In Color Designer Series Paper to make two 1 1/8 X 1 1/8 squares to cut diagonally for inside corners
- Greeting on inside of second picture: Basic White, 3 X 3 , Flowering Tulips stamp set, stamped in Starry Sky and cut with a retired Hippo & Friends Die
- Greeting Layer: Starry Sky, 3 X 3, die cut with retired Hippo & Friends Die, cut in half and glue to back of greeting
- Little Flowers (X2): Starry Sky, 1 X 1, die cut with Sending Dies and glue on a scrap of Daffodil Delight
- Embellishments: 5 In Color jewels, 4″ of Fresh Freesia ribbon tied in a knot
The top pieces are all adhered with Stampin’ Dimensionals, inside corners and flowers are glued directly down.
 I remember you used the Parakeet Party and the Tranquil Tide Cards and Envelopes for the catalog launch and now you have used the Orchid Oasis. What are you going to do with the Starry Sky and Sweet Sorbet?

The Tea Boutique Cards & Envelopes have 20 bases with matching envelopes so I have some left of all the colors. (Click for Catalog Launch details). I would love to do more of what I have done here in all the colors!
Recipe for Blossoming Happiness Card
 .
.  .
.
The front of this card is from a kit sent to me when I played Bunco online with Debra Harrison at Simply Sweet In Ink Designs. I created the inside using matching Hues of Happiness DSP and Blossoming Happiness Dies.
Base: Thick Basic White, 4 1/4 X 11, scored at 5 1/2
Layer 1: Hues of Happiness DSP, 4 X 5 1/4
Top Layer: Basic White, 4 X 4, Die cut with large Blossoming Happiness Die; Stamp sentiment from Pansy Patch stamp set in Granny Apple Green in upper right of die cut piece
Flower & 2 sets of Leaves: Hues of Happiness DSP die cut with Blossoming Happiness Dies.
Inside Layer: Hues of Happiness DSP with center cut out using retired Ornate Layers Die and stamped in Melon Mambo using the Limited Edition stamp set.
Recipe for New Horizons Card
 .
.  .
.
Base: Misty Moonlight, 8 1/2 X 5 1/2, Scored at 4 1/4
Layer 1 (X2): Soft Succulent, 5 3/8 X 4 1/8
Top Layer: New Horizons DSP, 5 1/4 X 4, and 5 1/4 by 2; I wanted the lake in the middle so I cut 3/4″ off the top of the 6″ DSP, then cut the 6″ width into two pieces – 4″ wide with the remaining 2″ wide for inside
Use the Oceanfront stamp set for grass in Evening Evergreen and Boulders in Basic Gray. Note: Stamp the boulders first, mask them, and then stamp the grass
On the Horizon stamp set is used for the birds but stamp lightly or they become blobs -practice makes perfect!
Horizon Dies are used for the fence with a scrap of Basic White and the grass with a scrap of soft succulent.
Thank you for your order is the retired You Always Deliver stamp set.
Embellishments are the retired Pebbles Enamel Shapes.
I hope I have brought you a “pinch of creativity to spice up your crafting world!”
Have a wonderful day!
SAL, Sending A Lovely set of cards to inspire you
Karen (click on little Sal in the computer to go to my online store)
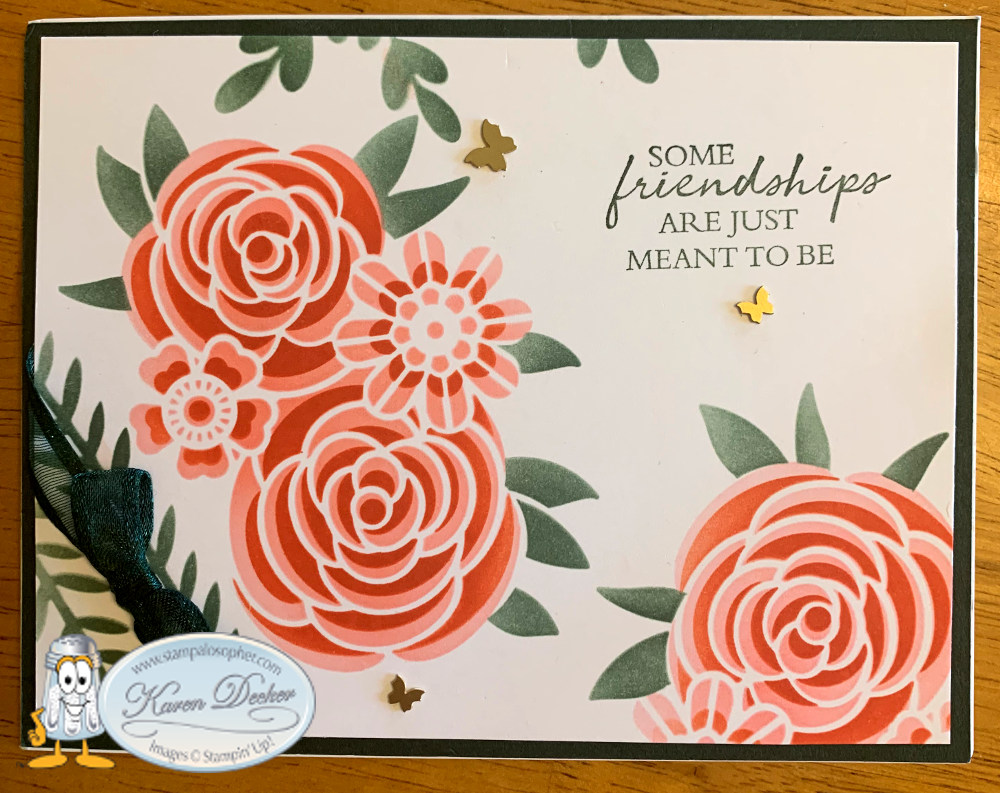
Butterflies & Flowers Decorative Stencils & Thank You Cards
Hello Stamping Friends, (click on the header if you are on a mobile device to view full blog)
In June I took a turn at hosting the shoebox swap and we had so much fun using the Stampin’ Up! Butterflies & Flowers Layering Decorative Masks.

 .
. I saved so many ideas from Pinterest but I really liked what Jen Morgan of cardmum.com did with one full layered set of flowers and then a partial flower at the bottom right. I did a bit more greenery, used different colors of ink and added the Brass Butterflies- my new favorite bling!
Recipe For Layered Flowers
Note: Don’t attach your green layer to the base until the top art work is done and attached to the green layer so you can wrap the ribbon on the artwork and the green layer.
- Base: Thick Basic White, 11 X 4 1/4 scored at 5 1/2 (opens like a book)
- Layer 1 (X2): Evening Evergreen, 4 3/16 X 5 7/16 (I know, I know, but I wanted just a tiny bit of white base- just think – one tick less than 1/4 and one tick less than 1/2)
- Top Layer (X2): Basic White, 4 X 5 1/4
- Three Brass Butterflies and 12″ of Evening Evergreen Open Weave Ribbon
- Greeting: Shaded Summer Stamp Set stamped with Evening Evergreen Ink
- Inks: Evening Evergreen, Flirty Flamingo, Calypso Coral, Soft Succulent for greenery
Tips For Stamping with the layered masks:
- Mark the shiny side of your masks and sponge with the shiny side up
- Each step, completely cover any and all white that is showing with sticky notes, outside the mask and on the mask where the flowers/greenery are cut that you are not sponging
- Use the thin looking flower mask first sponging with Flirty Flamingo
- Use the thick looking flower mask second sponging with Calypso Coral
- There is a set of leaves that exactly matches the large flower -sponge this with Soft Succulent
- Using the vine mask, sponge two Soft Succulent vines at bottom left
- Wrap the corner with ribbon, then add a bow with a glue dot
- If you have any ink smudges you can add greenery to cover them up
 .
. 
Recipe For Layered Butterfly
Note: Don’t attach your pink layer to the base until the top art work is done and attached to the pink so you can wrap the ribbon on the artwork and the pink layer.
- Base: Smoky Slate, 5 1/2 X 8 1/2, scored at 4 1/4
- Layer 1 (X2): Polished Pink, 4 3/16 X 5 7/16 (I know, I know, but I wanted just a tiny bit of white base- just think – one tick less than 1/4 and one tick less than 1/2)
- Top Layer (X2): Basic White, 4 X 5 1/4
- Three Rhinestone Basic Jewels and of Polished Pink Open Weave Ribbon 6″ to wrap and 8″ for bow
- Greeting: Hello from Forever Fern and ‘Love You Much’ from Pansy Patch and Amazing Silhouettes for the inside
- Inks: Smoky Slate and Polished Pink
Tips For Stamping with the layered masks:
- Mark the shiny side of your masks and sponge with the shiny side up
- Each step, completely cover any and all white that is showing with sticky notes, outside the mask and on the mask where the flower is cut that you are not sponging
- Sponge the full background butterfly mask with polished pink
- Sponge the butterfly detail mask with smoky slate
- Using Masking Paper, stamp a butterfly mask and cover your butterfly
- Using the background mask, sponge heavy on the corner and very lightly around the butterfly
- Stamp the outside greeting in Smoky Slate and the inside greeting in Polished Pink
- Use a Smoky Slate Marker to add a bit of artwork to make the butterfly look like he is fluttering
- Stamp your silhouettes, wrap the ribbon around the pink and white layers and add a bow and rhinestones
May 2022 Paper Pumpkin – Celebrating In Colors
The following pictures are my alternatives since I needed thank you notes:
I used the Amazing Thanks Dies and a thank you set from years ago.
Orchid Oasis and Sweet Sorbet:


Tranquil Tide and Parakeet Party:
 .
.  .
.
Starry Sky:

I like all those little dots! Where is that stamp from?
That stamp was in the May kit! Such fun!
Thank you for giving me a bit of your precious time! I hope you found some inspiration today.
SAL, Share A Love,
Karen. Click on little Sal in the computer to go to an online store.
Paradise Palms for May Swaps, Sweet Songbirds Catalog Launch
Hello Stamping Friends,
 Let’s take a moment to remember those who gave their lives for their country!
Jo Brooks sent a swap card that is so perfect for the day:

 .
.  .
.
The little red star is attached to the left and fits inside the blue star creating an awesome hinge. Opening up the stars, Jo has inserted ‘A Soldier’s Poem’:

May we honor their sacrifice by protecting our freedoms as best we can!
Jo’s card uses many Stampin’ Up! Dies– Celebrate You, Basic Borders, Cross of Hope, Scalloped Contours, and Stitched Stars. What a great card for Memorial Day! Thank you, Jo!
I have so much to share I hardly know where to start. Grab a cuppa and settle in for some wonderful inspiration from my group of swappers and the projects at the catalog launch.
 You had better hurry! You have so much to share.
Catalog Launch Fun

Stampin’ Up!’s new annual catalog made its debut May 3rd and it was so hard to decide what to showcase. I love birds and wasn’t sure about the Sweet Songbirds stamp set until I saw a card made by Sue Vine of Miss Pinks Craft Spot with the bird in the air so I went with that idea and voila:
.
 .
.  .
.
There are two different sets of eyes- open or closed- and two different feet -standing or walking- and a punch to punch out our little songbird! Laura Mellinger of laurasworksofgheart.blogspot.com designed the little nest which was perfect for a party favor!
I used the Tea Boutique Cards and Envelopes with strips of the new Tahitian Tide, Parakeet Party and Sweet Sorbet card stock adhered to the white side which I made the front. The clouds are from the Give It A Whirl Dies! The clouds have stitched edges for a fun look and there are hearts and circles and rectangles, a must for your collection, even if you never make a whirly card like I did here.
 .
.  .
. All the attendees got to see the new In Colors up close and personal as they made their color chart:
 .
. Sweet Songbird In Flight Recipe
–Sweet Songbirds stamp set, Songbird Builder Punch
-Base, Tea Boutique Cards and Envelopes
-Basic White, 2 3/4″ X 4″; stamp the songbird and then punch out. Stamp and punch an extra belly to make the larger wing. Helpful Hint: Punch the songbird out of scrap to make a template for positioning the stamps on the Stamparatus. Save your template with the stamp set.
-Side Strips X2, 5 1/2″ X 3/8″ in one color for the songbird and one color to match your choice of card
-Basic White scraps, various sizes to die cut clouds with the Whirly Dies
-Baker’s Twine, 12″ and 3 Opal Round embellishments (There is Baker’s Twine to match the In Colors)
-Inks, Memento Black, Soft Suede, Old Olive, Tahitian Tide, Crushed Curry, Sweet Sorbet (Poppy Parade)
Sweet Songbird Favors
-Nest box, Soft Suede, 3X3, score at 1″ and 2″ on both sides, cut from one score line to the other on opposite sides 
-Nest, Soft Suede, 2 1/2 X 3, stamp two nests and fussy cut
-Bird, Tahitian Tide 2 X 2 1/4, punch – no stamping, Basic White scrap for belly, Daffodil Delight scrap for beak
-Sign, Basic White, 2 X 2, stamp the post full strength and then the rectangle after stamping off (2nd generation) so the greeting stamps nicely over top, stamp the notes in memento black and fussy cut
May Swaps
I chose the Paradise Palms stamp set and Palm Dies on a background of New Horizons Designer Series Paper (retiring June 30) with a Pale Papaya Base and Basic Black accents. The greeting and birds are from the retired Beautiful Moments stamp set. The coconuts are from the Pebbles Enamel Shapes . I added the setting sun and sponged a bit of extra colors in the sky.


I made a vertical book fold with the same palm tree design and a different piece from the same DSP for the inside of the card that looks like a beach with sea foam just coming in!
 .
.  .
.
Horizontal Paradise Palms Recipe
- Base, Pale Papaya, 8 1/2 X 5 1/2, score at 4 1/4
- Layer, Basic Black, 5 3/8 X 3 3/8; 1/16 reveal top and sides
- Top Layer, New Horizons DSP, 5 1/4 X 3 1/4
- Designer Strip, Basic Black, 3/4 X 5 1/2, die cut with Palms Die and center 1/8″ up from bottom and 1/8″ from black layer
- Palm Tree, Basic Black, 2 5/8 X 3 3/8, die cut with Palms Dies
- Greeting and birds, Memento Black Ink; stamp set – Collect Beautiful Moments
- Sun, use a sponge dauber to make a circle in Crushed Curry with a little extra sponged in the sky
- Embellish with Pebbles Enamel Shapes for coconuts and 3 In Color gems on DSP
- Inside Layer, Basic Black, 2 5/8 X 5 3/8
- Inside Top, New Horizons DSP, 2 1/2 X 5 1/4
- Inside Greeting, Memento Black, Paradise Palms Stamp set
Vertical Book Fold Paradise Palms Recipe
- Base, Pale Papaya, 8 1/2 X 5 1/2, score at 4 1/4; Turn 180 degrees and score at 3 3/8″ and 3 3/8 + 1/16, (7/16) for a decorative extra score line
- Layer (X2), Basic Black, 3 1/8 X 5 1/2, this will be flush with top and bottom with 1/16 reveal right and left
- DSP Top Layer (X2), New Horizons, 3 X 5 1/2; Hint: with 3″ in width you can make two from a 6 X 6 which is the goal if you are making multiples. Obviously, a different DSP used for inside.
- Designer Strip, Basic Black, 3/4 X 5 1/2, die cut with Palms Die and center 3/16″ from side and 3/16″ from black layer
- Palm Tree, Basic Black, 2 5/8 X 3 3/8, die cut with Palms Dies
- Grass, Basic Black, 3 1/2 X 1
- Greeting and birds, Memento Black Ink, Stamp set – Collect Beautiful Moments
- Sun, use a sponge dauber to make a circle in Crushed Curry with a little extra sponged in the sky
- Embellish with Pebbles Enamel Shapes for coconuts
- Inside Greeting, Memento Black, Paradise Palms Stamp set
 Do you crafters really measure to the 1/16 of an inch?
Well, Sal, we often just eyeball the placement but that doesn’t make for very good instructions.
Let’s look at the swaps from the rest of the group. We saw Jo Brooks’ swap up top so now let’s look at Sharon’s swap using a tea cup very similar to our new tea cup in the Tea Boutique Suite. She uses three layers for the butterfly- a Fresh Freesia base, a Blushing Bride die cut and then tops her butterfly with a vellum die cut and a unique oval gem.

Heather used the Flowering Fields DSP (retiring June 30) and a greeting from the Flowering Tulips stamp set in beautifully layered circles on a gold foil circle. The base is Poppy Parade and she used a corner rounder punch on opposing sides of the DSP for a unique look.

Ann’s swap used embossed strips of the new In Colors on a Crumb Cake base and the greeting from Biggest Wish stamped in Parakeet Party with the ‘happy’ stamped over in Starry Sky. The ribbon is the 1/8″ Metallic Woven ribbon in Orchid Oasis

Lucille Kearin used the DSP with butterflies (retired) and a fun ‘hi’ Die. She embellished with white ribbon and Paper Studio Flowers.

Joy’s card uses the new Nature’s Prints stamp set and Natural Prints Dies. She used the Gray Granite side of the Sun Prints DSP, the Layering Circles Dies, a doily and beautiful gems. You would love the sparkly Wink of Stella she used on the branch but the camera didn’t capture the sparkle. Her gems really sparkled!

You must see the other card she made using the Nature’s Prints Dies! I love the shape of the greeting and had to go look up the dies since I hadn’t even noticed that die. She used the new Fern 3D embossing folder on a base of Starry Sky and then sponged the top lightly with white craft stampin’ ink.

Lori Moore made a slimline card on a white base with Design A Daydream DSP for her first layer and then a layer of embossed Basic White, a layer of Blackberry Bliss with the top layer of Basic White stamped with the Art Gallery stamp set flower in Berry Burst and Rich Razzleberry. The leaves and ribbon are Soft Succulent. The greeting is from the Floral Gallery Dies.

Wow, you will have lots of samples to show at your next party!
So true! Thank you everyone for participating in our monthly swaps!
Hopefully, I will have some cards from the May Paper Pumpkin to show you soon.
Now, now, Sal, be kind! Though you make a good point and I think I even missed the April swaps.
Thank you for spending some time with me!
SAL, Sharing A Lot of inspiration
Karen

Triangle Corner Pop Up Card for Case The Creator (CTC) #3
Hello Stamping Friends,
Case The Creator Card Challenge
This month we cased Dawn Griffith’s Triangle Corner Pop Up Easel Card!
Yes, Dawn calls it a “Fancy, Schmancy Corner Fun Fold”! Her video is in the instructions.
Case The Creator #3 printable pdf file

I ordered the tiny magnets from Amazon:

 .
.  .
. 
The bicycle is hidden when you open up the easel so be careful with your design. I had a lot of fun with the bicycle! I used the long, tiny tulip die to create a basket of tulips! I will write my greeting under the ‘thank you’ since I went against protocol and made the bottom left another flower display instead of the place to write a note.
Heather made a fabulous graduation card with beautiful gold embossed paper and black! I love the diploma for the easel stand up!
 .
. 
Joy’s beautiful card uses the ‘Expressions In Ink’ designer series paper. We only have until May 2nd to get discontinuing items, like this DSP, from the annual catalog!
 .
.
Sharon’s uses the Tea Time stamp set and Tea Together dies- look at the little heart she put on the lid!

Sheri used the ‘Flowering Fields’ DSP and the ‘Simply Succulents’ stamp set for greetings:
. 
 .
.
Ann used the ‘You’re A Peach’ DSP and the ’Sweet As A Peach Bundle’. Those peaches even look fuzzy! The amazing “Dist ink tive” stamps! These are in the Annual catalog as well so order before May 2.

 .
.
Jo’s little rabbit made us all smile, and eggs from the Arrange A Wreath set and Wreath Builder Dies were perfect with the paper.
 .
.  .
.
They followed instructions and had a large place for a message.
Indeed! Isn’t it fun to see all the different creations from one set of instructions?!
SAL, Seeing April Leave
Karen
Click on little Sal in the computer to shop.
CTC #1 Pocket Card
Good morning, Stamping Friends,
Here is a walk down memory lane for a swiper St. Patrick’s Day card. When you pull the card side to side the pot of gold pops up:

You can click on the image to go to the post for detailed pictured instructions! We can change the images to a current product while maintaining rainbows, shamrocks and a pot of gold!
Now there’s a thought! And we could add a pepper shaker to be your friend!
Ann Hausmann cased Kirsteen Gill and made the cutest St. Patrick’s Day favor:
 .
.  .
.
Thank you, Ann!
February Case The Creator #1 printable pdf file (click on the blue)
 Lynn Dunn of Stamptastic Designs is our creator! Thank you, Lynn.

I made a Valentines Day card since I had all those supplies sitting at my work table, and then I used the same design for February thank you cards. Another sincere thank you to all those who ordered in February! Oops…. That’s why I have you!
I used the ‘Always In My Heart’ stamp set for Be My Valentine on a banner die cut from the Floral Heart Dies. The paper is the ‘Sweet Talk’ Designer Series Paper in the mini catalog. I fussy cut candies for the inside. The Happy Valentine’s Day fits so perfectly in the opening and is from the retired ‘Heartfelt’ stamp set. The ribbon is the Faux Linen Real Red ribbon from the mini catalog.


For the Thank You card and a card for Mom I made these:
 .
.  .
.
The paper is from the ‘Flowering Fields’ designer series paper, also in the mini catalog and I used the ‘Jar of Flowers’ stamp set to make a bouquet the perfect size for the pocket opening. I had a stack of products by the time I finished:
- Delivering Cheer stamp set – shadow under the jar
- Positve Thoughts stamp set – Hugs, Prayers, Love
- Forever Blossoms stamp set – All of me loves all of you
- Prized Peony stamp set – Love & thanks to a dear friend
- Jar of Flowers stamp set – Tulips & stems, jar stamped on a window sheet with stazon ink
- Detailed Bands Dies – cut once in Basic White and once in Fresh Freesia
- Stampin’ Blends – Lt Fresh Freesia, Dk & Lt Soft Succulent, Dk Rich Razzleberry, Lt Highland Heather, Pineapple Punch
To the above CTC instructions I added a Gorgeous Grape belly band permanently attached – 1″ X 8 1/4″, score at 1/4″ and then gently fold to determine where it will wrap on the side, then score that fold.
For the bow on the jar I used a 1/8″ X 4″ strip of Gorgeous Grape and folded in a 45 degree fold to which I added a second 1/8″ X 1 1/2″ strip tucked in at the fold.
I also added a 3 X 4 Basic White piece to go on back of the insert for writing a message, a doily and three little brass butterflies.
. I love the little fussy cut flower laying on the ground in the insert! Nice touch.
Thank you, Sal! Let’s look at the cards from those who participated and sent me pictures.
Joy used the cut off for the pocket to make a second card and the Layering Ovals punch for two different greetings. She’s using products from the Art Gallery suite.

Sharon did three different cards – the pocket card and then used the pieces for two others. She used the ‘Expressions In Ink’ designer series paper and a paper bow from the ‘Pierced Blooms Dies’.
 .
. 

Ann used the hostess ‘Pattern Party’ designer series paper and the ‘Pierced Blooms Dies’. I love the stripes that peek out from the back:
 .
. 
Heather used the Poppy set in Pool Party for a lovely card:
 .
.  .
. Thank you, dear stampers, for participating and helping others see the variety of creations from one fun fold pocket card! We have a large flower in the opening, a whole bouquet in the opening, a lovely paper bow or even a heart in the opening!
SAL, Spring At Last
Karen
Click on Sal in the computer to go to my store:’
Welcome to my blog!

Sal Window to Products


