
Home » Fancy Fold
Category Archives: Fancy Fold
Valentine’s Day Pop Up Card
Would you like to see what I made for the grandchildren’s valentines? Do you ever see a card creation and say -“That is perfect”- what do I need to buy to make it? That was me when I opened a post of Deb Valder’s at Teaspoon of Fun. She had a pop up card with teddy bears! Yep – had to have the stamp, and the dies! Check it out:

 .
.


You pull the little heart to pull up the inside of the card. When it is flat it fits in an A2 envelope. The ‘Always In My Heart’ Stampin’ Up! set was the pull out greeting.
I will link the Stole My Heart stamp set at Teaspoon of Fun at the end with little Sal in the computer. The dies are available as well at Teaspoon of Fun.
We made these pop up cards years ago in club with the cutting and scoring done manually. I found the instructions carefully documented at Splitcoaststampers. If you would like those instructions click HERE.
 .
. 
 .
. 


To see the products I used on these cards, click HERE.
 Do those cards open up sideways as well?
No, Sal, those cards are a vertical card with a full base that opens up. On the children’s valentines, I didn’t make a full base like those, I left enough space before the “Hi there, Valentine”, to write their name with a white gel pen. These are the products I used that I purchased from Teaspoon of Fun:

 .
.  .
. 
And here is a video from Deb Valder of Teasoon of Fun.
Recipe
- Base: Real Red, 4 1/4 X 5 1/2, Diecut with the large rectangle die in the ArtZy die set
- Stamp Greeting in lower section
- Pop Up Feature: 4 1/4 X 5 1/2, Diecut with the large rectangle die in the ArtZy die set
- Pull Out Panel: Basic White, 3 X 4 3/8
- Stamp greeting before adhering
- Top Layer: Basic White, 4 X 5, Diecut with the smaller rectangular die of the set -burnish score lines
- Flip this over and adhere the small rectangle cut out of Basic White to the 1/2″ bottom of the flap
- Place foam strips around the sides and bottom of the pop up feature and adhere to card base
- Embellish:
- Scraps of red and white, Cut two circles & heart pieces and adhere to both sides of the pull out panel
- Love Designer series Paper (X2), 2 1/2 X 1 1/2 , Diecut with larger recrtangle; make two
- Love Designer series Paper, 2 1/2 X 1/2, Diecut with smallest rectangle
- Bears: Stole My Heart Stamp Set & Die, Basic White 3 1/2 X 3 1/2
- Stamp in Memento Black Ink, Die cut with die in set
- Copic Markers, cheeks- RV11, Bears-E31, E33, E13, Heart-R24, R27, R59
- Love Flourish: Love Designer Series Paper, 2 1/4 X 1 1/2 (I used the same DSP as the small rectangle)
- Cut two additional flourishes in real red and layer the three
- Heart: Many Hearts Dies
- Outside Heart, Real Red, 2 1/2 X 2 1/2
- Inside Heart, Basic White, 2 3/4 X 2 1/2 with this set of dies you can glue the red directly to the white
That’s not so complicated when you show a video and your dimensions and all the products you used.
Well, Sal, I list those so I have a good start when I make another. My card journaling so to speak.
I hope my journal is useful to some of my followers!
SAL, Send A Love letter
Karen
Sal will take you to Teaspoon of Fun!

Elephant Parade Pop & Twist Birthday Card
Happy New Year! Let’s start it out with a Pop Up and Twist Birthday Card. I used the Elephant Parade Stamp Set and Elephant Dies for Emma’s fourth birthday card as well as the retired Mischievous Mouse Hostess Stamp Set. I wanted 4 mice – 4 elephants – 4 peanuts – 4 butterflies – 4 balloons and 4 bits of bling. Thanks to Jaime Marsh for the front design on Pinterest and Teri Pocock of Stampin’ Magic for a great Youtube video showing how to make the card.


 . So…. who couldn’t resist counting?
Sort of like the joke.. “The first sign of craziness is a hair on your finger knuckle, the second sign is looking for it!”
Here is Teri Pocock’s youtube video- you will need this for construction of the mechanism.
https://www.youtube.com/watch?v=WIQ869fvcGc
Recipe
- Base: Flirty Flamingo, 4 1/4 X 11, scored at 5 1/2
- Flirty Flamingo, 10 X 3 1/2, score at 2 1/2, 5, 7 1/2; Fold to ‘W’ and burnish well
- Pop Up Mechanism: Flirty Flamingo, 8 X 3 1/2
- Score down the middle of the 3 1/2 side at 1 3/4
- Mark both long sides at 2 1/4 and 5 3/4
- Score on the diagonal from the 2 1/4 to 5 3/4 marks
- Fold the center as a mountain fold
- Fold the diagonals as Valley folds
- Burnish well
- Border Mat top and bottom (X3): Basic White, 4 X 5 1/4 (1/8″ reveal)
- Top Base Layers (X3): Mint Macaron, 3 1/2 X 4 3/4 (1/4″ reveal); Emboss with diamond embossing folder.
- Pop Up Top Layers: Basic White, 3 1/4 X 2 1/4
- Elephants, mice, balloons, butterflies, heart: Basic White, 8 1/2 X 11
- Stamp in Memento Tuxedo Black
- Color with Stampin’ Blends, Lt Smoky Slate, Dk Petal Pink, Mint Macaron
- Peanuts: Stamp 2 with Memento on Mint Macaron and stamp 2 on Flirty Flamingo; die cut
- Grass: Mint Macaron, die cut 5, one for outside, four for inside
- Outside circles:
- Basic White, 3 3/16 die cut circle (retired circle dies)
- Flirty Flamingo, 2 3/4 die cut with layered circle scalloped die
- Basic White, 2 1/16 die cut with layered circle plain circle die
- 4 green sequins
Note: The E, M, M, A and the ‘4’ stamped on the balloons is from one of Stampin’ Up!’s very first photopolymer sets- retired.
“It’s your birthday” is from Mischievous Mouse stamp set.
What about the outside greeting?
Oops, I forgot to list that in my notes. The greeting is in the Elephant Parade stamp set and the die is the Pretty Pillowbox die, stamped with the greeting in Mint Macaron on Basic White and then die cut, and a second die cut with flirty flamingo, cut in half and then layered under the basic white.
The heart for the inside greeting is a retired heart punch.
I love this cute animal card! It could be for an adult with a sense of fun!
That’s true! “We don’t quit laughing because we grow old; we grow old because we quit laughing.”
May we keep the childlike love of life!
Sal, Smiling A Lot with this card
Hostess code: MBCZMZ3P
Karen

Let’s talk about Stampin’ Up! instead of elephants! January 5th started the beginning of Sale A Bration and the new Mini Catalog! With each $50 or $100 purchase from the mini and/or annual catalogs you receive an item free from the Sale A Bration brochure. Click on the image to see a pdf of the catalog.


Case The Creator #8, Spanner Card Fancy Fold
Let’s get fancy today and make a Spanner Card!
 .
. The top has a strip of window sheet attached to the two sides which were cut from the main card base. You lift the front to reveal a middle panel:
 .
. Then lift the middle panel to see the greeting:
 .
.
Here is the printable pdf file and if you open it you can click on the Youtube from Sharon Lim to see a video…
Case The Creator #8 printable pdf file with video link
…. and if you would prefer to just look at the directions here, this is a screen print of the pdf (so the link will not work):
 .
.
I used the scrumptious Rustic Harvest DSP (designer series paper) on a Cajun Craze base with a Basic Black mat. The Sending Dies and the Sending Smiles stamp set are a great addition to anyone’s stash. I did cut two additional 1 1/4 X 1 1/4 Basic Black squares to put over top of the back sides of the window sheet so the glue dots wouldn’t show. I die cut a little pumpkin and a branch of leaves from the Seasonal Swirls Dies. The greeting is from Blessings of Home stamp set.
The greeting doesn’t look like what is in the stamp set?!
No, Sal, I masked off the ‘hello’ in ‘A CARD TO SAY HELLO’ and added three little dots with a marker. The greeting dies were longer than I wanted and I didn’t want to cover up the beautiful DSP so I masked, then stamped, then die cut half of the greeting, removed the die and then placed the die on the other end of the greeting to die cut a shorter length. The embossed edges kept the die in place.
Oh, yes! But practice makes perfect so its best to challenge ourselves to step out of our comfort zone so we get comfortable using our dies in various ways. It is nice to know we don’t need dies and punches in every size!
Let’s look at what my crafty friends came up with for challenge #8!
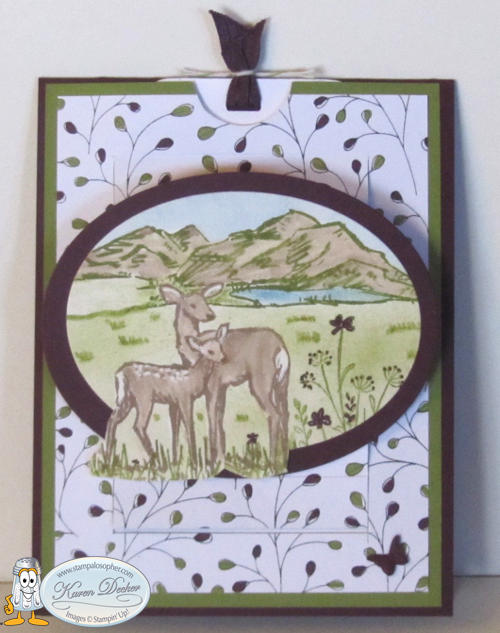
Ann used the Peaceful Deer Stamp Set and Deer Builder Punch:
 .
.
 .
.
Lucille’s card has a fall feel to it with a die cut bouquet from Penned Flowers dies.

Jo used the Delicate Edges Dies! Her flower is from the Color & Contour stamp set with the Scalloped Contours dies.
 .
.

You are so lucky to have such talented crafters playing along with your CTC challenges!
Blessed, Sal, blessed!
Thank you crafty friends for joining the challenge and sending pictures of your creations. Thank you, dear followers, for spending some of your day with me!
SAL, Sending A Lot of samples to spice up your crafting world!
Karen
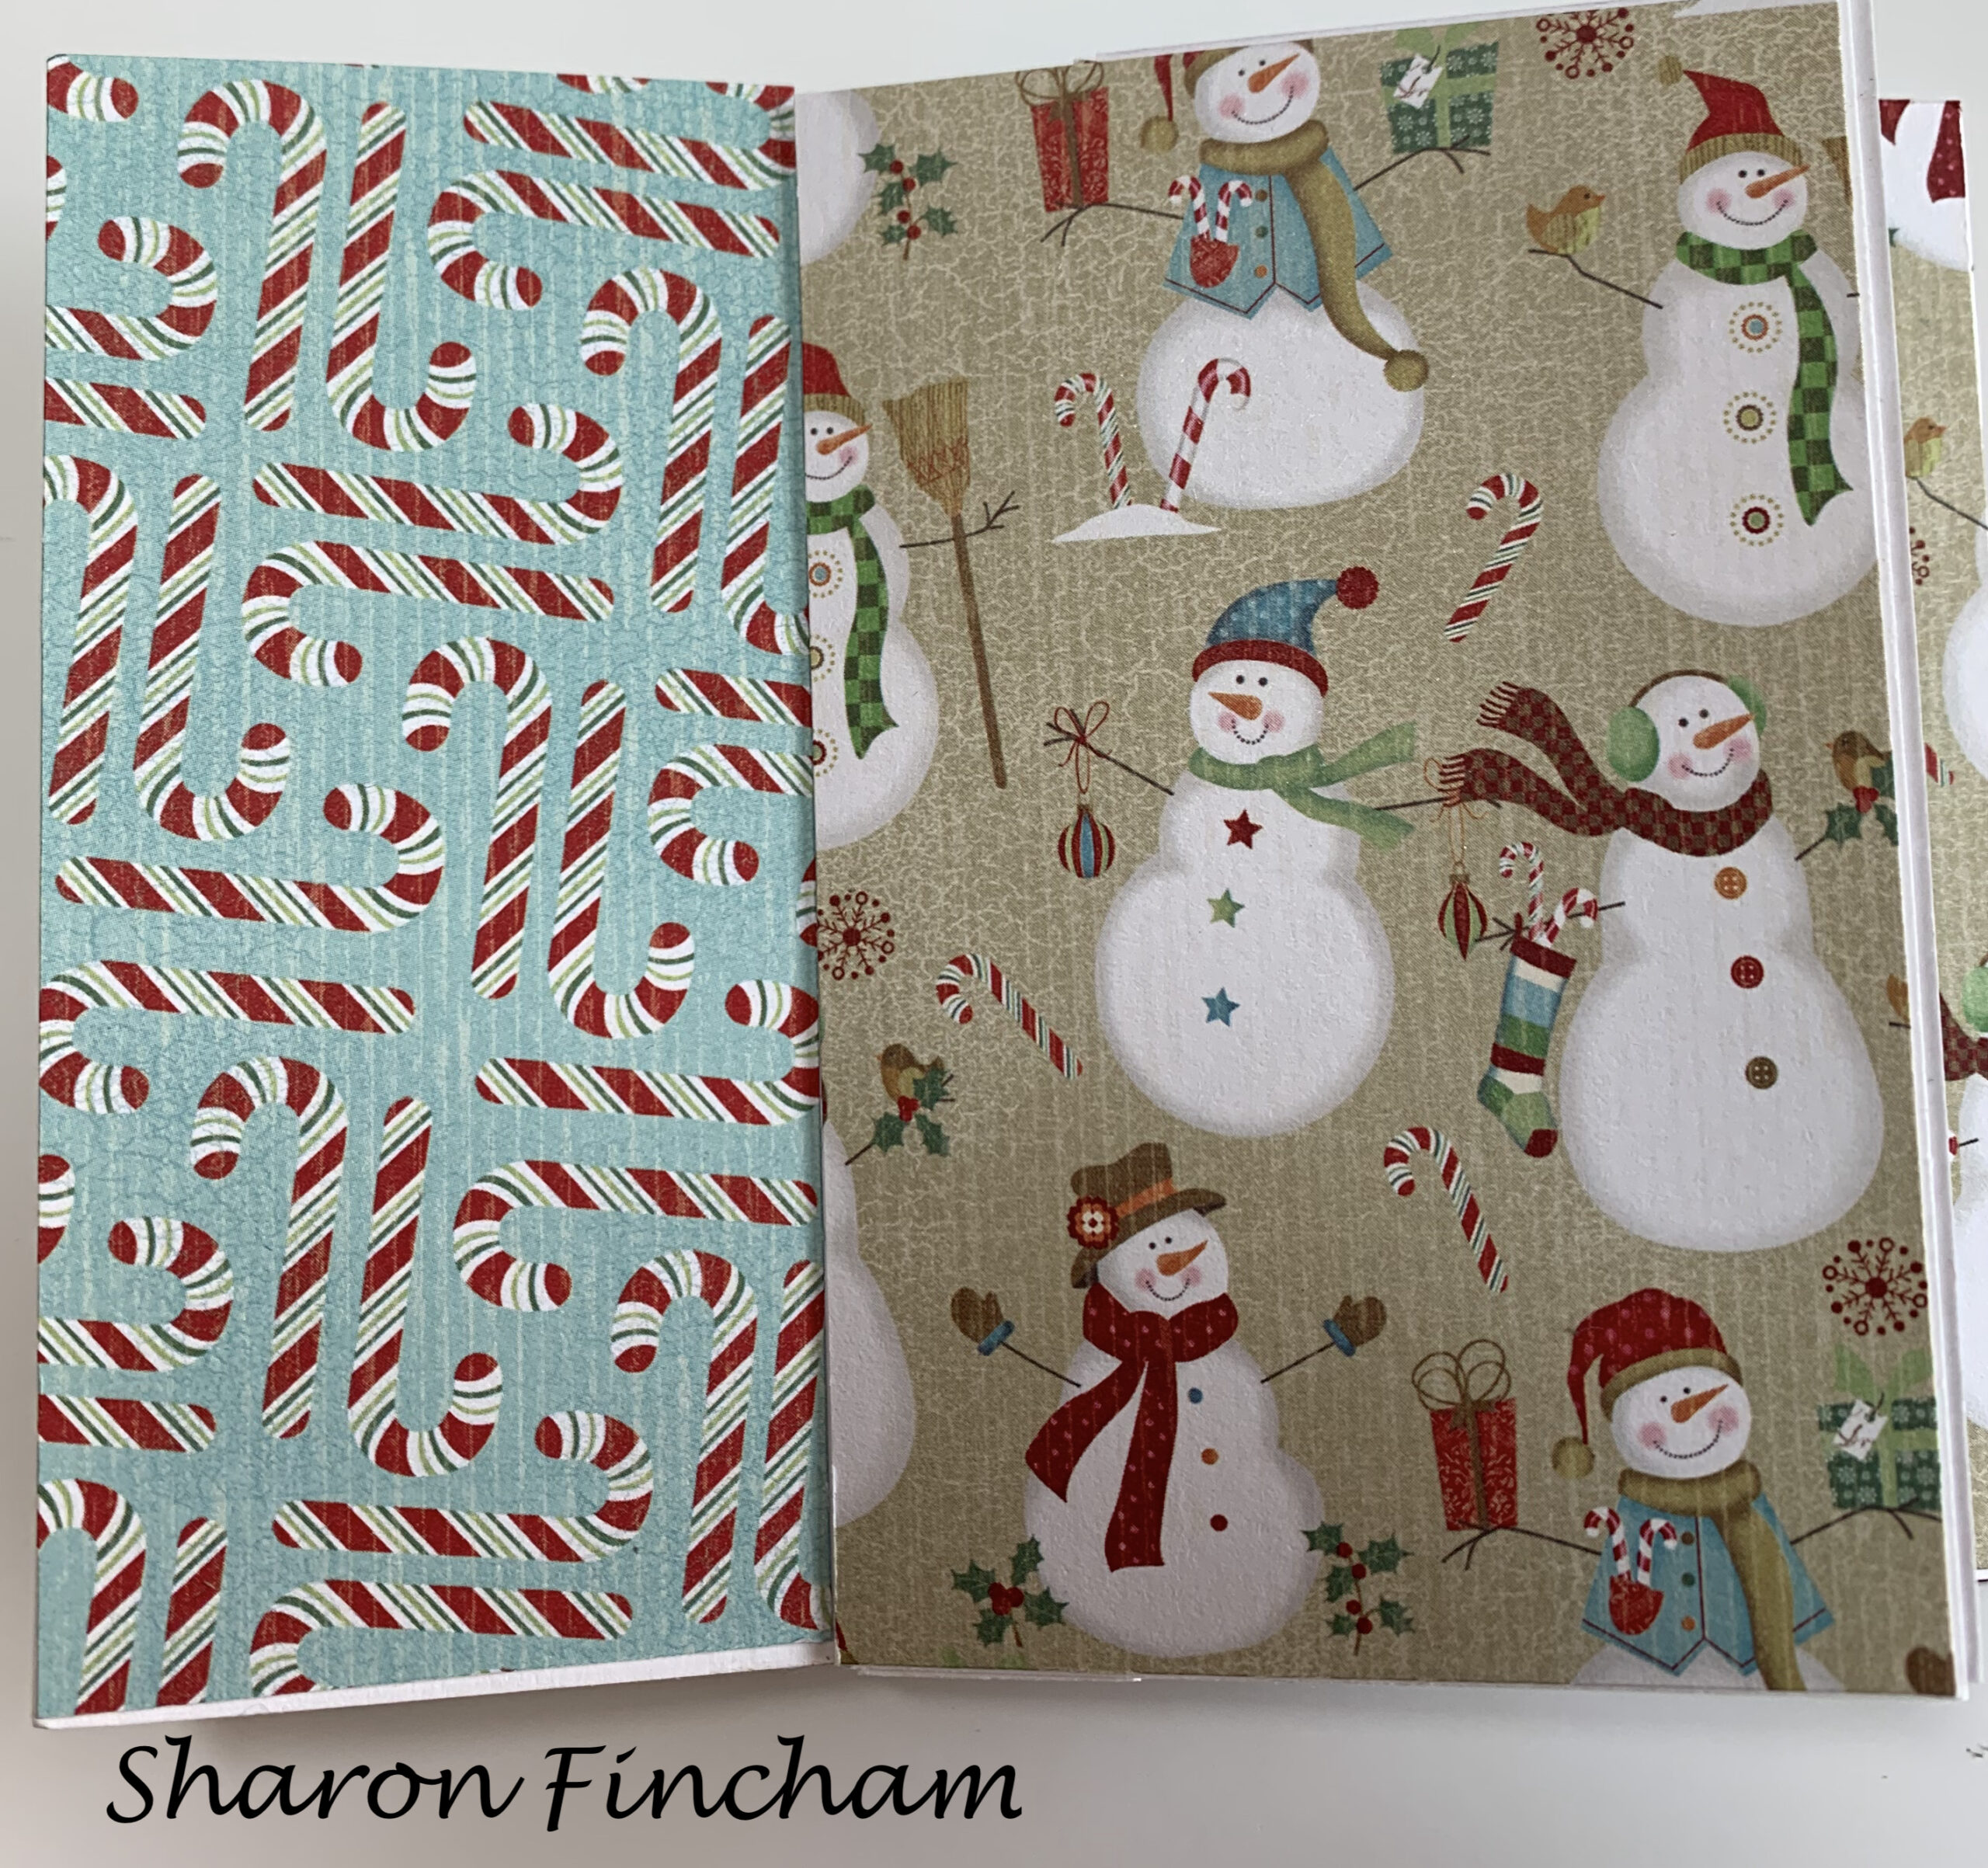
Book Fold Candy Cane Christmas Card & Circle Tri Fold Card
Let’s look at two Christmas cards we made at the Christmas Stamp Camp.
 .
. 
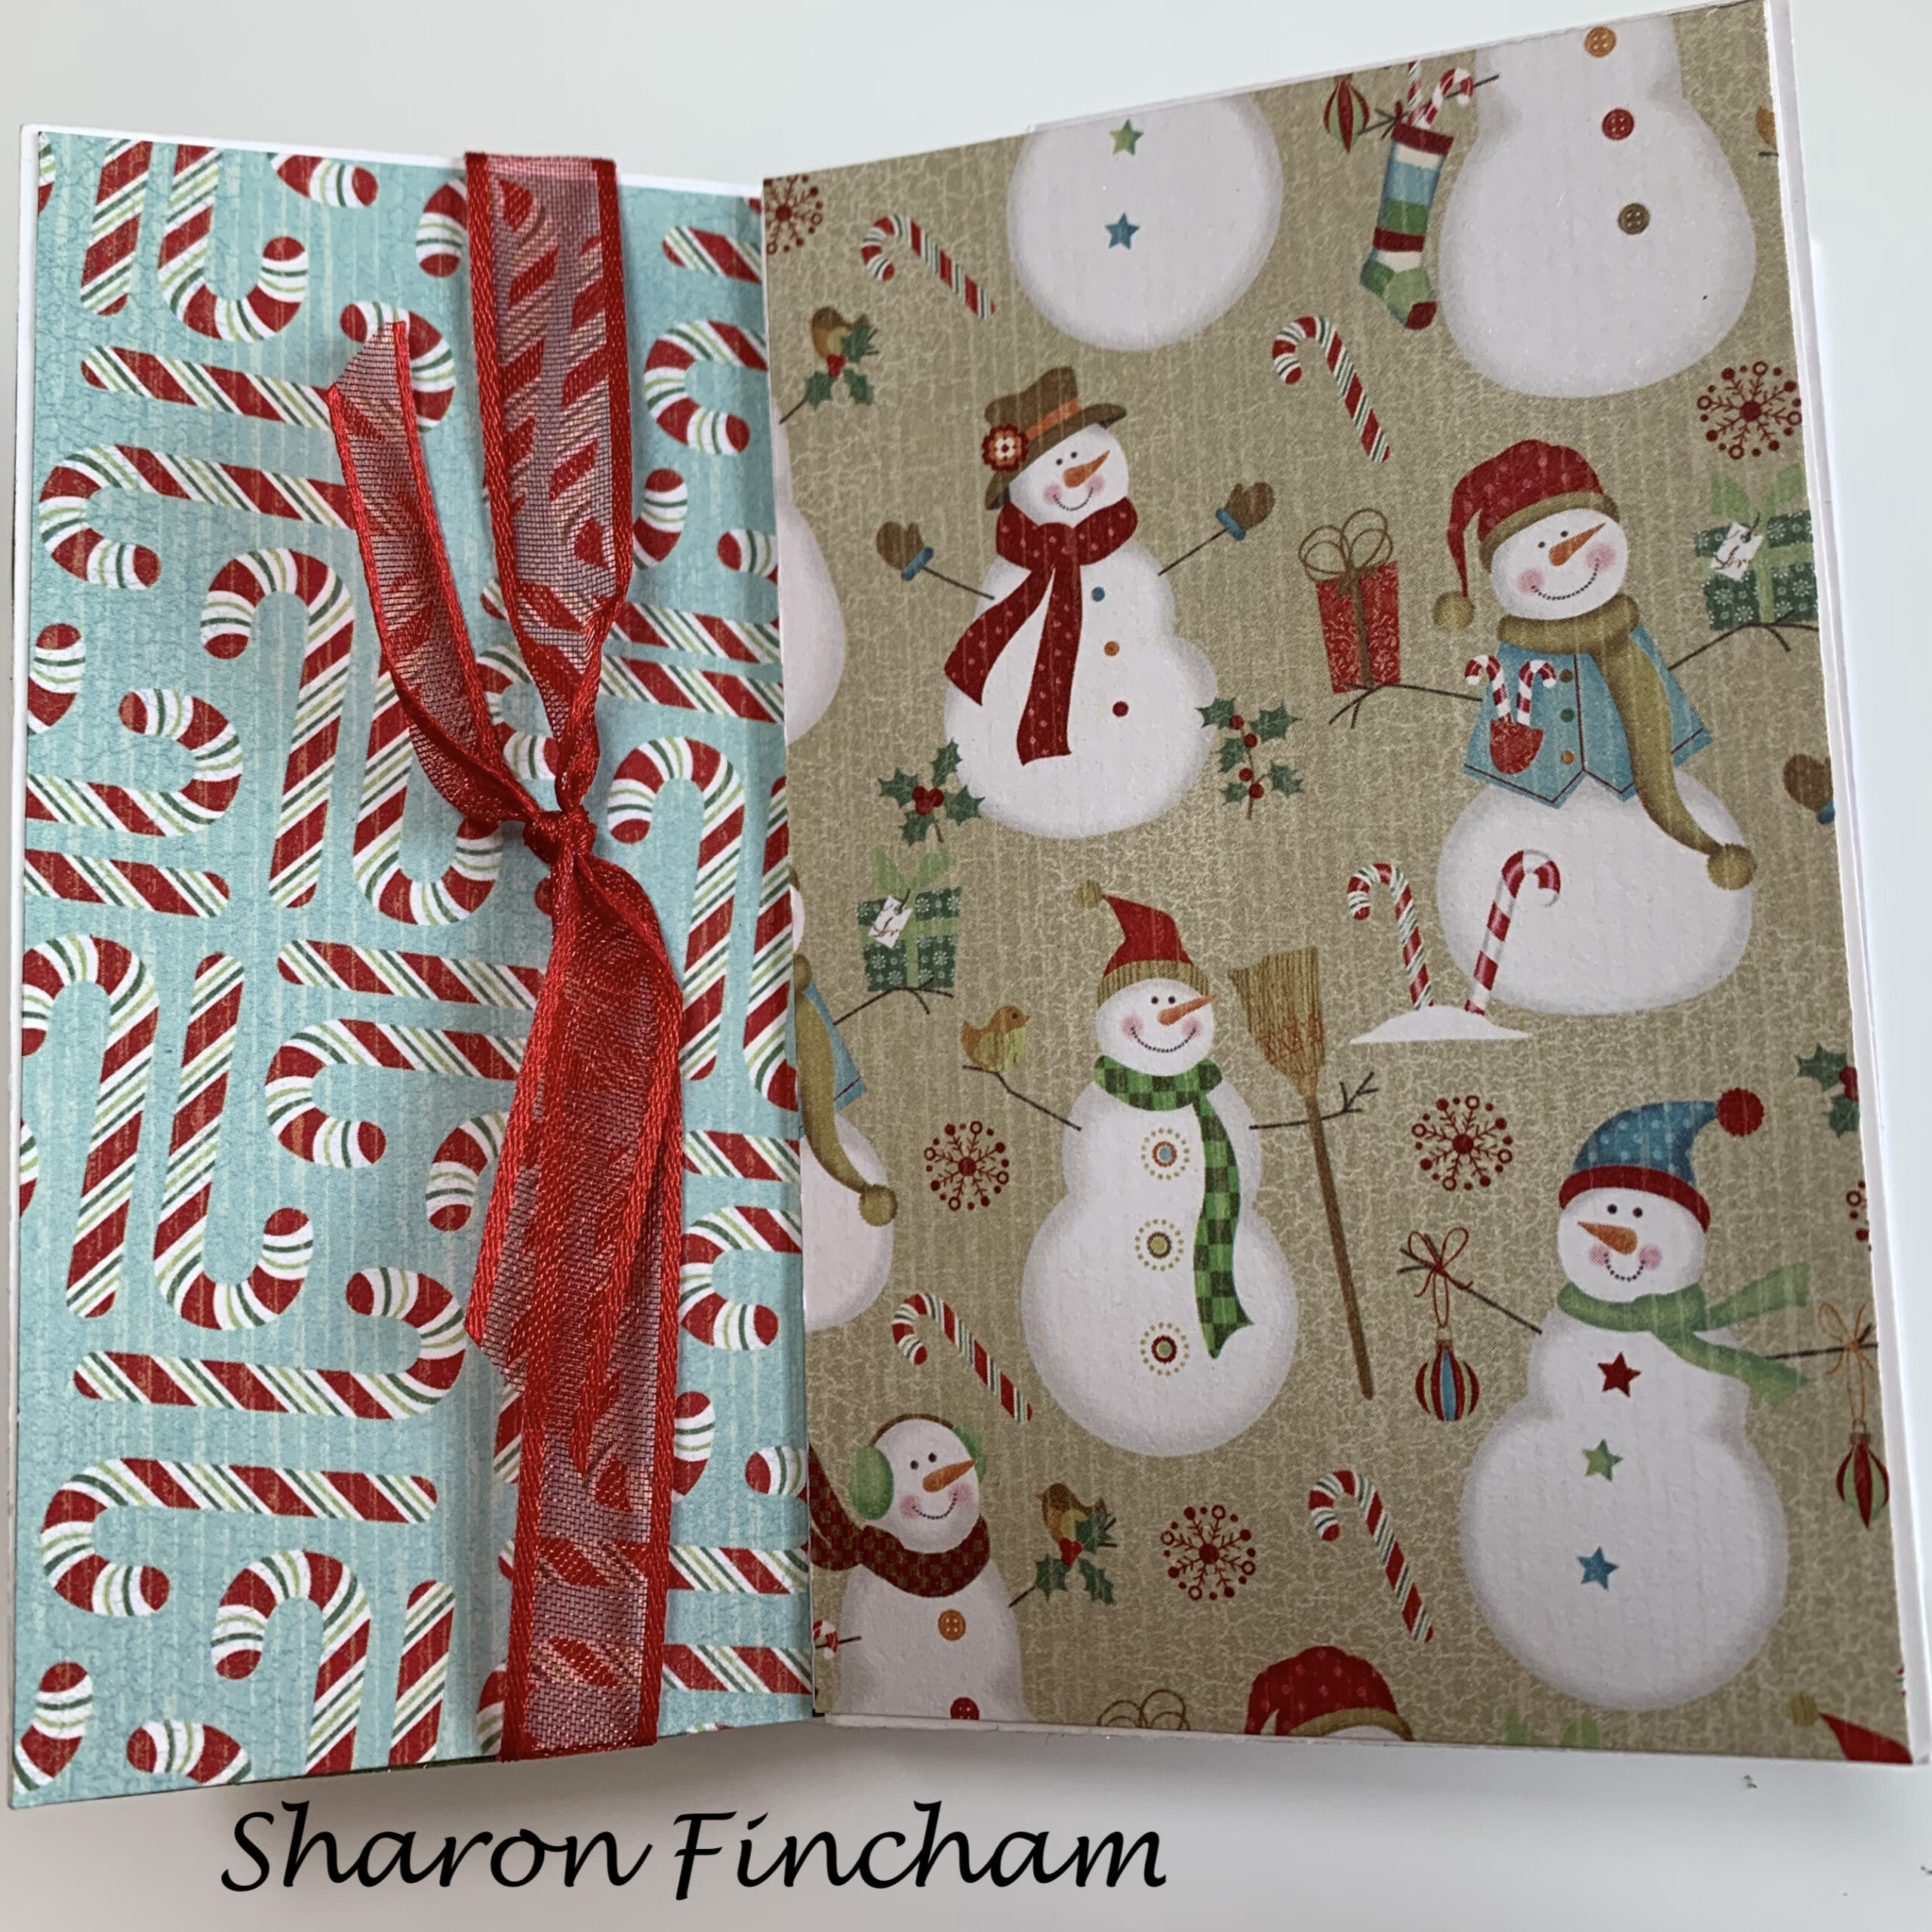
You know how it is–we say “I don’t need that stamp set…” and then we see a wonderful card and, oh my, we must have the stamp set. That is what happened when I saw this card made by Mary Deatherage. She used The Sweet Candy Canes Bundle, bundle meaning a stamp set and die set sold together for 10% off. The stamp set is Sweet Candy Canes and the dies are Candy Cane Dies. Just as important to the card is the Sweetest Christmas Designer Series Paper. The paper has candy canes that you can cut out with the dies- and the candy cane dies have a die that faces right and one that faces left to create what you see above. The set is in the holiday mini catalog- pages 8-11. I used the label die for threading ribbon but check out how a real candy cane could be used:
 .
.
Don’t miss those little Flat Jingle Bell Trinkets! What fun to add those to your candy cane – or your cards!

Why would I want ‘flat’ bells?
Ahh, good question, Sal. I received several cards in years past with the jingle bells that are 3D and the post office machines completely smashed the bells. You also pay extra if your card doesn’t fit through a 1/4″ slot. They actually test it at the post office and if it doesn’t fit their slot the card becomes a package and you pay a lot more to mail it.
Recipe for Book Fold Candy Cane Christmas card:
- Base: Garden Green, 4 1/4 X 11, scored at 5 1/2 and 6 3/4
- Burnish the 5 1/2 score line in a valley fold and the 6 3/4 score line in a mountain fold
- Adhere the front to back between the 5 1/2 and 6 3/4 score lines
- Mats: Real Red
- 1 1/8 X 4 1/8, left side small mat
- 4 1/8 X 4 1/8, main front mat
- 4 1/8 X 4 1/8, inside mat
- Top Layers: Note: Build your front candy canes, labels and ribbon before adhering to red mat so you can adhere the ribbon under the DSP layer or the real red mat if you prefer the green ribbon matching up to the green base
- Sweet Christmas DSP in candy canes, 1 X 4, left side small top layer
- Sweet Christmas DSP in polka dots, 4 X 4, main front top layer
- Basic White, 4 X 4, inside top layer
- Candy Canes: Sweet Christmas DSP, die cut one going left, one going right
- Adhere directly to the DSP layer with liquid glue
- Label: Basic White stamped with greeting from Sweet Candy Cane in Real Red Ink
- Die cut with label die in Candy Canes Dies
- Mistletoe: Stamp two mistletoe sprigs in garden green and die cut with Candy Cane Die, adhere to right side of label
- Ribbon: Garden Green 3/8″
- 5″ to wrap through the holes in the label adhering ends behind the DSP with glue dots
- 8″ to tie a bow to attach to right side of label
- Embellishments: one red heart (retired) and three small pearls for the mistletoe berries
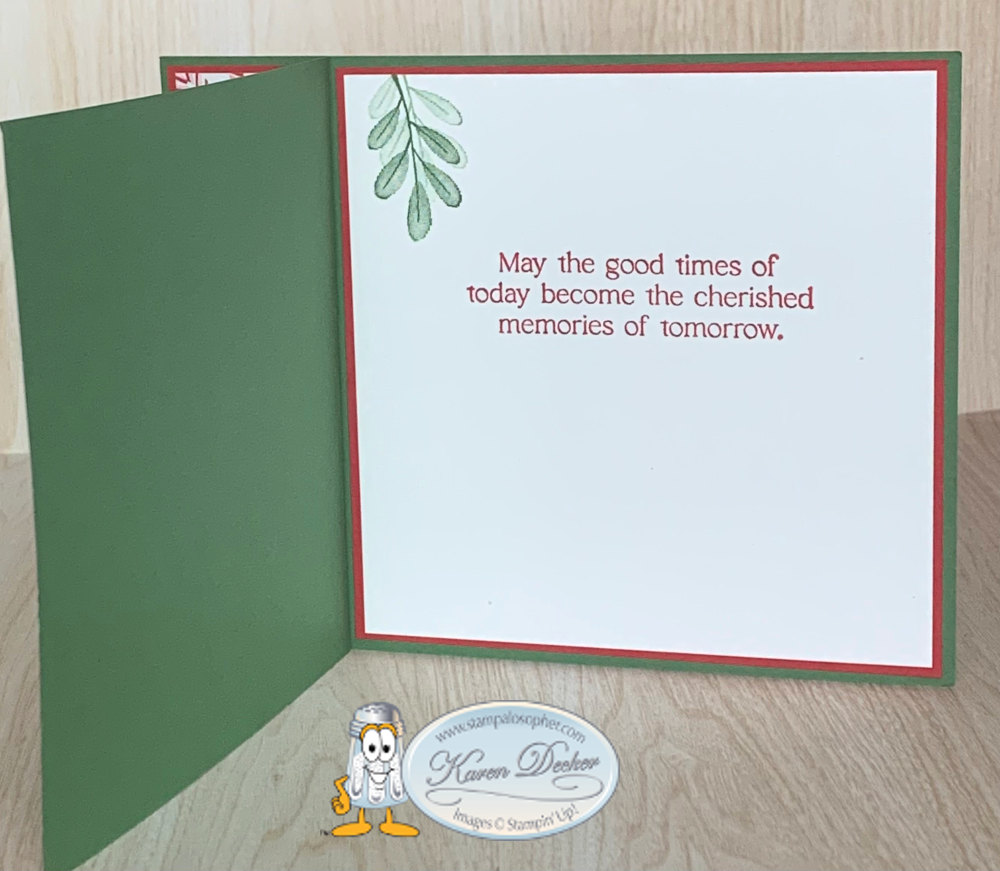
- Inside is stamped in real red with a sentiment from the Sweet Candy Canes Stamp set and the mistletoe is stamped in garden green, once full strength and once stamped off
How many candy canes can you cut from the DSP?
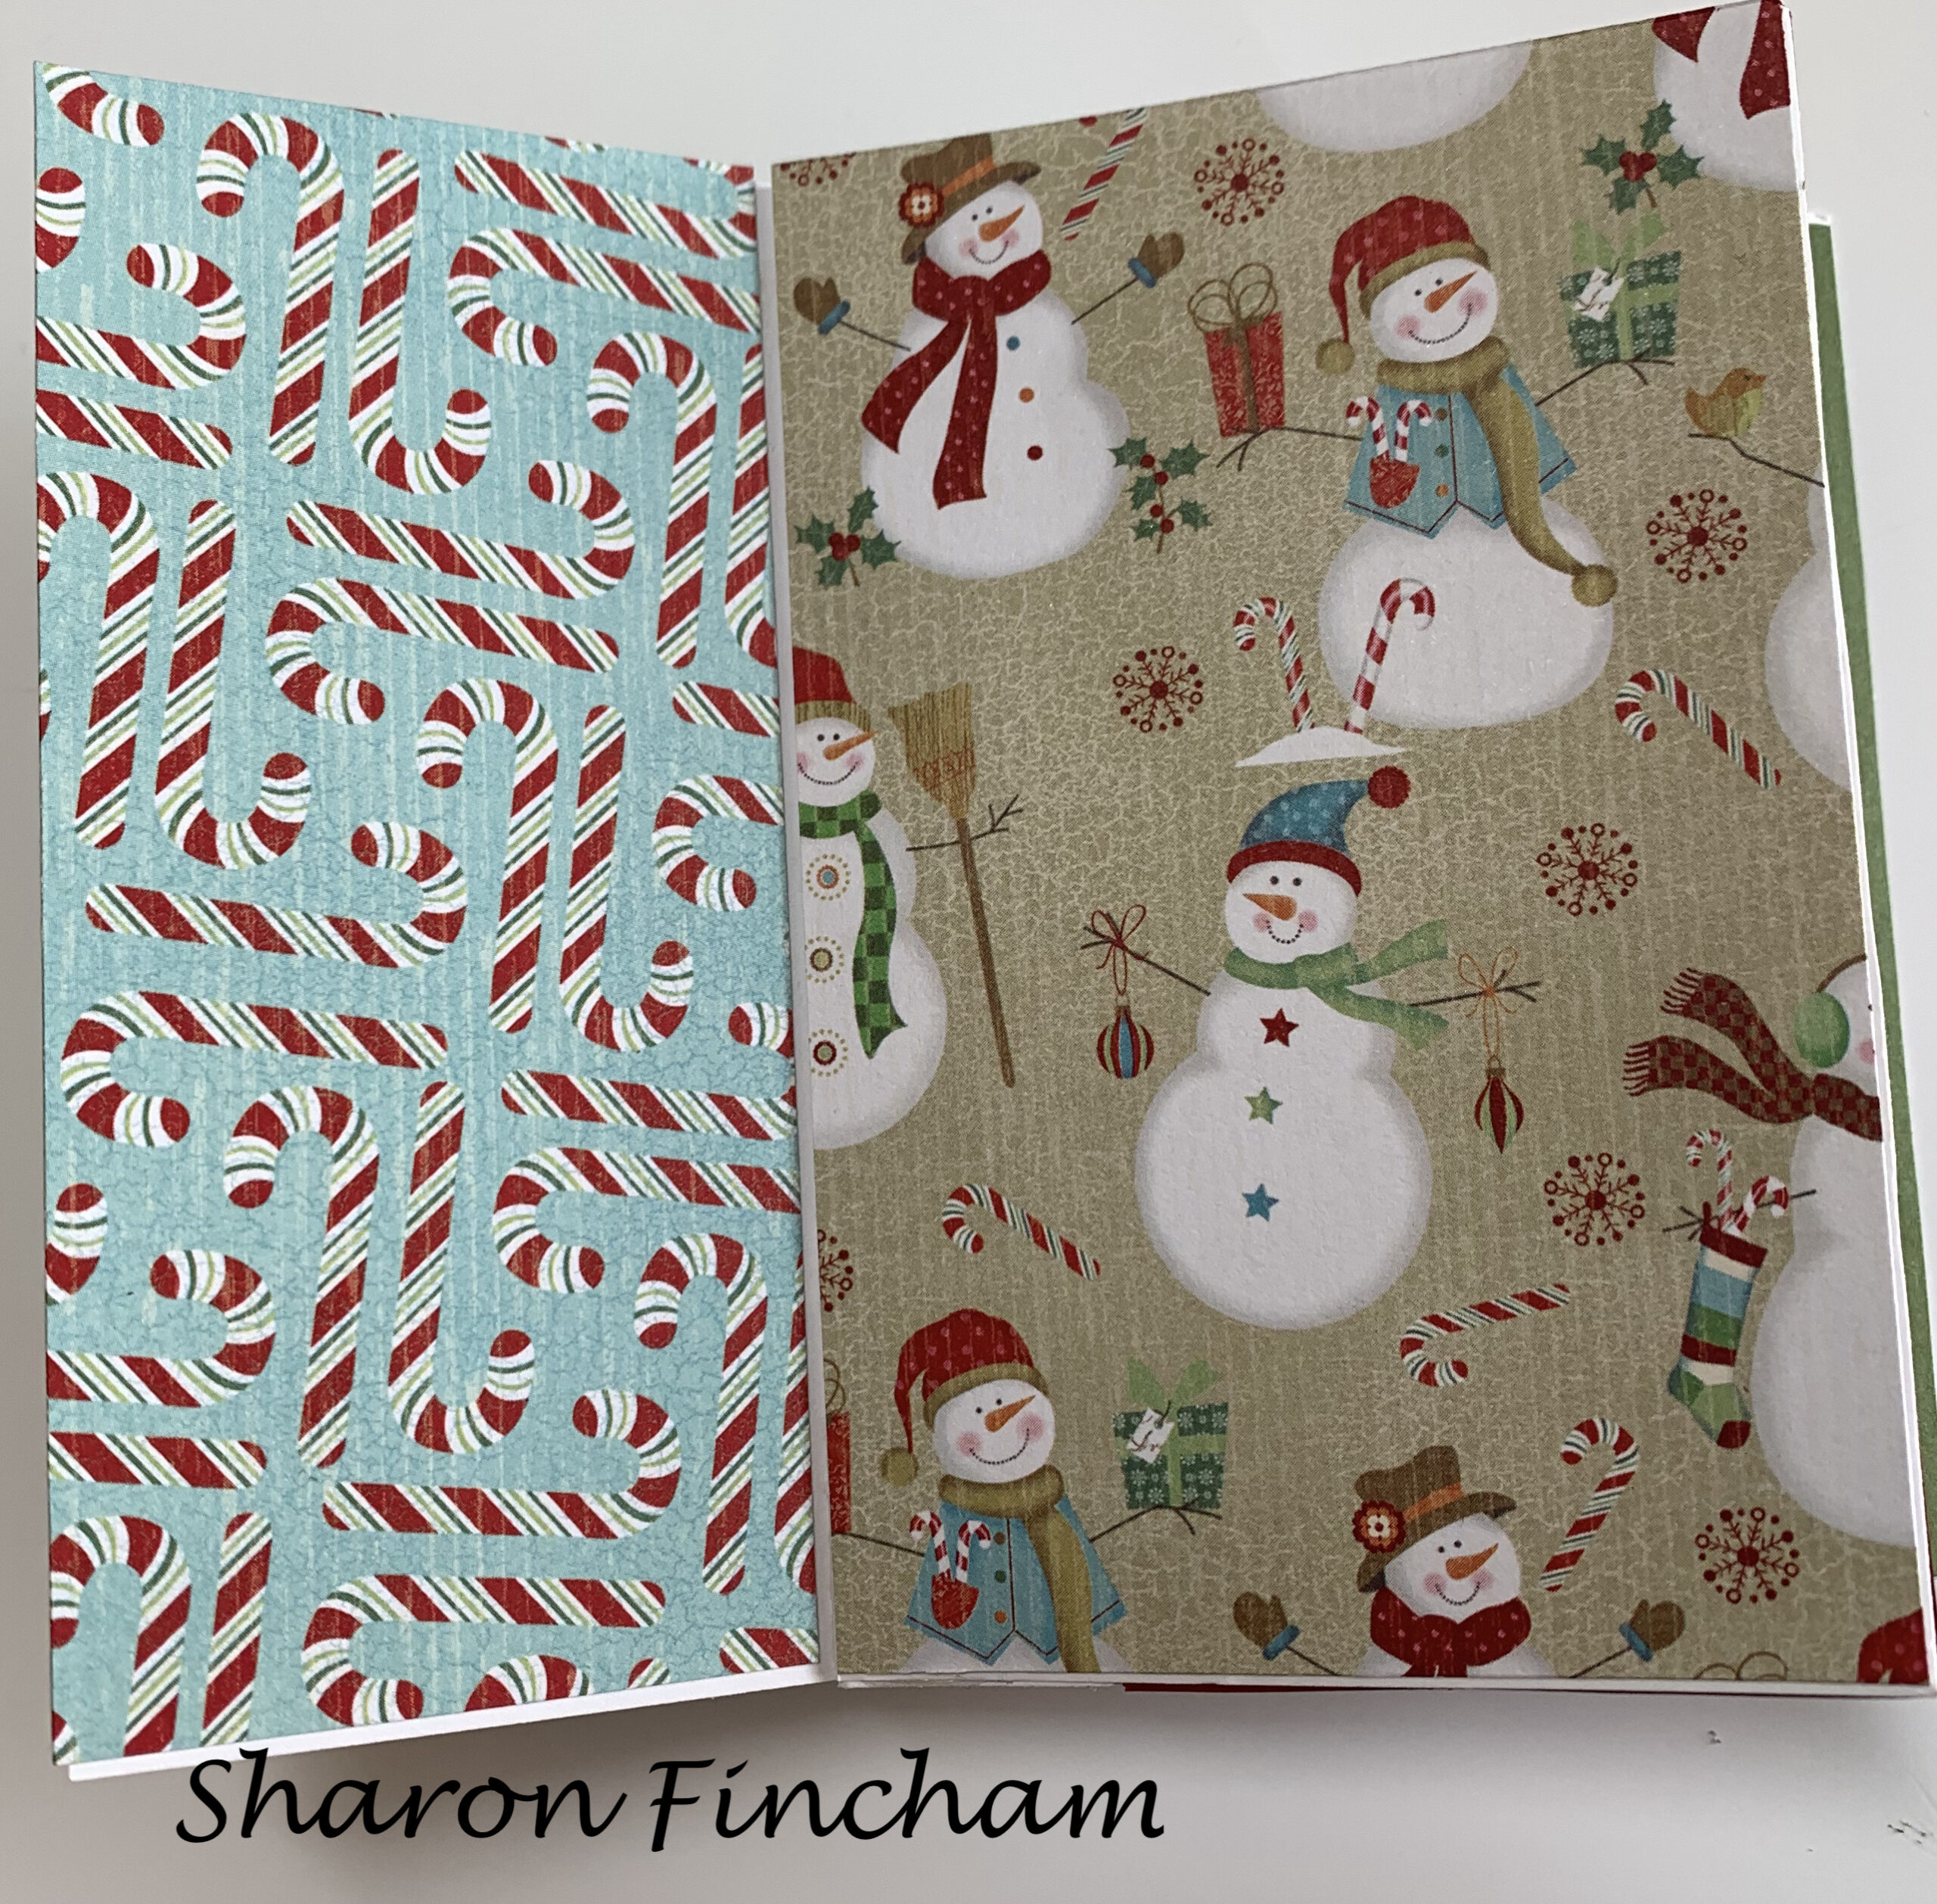
Good question, Sal. There are various colors of candy canes and two pieces of 12X12, so 32 from each sheet, 64 in total, if you don’t care which direction they are going or which color they are. For my stamp camp I used the red and green candy canes but here is what the DSP looks like – minus the red and green I used for my class:

Oooh, I like the pastel colored one!
Yes, and the Christmas Whimsey paper with its beautiful pastels just got added to the Clearance Rack.
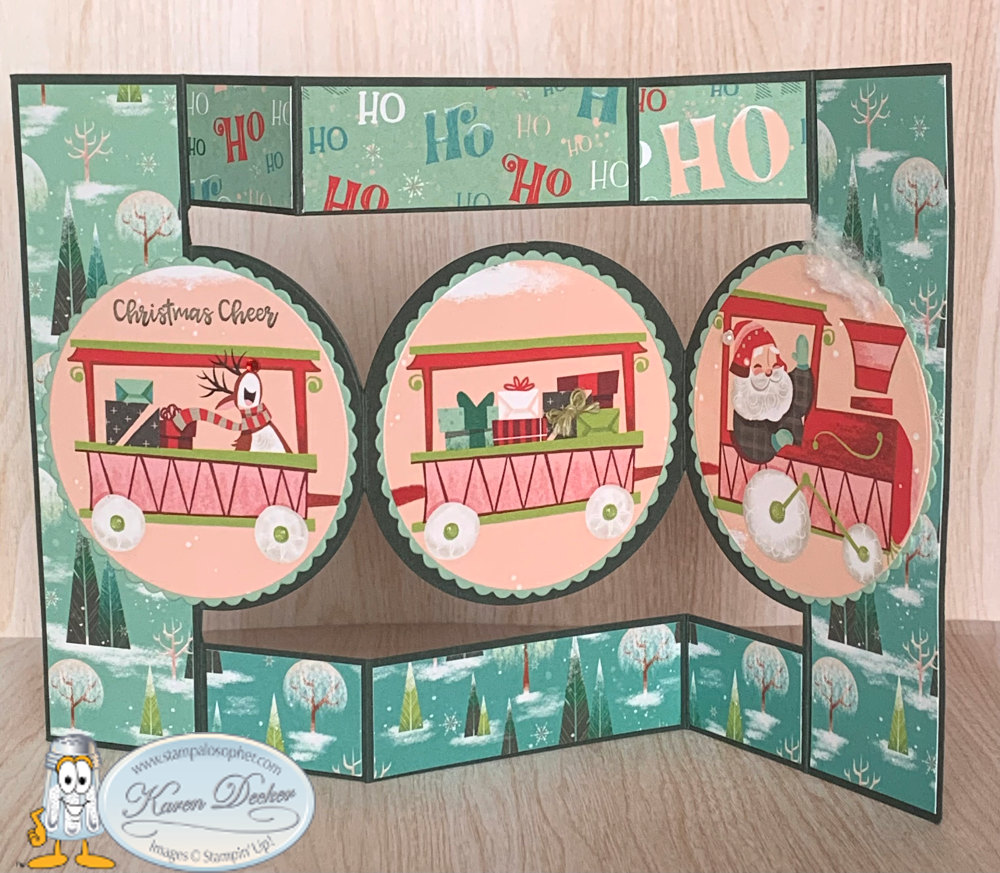
The second card we did is a case of Lavonne Schwendeman’s Santa train card design and Crystal Best’s Circle Tri Fold instructions adjusted by me to fit our standard A2 envelopes.
https://www.youtube.com/watch?v=ZJ0hUkZX_v0
Recipe for Circle Tri Fold Card
- Base: Evening Evergreen, 9 1/2 X 5 1/2
- Score at 1 1/2, 3, 6 and 7 1/2, on the 9″ side, fold and burnish this side only
- Score at 1 and 4 1/2, on the 5 1/2 side- do NOT fold and burnish
- Partial Die cut with 3″ Layering Circle Die
- Fold on 2nd score line
- Center the circle die between the horizontal score lines with the edge hanging over so it won’t cut on the folded side
- Place the cutting plate on the fold/die so the beveled edge is just barely beyond the score line and die cut
- Repeat on the other side
- Cut out the 1/8″ on the top and bottom of the circles from the circle to the horizontal score lines; look at the second picture and you will be able to see the 1/8 cut between the circle and the top score line
- Cut the top horizontal score line from the 1/8″ cut out on the right side to the 1/8″ cut on the left side
- Repeat on the bottom horizontal score line
I think I would tell them to ‘just watch the video’ for all that partial die cutting.
It certainly helps. From here I changed up a bit from what Lavonne did for decorating. I did use the Santa Express DSP (that means designer series paper) for the train images but I just cut them out with the Layering Circle Dies even though the Santa Train Die set has dies that could cut out the images.
- Top: Santa Express DSP
- DSP with trees
- 1 3/8 X 5 3/8 (X2), right and left sides,
- 1 3/8 X 7/8 (X2), bottom pieces to right and left of middle piece
- 2 7/8 X 7/8, bottom middle piece
- DSP with HO HO HO, Note- I purposely cut the right top little piece with the largest ‘Ho’
- 1 3/8 X 7/8 (X2), top pieces to right and left of middle piece
- 2 7/8 X 7/8, top middle piece
- DSP with trees
- Circle Layers (X4): Mint Macaron, die cut with Scalloped 3″ Layering Circle Die; 3 for front, 1 for back
- Santa Train: Santa Express DSP
- use the 2 3/4 Layering Circle Die and cut one santa, one car with gifts, one car with reindeer
- cut one 2 3/4 circle of the HO HO HO for back
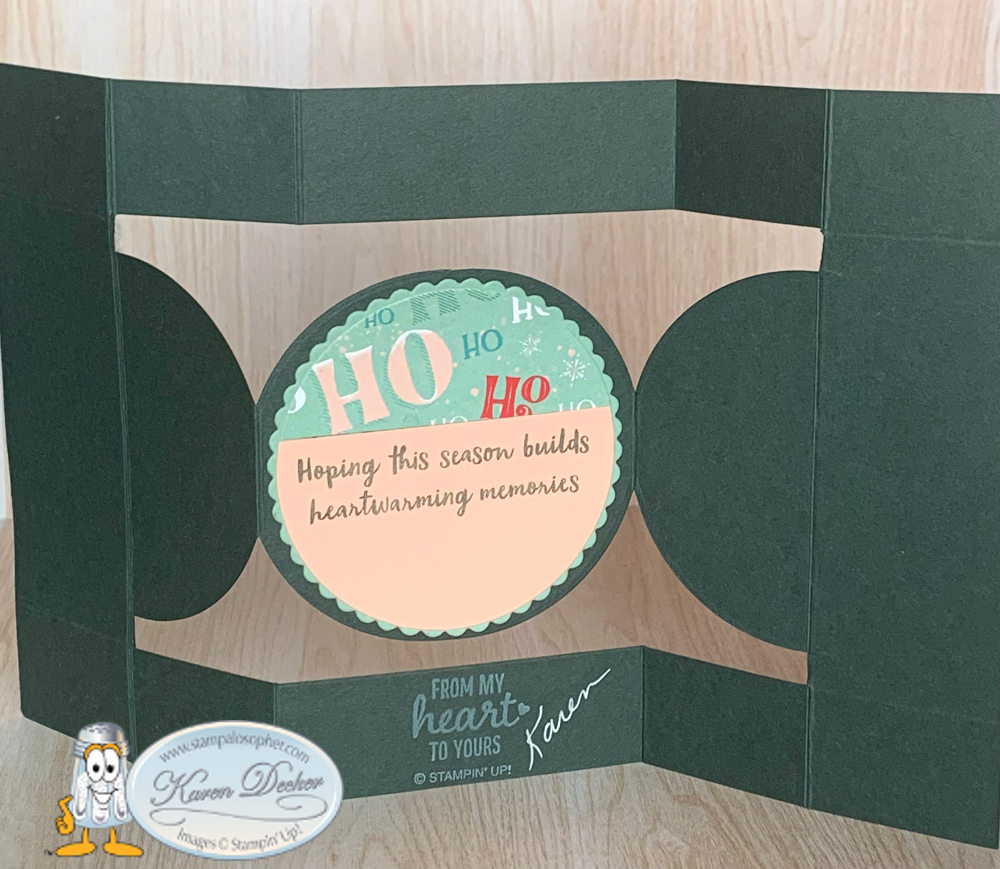
- cut one 2 3/4 circle in Blushing Bride cardstock, lay the two together and cut less than half way down on DSP to make the two layer nicely for the back
- The greeting “Hoping the season….” comes from the Snowman Season retired stamp set. To emphasize how it ties to the Ho, Ho, Ho, I wish I had used a red marker and colored the ‘h’ and the ‘o’ on the greeting. Next time….
- Embellishments: I embellished differently than Lavonne, though she used current products
- by stamping ‘Christmas Cheer’ from the Itty Bitty Christmas retired set over the train car with the reindeer
- by adding a red jewel to the reindeer’s nose
- by adding a little tiny bakers twine bow on one of the packages
- by adding a whisp of smoke made with a bit of cotton ball
- by adding a white pearl to santa’s hat
- by adding clear jewels to the wheels which showed the green perfectly
For my party favor I used another sheet of the Santa Express DSP which has four 3″ strips of scenes on one 12 X 12 that worked perfectly with the Pretty Pillowbox Die set. I printed the attendee’s names on a Basic White cardstock and then used the Pillowbox Label Die to partial die cut one end, then lay the die on the partial cut label and cut the other end. With the stitched label, the partially die cut portion sits nicely in the stitches so you have perfect alignment as you run the label through a second time. Check out this cool die set!

Julie Gilson, of Stampingala.com, designed this box last year using the Frosted Gingerbread DSP.
Scroll to the 39 minute point where the pillowbox starts:


Recipe for Pretty Pillowbox Party Favor
- Box for inside: Granny Apple Green, 7 1/4 X 5 1/2
- score 2″ on each side and burnish (that means rub real well) the scores
- Cut the score lines on long side to the short side score lines, then cut out a diagonal piece from the end squares which makes a triangular tab on each corner

- Add liquid glue to the end triangles and adhere to long side to create a box; Julie used tombow glue and little clothespins to hold the tabs in place while the glue dried
- Base of the outside: Real Red cardstock (X2), 4 1/2 X 6
- cut two pillowbox dies
- cut off the tabs on the base of both
- cut off the circular edge of the tab part of the die cut; here is what the original die cut looks like and what it looks like after you cut off the tabs and the circle edge. I used the Stampin’ Trimmer originally so I got nice straight lines instead of just fussy cutting like I did on these.

- Punch a 3/4″ hole in the tops of each base


- Overlap the square part of each piece and glue together to make a nice sturdy bottom base
- Glue the granny apple green box you made above to the base, centering on the bottom and glue, then glue both sides to the base
- Layers on the box
- Santa Express DSP, 4 3/8 X 2 1/8 cut two pillowbox die portions (see picture) for the front and back
- Santa Express DSP (X2), 1 1/2 X 2 for the sides of the box
- One of your 3″ X 12″ strips of DSP will make the front, back and two sides
- The die is upside down on the picture but I wanted to show you how it would lay on the 3″ strip of DSP where the top edge is right at the top of the scene. You will cut on the score lines top and bottom of that section.

- The die is upside down on the picture but I wanted to show you how it would lay on the 3″ strip of DSP where the top edge is right at the top of the scene. You will cut on the score lines top and bottom of that section.
- Embellish! I added the name plates, snowflakes from our retired gems, and an Evening Evergreen bow -8″
- Red striped tissue paper and red striped mints make a perfect addition to the box

. Why do you write out all the directions and have a youtube video? Isn’t the youtube enough?
Good question, Sal! First off, what if the youtube links don’t work in a year or a few years and one of my followers wants to make the box. Secondly, it can be very time consuming to watch a youtube over and over, stopping and starting as you complete each step. Thirdly, if you are hearing disabled, the written directions are important.
If any of you find corrections, please let me know in the comments. I would appreciate being able to correct these directions so they are accurate for the reasons stated above.
Have a wonderful fall season!
SAL, Sharing A Love of stamping
Karen
Click on little Sal in the computer to go to the Stampin’ Up! website.
Hues of Happiness Easel Card
Stampin’ Up!’s Hues of Happiness designer series paper (DSP) is beyond gorgeous. I made this bouquet easel card with one of the less used pieces of DSP that I thought was extra pretty with its yellow and black centers.
 .
. I started my fussy cutting focusing on those three little flowers on the right that I wanted to hang over the pot. The fresh freesia flower you see on the left was a separate fussy cut that I added so that a flower wasn’t hanging over too far on the pot where I wanted a couple leaves (fussy cut). The card itself is a tri-layer fold that I saw Jan B. make at janbcards.com. She was casing a lovely card from a Japanese demonstrator and translating the directions from Japanese to English. What a challenge! Thank you, Jan. From there I changed up the dsp, the embossing folder and altered the cuts a bit to come up with this Hues of Happiness Easel Card.
 .
.
The bottom flap folds out to give you a great place for a message!

Remember- don’t toss those edge pieces of your DSP! You can add them to the inside like in the picture above!
I started a bouquet card with cutting out the flowers in the Hues of Happiness DSP with the Blossoming Happiness Dies but it just lacked something and then I realized the piece of DSP I thought was much too busy was actually perfect. However, I did save the cutouts and used them on the back of the bouquet:

I think its the yellow in the DSP that made you prefer it over the other.
Maybe so, Sal, it definitely is eye appealing with yellow centers and little yellow flowers and added greenery which always enhances flowers. What a great job the Stampin’ Up! artists did in designing this paper!
Recipe
- Top Base 1: Bermuda Bay Cardstock, 4 1/4 X 11, scored at 5 1/2 and 2 3/4
- Bottom Base 2: Bermuda Bay Cardstock, 4 1/4 X 10 3/4, scored at 5 3/8;
- adhere to base 1 with the fold of base 2 aligned to the inside bottom edge of base 1. The length of base 2 is 1/4″ smaller to allow for the fold of base 1. The top of base 1 flips up and the bottom base 2 flips down. I didn’t get a picture but here is one from JanB’s blog post. I am using 1/8″ borders so my layers won’t look like hers

- Middle Layers for Base 2, (X2), Basic White, 4 X 5 1/8;
- one is for the inside of base 2, the other is for the outside of base 2 when it is folded in
- DSP for Card Base 2: Hues of Happiness DSP, 3 3/4 X 4 7/8, this is for the outside of base 2 when it is folded in
- Folded Layers of Base 1 (X2): Basic White, 4 X 2 1/2
- DSP Layer for the folded layers (X2): DSP, 3 3/4 X 2 1/4; make an effort to use the same color of DSP flowers on the right and left as you have on the Base 2 DSP that folds in so it has a continuous look
- Flower Pot Base: Basic White, 3 1/4 X 2 3/4
- pencil mark the top of the base 1/2″ in on the right and left sides
- pencil mark the bottom of the base 1″ in on the right and left sides
- cut from the bottom to the top mark on both sides
- Flower Pot Rim: Basic White, 3/4 X 4 1/4
- die cut both the base and rim with the Stitched Greenery Die
- Circle Stabilizer for flowers: Window Sheet, die cut with the 2nd largest of the plain layering circles
- Attach the window sheet circle between the base and rim of the pot making sure the top won’t go over the base of the card when closed. This also gives you a guide for mounting your flowers.
- Lay the pot on base 1, 1/8″ above the easel fold and pencil mark the pot on the base, then cut the base cardstock to match the pot. I tried to use the trimmer and found fussy cutting would have been better
- Adhere the pot to the base with a foam strip (you can see this in the picture of the back)
- The bottom of the pot should line up with the basic white layer (I had to trim mine a bit)
- Bouquet: Hues of Happiness Designer Series Paper cut to about 4″ X 3 1/2″ with added fussy cut greenery and flowers to make it fuller if necessary. I wanted those three little flowers on the bottom so I started there and used regular scotch tape to glue the extra pieces I wanted to fill it in with edge flowers and greenery
- Attach to the window sheet with glue dots
- cut additional flowers for the back with the Blossoming Happiness Dies or use the same sheet of DSP if you aren’t making numerous cards and have enough or don’t have the dies
- Sentiment Layer: Bermuda Bay Cardstock, 4 X 3/4, attach with a 1/2 X 3 3/4 foam strip 2 3/4″ from bottom
- Sentiment Top Greeting: Basic White, 3 3/4 X 1/2, stamp with greeting from Pansy Patch Stamp Set
- Bow: Scrap of Bermuda Bay cut with the Pierced Blooms Die (retired)
- Embellishment: In Color Rhinestone for center of the bow and a dragonfly punched from retired DSP

What!? You didn’t use the brass butterflies?
Not this time, Sal. I must be over-using them for you to say that!
This card and a triple time stamping card were for my July Stamp Camp.
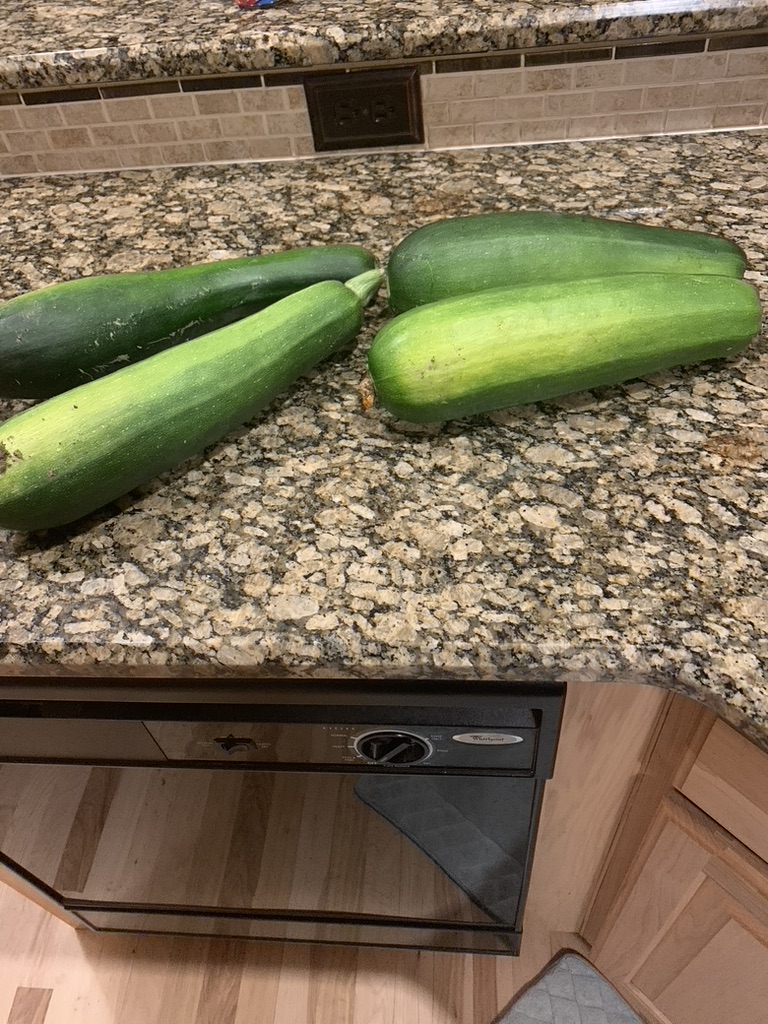
And a lunch with something zucchini or green beans, right?


Hopefully all the zucchini will be shredded and frozen by then, and the green beans are already frozen. The cherry tomatoes are the best this year! So sweet, but I digress….
Well, it is not a ‘card buffet’ where you pick out which card to make from several kits, and it is not a ‘stamp-a-stack’ where you make several cards of each design, and it is not a ‘technique class’ which I have held before, and it is not a ‘club’ or ‘coffee and a card’, so I guess the closest title would be a ‘stamp camp’, just not an all day event. Does anyone have a better name I could use?
Click on little Sal in the computer to go to the online store.
SAL, Be Salt And Light out there folks, it’s a crazy world these days
Karen
Triangle Tri-Fold Card for Case The Creator #6
A card that twists from portrait to landscape? Yes, really! This was our Case The Creator card #6 in July. The creator, Twila Davis, was featured on Splitcoast Stampers with this amazing fun fold card. For this card I am using the Painted Christmas Designer Series Paper. For the greeting, holly berries and greenery, I am using the Merriest Moments. It carried over from last year so you can check out last year’s creations with that set HERE.
 .
.  .
. . And the “JOY” stays upright even when you open the card! That’s unique!
Definitely different. I had to make one to wrap my mind around how it worked. Here is a picture of the two diagonal pieces that are on the top and bottom and just look like strips from the front.

Here is a printable pdf of the instructions if you would like to case the case!!
Case The Creator #6 printable pdf file
 .
. My fellow stampers made some great cards for the Zoom meeting!
 .
.
 .
.
Joy Meadows used the Wonderful World Designer Series Paper.
 .
.
 .
.

 .
.
 .
.
 .
.
 .
.
Beautiful card creations! Thank you, ladies, for participating!
Thank you for spending time with me as Sal and I bring you a “pinch of creativity to spice up your crafting world!”
SAL, Sharing A Love of stamping
Karen Click on little Sal in the computer to go to the online store!
Merriest Moments and Poinsettia Petals Center Panel Easel Cards
If you are opening this email in your mobile device, be sure and click on the header again to go to the full blog.
Hello Stamping Friends,
I don’t know when I have had as much fun with a stamp set as I had with Stampin’ Up!’s ‘Merriest Moments’! Usually I search and search for just the right card to teach at club and then I combine different ideas from different cards to come up with what I like. This time was different; I found so many cards that I loved. If you are still on the fence about which stamp set to buy to make your Christmas cards, I recommend the Merriest Moments bundle. It has a stamp set, a set of dies and a hybrid embossing folder. You could make dozens of Christmas cards without a hint of boredom.
Join me here on Youtube or in the written words as I show off this amazing set with the Poinsettia Petals set coming along for fun!

Thank you, Julianne Richards, for the inspiration to make these easel cards! Stampin With Julie Richards.com
Let’s start with the Poinsettia Petals-
 .
.  .
.
Recipe
- Stamps: Poinsettia Petals
- Tools: Poinsettia Dies, Ornate Layers Dies, Stitched Rectangle dies, Double Oval Punch, sponge daubers
- Ink: Shaded Spruce
- Base: Shaded Spruce, 5 1/2 X 8 1/2 scored at 4 1/4. Cut 1 1/2 inches from the score line to the front bottom edge on both the right and left sides. Cut 1″ off the middle flap front edge then score 2 1/4″ from the score line to the cut edge. Glue down the side flaps.
- Side Flaps: Expressions In Ink DSP, 4 1/8″ X 1 3/8″
- Ornate Layer: Shaded Spruce, 5 X 3 1/2, Use the 2nd largest Ornate Layer Die to cut. TIP: Place a dryer sheet folded in half under the cardstock before die cutting to hold all the little pieces. Also place a piece of copy paper 2 1/2 X 1 3/4 under the cardstock on top of the dryer sheet to prevent a film on the back of your die cut piece since it will be visible from back.
- Middle Greeting: Basic White, 2 3/4 X 4, Die cut with the fourth from smallest Stitched Rectangle die; I usually say stamp first then die cut but in this case it is better to see the actual corners for stamping
- Oval Greeting: Basic White, 1 1/2 X 3, stamp then punch with the double oval punch
- Stitched Rectangle, three leaves and leaves for tiny flower : Just Jade, 2 3/4 X 5 1/2; picture below; cut one large and two small leaves and one tiny flower to be the leaves behind the poinsettia. Sponge the edge with Shaded Spruce and they come alive!
- Poinsettias: Cherry Cobbler, 4 1/4 X 5 1/2, Die cut four smaller flowers, 4 tiny flowers and 2 circle tops; picture below. TIP: place double back adhesive tape under the cherry cobbler on the 2 circle tops so you can easily glue them to the gold centers; if you are really careful you can place the tape so it only covers 2/3 or so of the circle and then it is easy to pull off. Happened by serendipity for me. The poinsettias are layered with two same size flowers offset and then a tiny one on top with gold solid centers covered with the red center with holes. TIP: Roll the edges of the flowers toward the middle with a pencil and sponge the edges with Cherry Cobbler.
- Gold Sprigs and centers: Gold Foil, (X2) 1 1/2 X 2 1/2, Die cut one solid round center and one sprig. TIP: cut two separate foil pieces; running foil through the cut and emboss machine can show lines from the cutting pad. Cut one little ball off the sprig for the center of the tiny poinsettia
- Inside Greeting: Basic White, 2 X 2 3/4 (Or use the stitched rectangle in the Merriest Frames dies)
 .
.  .
. The Just Jade rectangle is a duplicate. If you have a scrap you won’t need the length shown on the right. You need two of the gold foils and don’t forget to back the tiny Cherry Cobbler circles with double back adhesive tape.
 The gold foil in the designer series paper and the gold sprigs make this card a wow!
I agree and last year we used the same tools for this card so the set is a great addition to a crafter’s stash! Click to see that post:
 .
. Now on to the Merriest Moments Bundle:

 .
. Don’t you just love those large greetings! Our cards today will use almost everyone of those stamps. So let’s start with the club card:
 .
. 
Merriest Moments Center Panel Easel Card
Recipe
- Stamps: Merriest Moments
- Tools: Merriest Frames Dies and Hybrid Embossing Folder, Stitched Rectangle dies,
- Ink: Shaded Spruce, Cherry Cobbler, Evening Evergreen, Versa Mark
- Base: Shaded Spruce, 5 1/2 X 8 1/2 scored at 4 1/4. Cut 1 1/2 inches from the score line to the front bottom edge on both the right and left sides. Cut 1″ off the middle flap front edge then score 2 1/4″ from the score line to the cut edge. Glue down the side flaps.
- Side Flaps: Expressions In Ink DSP, 4 1/8″ X 1 3/8″
- Gold Foil Layer: Gold Foil, 5 5/8 X 4 3/8; place the border die inside the embossing folder and you can cut and emboss the gold layer at the same time. Of course, in our instance we really just need to cut the layer using the border die from the gold foil but it is so cool to see how it looks embossed! Just playing….
- Detail Layer on the gold: Shaded Spruce, 5 1/2 X 4 1/4, Two steps – 1-cut with the detailed die, 2- place in embossing folder and emboss
- Front and Inside Greeting: Basic White (X2), 2 1/4 X 3; die cut with stitched rectangle in the Merriest Frames Dies
- Bottom Greeting and Easel: Just Jade, 2 3/4 X 1 1/2, Stamp ‘Joy’ with Versa Mark, apply gold embossing powder, heat
- Stamped Images: Basic White, 5 1/2 X 4 1/4; I set up the Stamparatus with all the geenery on one plate and all the flower and berry parts on a separate plate. Stamp the greenery in Evening Evergreen and the Flowers and Berries in Cherry Cobbler. With the stamparatus, I could stamp the Evening Evergreen more than once to get a darker color. Stamp one of each of the greeneries from the set, one large and one small flower, one flower middle and one set of berries.

I used a little extra spacing so we could be sure and die cut each stamped image.
Glue the layers, embellish with three of the In Color jewels and you have one more Christmas card ready to send.
Oh yes, Sal, just remember that many are duplicates of what is on pinterest and all I had to do was add my special touches with different embossing, different DSP and of course – an inside!
Card #1
Inspired by StampWithTami.com using the detail cut out and a separate piece of Night of Navy for the greeting
 .
.  .
. There is a separate full card front layer of Night of Navy that is embossed with the Wintry 3D boughs embossing folder. Don’t be afraid of this mini embossing folder. You can run it through twice to cover the front. I stamped the “Glory to the Newborn King” in versa mark, embossed with white, then fussy cut around the words.
Stamps: For Unto Us, Music From The Heart (retired – but I really wanted music notes)
Card #2
Red Velvet meets Merriest Moments inspired by Margi Stamps:
 .
.  .
.
The pictures don’t do justice to the simple beauty of this card. The outside is embossed on a separate layer of Basic White. Look at all the little snowflakes or stars around the embossed greenery. Love it! The greeting is stamped directly on the embossed front. Red Velvet Paper is on page 41 of the mini. I suggest stocking up.
I wanted to carry the idea of the frame to the middle so I cut a piece of basic white 3 1/4 X 2 1/2 expecting to trim off the edges but I loved the extra embossing around the frame and left it untrimmed.
The outside greeting is ‘Merriest Moments’ and inside is a greeting from the ‘Snowman Season’ stamp set with the Merry Christmas from ‘For Unto Us’. Together is the best place to build heartwarming memories!
Card #3
Jenny Hayward at A Stamping Journey inspired this partial die cut:
 .
.  .
.
I used the center ‘frame only’ idea and ‘Painted Christmas’ Designer Series Paper (DSP) with the detailed Merriest Moments die- cut first, then embossed and cut in half for a side partial die. There is an additional layer of Basic White added on the inside and a matching piece of DSP cut with the stitched rectangle in the set. I used the bough stamp in the Merriest Moments stamp set to do 2nd and 3rd generation stamping for the boughs. The inside greeting and the pinecone are in the ‘Perfectly Plaid’ stamp set. The boughs Wintry 3D embossing folder is used on the right edge.
Card #4
Another partial die cut layered on the side inspired by Jenny Hayward at A Stamping Journey:

 .
.
I used the ‘Snowflake Wishes’ stamp set for the outside greeting and inside snowflakes, The inside greeting is Merriest Moments and the side DSP is from the ‘Gingerbread and Peppermint’ DSP. The large snowflake comes from the set of 24 iridescent snowflakes called Wonderful Snowflakes. (see page 25 of the mini) One of the Stitched Rectangle Dies cut out the greeting perfectly!
Card #5
Inspired by Lori Pinto at Lolly Pop Papers & Ink:
 .
.  .
.
Similar to our easel card in its layering and yet exceptional in the use of Evening Evergreen for the background and Crumb Cake for a layer and the greeting. The greeting is a separate stitched rectangle cut and popped up on the detailed embossed layer.
A ‘Snowman Season’ greeting is used for the inside and Merry Christmas from ‘For Unto Us’. I wanted to bring the outside colors in so I cut Crumb Cake squares diagonally in half and layered them with a little larger diagonal cut square in Evening Evergreen.
Card #6
Here is a different use of the dies by Stamp It Up With Jamie. She cut out the middle and popped up the embossed detail with stampin’ dimensionals (lots) on DSP. I didn’t have the DSP she used so I came up with this using ‘Painted Christmas’ DSP:
 .
.  .
.
The greeting comes from the ‘Frosted Gingerbread’ stamp set. The pine cones are fussy cut from the DSP.
Card #7
Jenny Hayward at A Stamping Journey used vellum so I had to give that a try.
 .
. 
Isn’t it beautiful?! The inside greeting is from ‘Perfectly Plaid’ but everything else is ‘Merriest Moments’. The base is Fresh
Freesia as are the stamped flowers. The greenery is stamped in Soft Succulent and Evening Evergreen. I used three of the smallest In Color gems for the inside of the flower.
You know, it is a good thing they don’t limit you to the number of words you can use!
..or pictures, Sal, I would be in trouble!
So, Stamping Friends, you have 8 Merriest Moments cards for inspiration and 1 Poinsettia Petal card. Which would you use for your Christmas cards if you were to make just one version?? I would love to hear from you!
SAL, Sharing A Lot of Merriest Moments
Karen

Pop Up Bouquet Birthday Card with Artistic Dies
Hello Stamping Friends,
Remember to click the heading if you have opened this post in your phone so that you go to the main blog and all the videos and pictures will work correctly.
I have a very special card to show you today using the Artistic Dies! Spoiler alert – if you have an October birthday, you will see your card!
If a picture if worth a thousand words, what is a video worth?
Good question, Sal! And here are pictures of the card:
 .
.
 .
.
Recipe
- Base: Shimmer White, 8 1/2 X 11, scored at 4 1/4
- Layer: Shimmer White, 4 X 4, Embossed with the 3D Tasteful Textile folder
- Front Flower: Shimmer White, 4 1/4 X 4 1/4, Die Cut with large Artistic Die bouquet layered on a double back adhesive sheet to make things easier
- Rose- color with Lt Cherry Cobbler Stampin’ Blend
- Daisy- color with Lt Polished Pink Stampin’ Blend
- Circles- color with Lt Highland Heather Stampin’ Blend
- Sprigs- color with Lt Misty Moonlight Stampin’ Blend
- Lg Leaves- color with Dk Granny Apple Green, reversed from the video colors
- Sm Leaves- color with Lt Old Olive, reversed from the video picture
- Inside Leaves: Granny Apple Green, 5 1/2 X 4 1/4; die cut 2 long leaves placed on card stock with a dryer sheet under the card stock and die. Layer the card stock on a double back adhesive sheet for ease of adhering. Tip: after cutting out one of the leaf stems, turn it to the back side, place it on a shim of card stock and run it through the Cut and Emboss machine to give it a nice flat look since we are placing it on the card with the back side facing up.
- Greeting stamps and ink: Pansy Patch with Smoky Slate; stamp the outside greeting then emboss; stamp the inside greeting and then apply your flower
- Ribbon: 5″ to wrap the front, 4″ for the tied knot and (X2) 1 3/4 for inside
- Embellishments: Rhinestones and butterflies
- Pop Up Flower: Copy Paper (copy paper can be brayered to color) or Envelope Paper, (7) 2 3/4 X 2 3/4
- Fold Corner to Corner three times
- Holding point cut like an ice cream cone then use that cut as template to cut additional six flowers
- Unfold your flowers and fold each flower in half repeatedly to give crisp folds on all of the flower folds
- Stamp the middles of each with the largest ‘beard’ of the Pansy Patch stamp set; or sponge, or draw stamen
- Cut out one of the petals on each flower and then glue the two petals on either side of the cut out together- neighbor on neighbor
- Fold each flower in half
- Step 1 – place a bit of tombow glue on the two petals on either side of the middle petal of a folded flower and place another folded flower on the glue on each side
- Step 2 – place a bit of tombow glue on the middle three petals and place a folded flower on the glue
- Step 3 – repeat step 1
- Step 4 – repeat step 2

 .
. It is so hard to explain even with pictures, Sal, which is why the video on this one is so important.
- Keeping the flower folded, place a dot of tombow on the middle petal of the seven petals and lay the flower on the inside right of the card by placing the flower with the open ‘V’ 1/8″ away from the middle fold. Hold to dry. Place another dot of glue on the middle petal that is now the top of the folded flower and then close the card front over the flower and hold to let the glue dry. When dry, open and gasp at the awesomeness!
- Add a leaf stem on each side of the bouquet and two lengths of ribbon to the bottom of each side of the inside
. Could you make a poinsettia bouquet for a Christmas card?
Maybe, Sal. I do have red envelope paper from Stampin’ Up! a couple years ago. We’ll see. It sure was a fun one to make!
Thank you for giving me some of your precious time today!
. ’cause we want to bring a pinch of creativity to spice up your crafting world!
lol, yes, Sal, that is the best part.
Enjoy this wonderful fall season!
SAL, Saw A Leaf (a falling)
Karen
Click on Sal in the computer to go to the online store.
September Swaps and Mystery Card #16-Origami Frame Card
Hello Stamping Friends,
It is almost over- September – and summer – and ….. boo hoo
 . NO it is “Woo hoo” – that means fall is here, with its pumpkins and scarecrows and pumpkin spice lattes and …..
 . And only 86 days until Christmas! Just sayin……
We will be ready!!
Mystery Card Challenge #16 printable pdf file

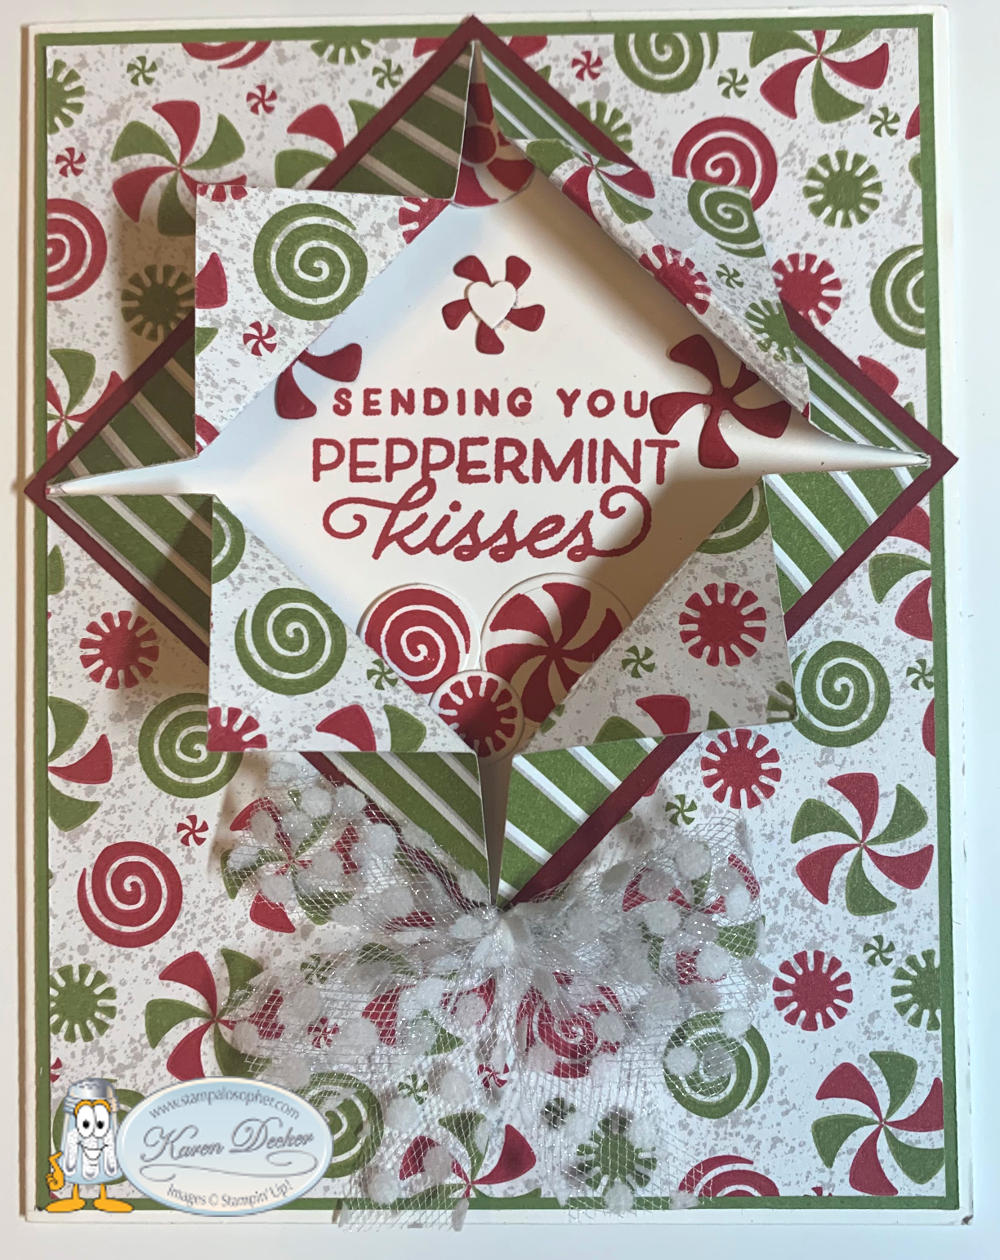
It is an Origami Frame Card (also called Shadow Box Technique, Folded Paper Frame, and Origami Window Frame)!
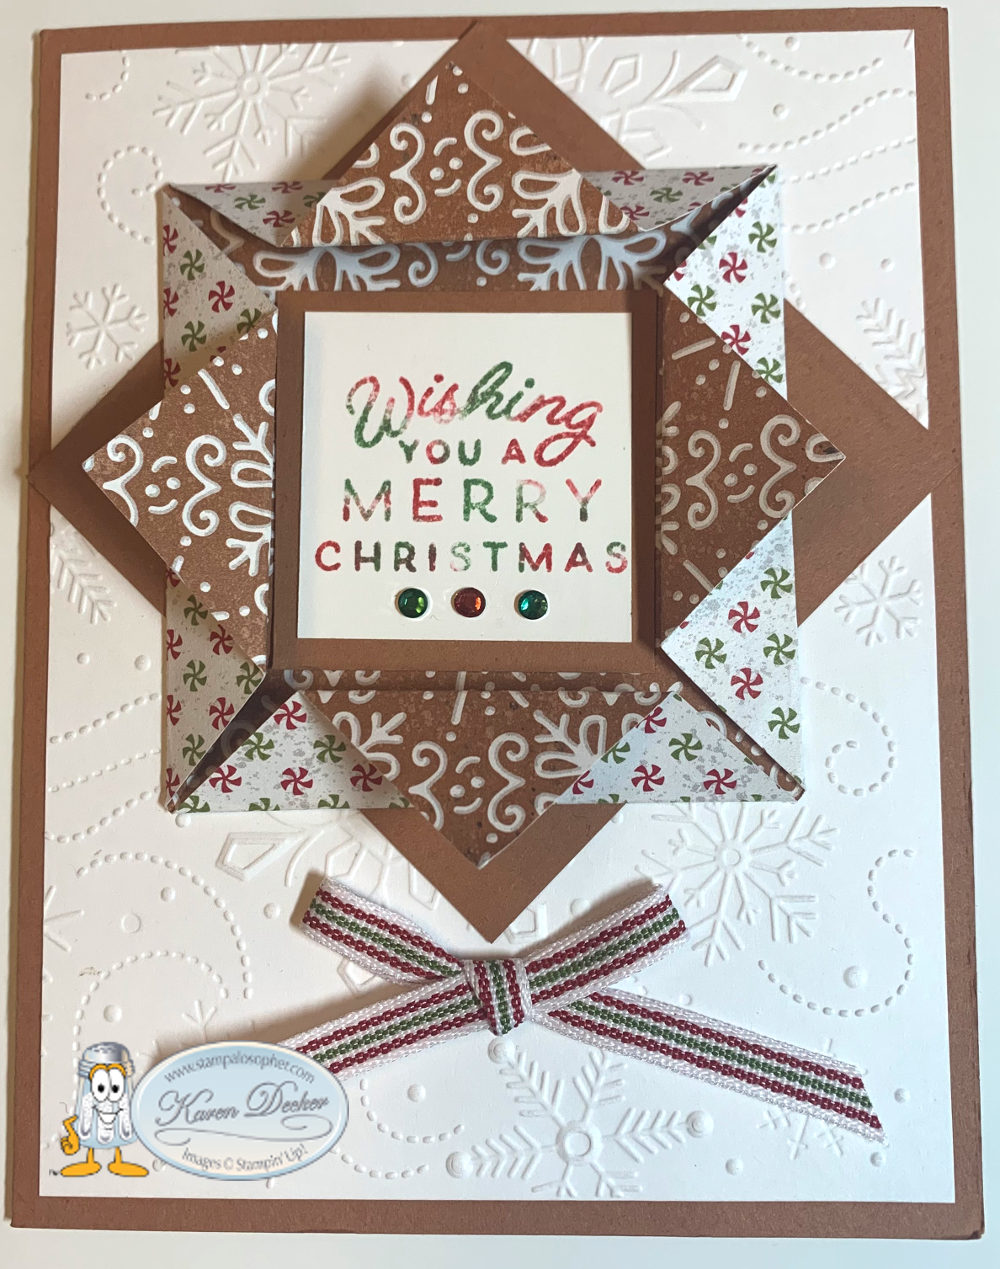
This is the one I created with the specific instructions. I used the wintry 3D embossing folder and since it is made for the mini machine, I just rotated the folder 180 degrees so there were no half embossed images and ran it a second time. I used the Baby Wipe Technique for the greeting from the Frosted Gingerbread stamp set by placing a baby wipe on our largest acrylic block and then drip dropping red and green ink from the reinkers on the baby wipe to create my own mixed color ink ‘pad’. The base is Cinnamon Cider and the DSP is Gingerbread & Peppermint DSP from the mini catalog.
- The 4X4 DSP is folded lightly in half and then opened up and folded lightly in half again to find the middle point, or use a pencil and a ruler to draw diagonal lines from each corner to corner to find the middle, then erase the pencil mark.
- Unfold and fold each corner with its point exactly in the center. Burnish well with your bone folder (1st folds)
- Fold back the corner points to about 1/8″ over the 1st folds and burnish well.
- Place at least two glue dots underneath the frame folds at the very edge of the 1st fold, you want the folds to pop a little at the second fold but be held in place at the first fold. Glue dots were less visible than when I used the mini dimensionals.
There are several different ways to place the frame on your card. In the card above, I used the 3X3 square offset from the frame to make added points to the frame but in this card I placed the 3X3 exactly under the frame for just a border:
I used an extra layer of Old Olive since I was using DSP from the Gingerbread & Peppermint DSP which was a bit busy.
- Old Olive Layer, 4 1/8 X 5 3/8
- DSP Layer, 4 X 5 1/4
- Basic White for stamping the greeting, 2 3/4 X 2 3/4 (I had fun with all the dies in the Gingerbread Dies!)
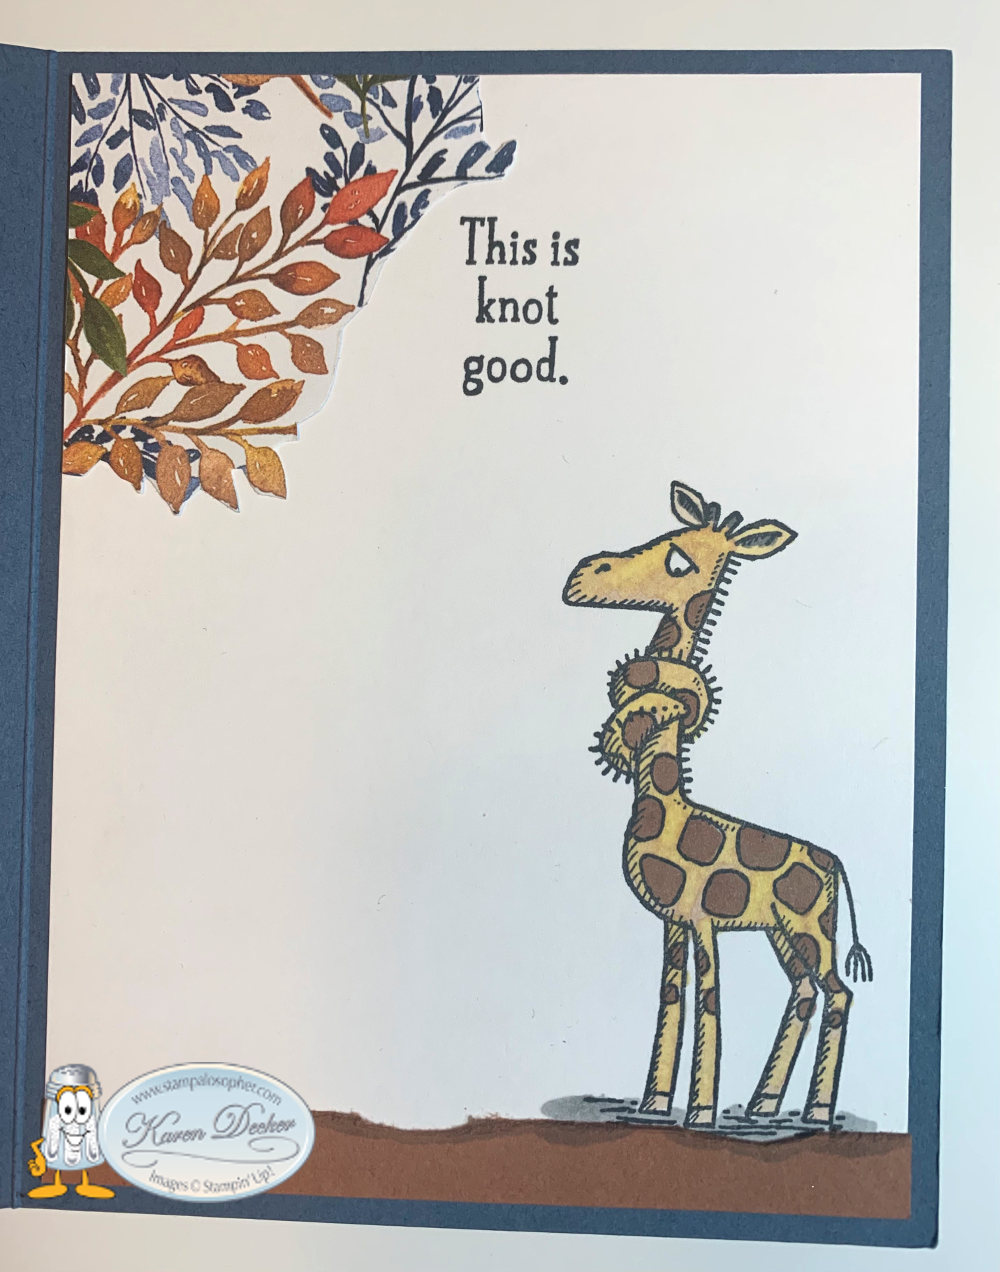
This next card uses the 3X3 for a border again instead of extra points since the back of the DSP that folds out is the same blue and got lost when I looked at having the extra points with blue on blue. This uses the Back On Your Feet stamp set.

Differences from the original:
- Beauty of The Earth DSP, 4 X 5 1/4
- Cinnamon Cider, 3 3/4 X 5, embossed with Painted Texture 3D embossing folder
- Basic White for stamping the greeting, 2 3/4 X 2 3/4
The Origami Frame would also fit on a card with a horizontal alignment.
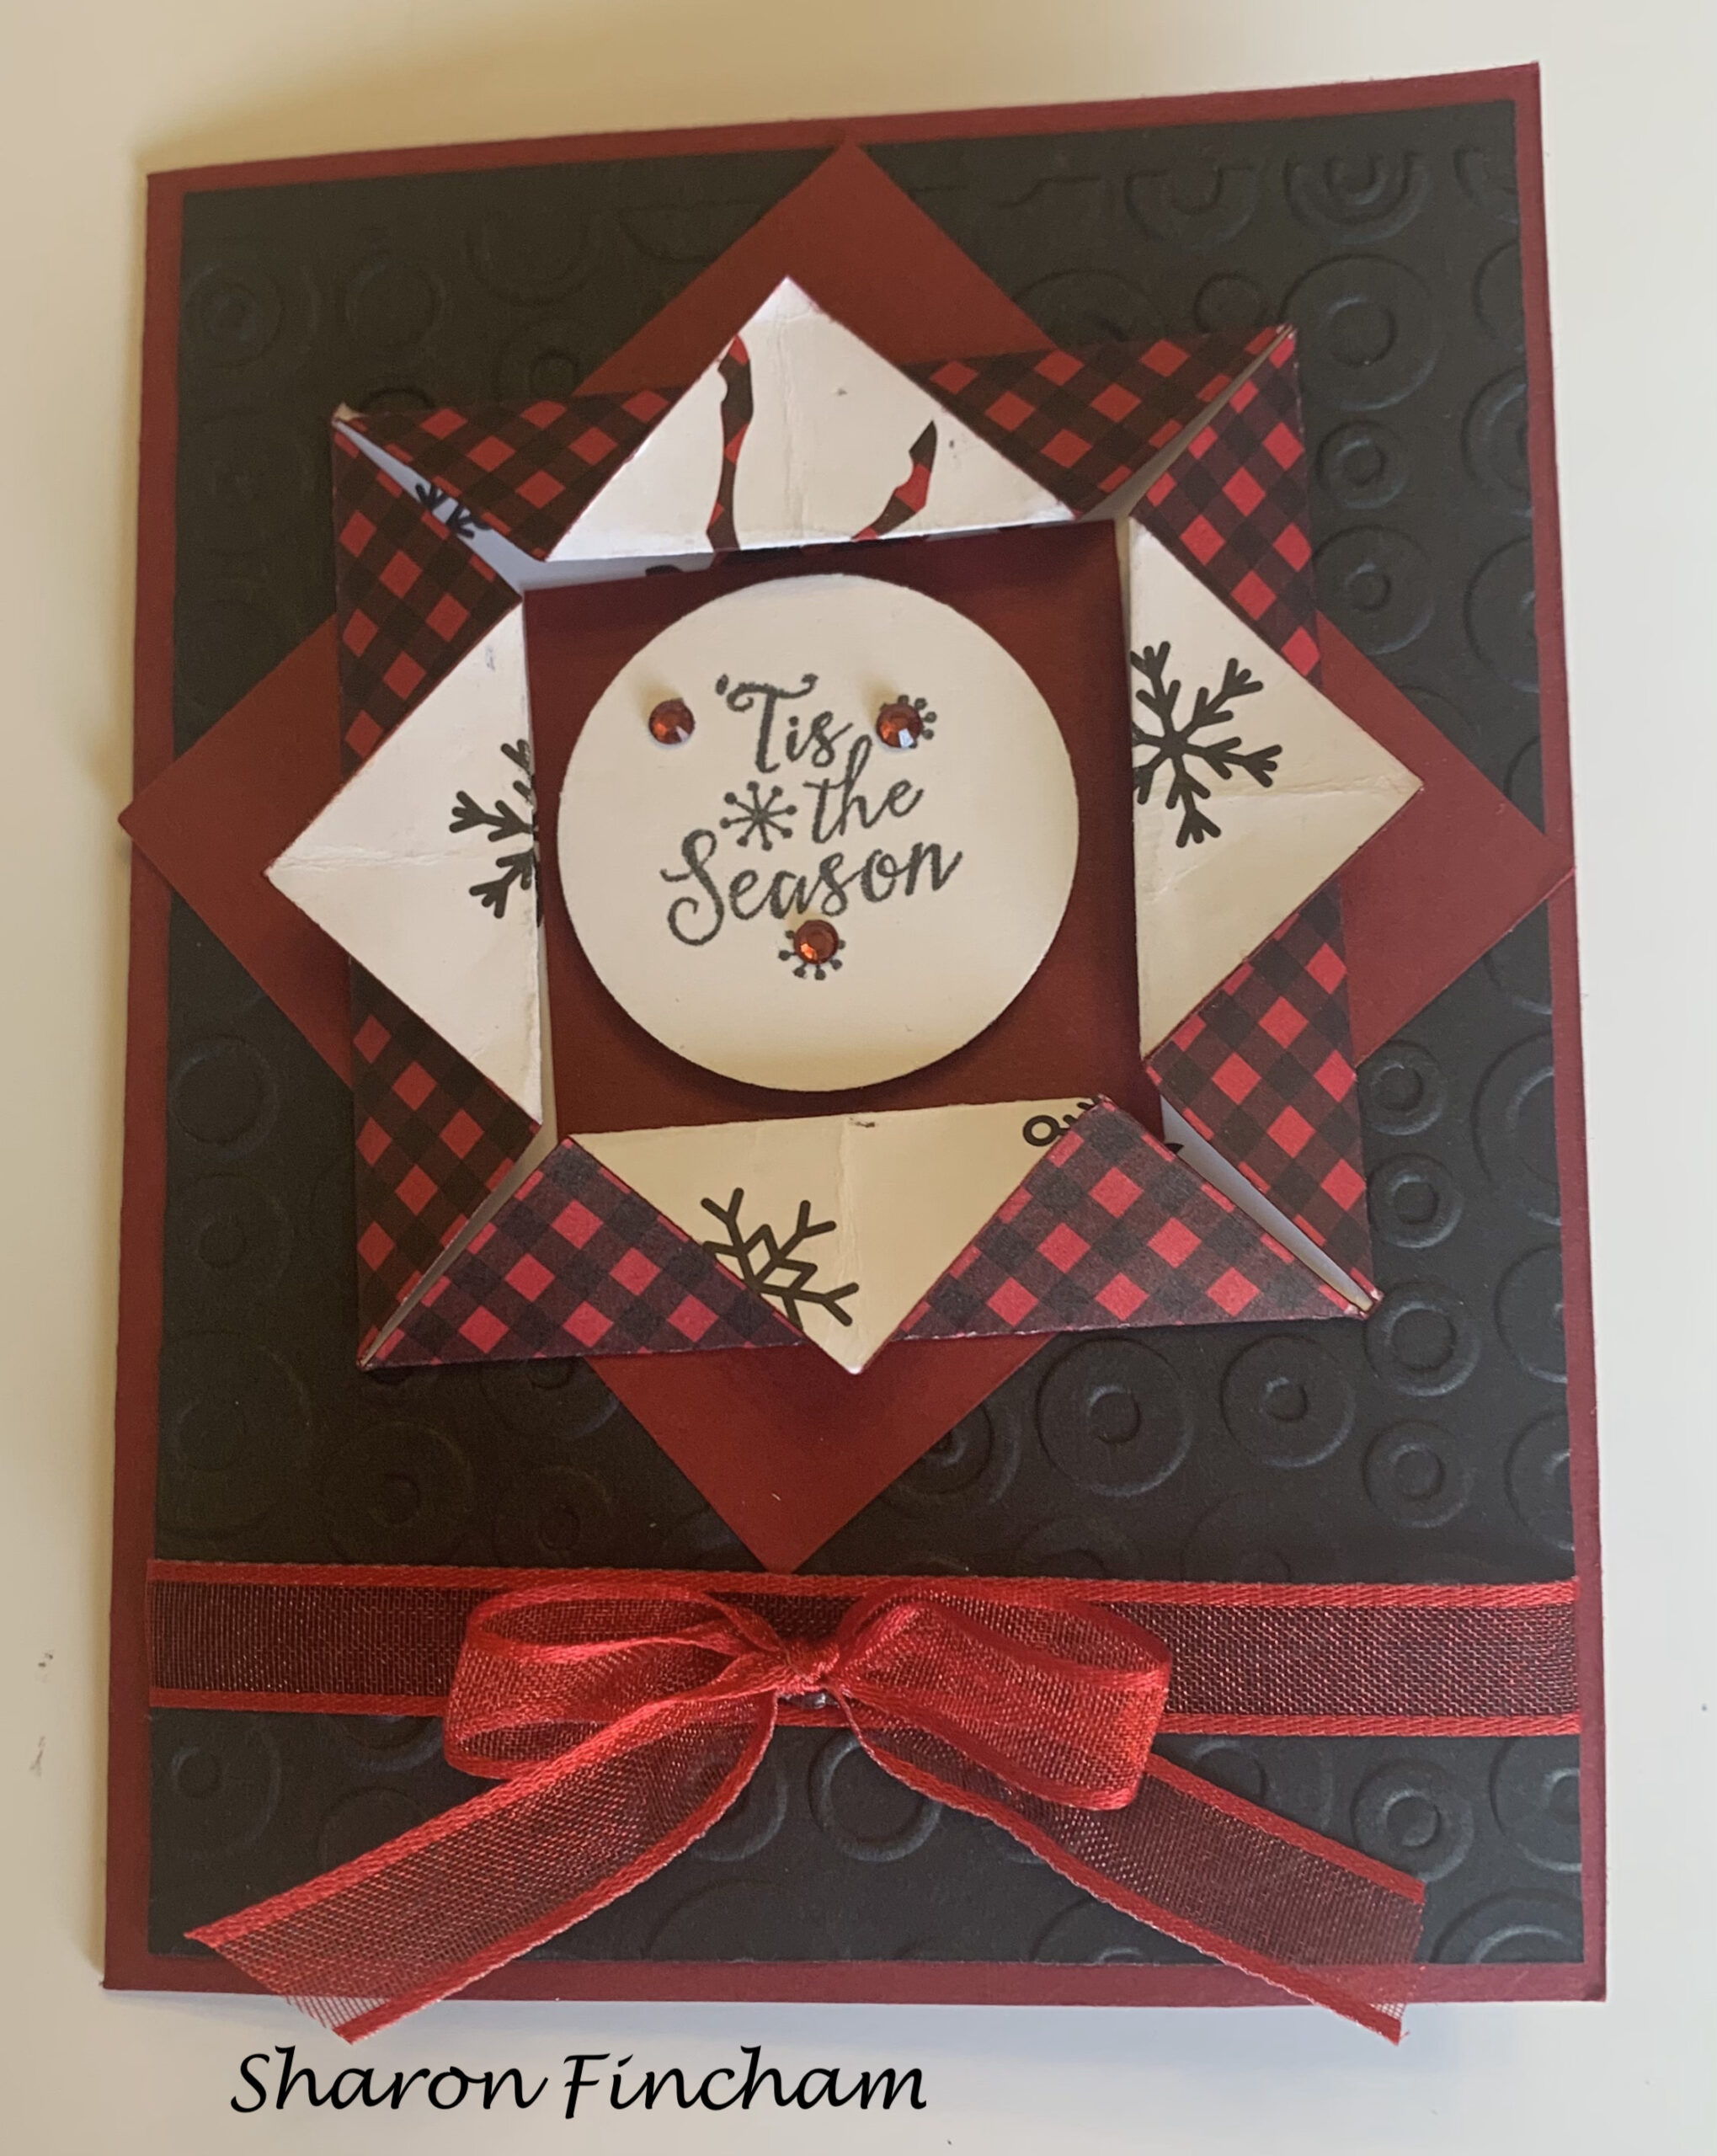
Sharon used the 3X3 for extra points and made a stunning card with the Sale A Bration Peaceful Prints DSP, Cherry Cobbler and Basic Black:
Joy’s card uses the Hand Penned DSP and Gorgeous Grape with the Timeworn Type 3D Embossing Folder:
 .
.
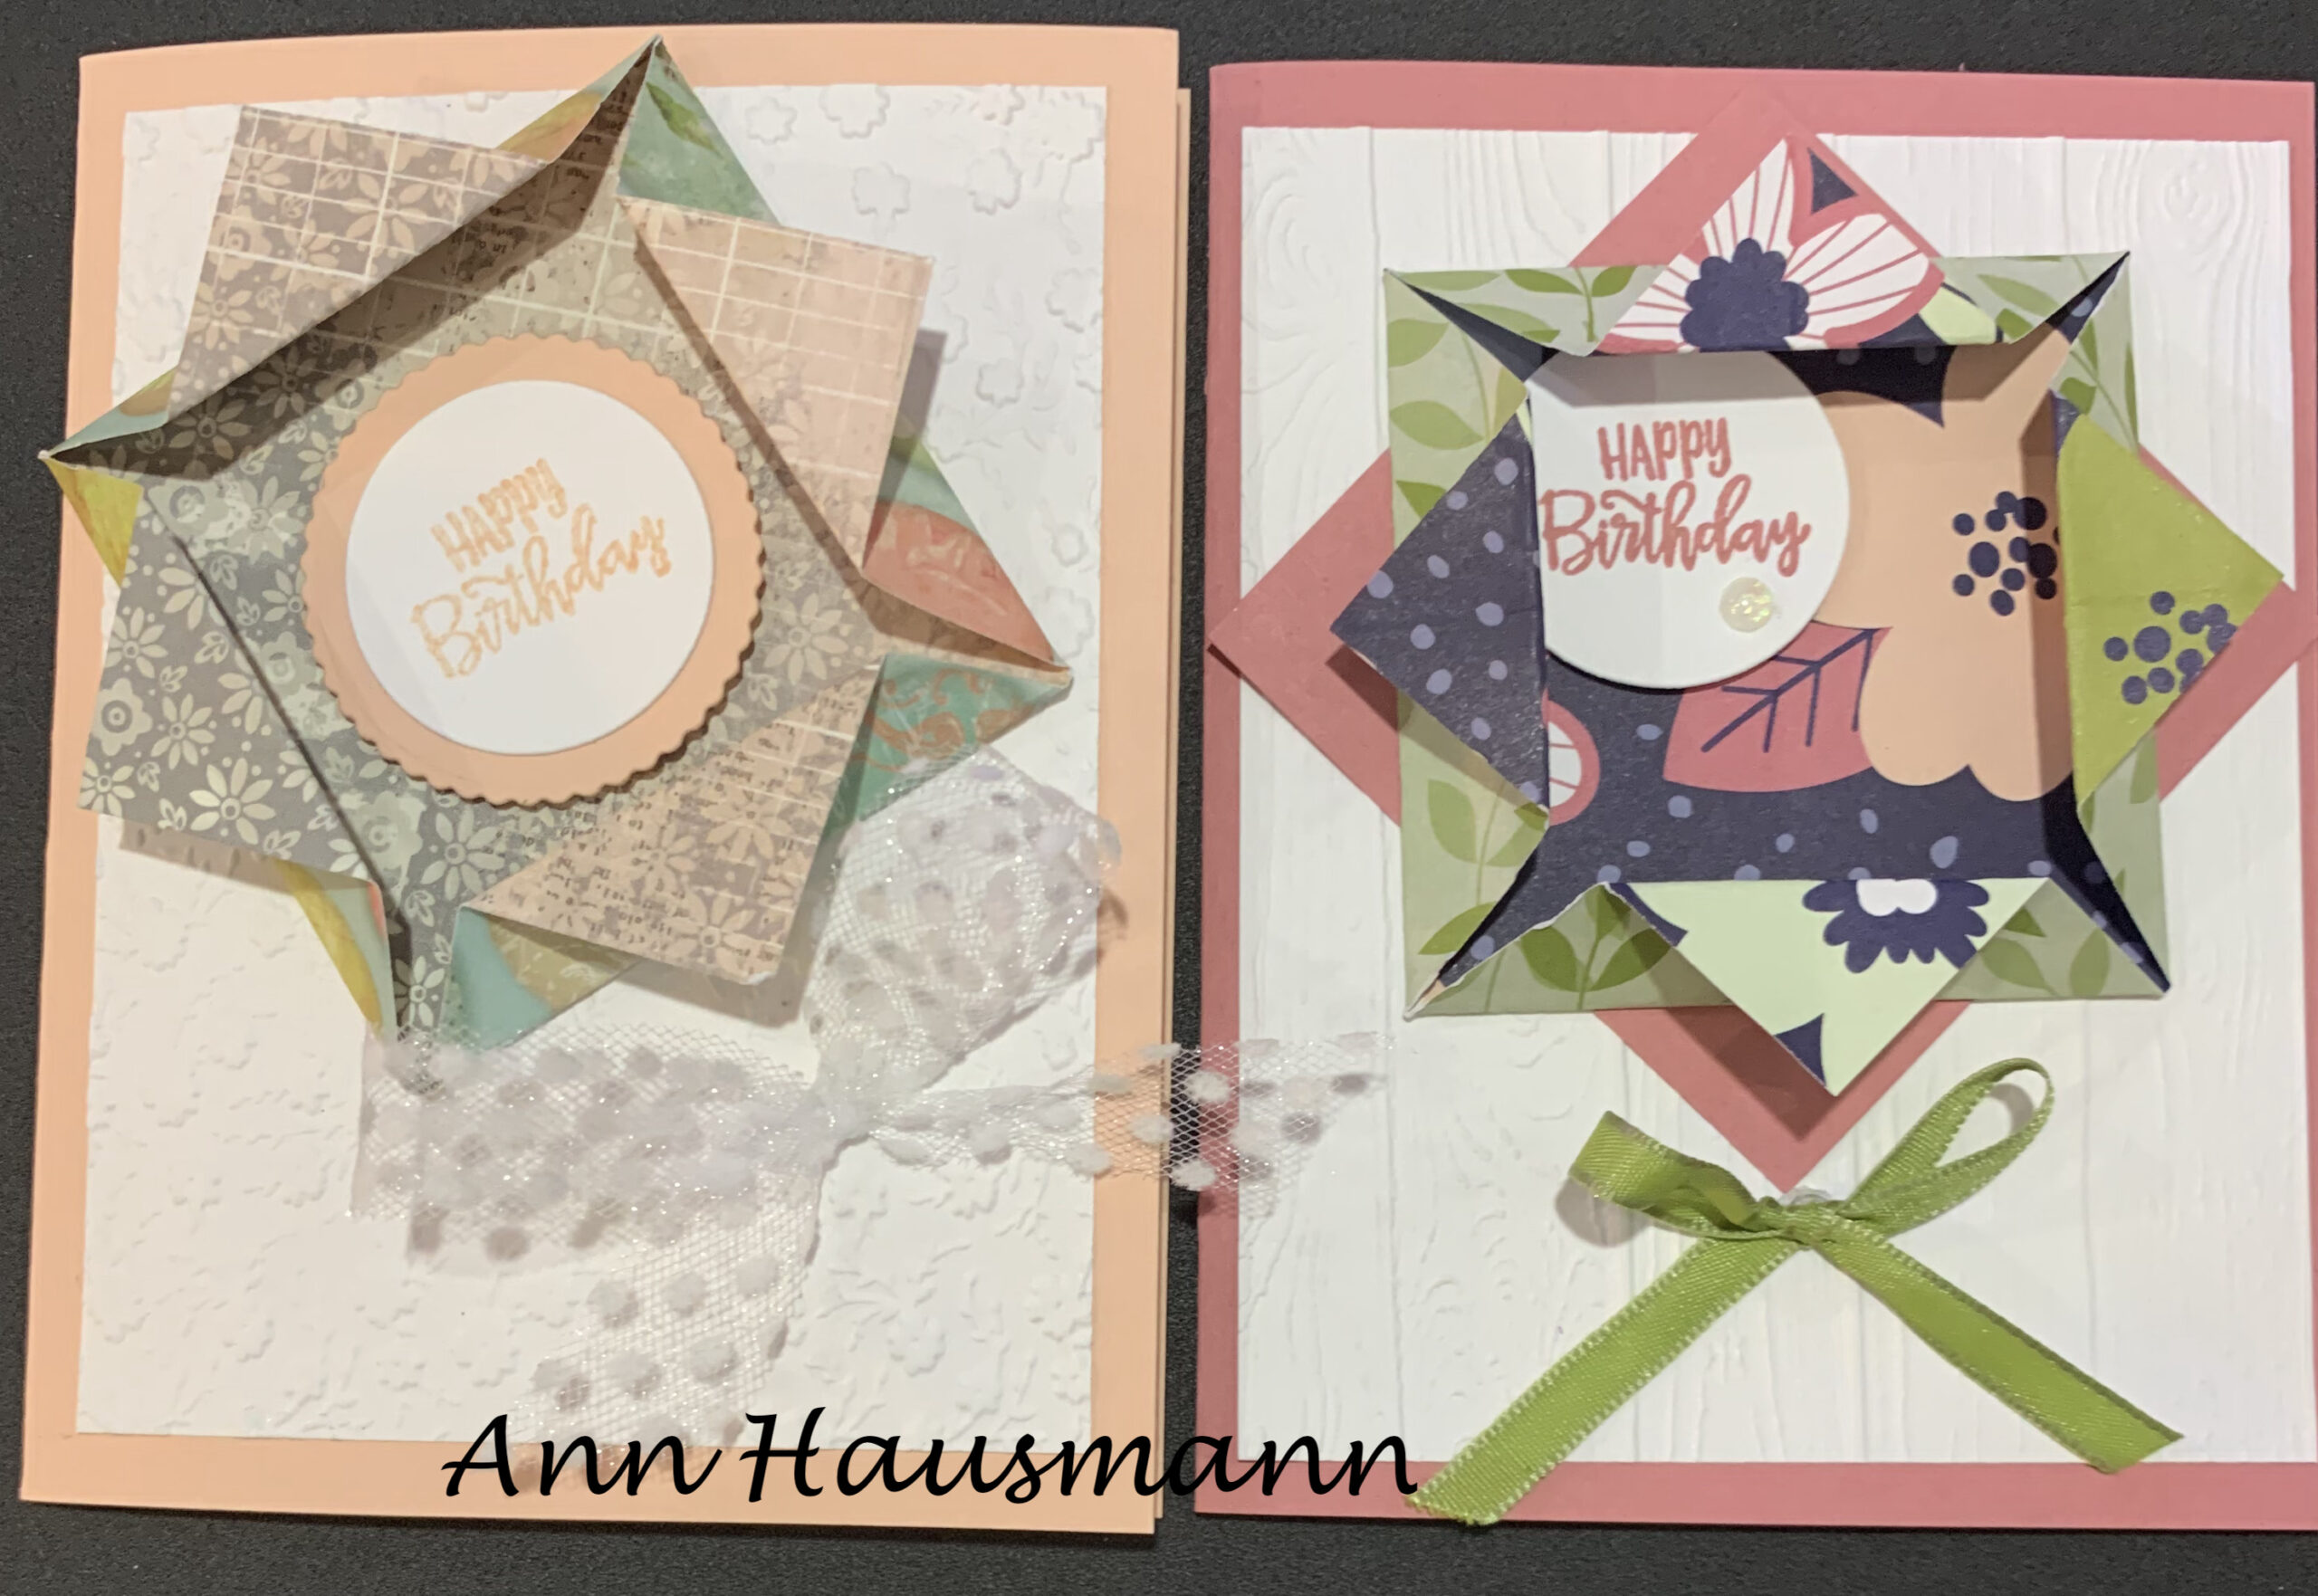
Ann made two cards in differing colors and two different embossing folders- the Ornate Floral 3D on the left and the Timber 3D on the right:
Thank you for participating in the Mystery Card Challenge and sharing your cards!
We Zoom on the 4th Tuesday of each month at 9:30 to share our swaps and do a Mystery Card Challenge. Hop on by some time, just send your email address to me at [email protected].
Don’t go until you share those swap cards!
Oh dear, I almost did. This was my swap and if you click on the picture you can go to the blog post with all the directions and even a video:

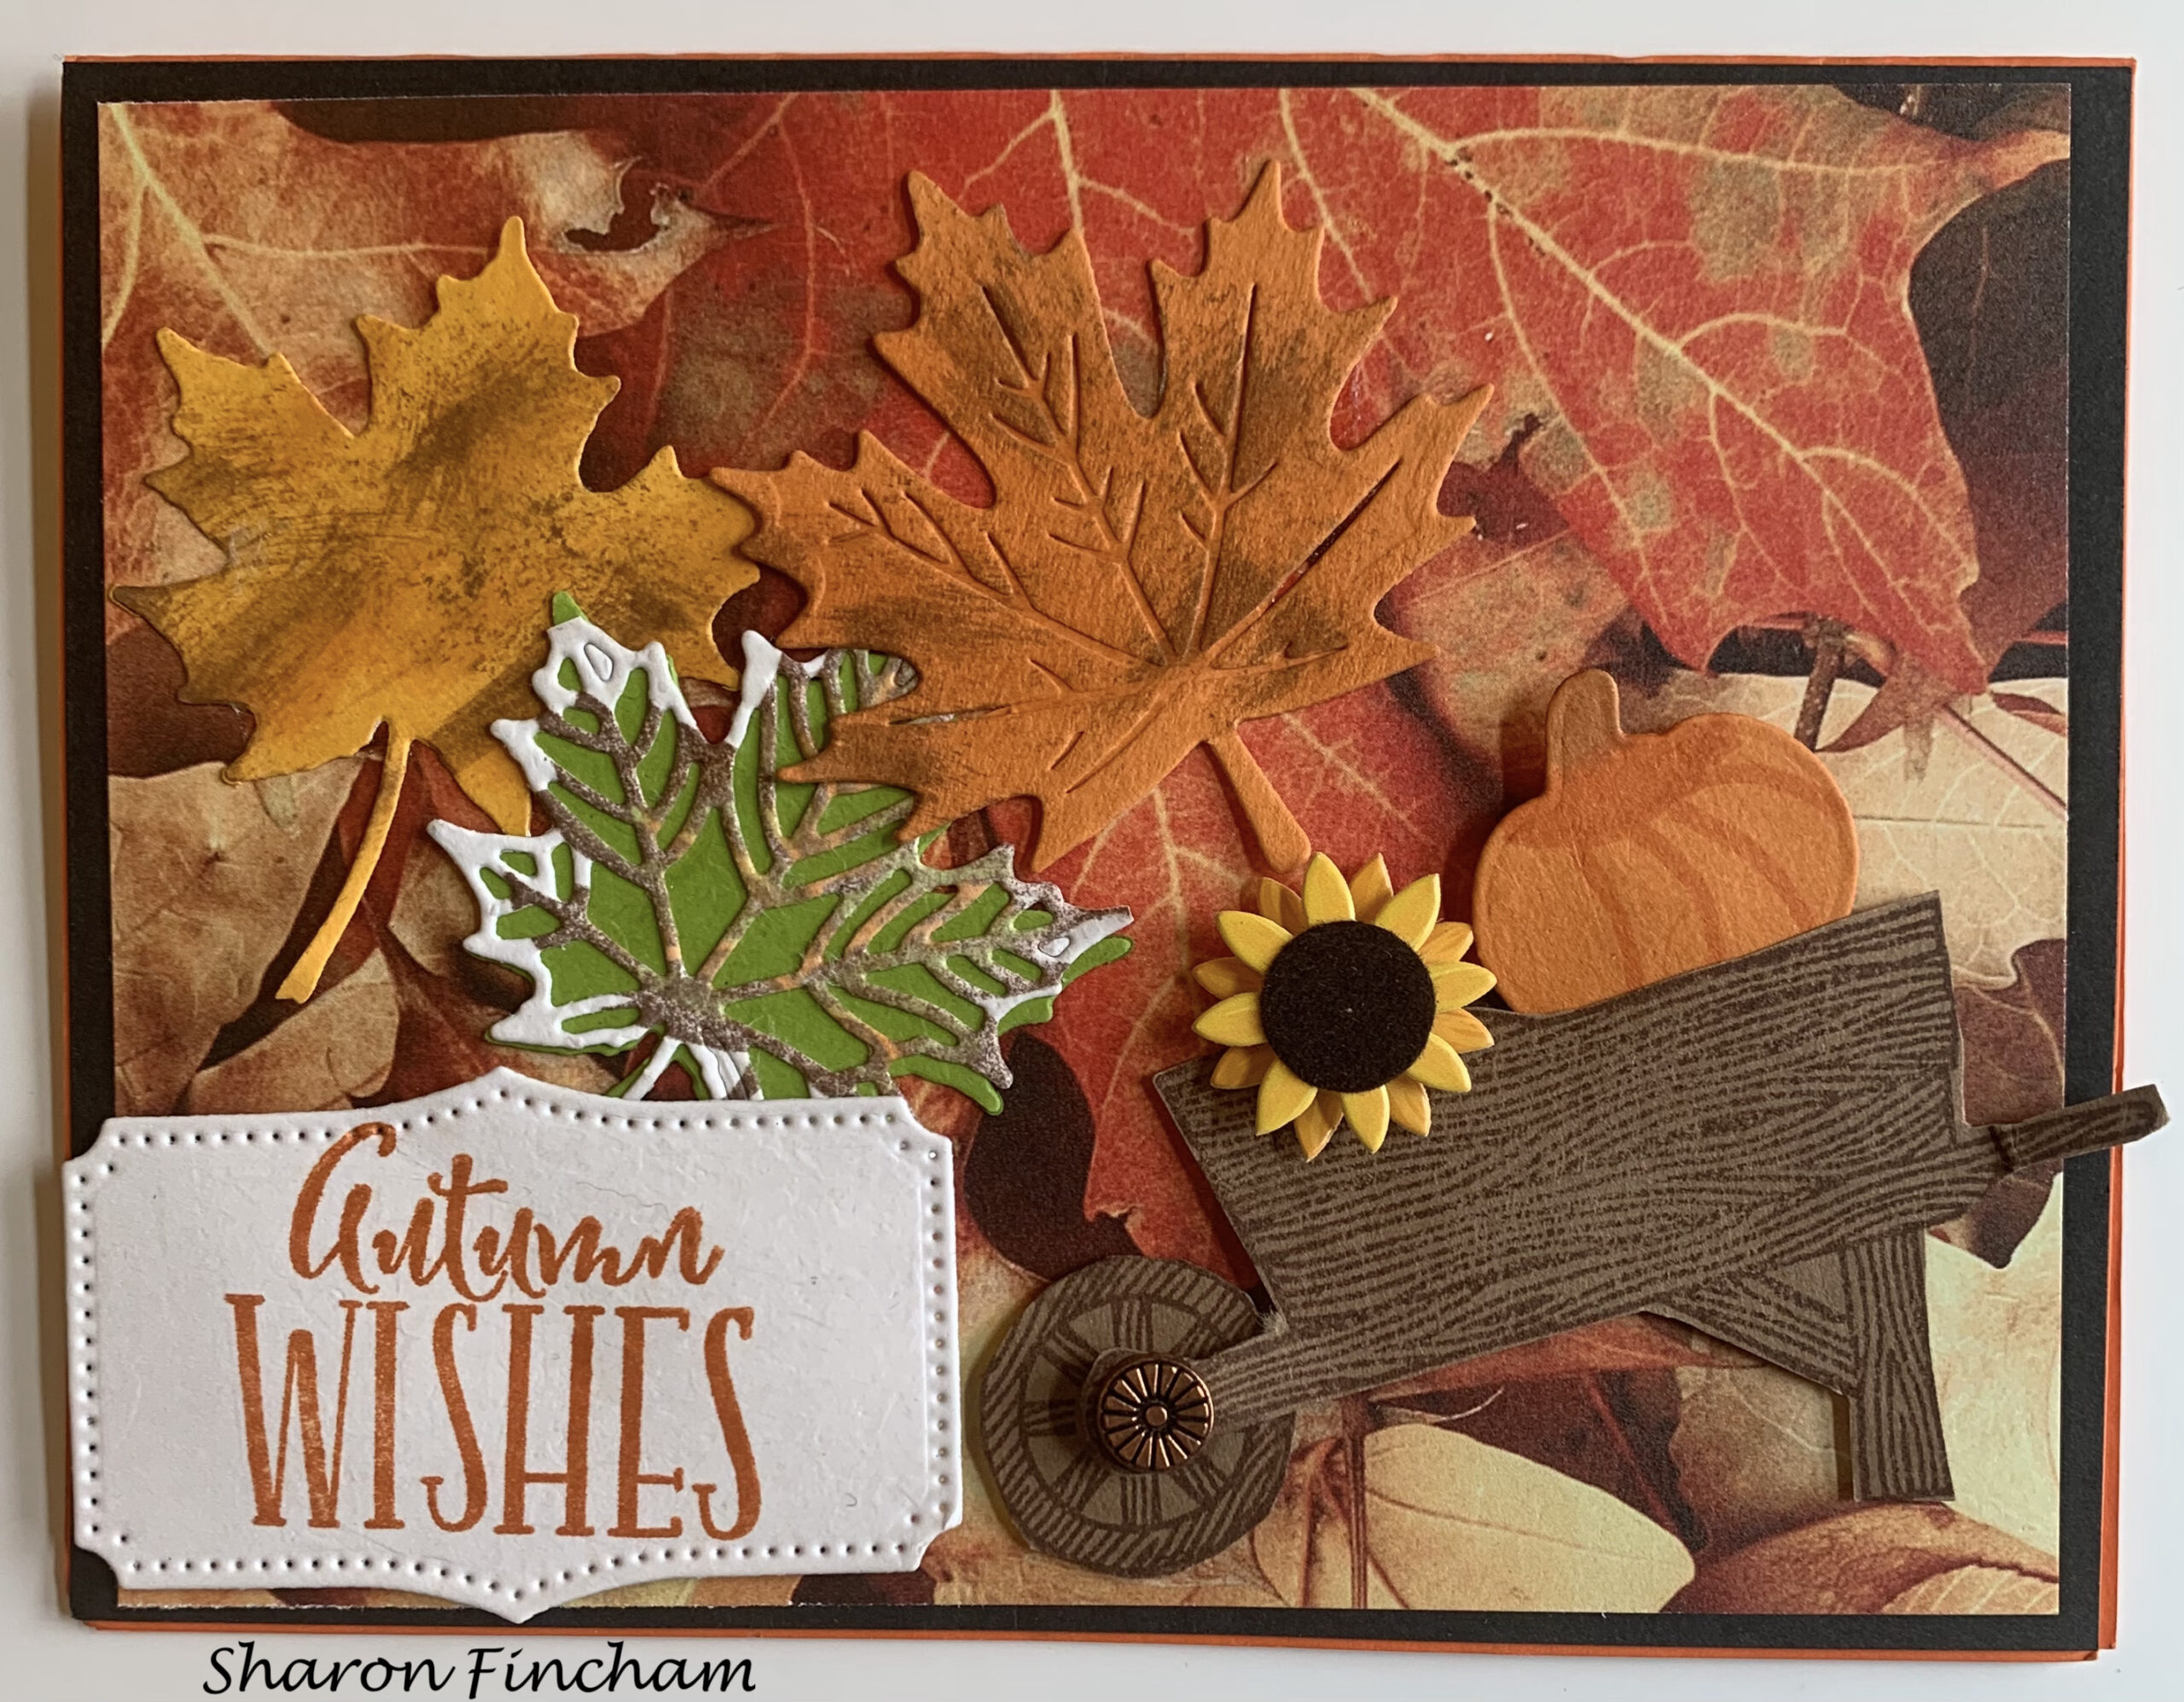
Sharon’s card celebrates the beauty of fall with gorgeous die cut leaves on fall DSP and she used the Autumn Wheelbarrow Dies from last year’s holiday mini, Pierced Blooms Dies, Seasonal Layers Dies, and Autumn Wishes from Close To My Heart.
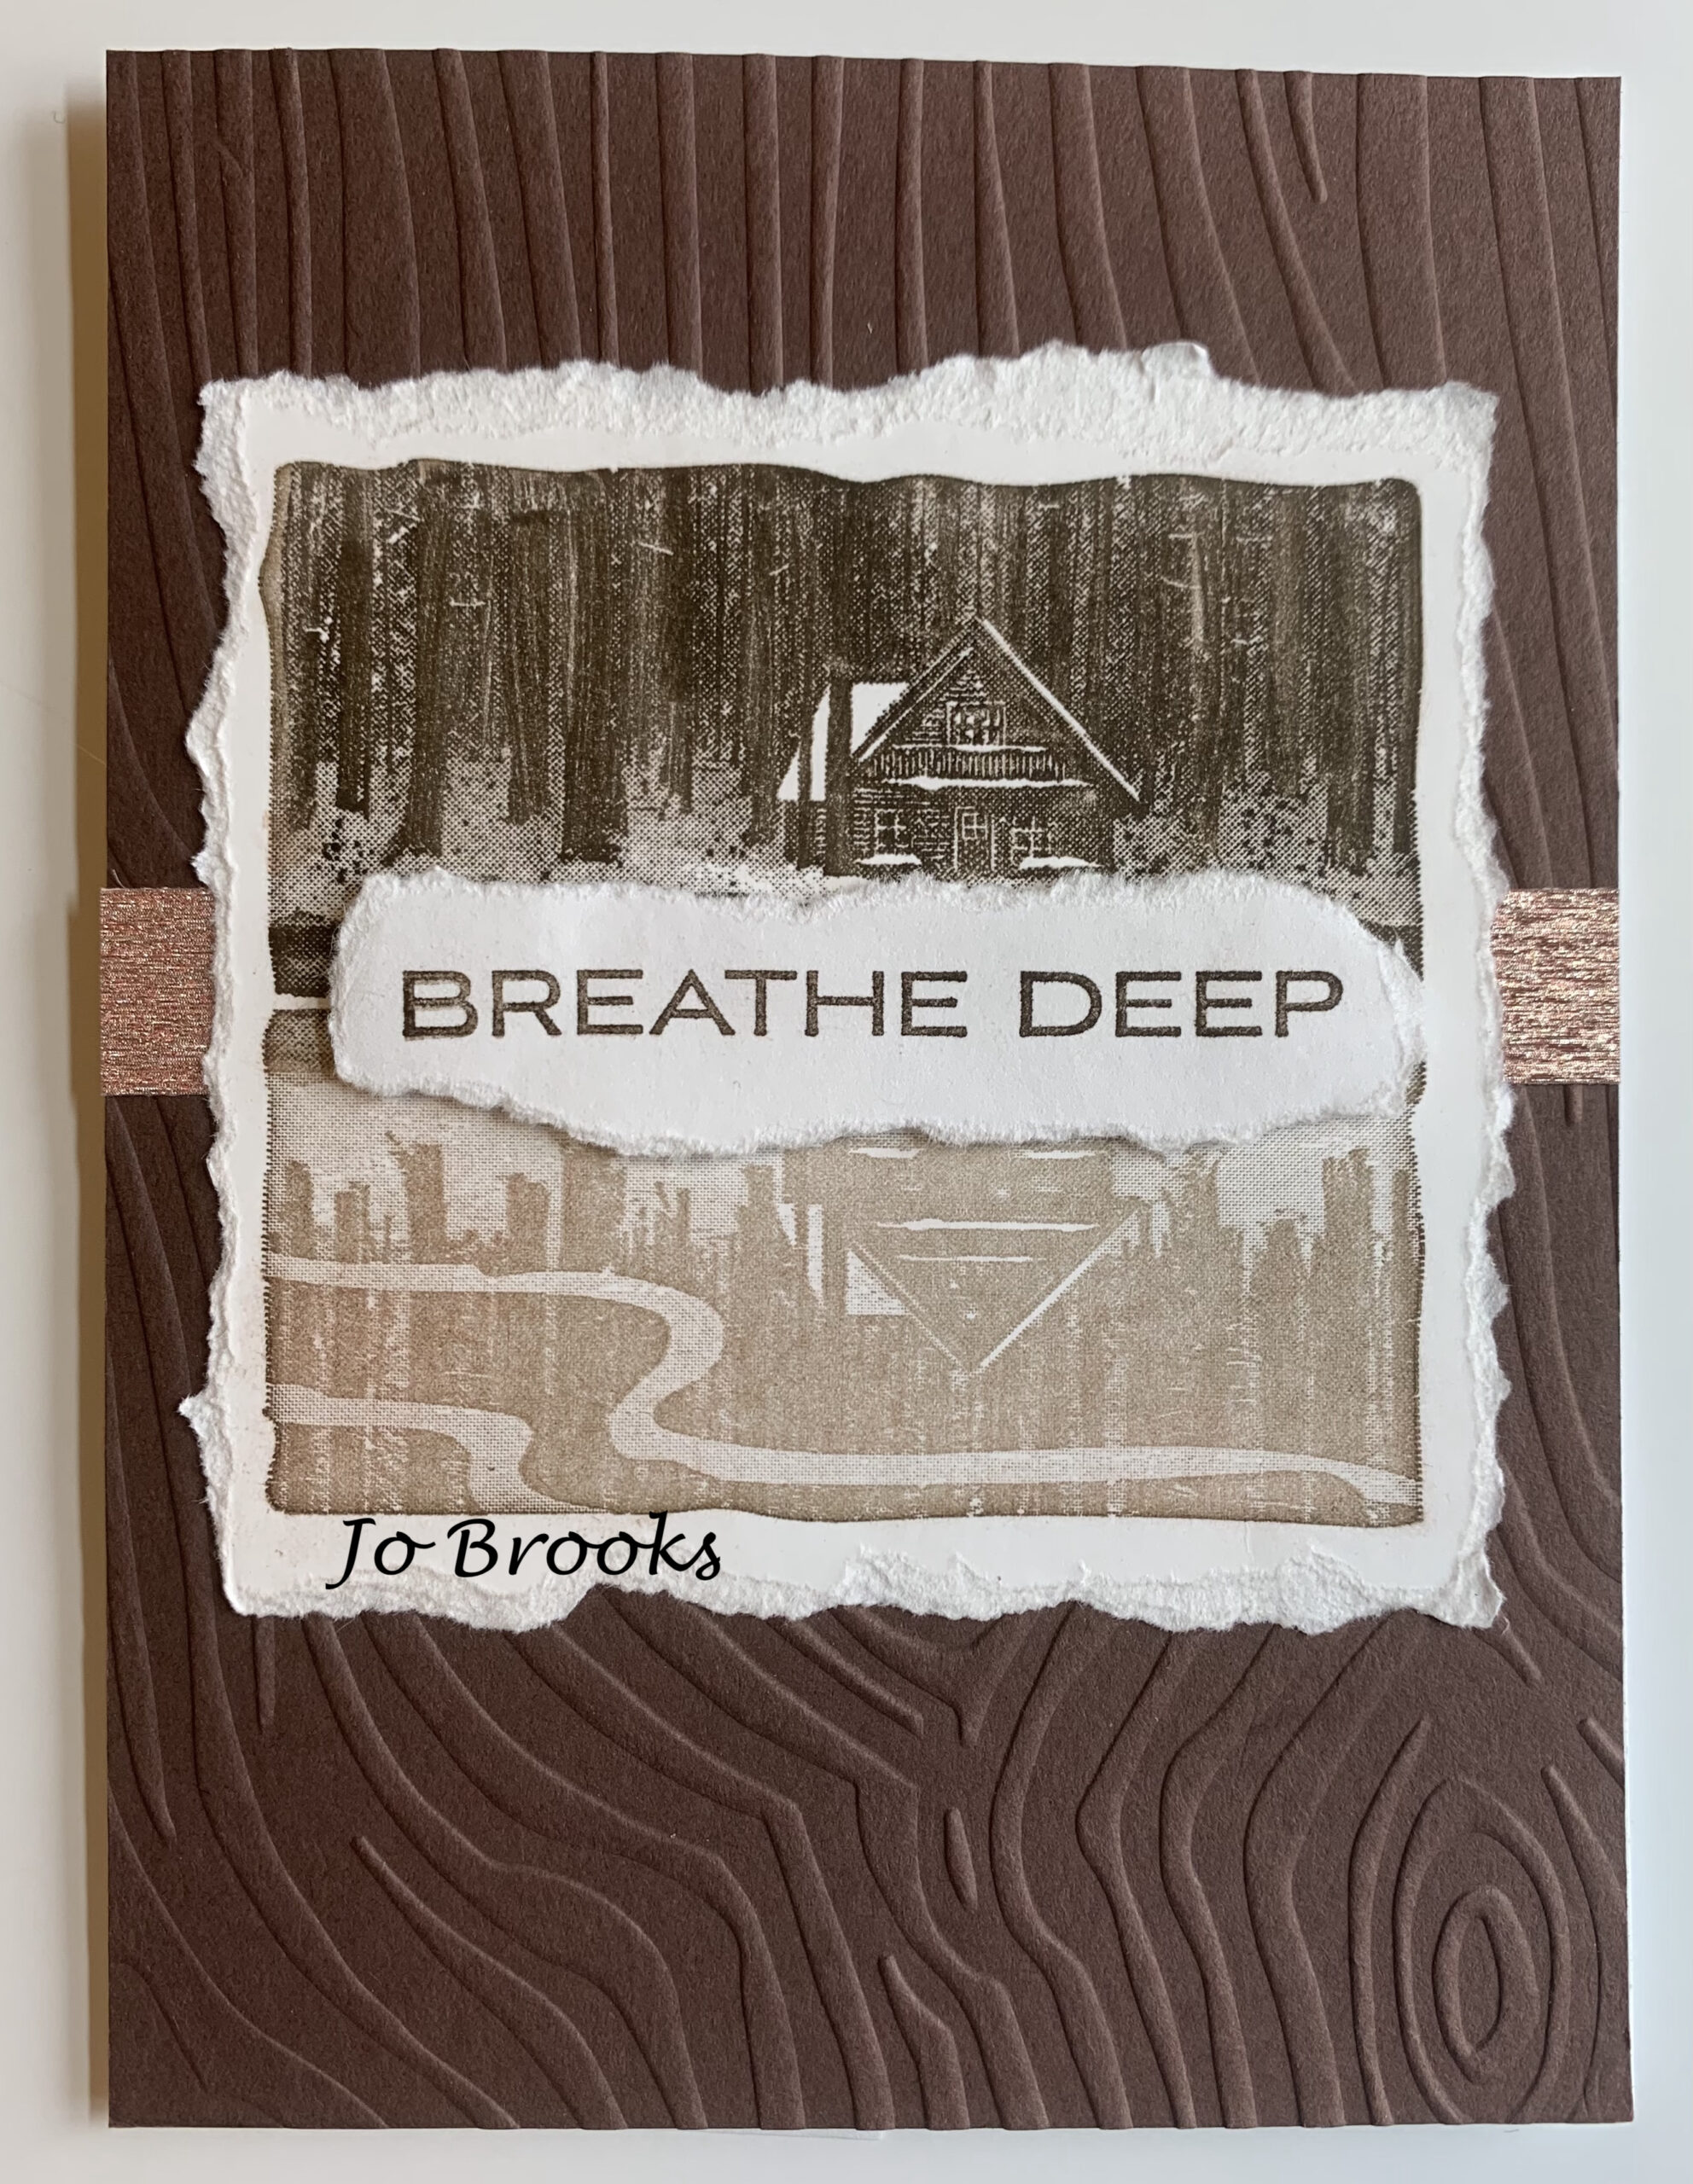
Jo’s Card uses Stampin’ Up! Reflected In Nature stamps on Thick Basic White with a full panel of brown embossed with the Wood Grain embossing folder. The shiny strip is Stampin’ Up! Rose Specialty Paper:
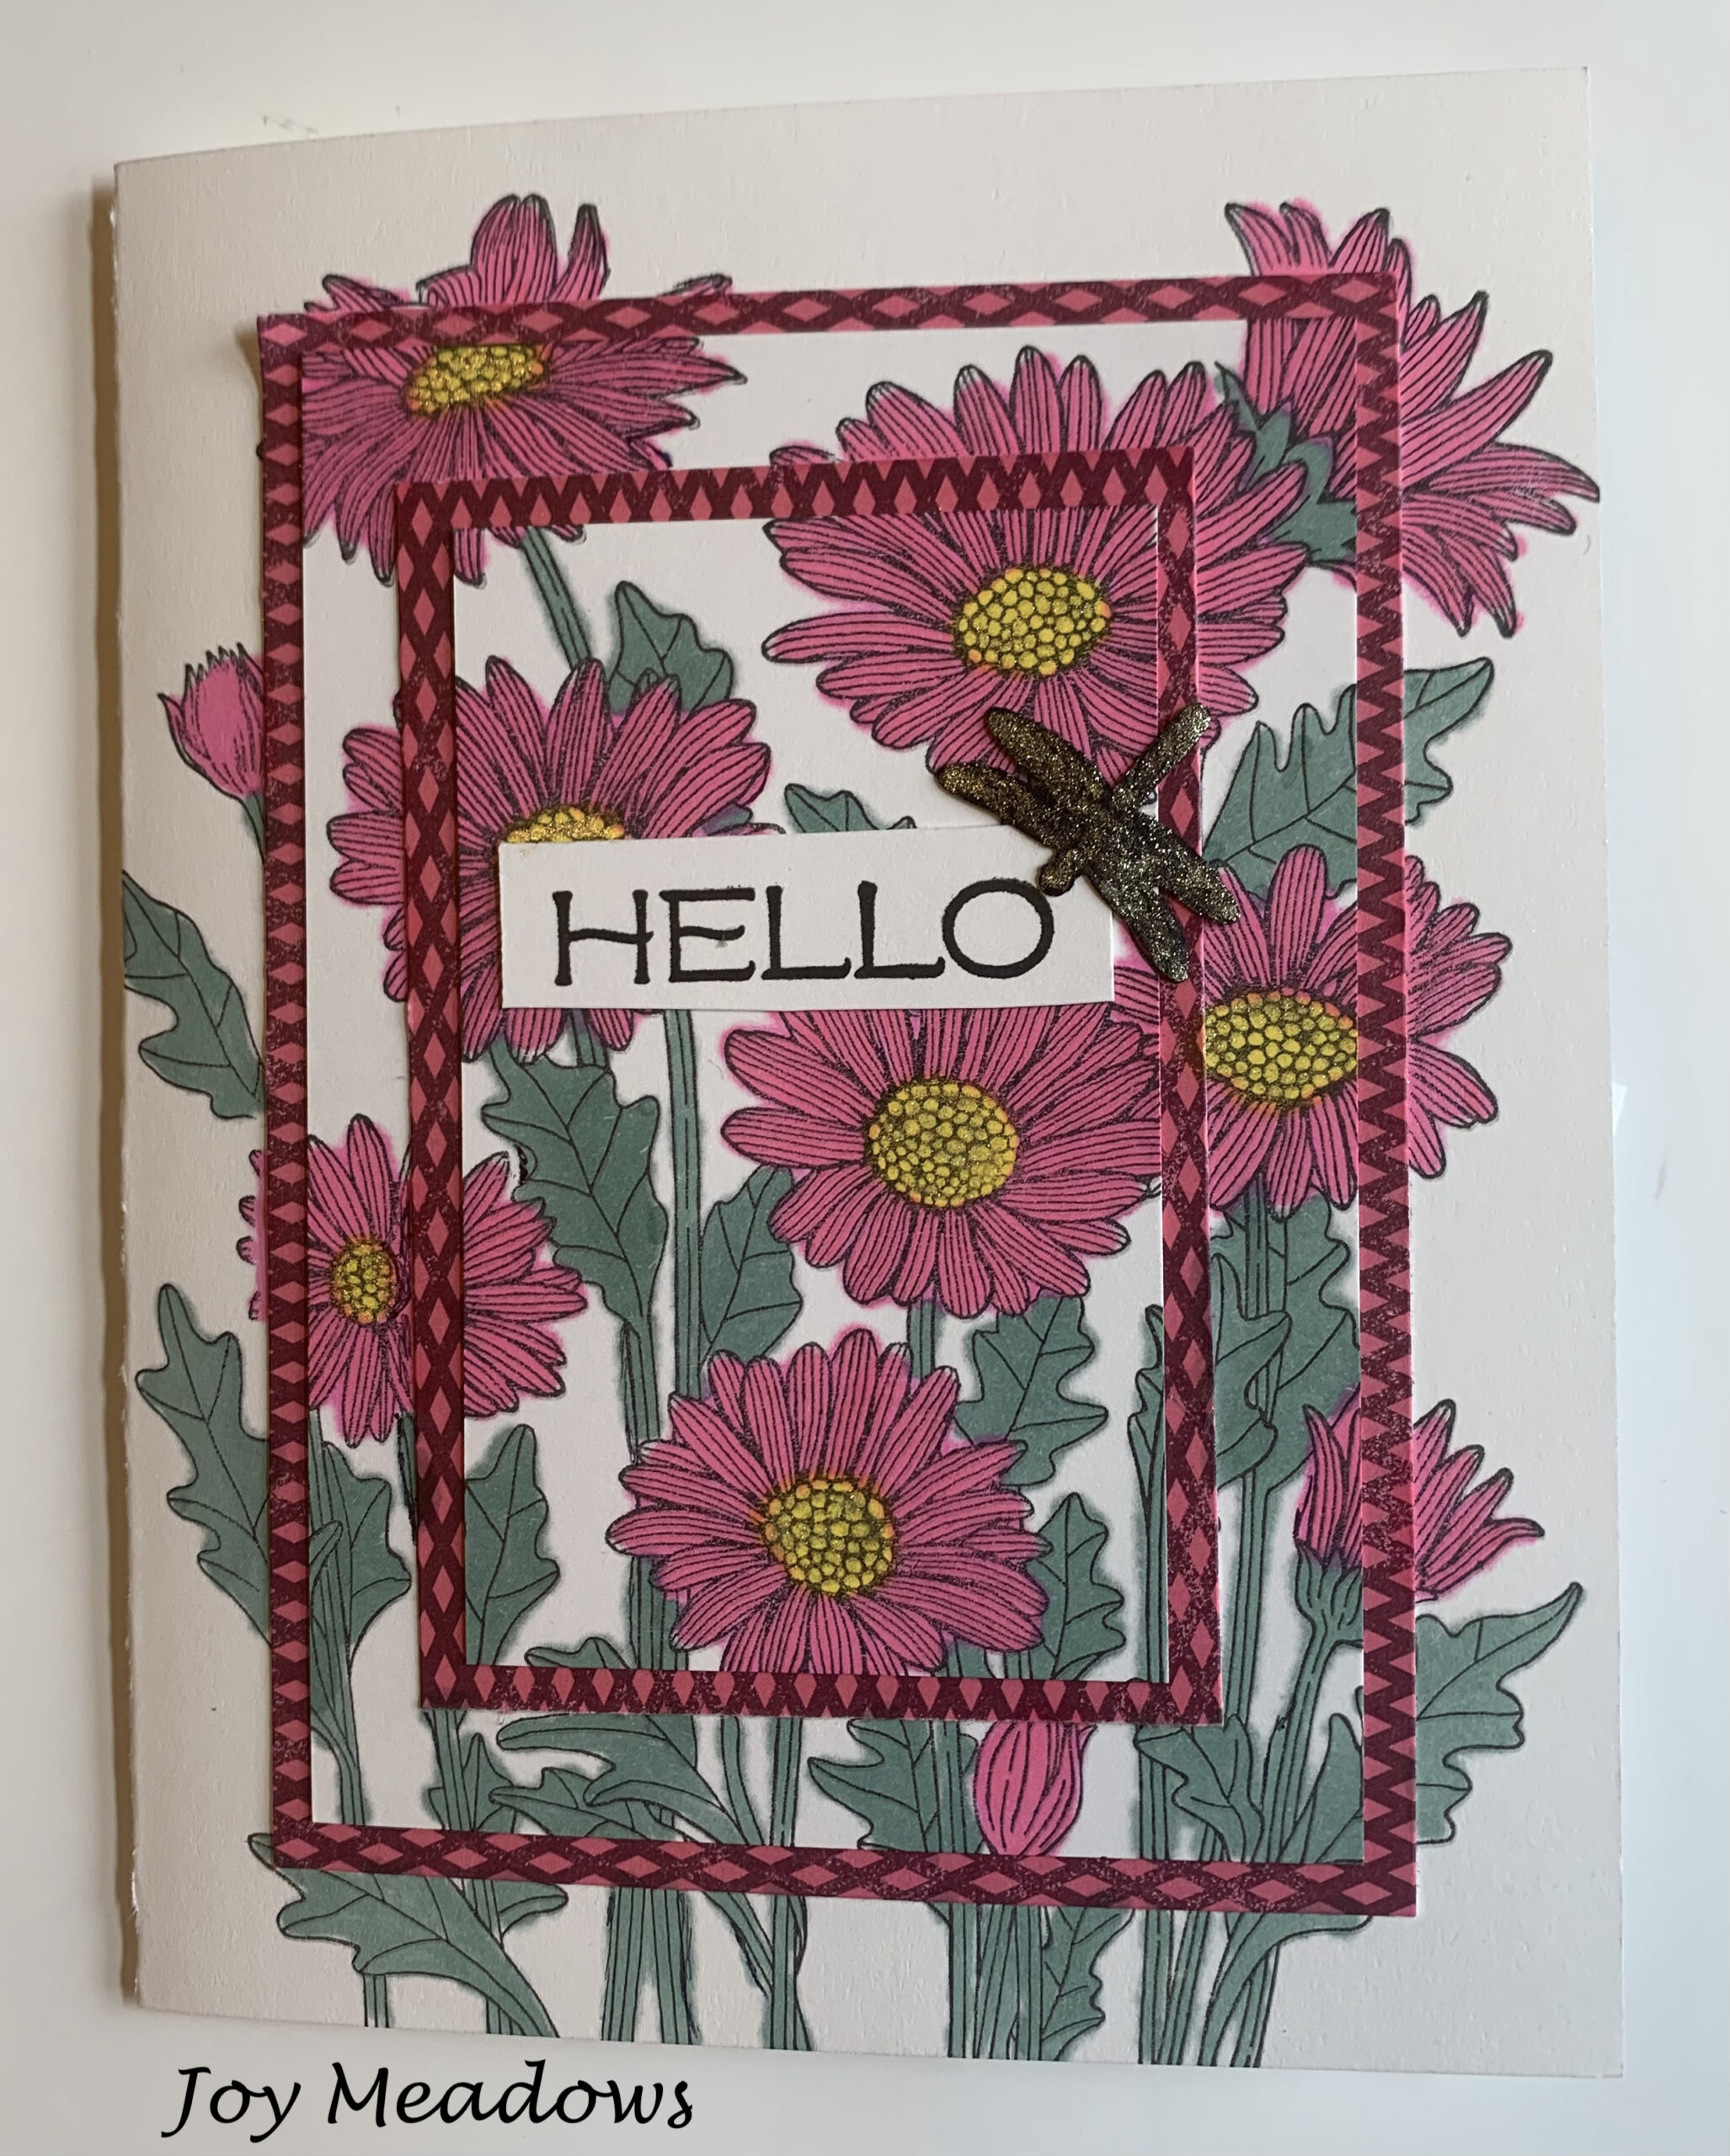
I wish you could see the sparkle on Joy’s card. She used the Triple Time Stamping Technique with the Stampin’ Up! Daisy Garden and Vine Design stamp sets with a border between her layers of Blackberry Beauty DSP. The little dragonfly is punched in black and then sparkled with the gold!
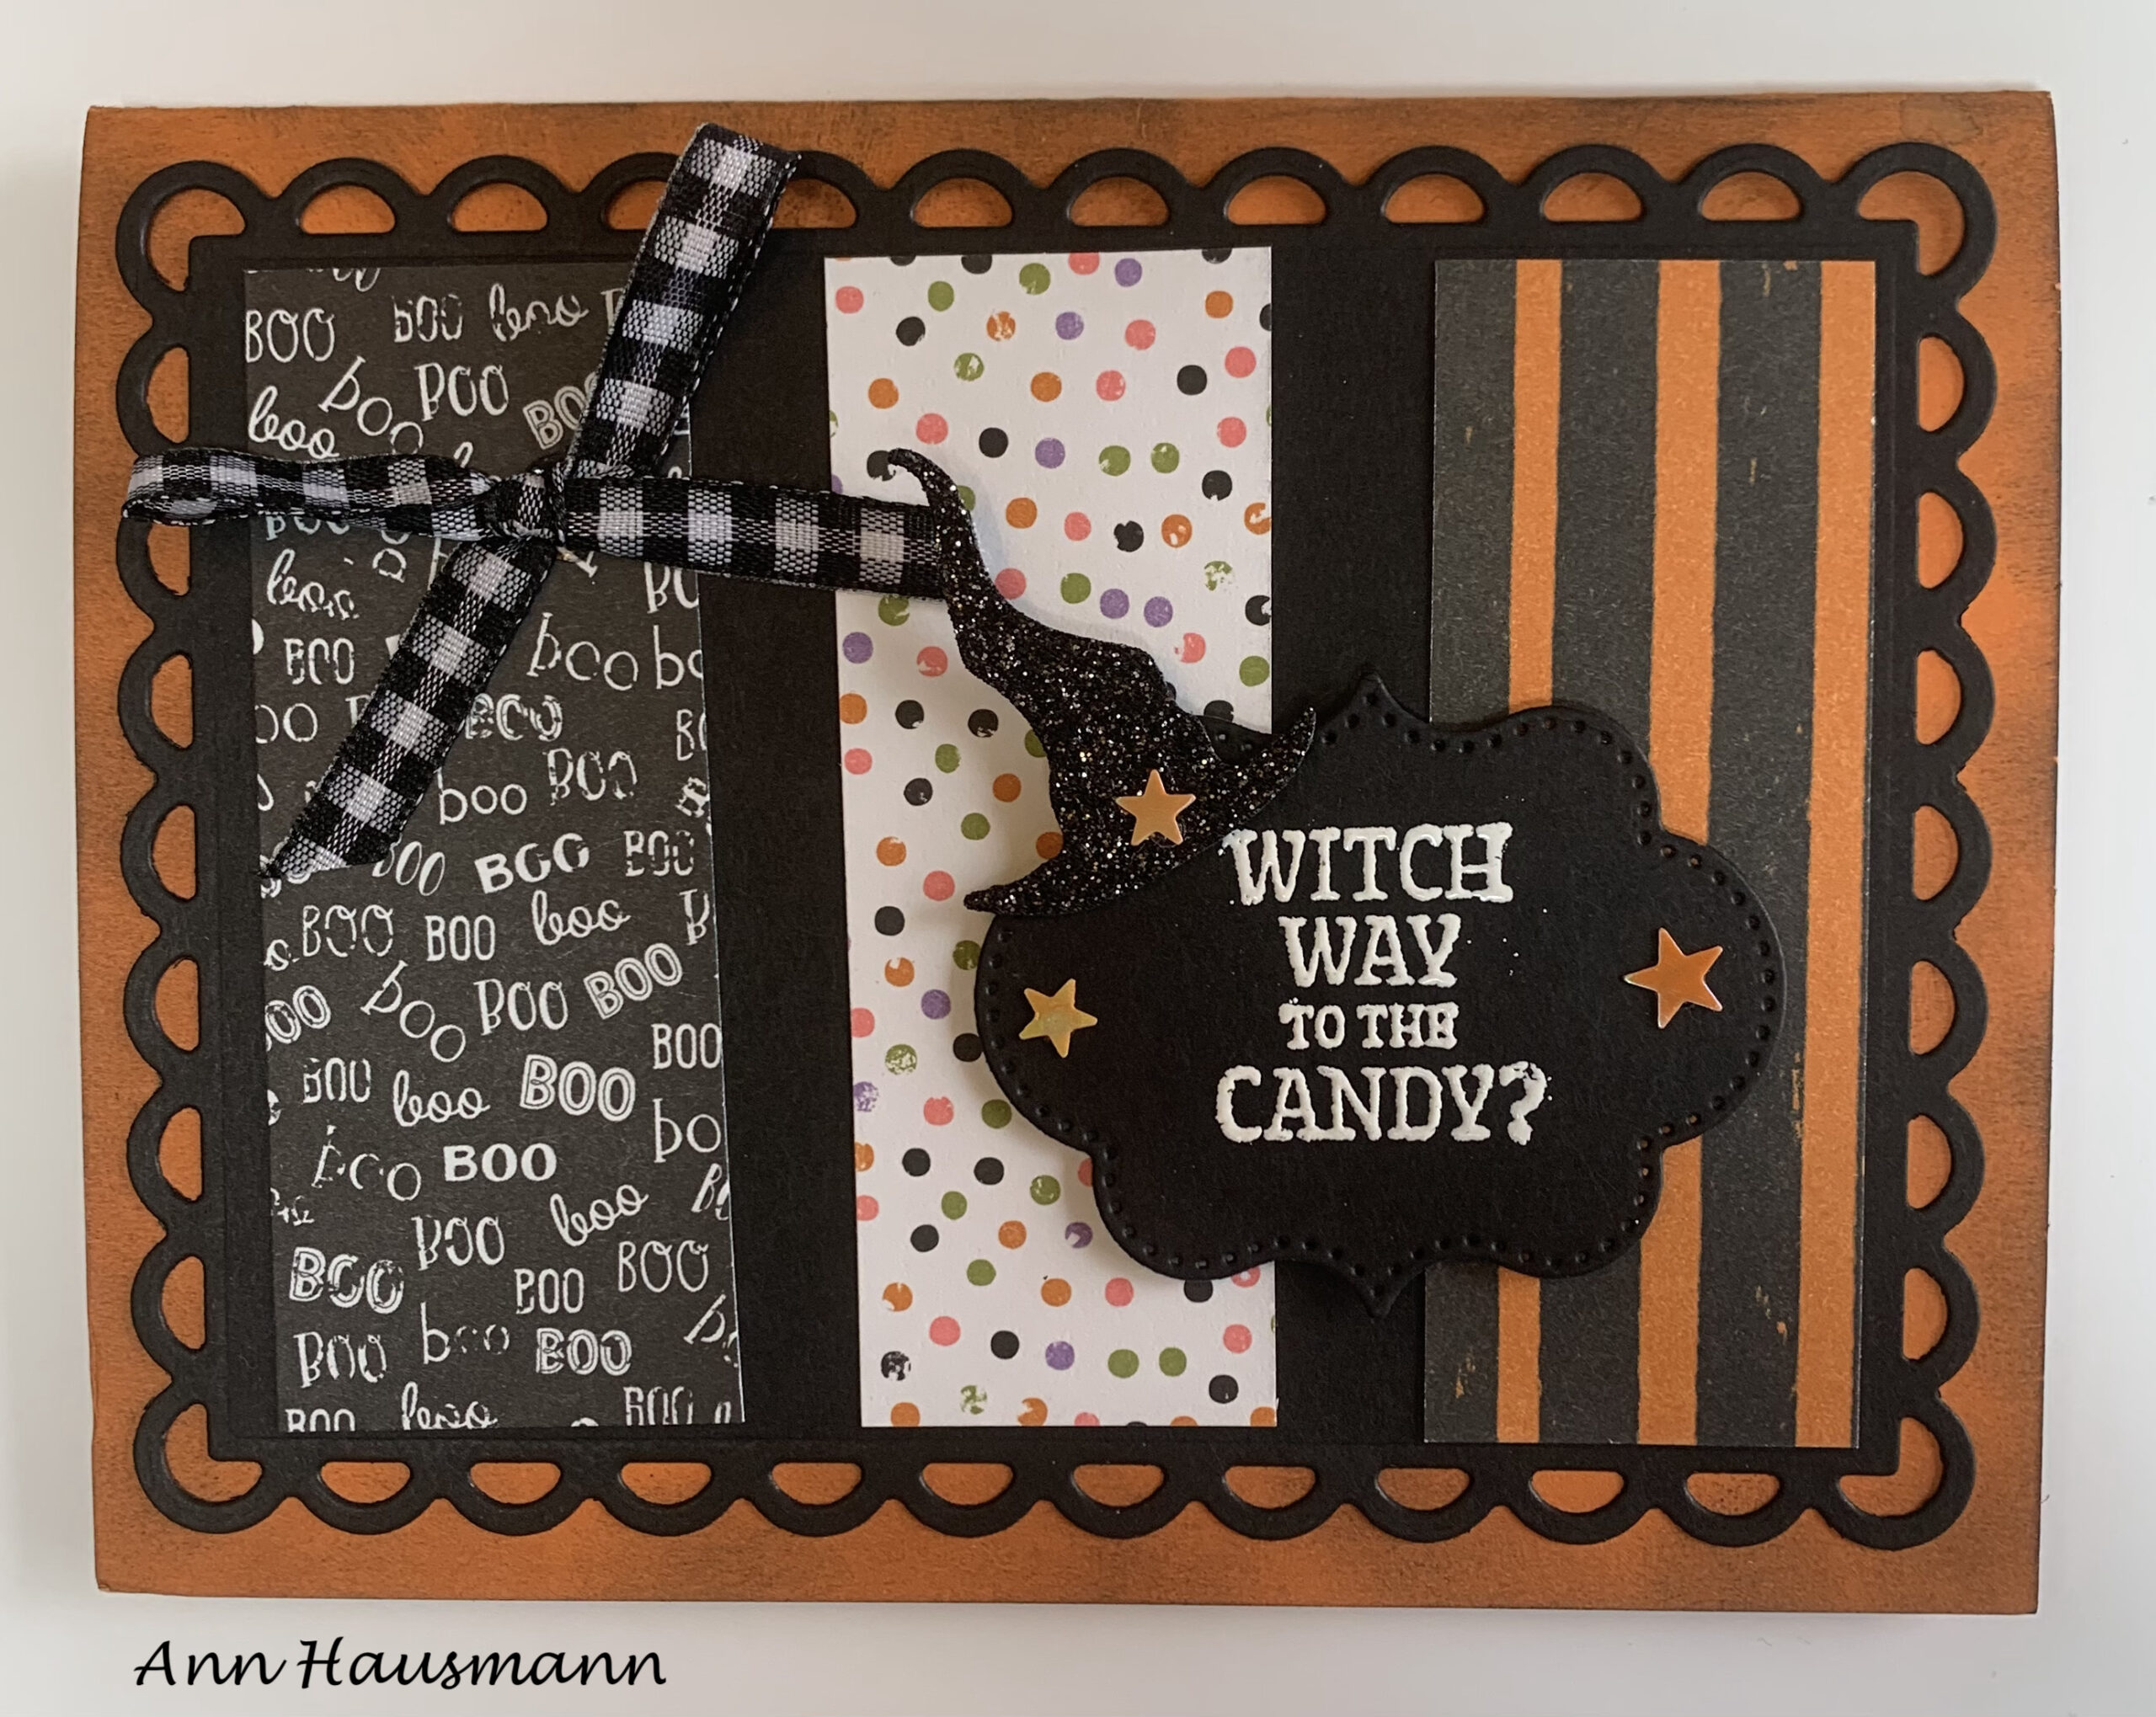
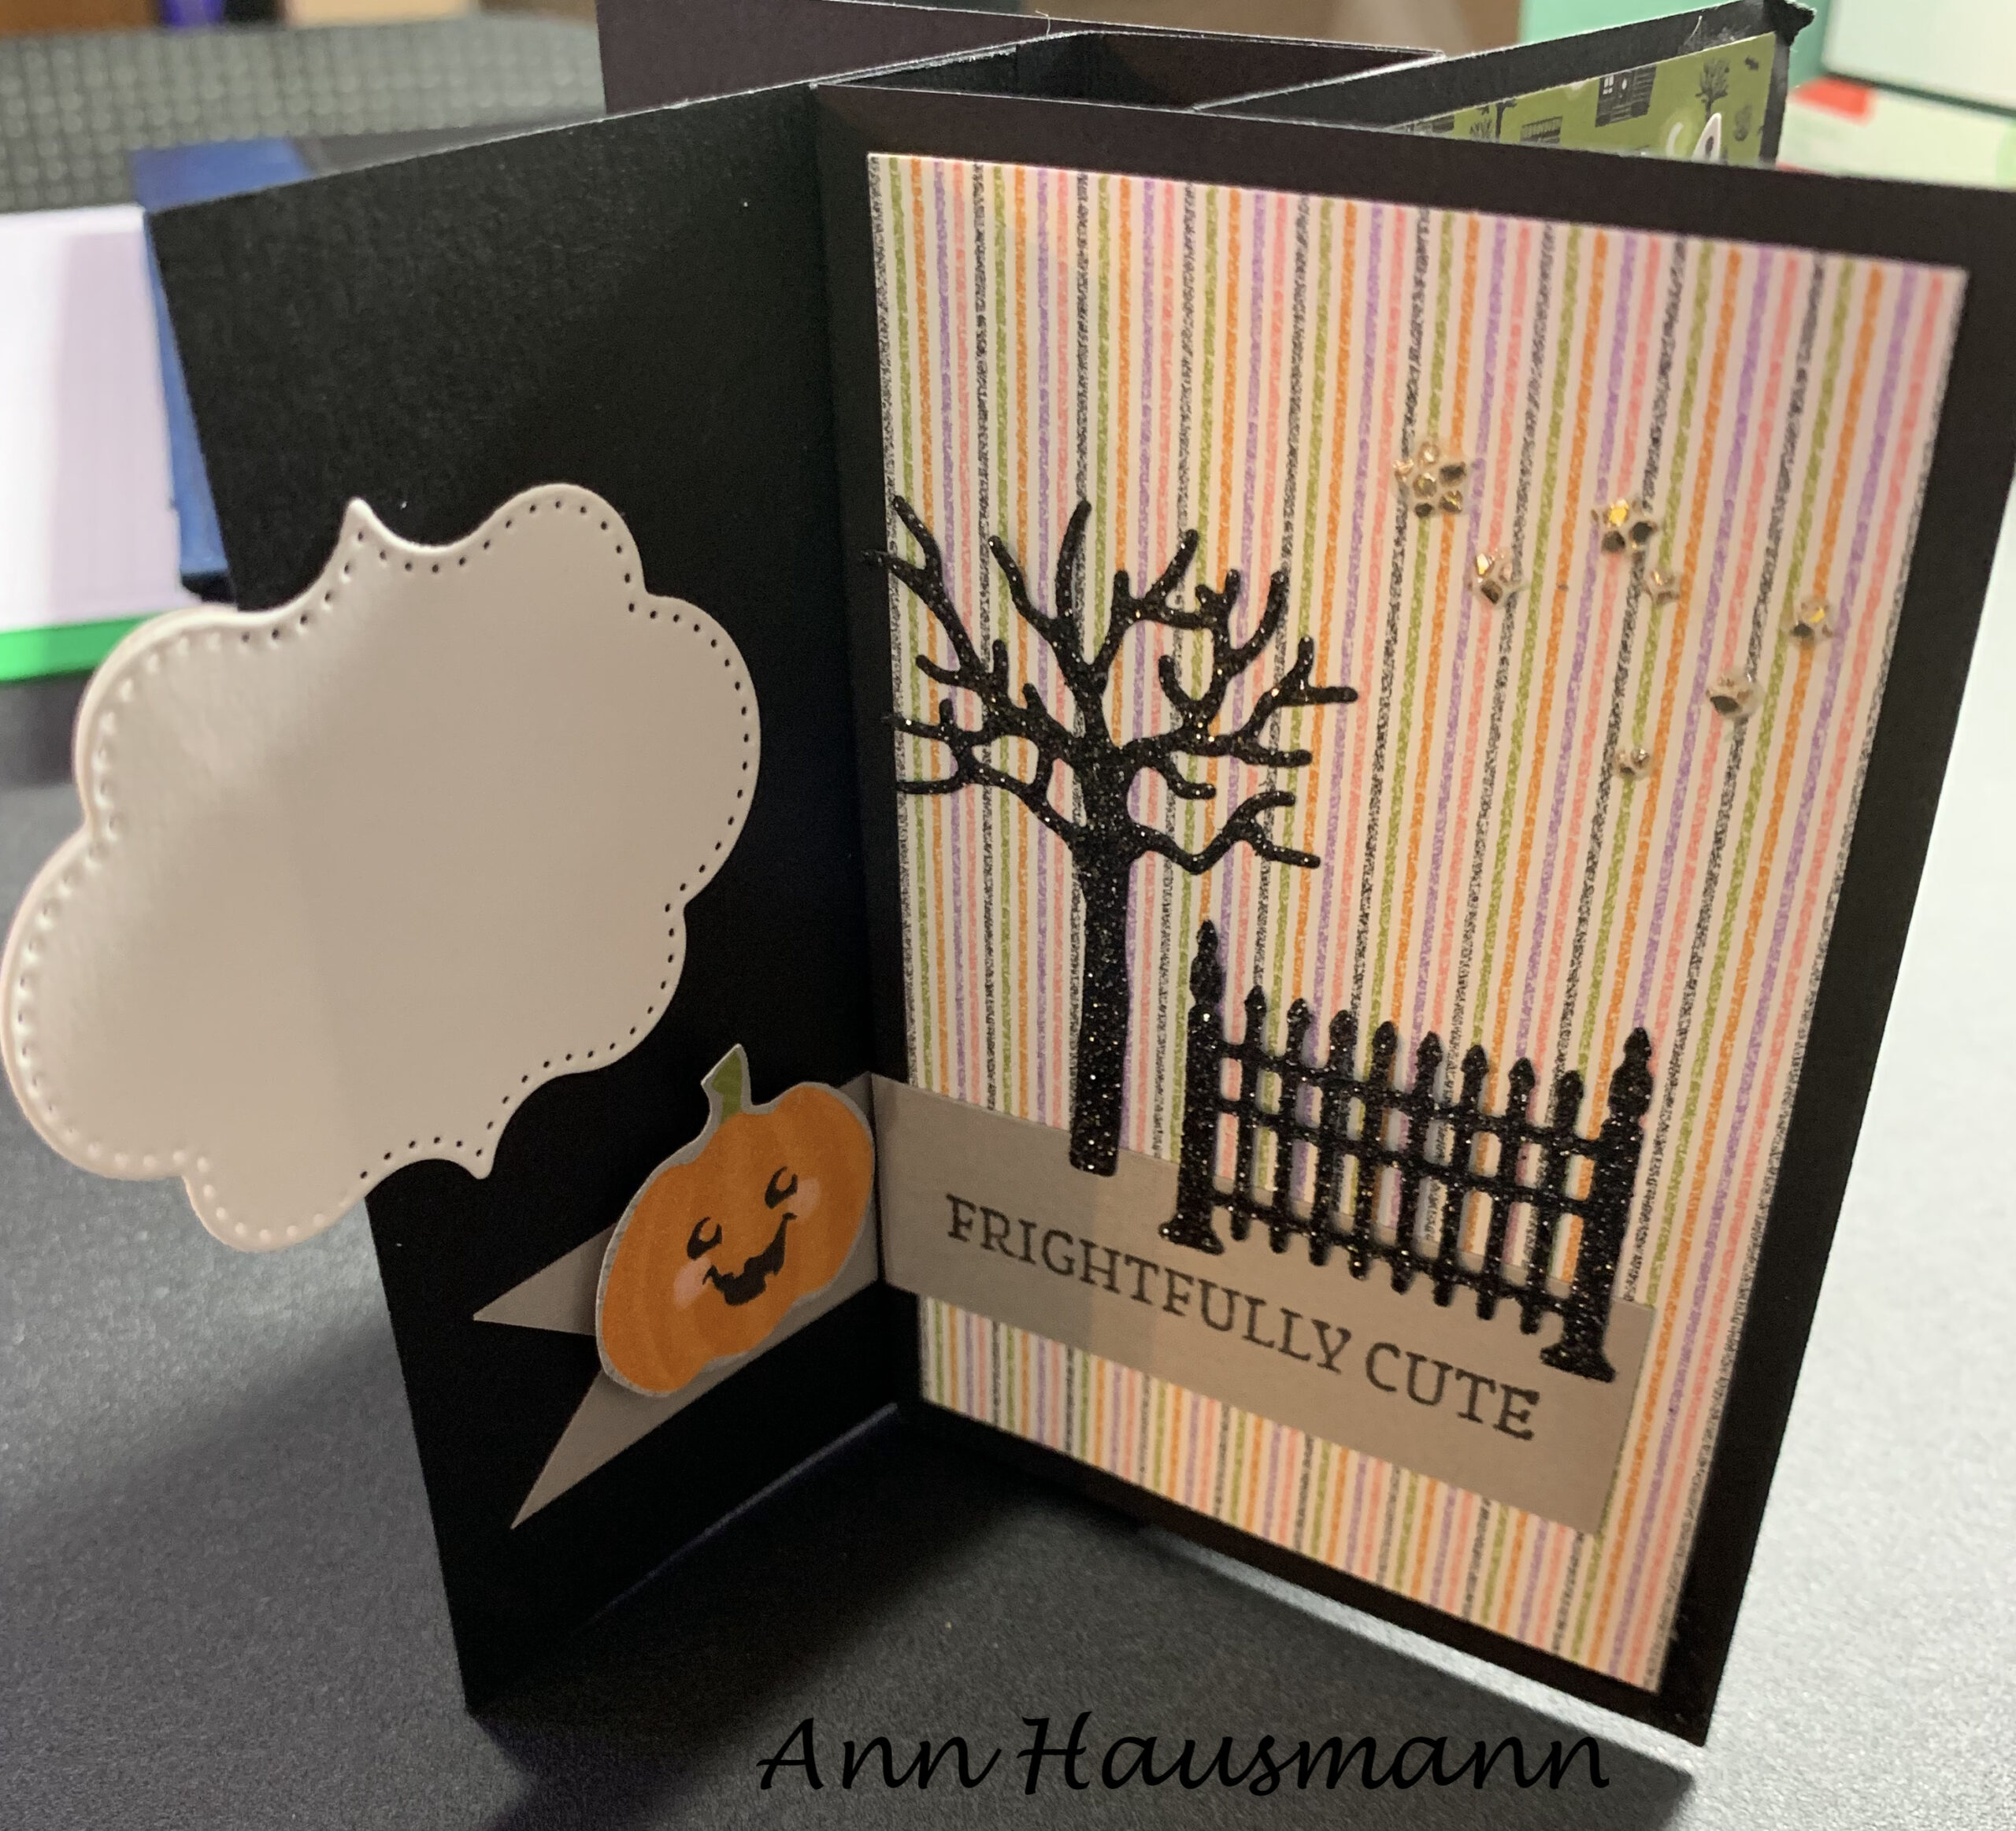
Ann’s card is a fun Halloween card using Pumpkin Pie and Basic Black. She sponged the edge of the Pumpkin Pie with black for a smoky look. She used Stampin’ Up!’s Frightfully Cute stamp set, the Scalloped Contour Dies, the Frightful Tag Dies, the Cute Halloween DSP, and Black Glitter Paper. The star sequins and black and white gingham ribbon are the perfect embellishment!
Your blog is like a virtual scrapbook of cards!
So true! And for you travelers and out of staters who missed the Mystery card, you can still make one and send me the picture and I can add it to the ‘virtual scrapbook’. I think it really helps everyone see the amazing things we can do with a bit of paper, stamps, tools and ink. An added benefit of our card scrapbook is to go back and see a card that we may have already mailed out but now want to make one like it. Well, here is your place to go to see those past cards. My cards are in the recipe box because they are linked to the full directions but you can always do a search by “swaps” and find the others.
And the ‘scrapbook’ brings a pinch of creativity to spice up their crafting worlds!
Mustn’t forget to say that, Sal, so they see where you come in!
SAL, Share A Love
Karen (Click on little Sal in the computer to go to the online store)
Pinwheel Tower Cards
Hello Stamping Friends,
Remember to click the heading after you open your email to access the full blog.
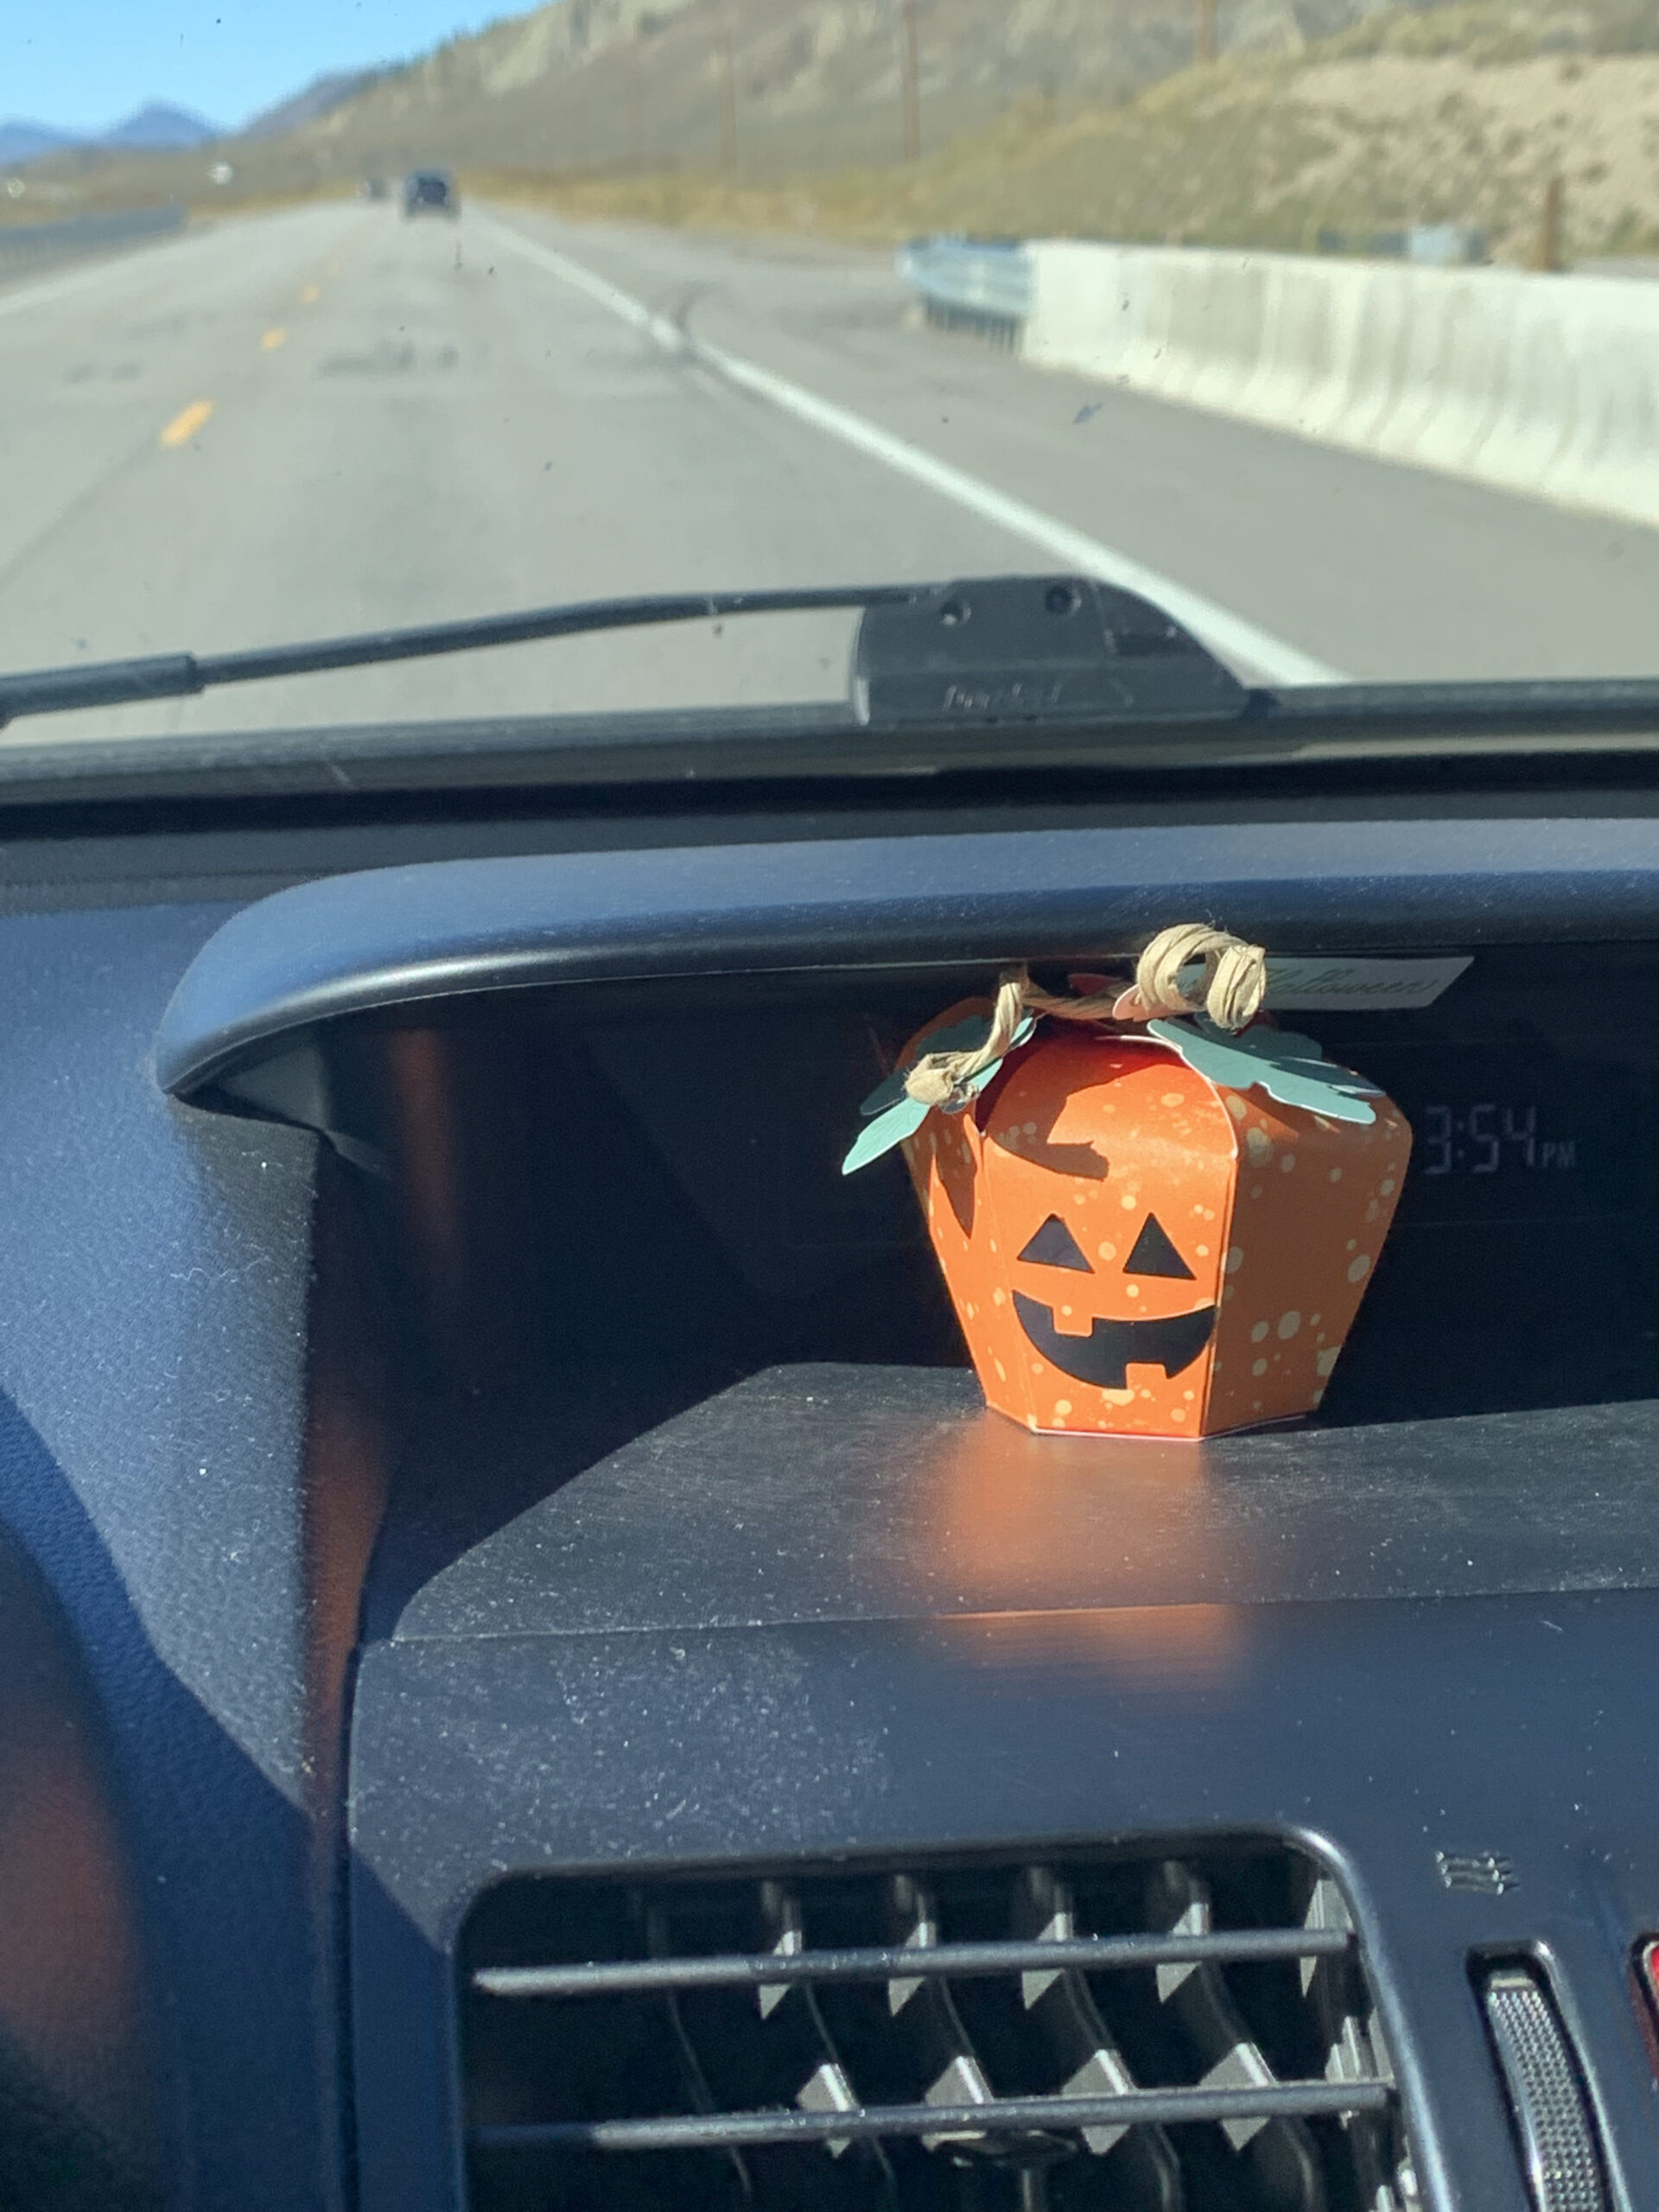
The little pumpkin sandwiched nicely in the dash of my car made little Emma in the back carseat giggle as we headed to Steamboat Springs. She helped with the construction!
Pinwheel Tower Card
These cards are the new rage on social media so I had an open house crafting day to gather together and make one. There were so many different versions online that I sent out three videos and the stampers picked the style of their choice and brought the kit components to the house. It was a fun morning!
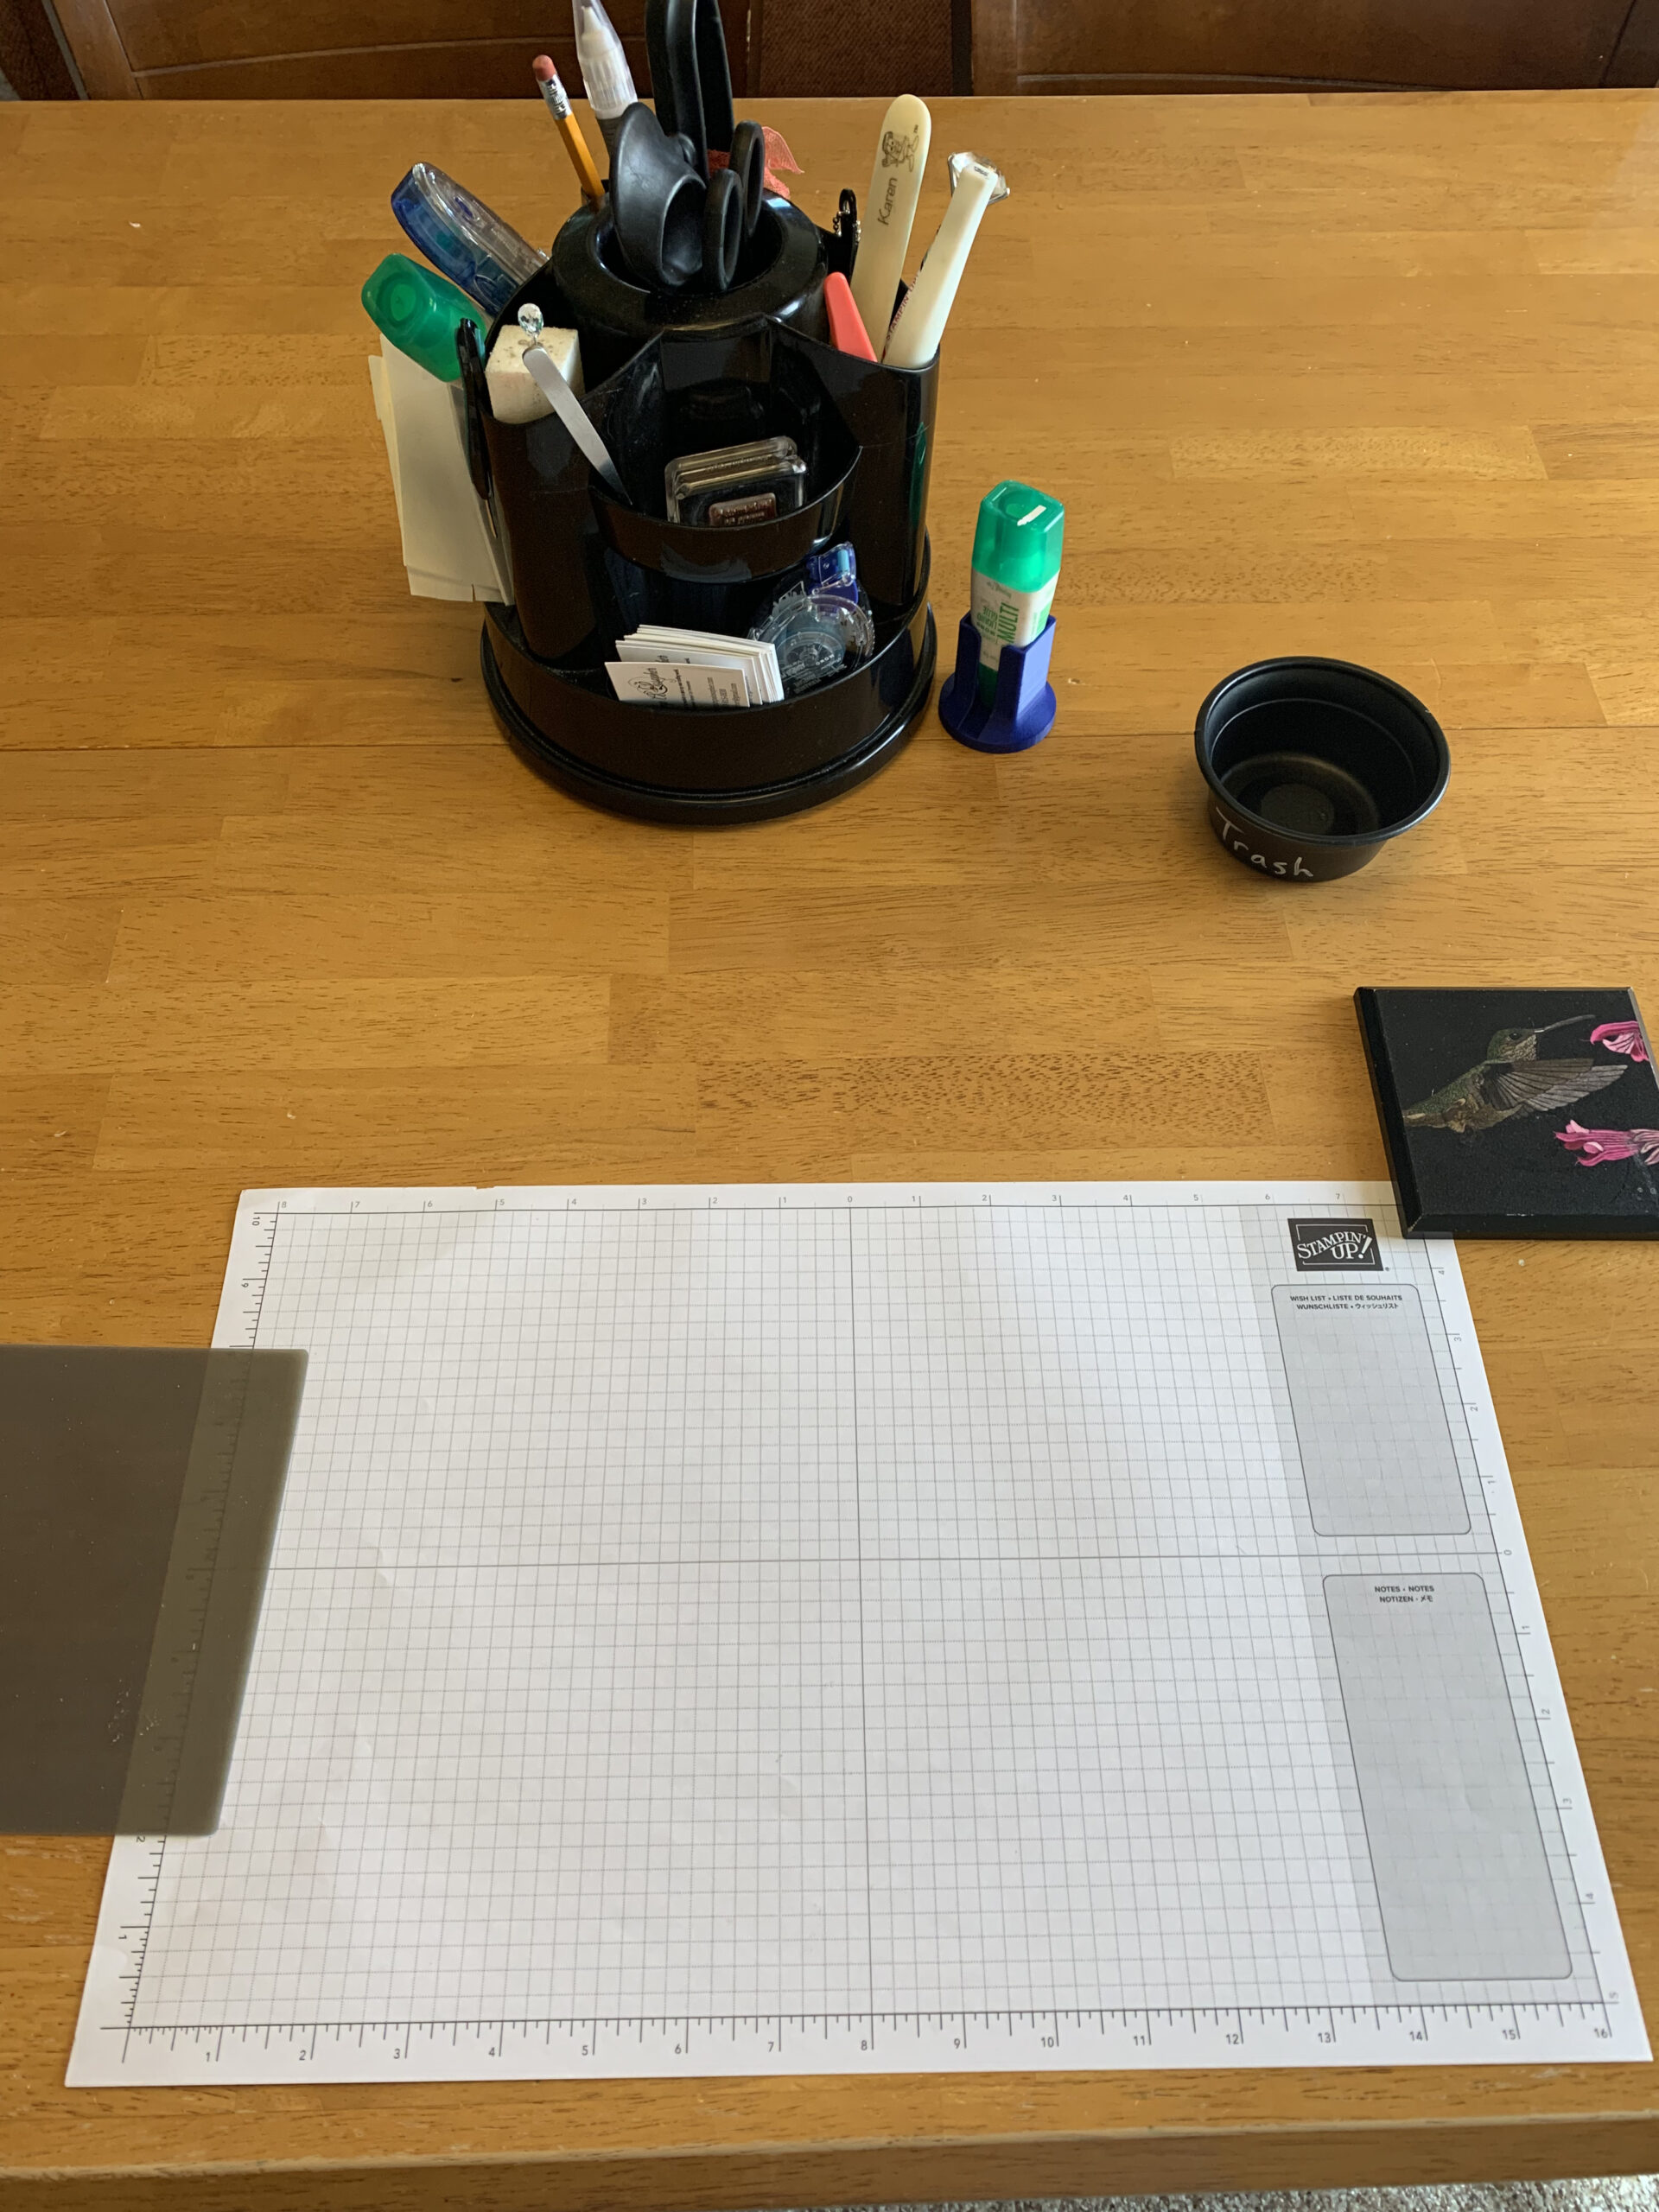
This is how my work table looked to start:
The card cuts here are those used by Meg Loven though all the colors are different:
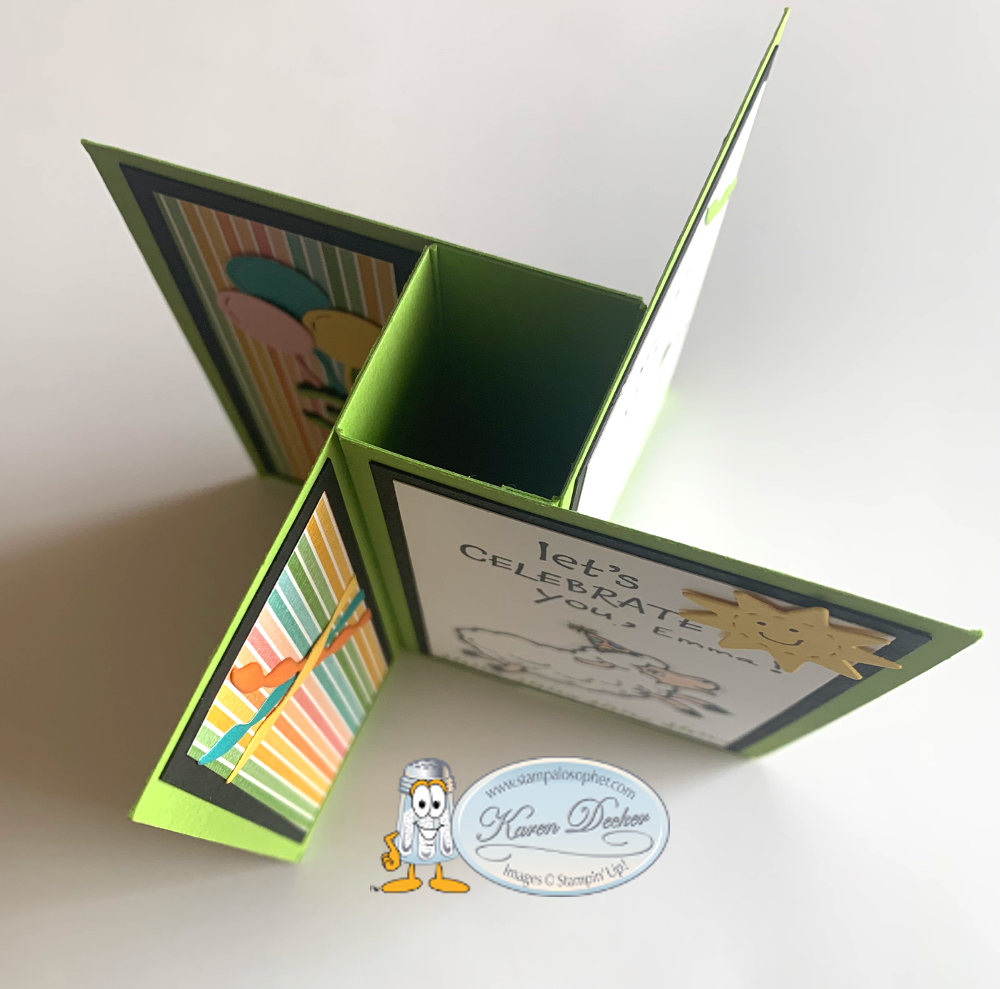
Recipe:
- Tower Base: Granny Apple Green, 4 1/4 X 4 1/4; Score at 1″, 2″, 3″ and 4″. This leaves a little 1/4″ tab on which you will put a piece of tear and tape, then lay it flat on your work surface and bring the opposite side over and press it down on the tab. This works so much better than trying to hold it in your hands and match the sides.
- Panels (X4): Granny Apple Green, 4 1/4 X 2 3/4
- Borders (X4): Basic Black, 4 X 2 1/2
- Borders (X4): Basic Black, 4 X 1 1/2
- Layers for stamping (X4): Basic White, 3 3/4 X 2 1/4
- Layers for pretty (X4): Pattern Party DSP, 3 3/4 X 1 1/4
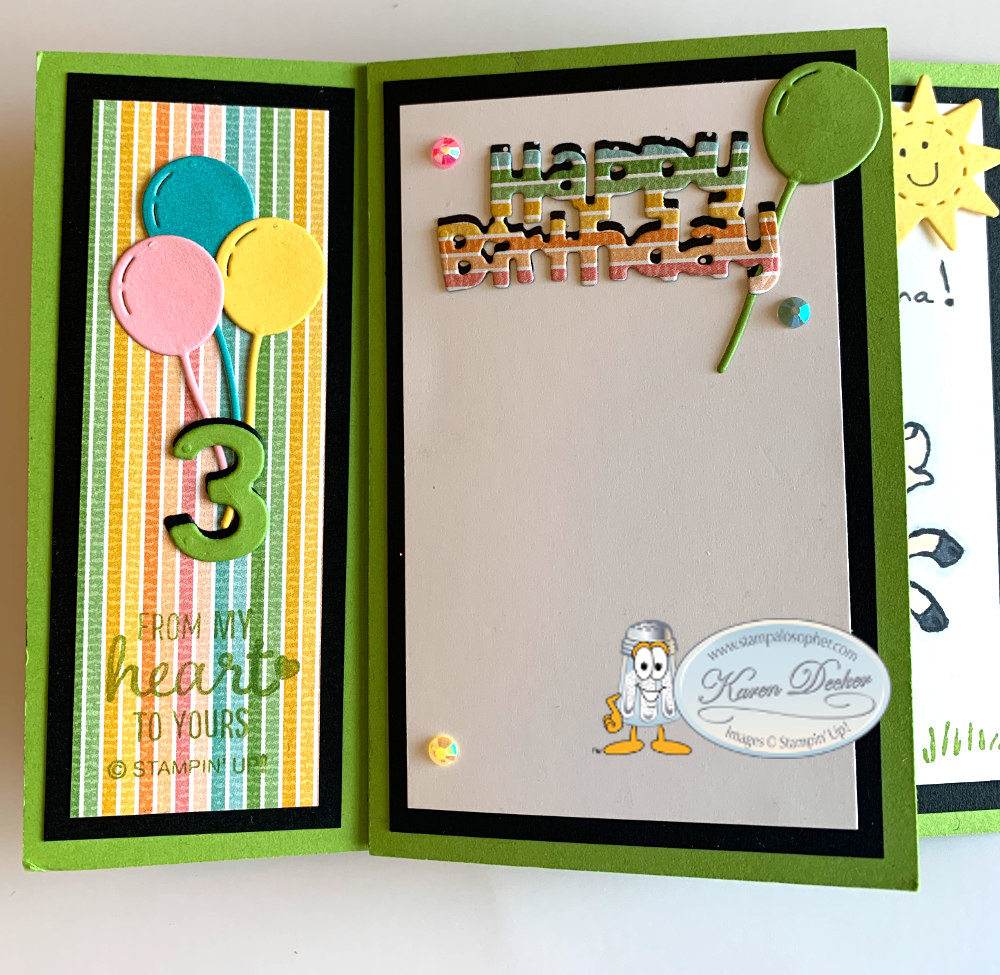
That’s really all there is for pieces and now comes the fun part of decorating! I used the Counting Sheep Stamp Set and Sheep Dies, (each are free during Sale A Bration (ends September 30) with a $50 order). Emma’s birthday is this month and she turns 3, so the three sheep were perfect! I used the streamers and bow tie from the Birthday Chick Dies and stamps from the Hey Birthday Chick stamp set.
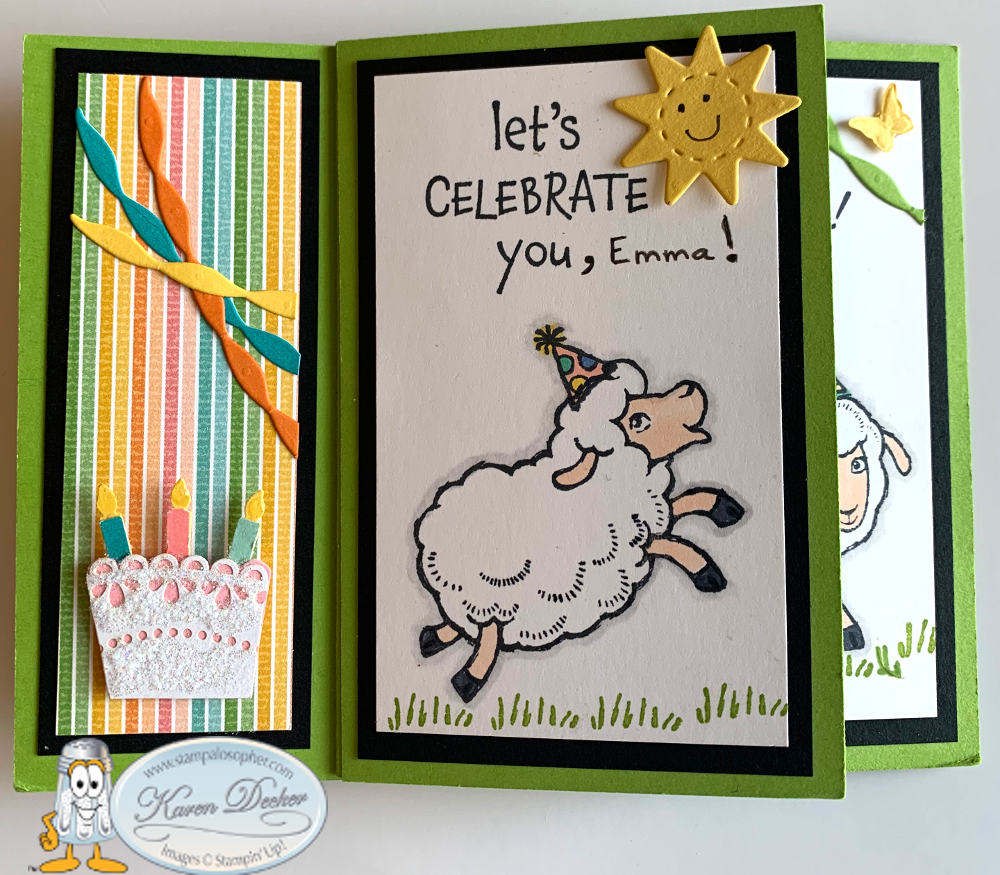
The sheep are all stamped directly on the Basic White, however, by outlining the image with a Light Smoky Slate Blend and then using the Color Lifter to soften the shadow you create a look of a whiter white. The candles are from a retired punch and the frosting is a piece of doily. The flames are made real with a drop of our Shimmery Crystal Effects.
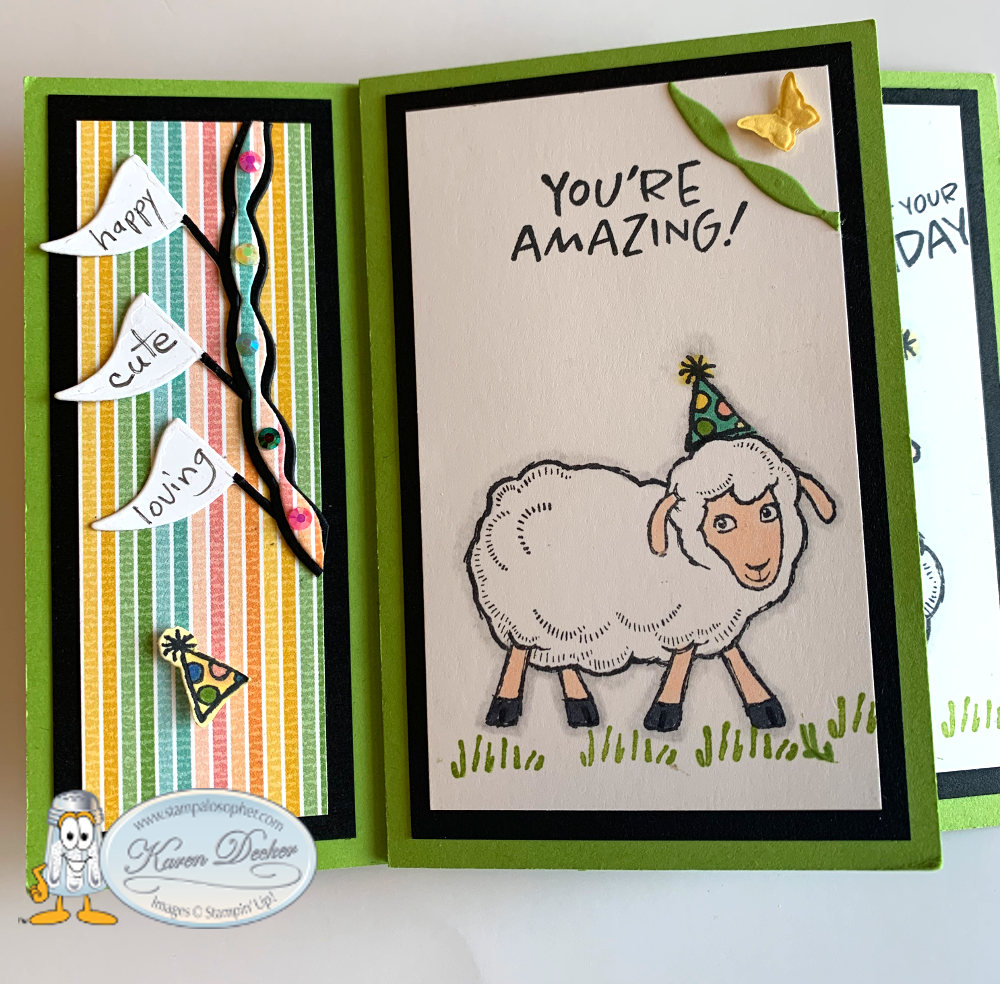
Even if you don’t need the sheep, the sheep dies have this cool pennant, the sun, the balloon, clouds and the birthday hat. The grass, the greeting and the birthday hat come from the Counting Sheep stamp set. The streamers are in the Birthday Chick die set.
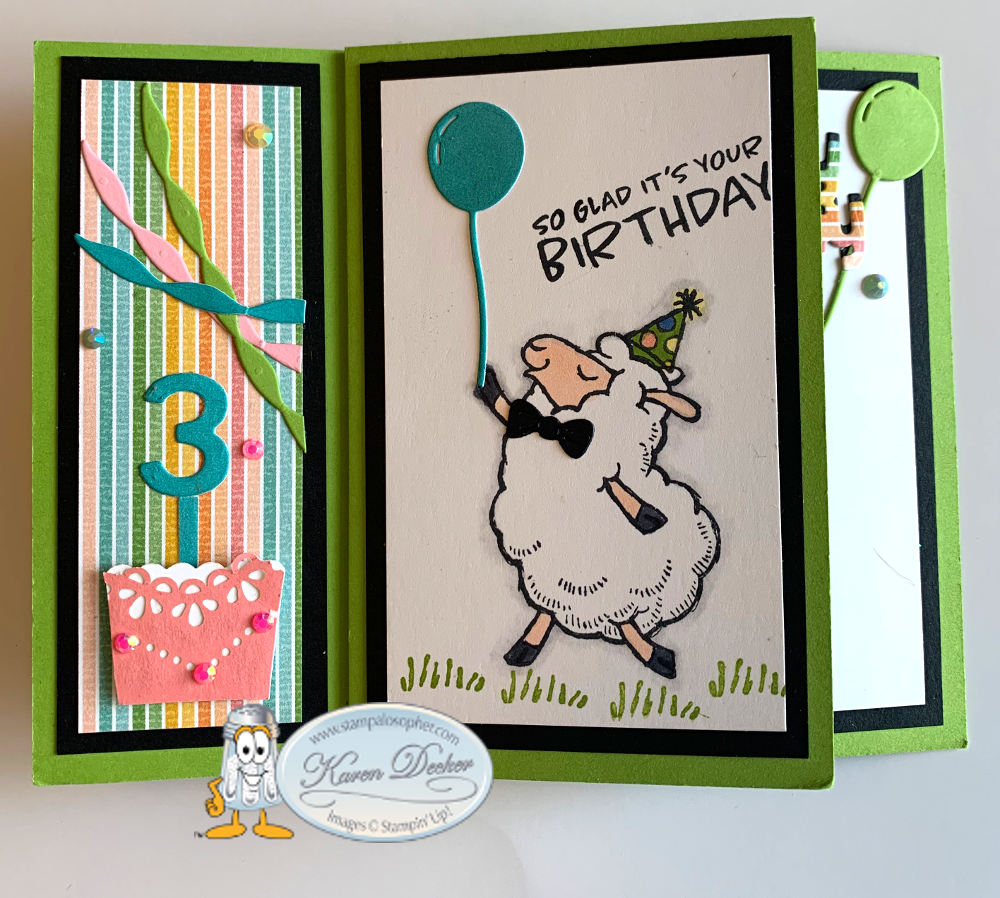
On this side I used a number 3 from the Playful Alphabet set, more Hey Chick streamers, a doily and a cute bow tie from the Birthday Chick Dies.

The Happy Birthday is another die in the Birthday Chick die set and the balloons are in the Sheep Dies. I cut the words once in basic black and once in the Pattern Party paper with horizontal stripes for a different look.
This is what the work table looks like at the end of making the card:
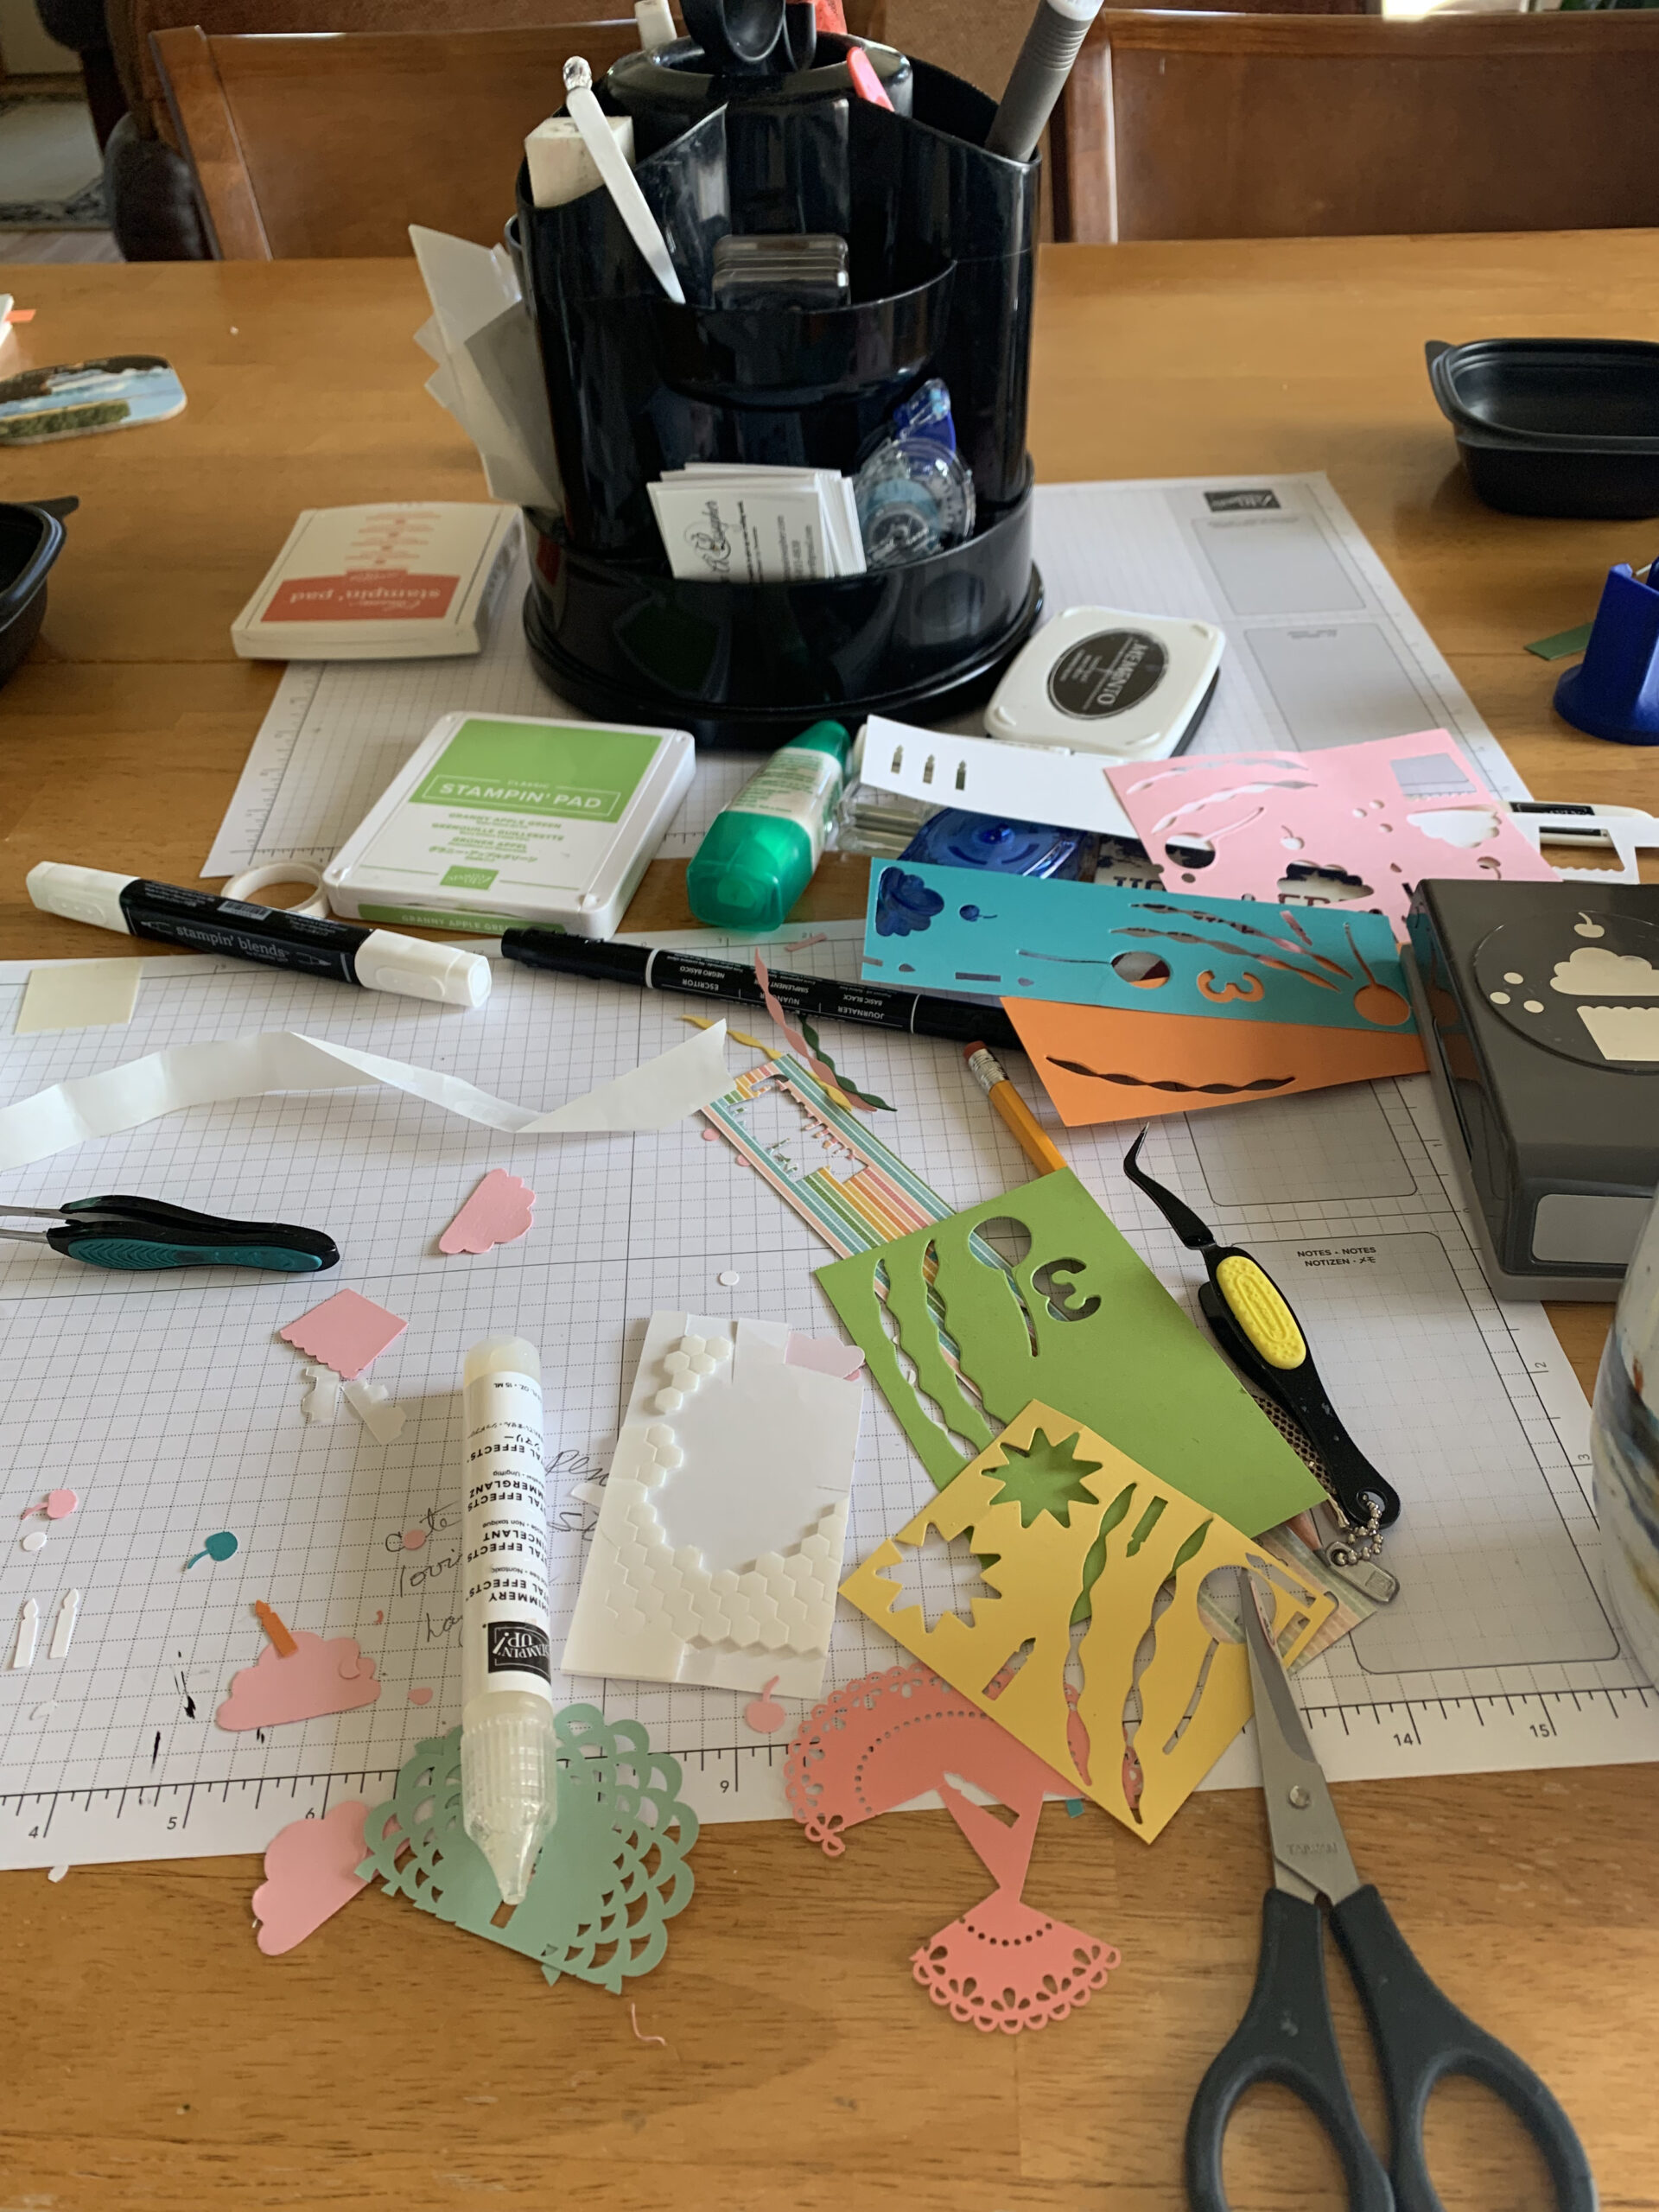
Ugh — I thought all the skeletons and halloween decorations were scary but this is worse.
A normal day in the life of a crafter!
Let’s look at the cards made by the others. Thank you Stampers for your amazing creations and letting me share them!
Sharon Fincham’s Christmas Card:
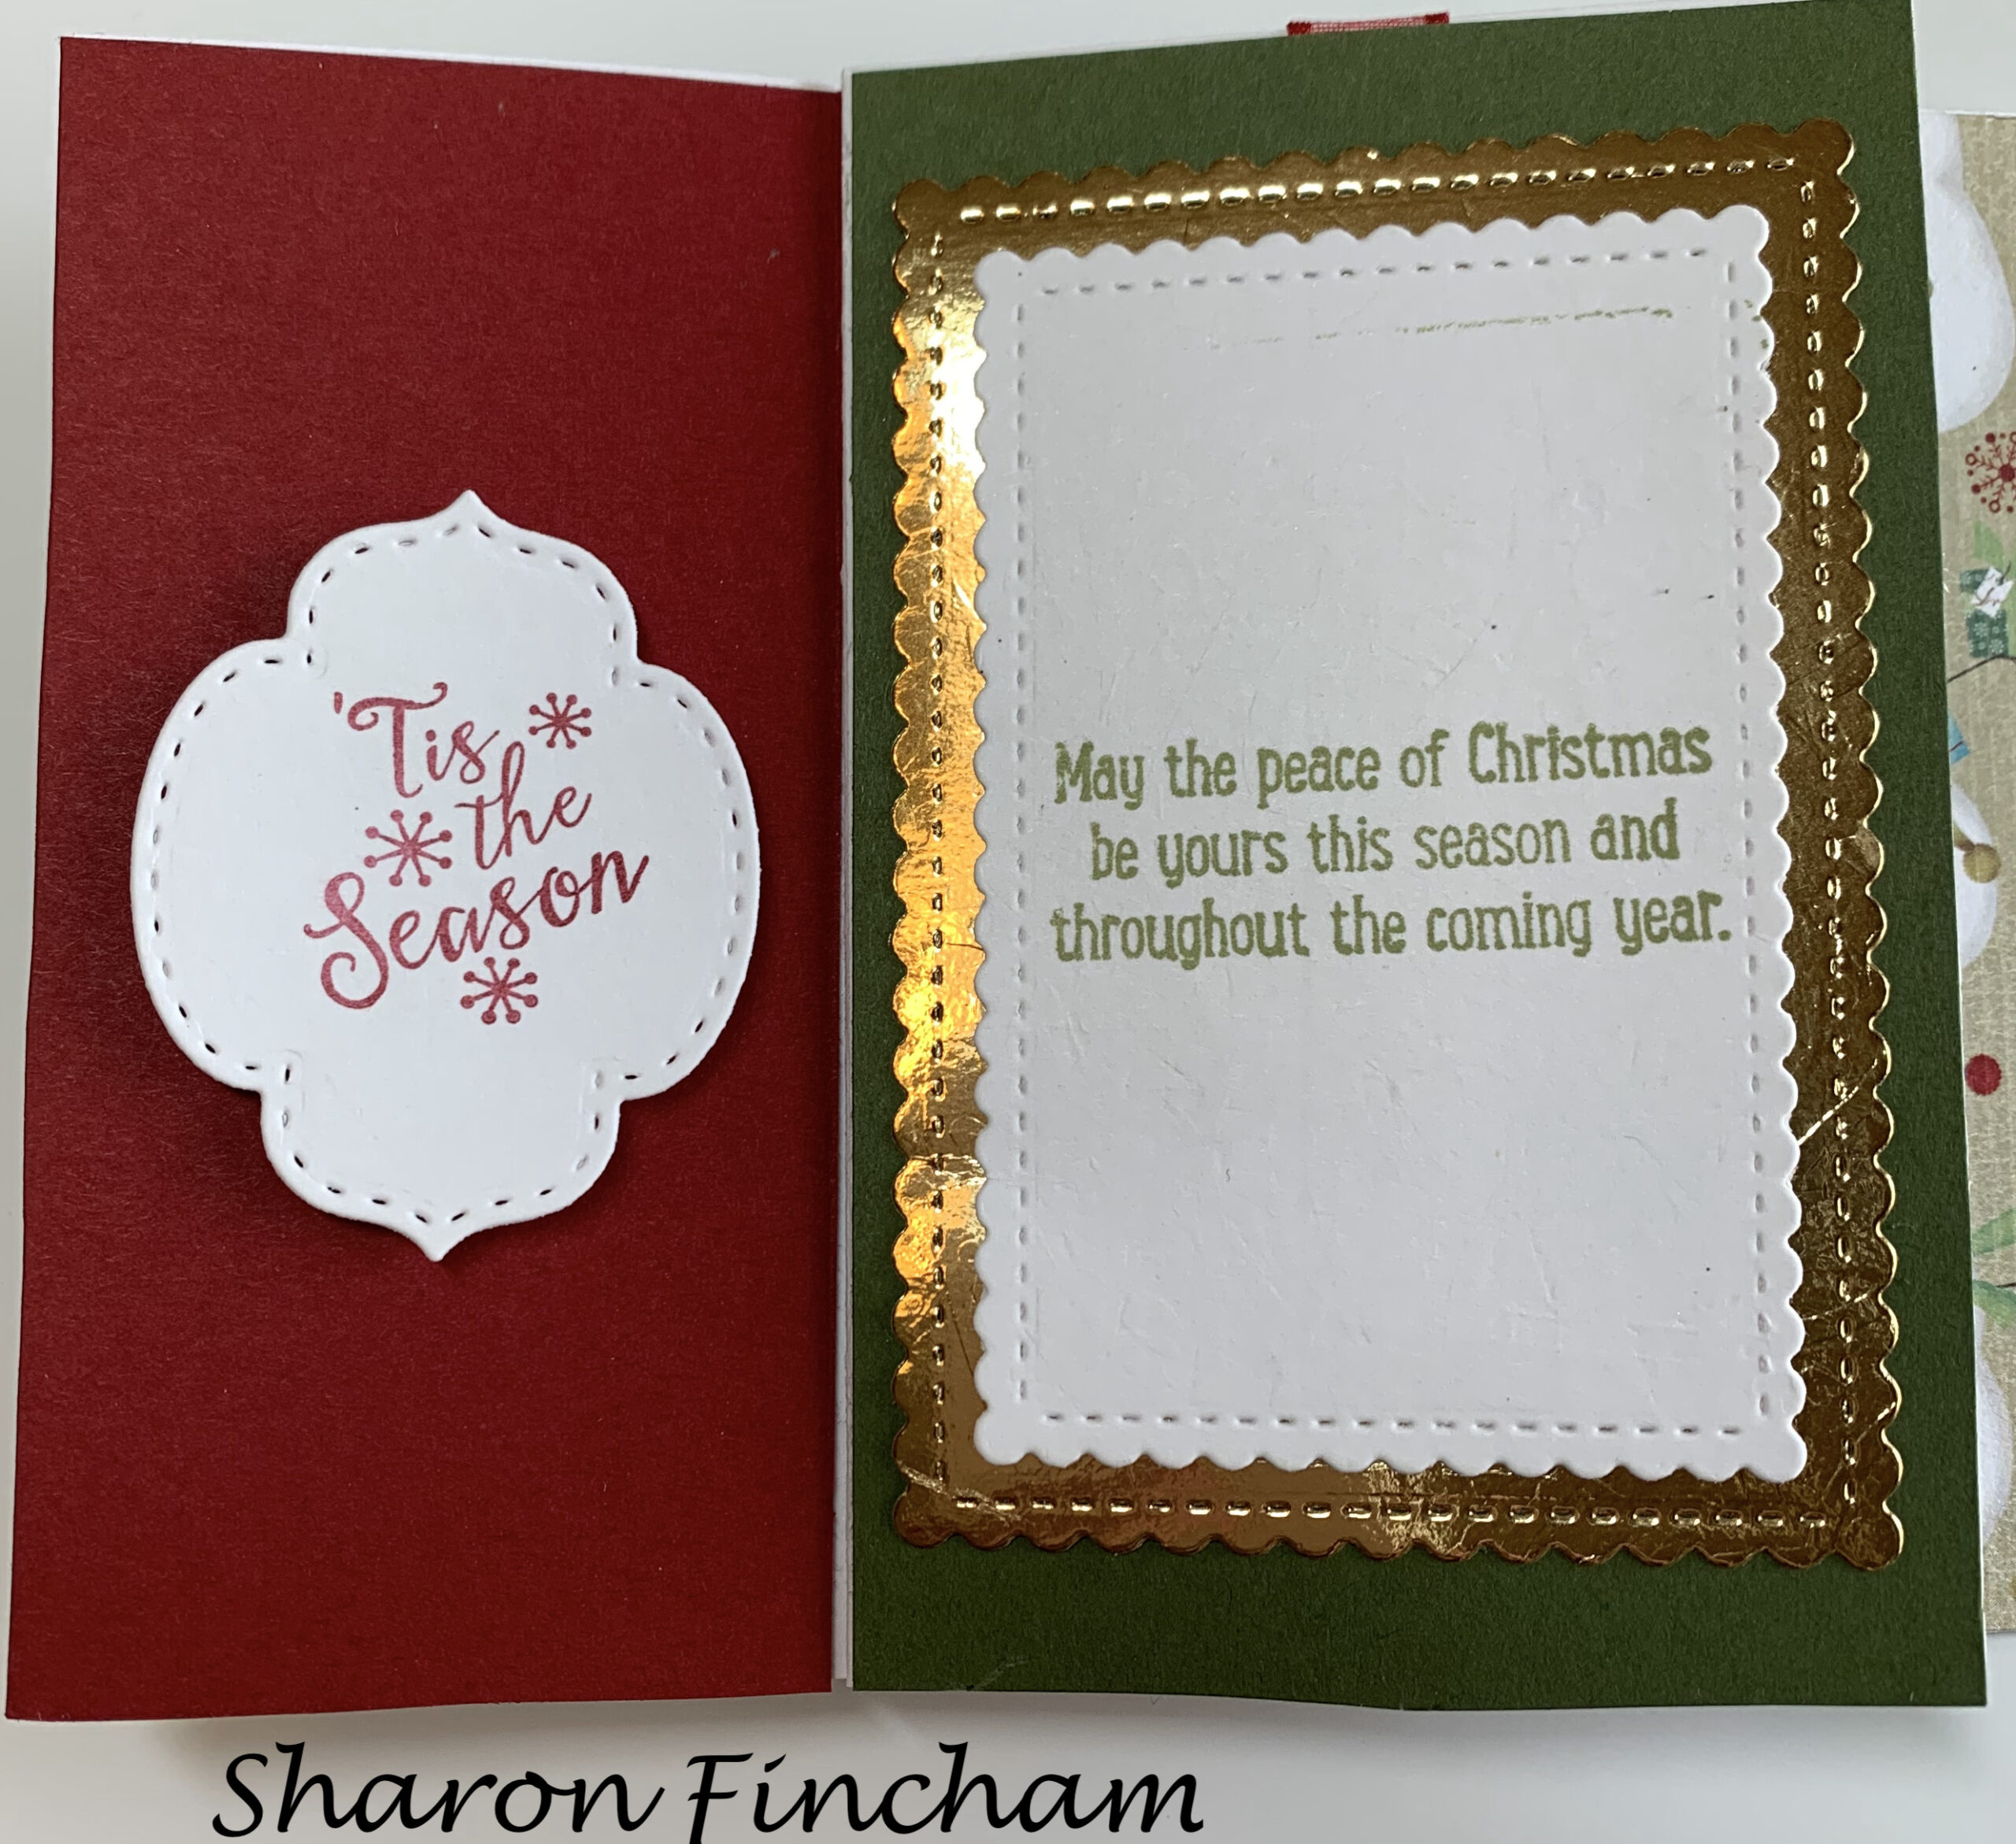
 .
.
Joy Meadows also made a Christmas card and used the Whimsy & Wonder Specialty Paper and the Christmas Trees Dies. The sparkly gold is the Sale A Bration Be Dazzling specialty paper:
 .
.  .
.
 .
. 
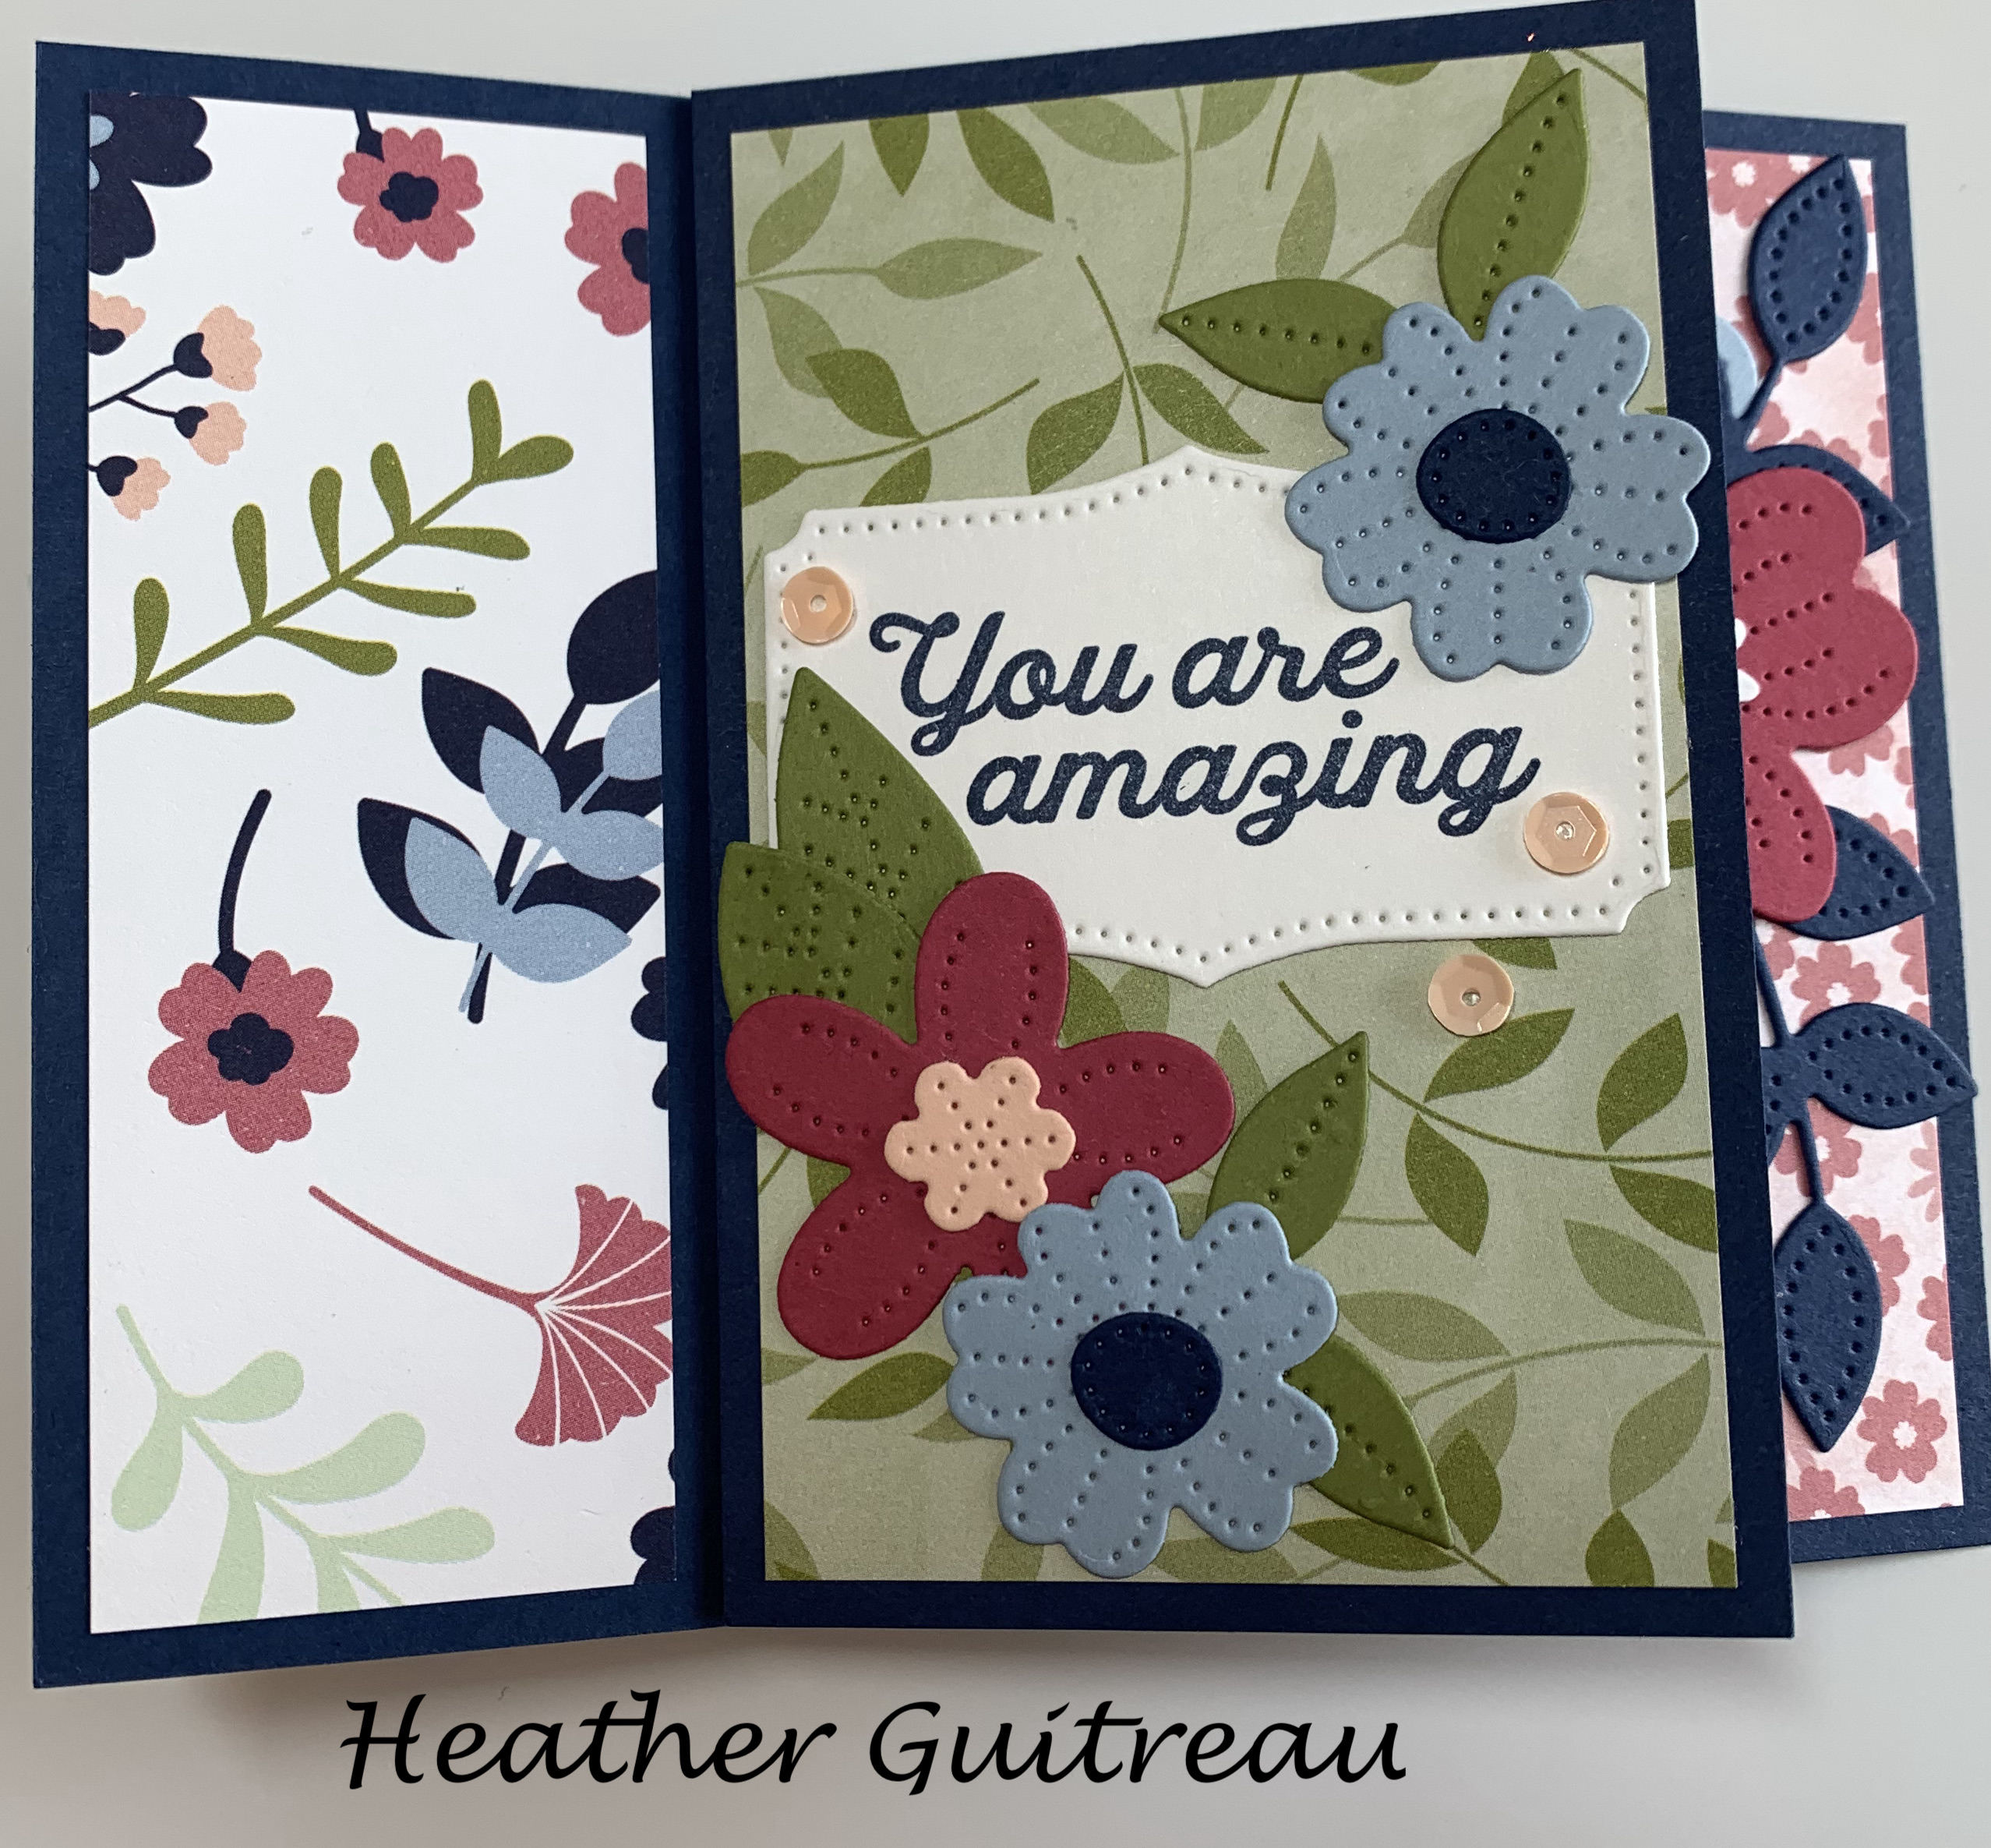
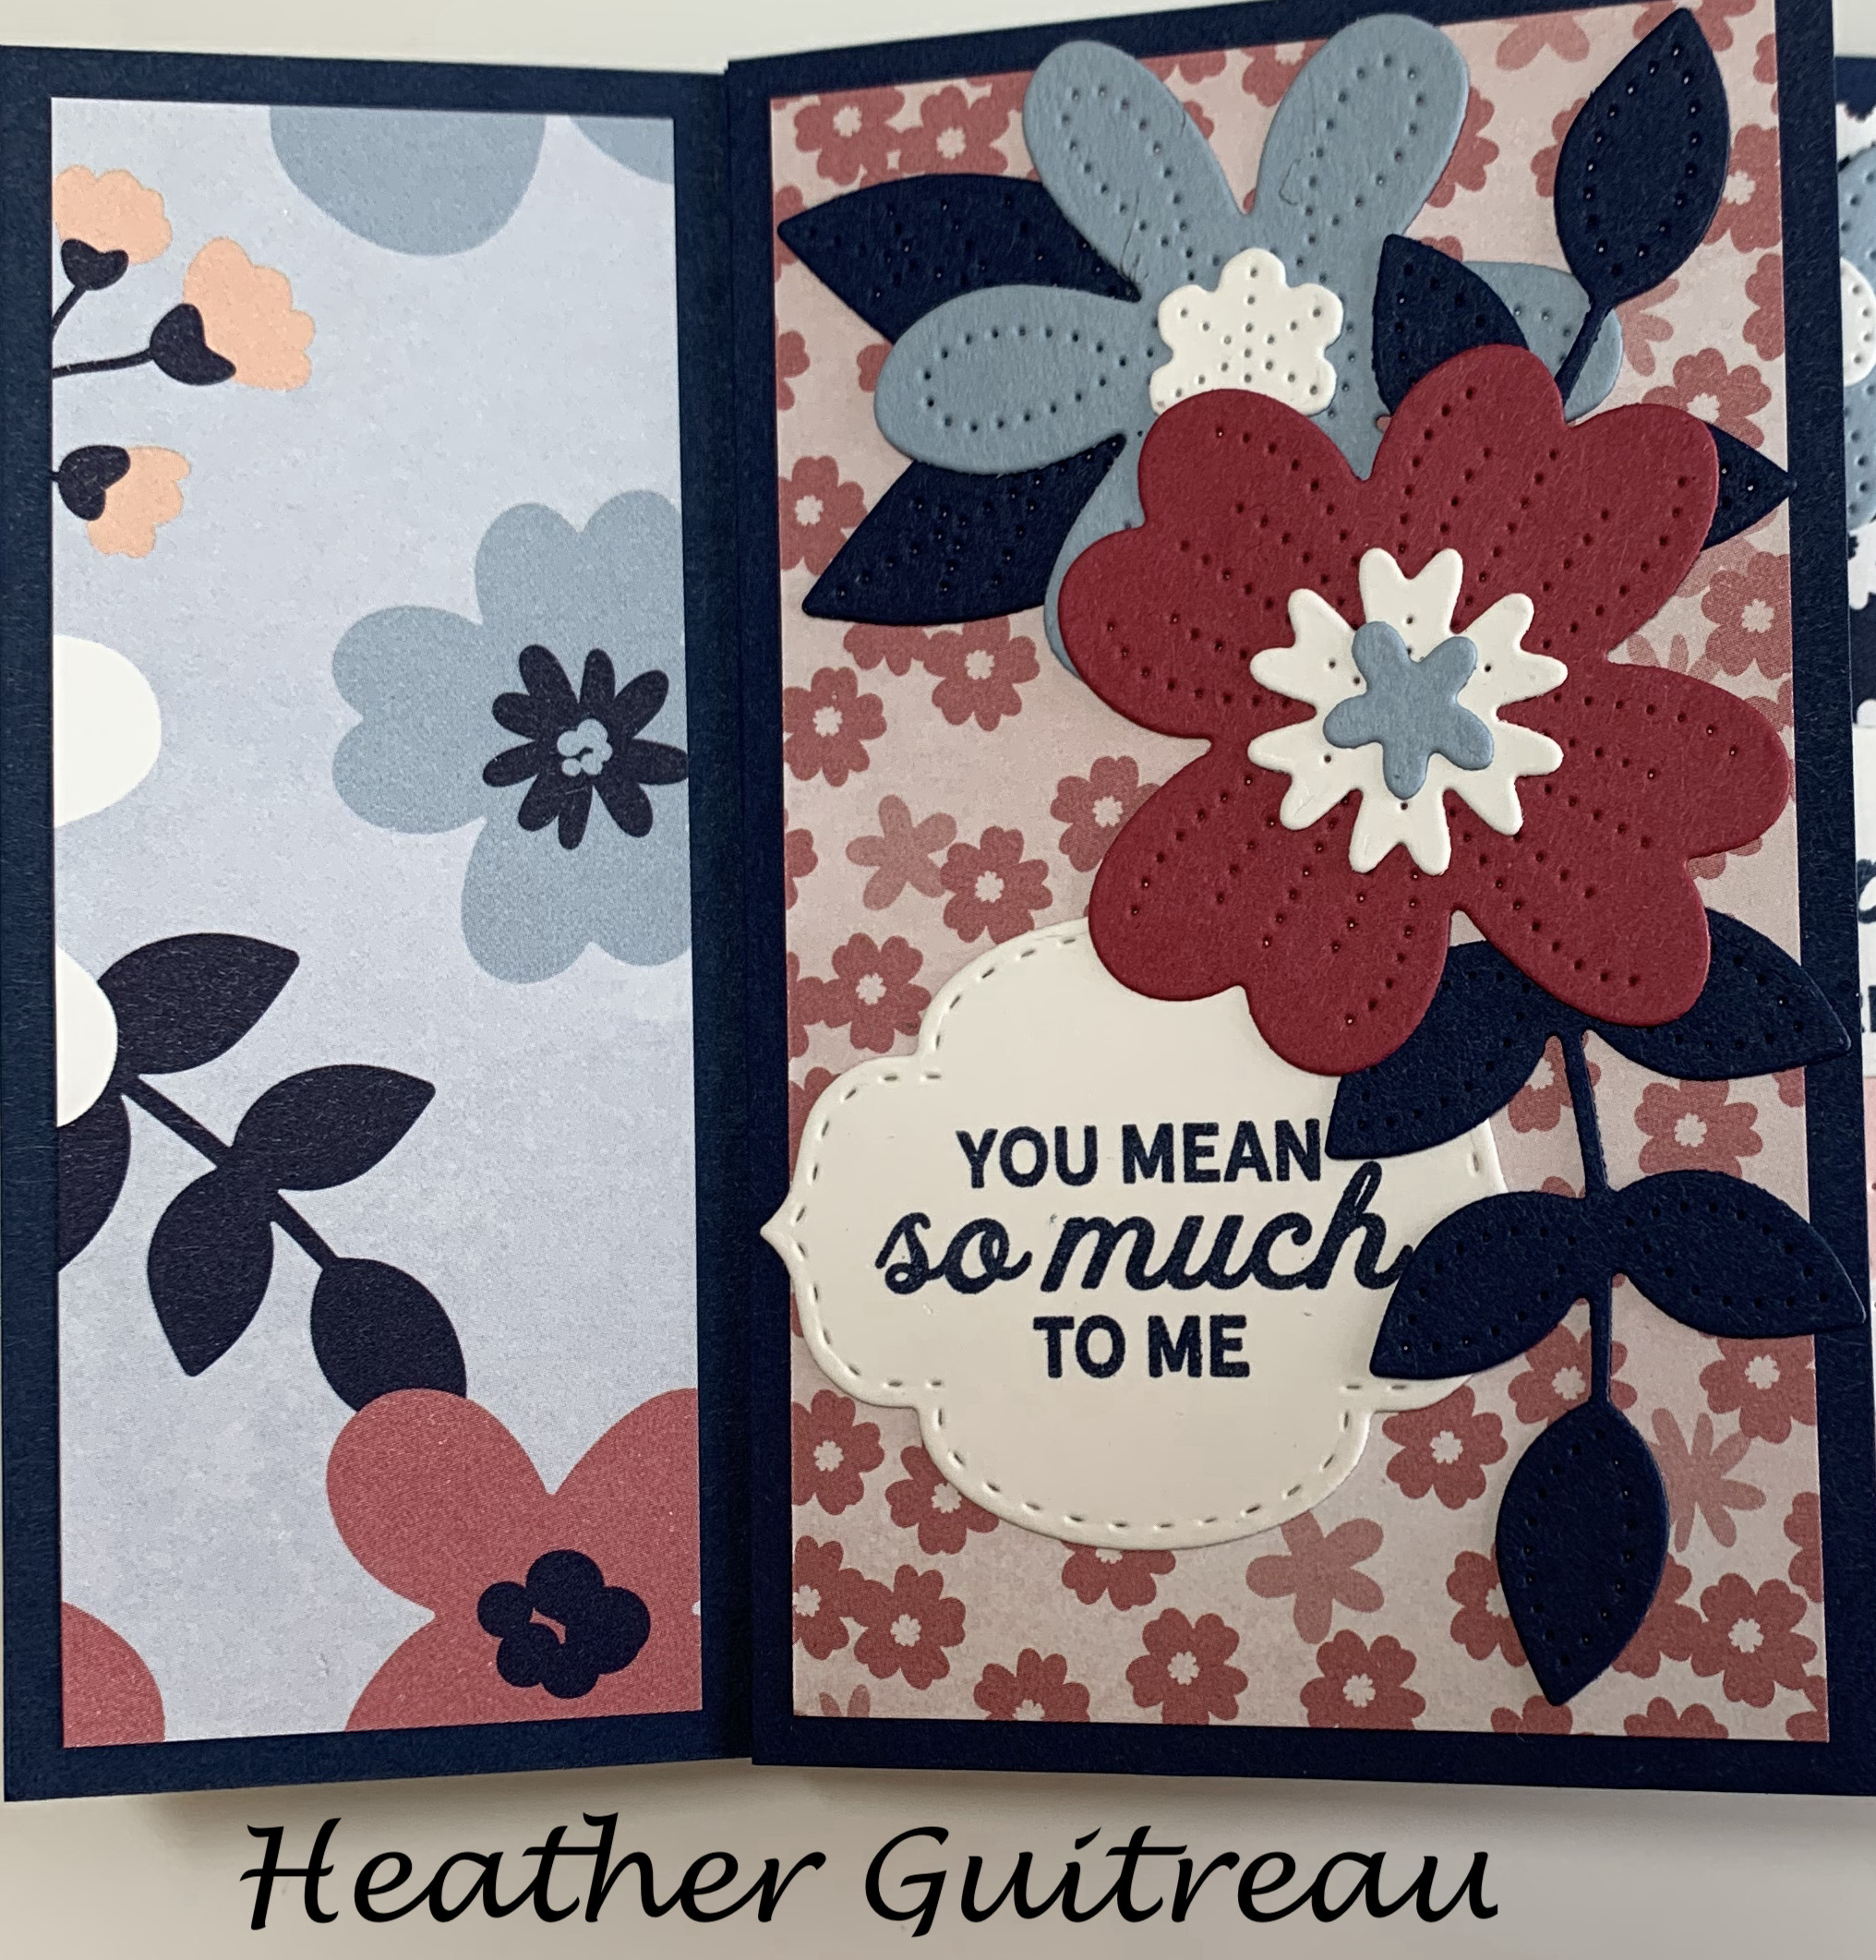
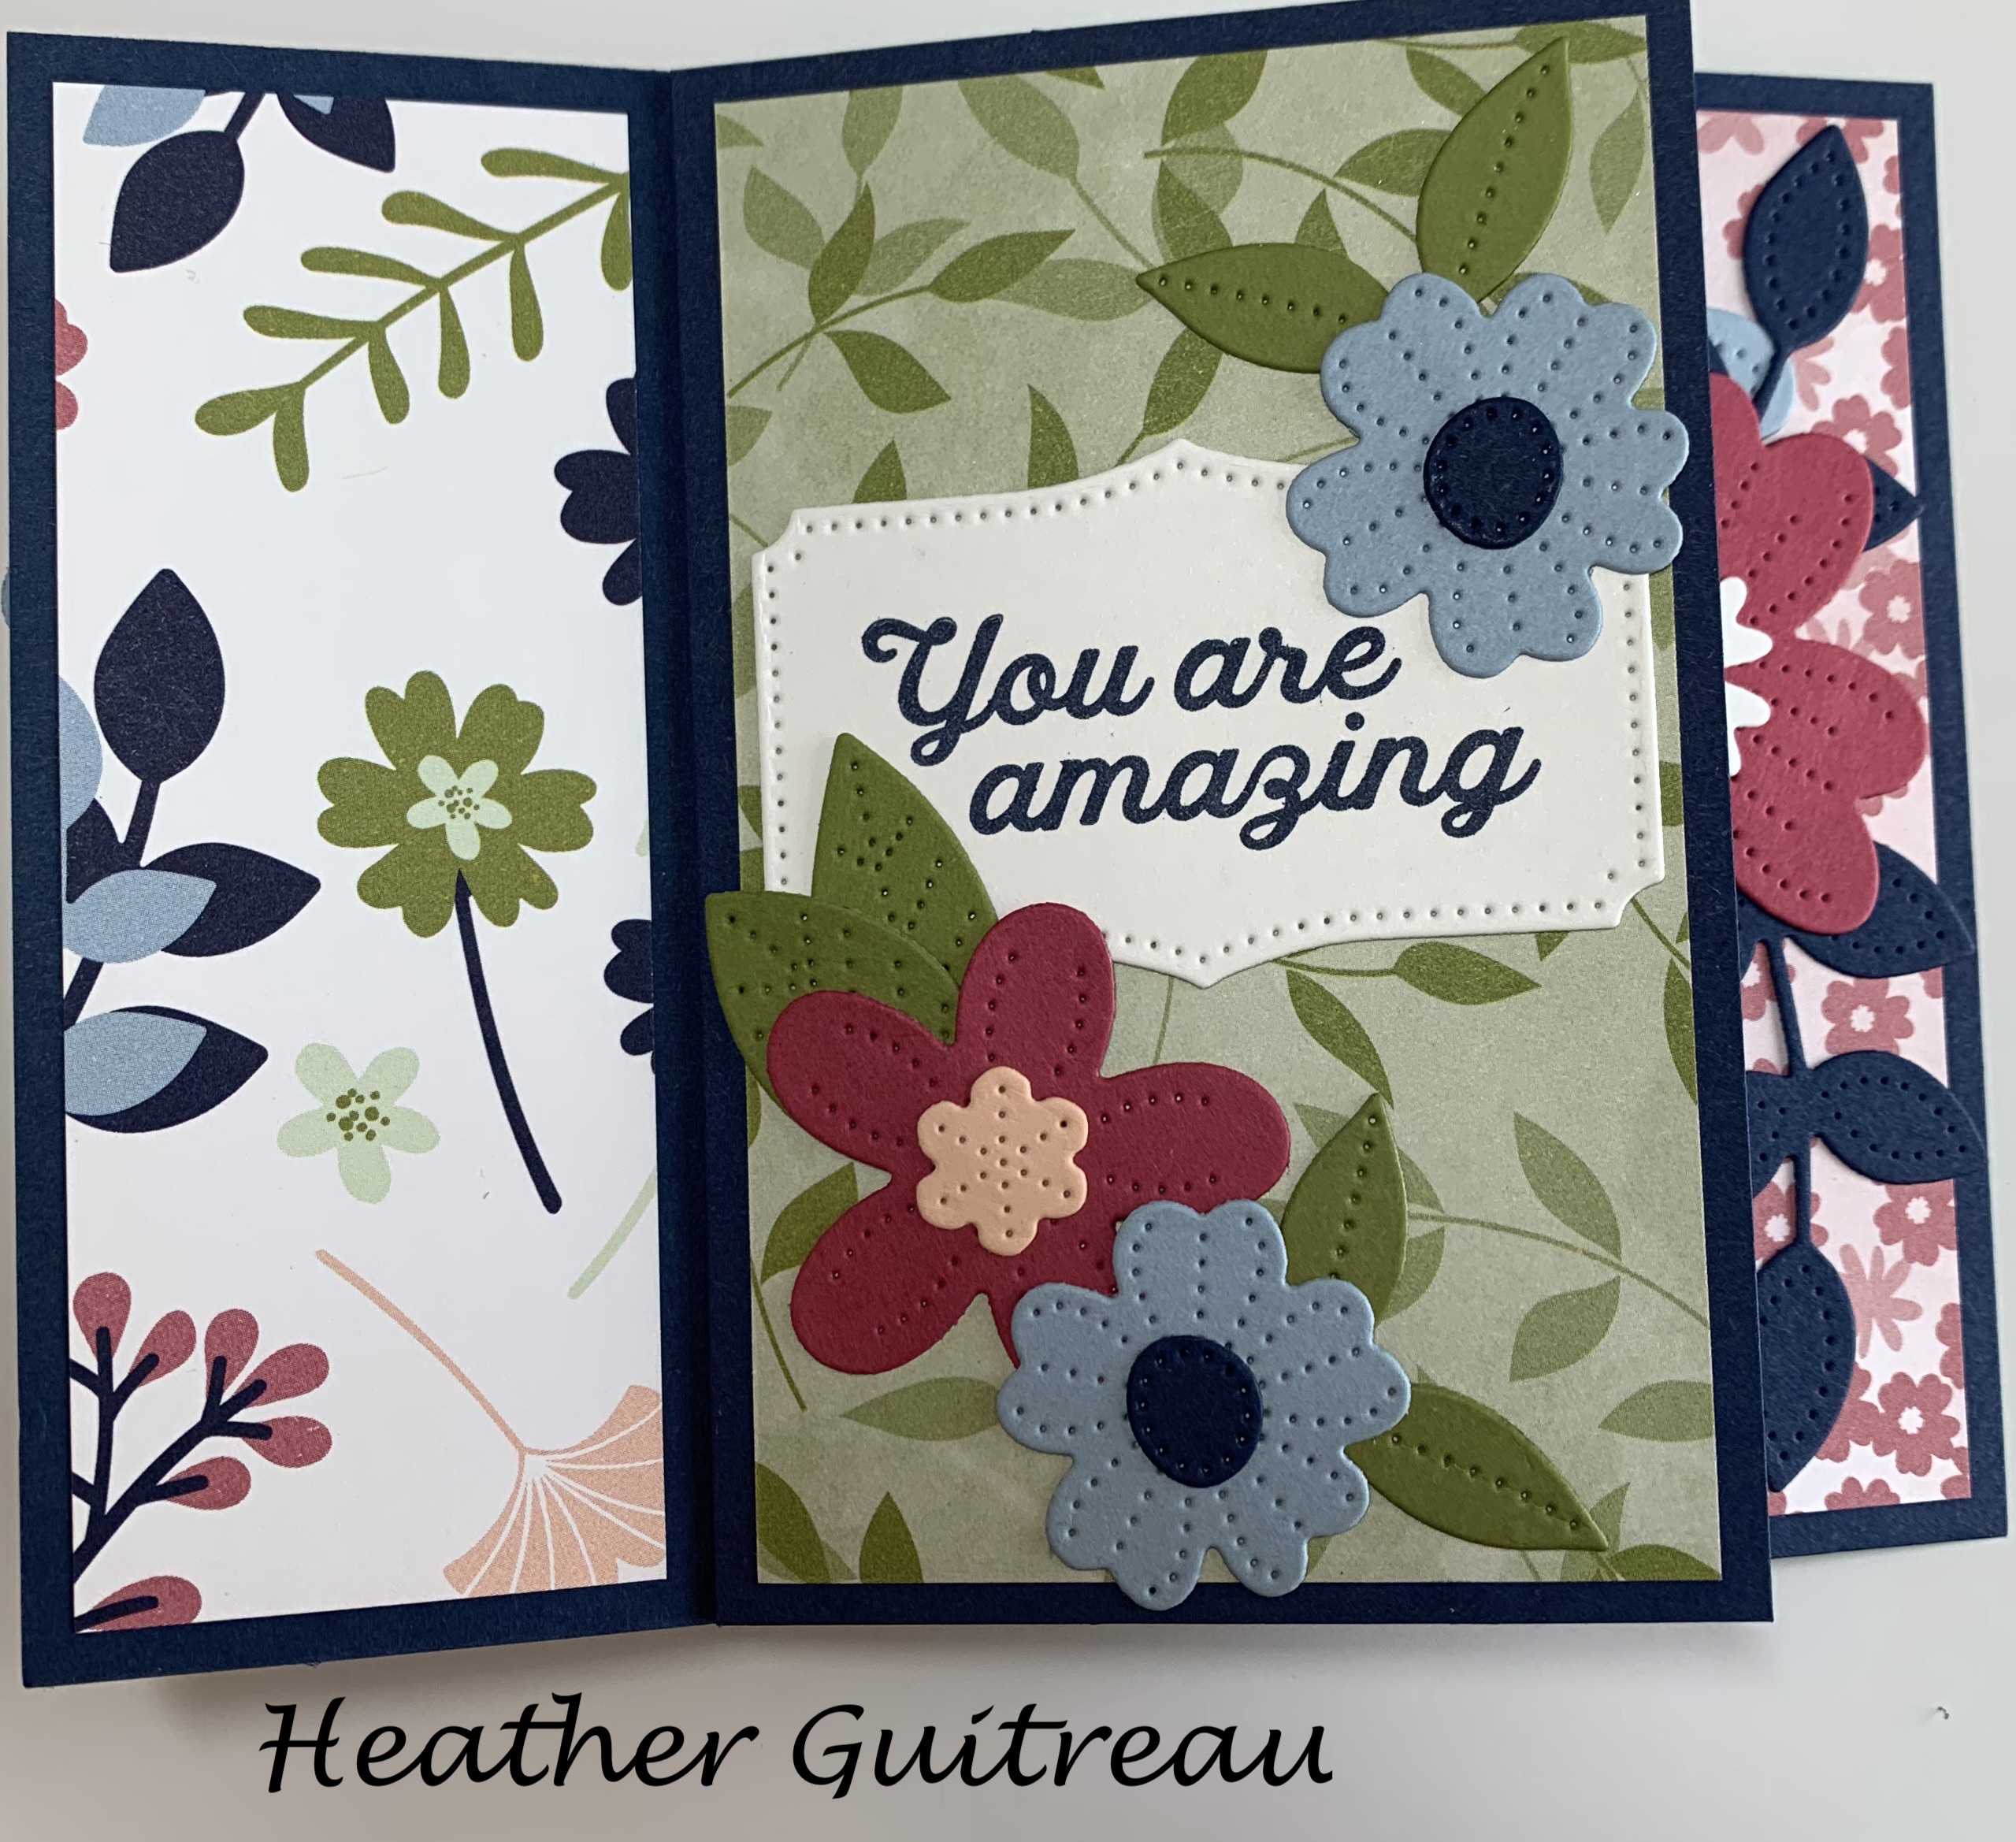
Heather Guitreau- for a friend using the Pierced Blooms Dies:
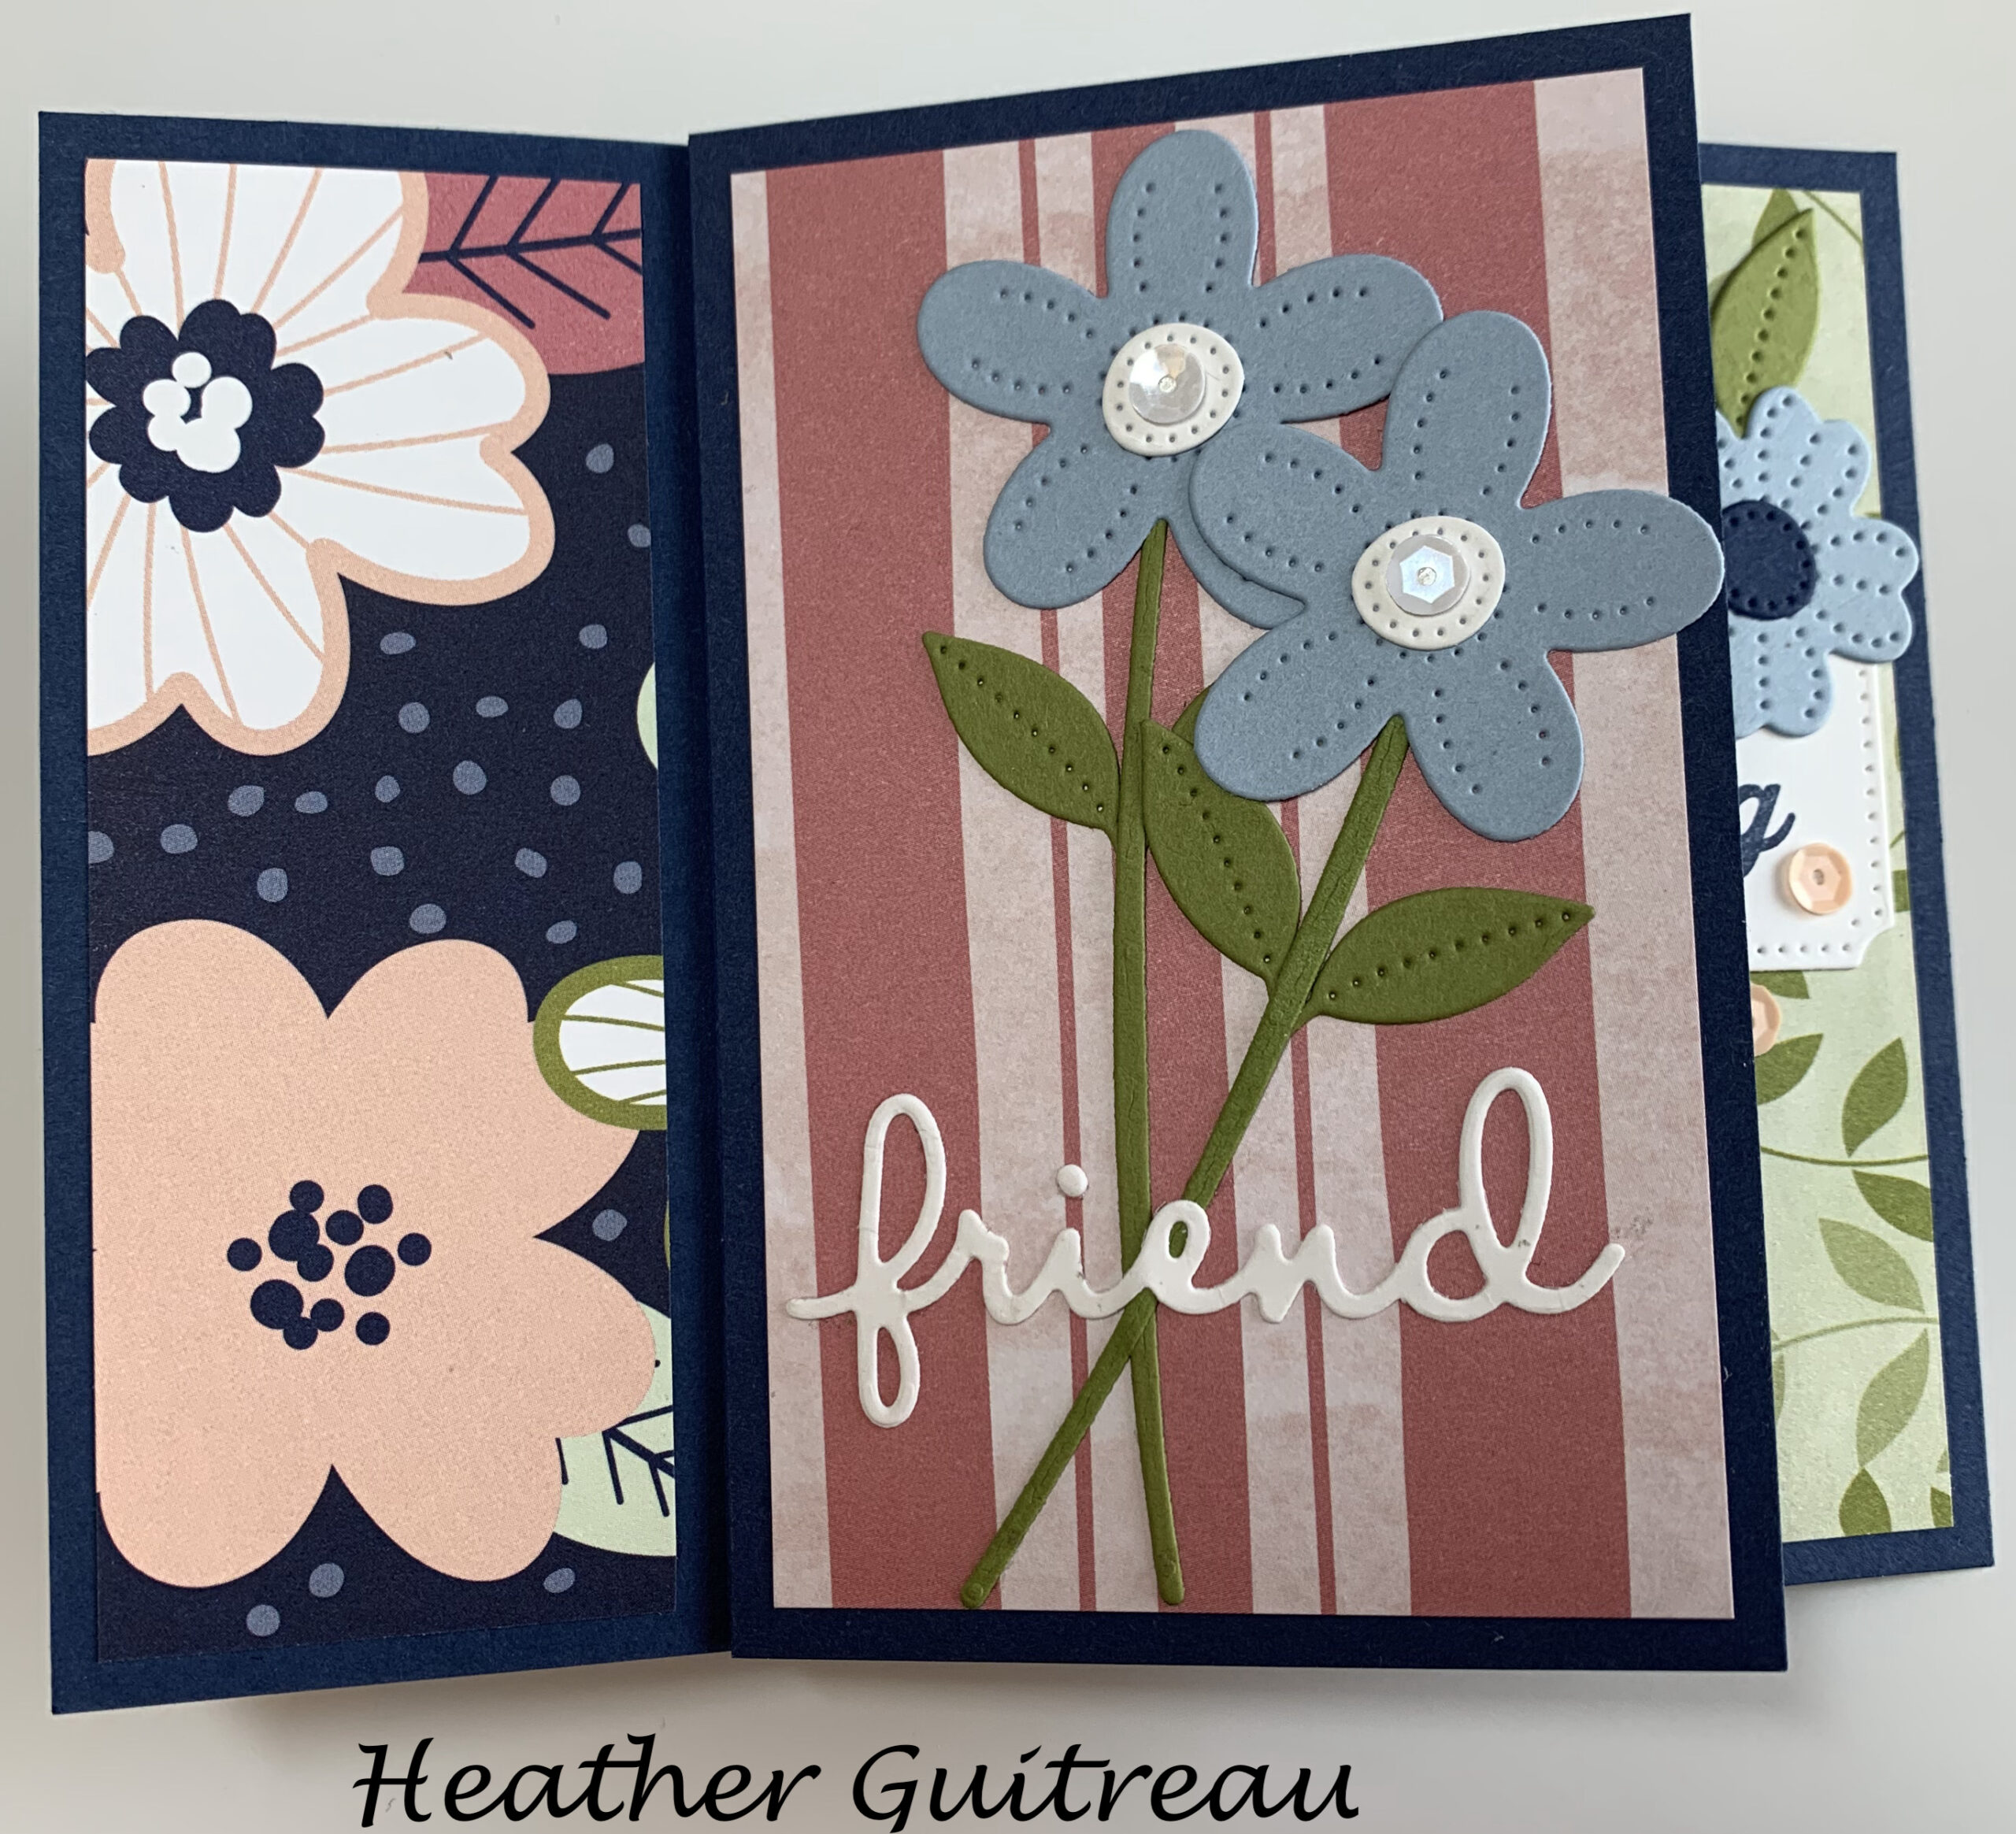 .
. 
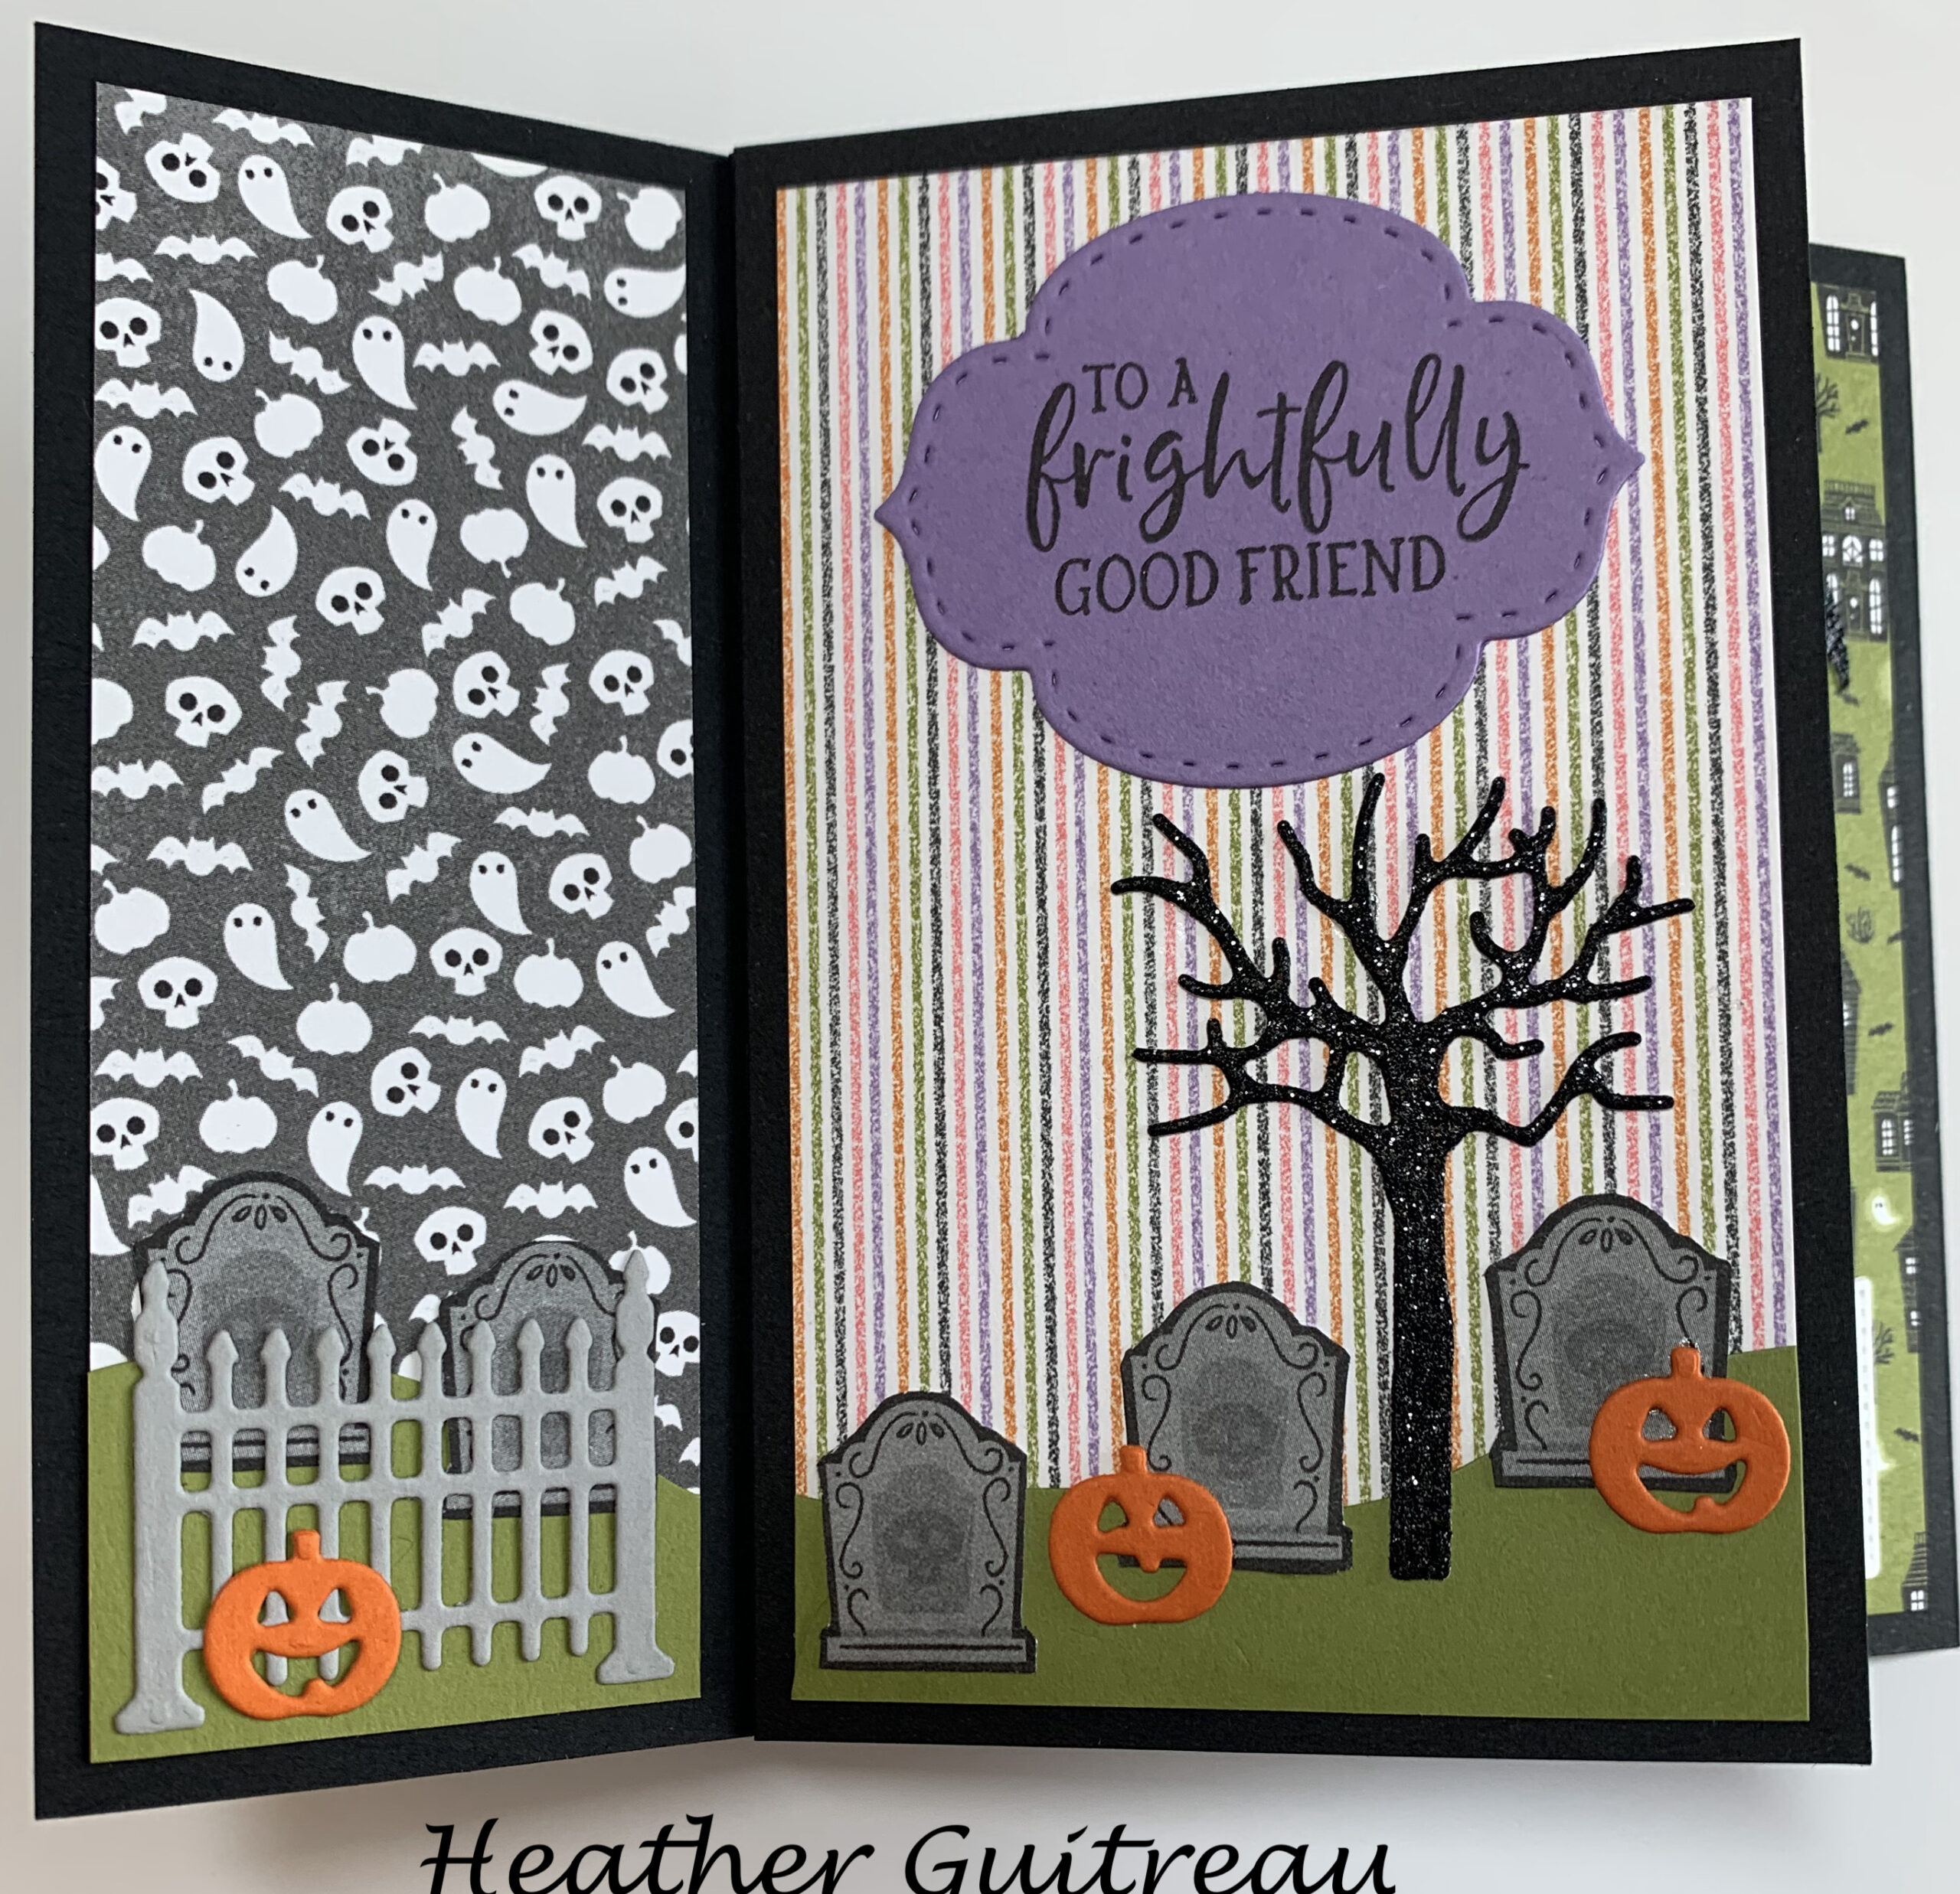
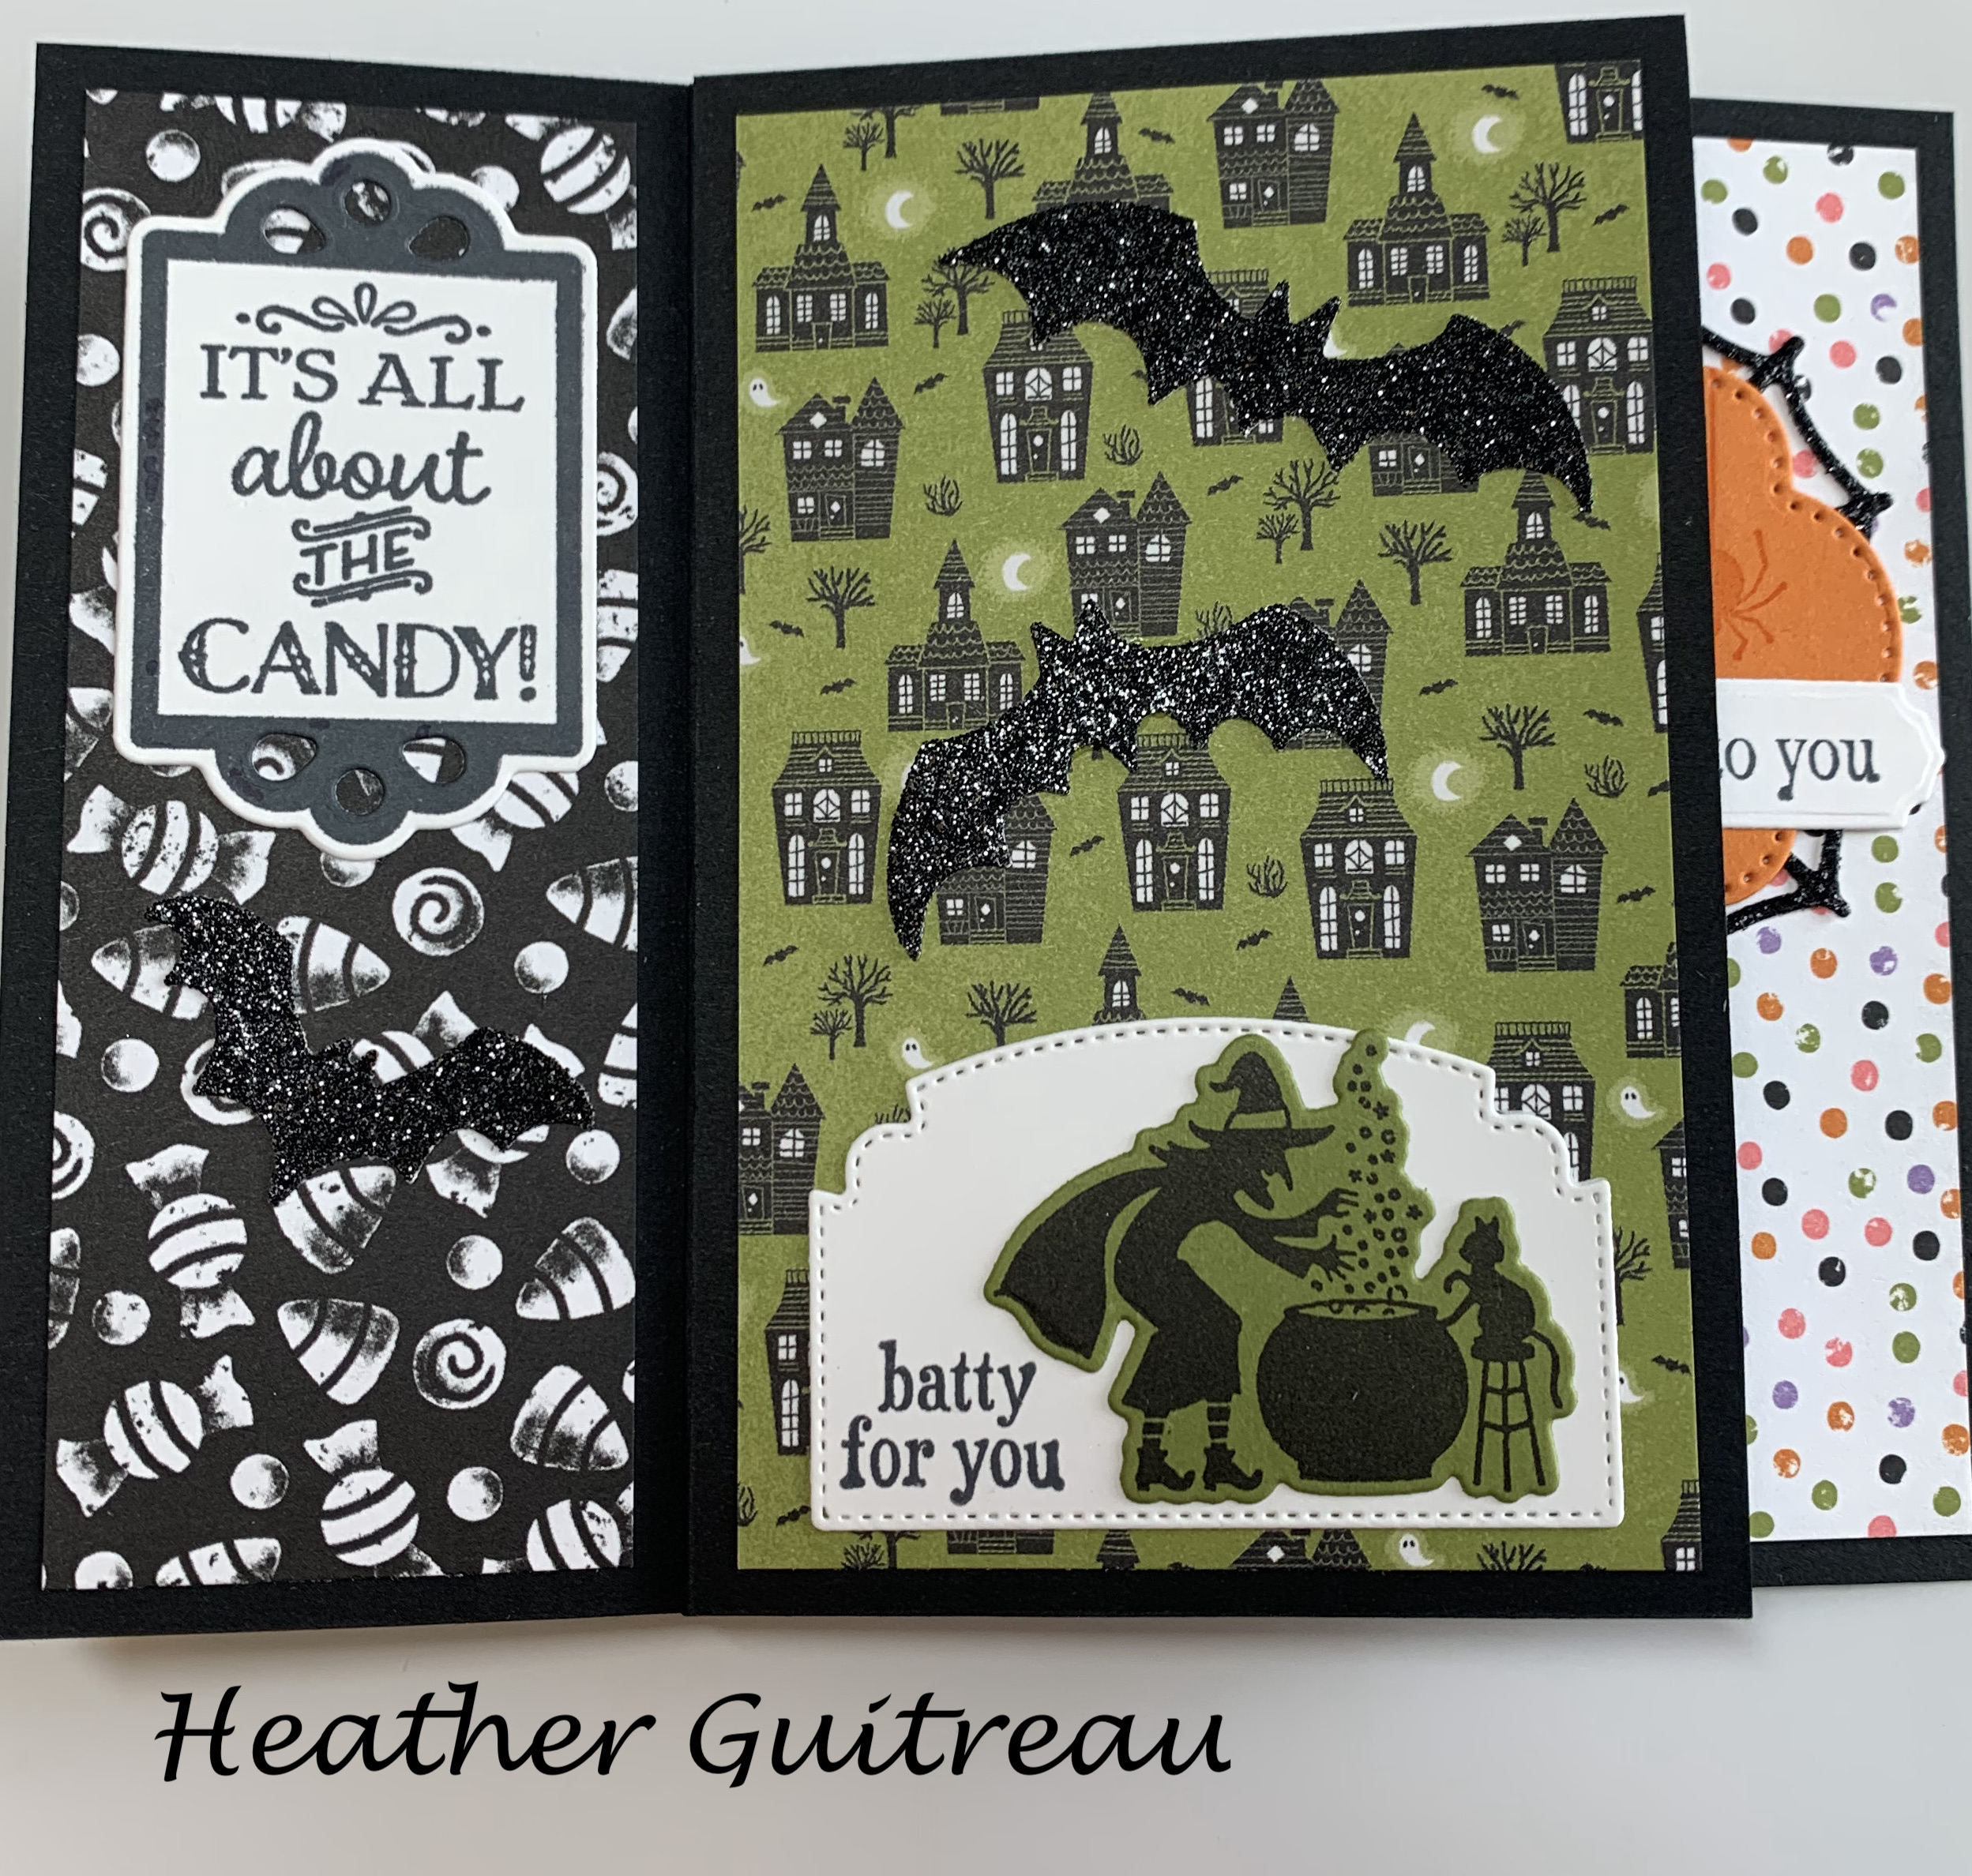
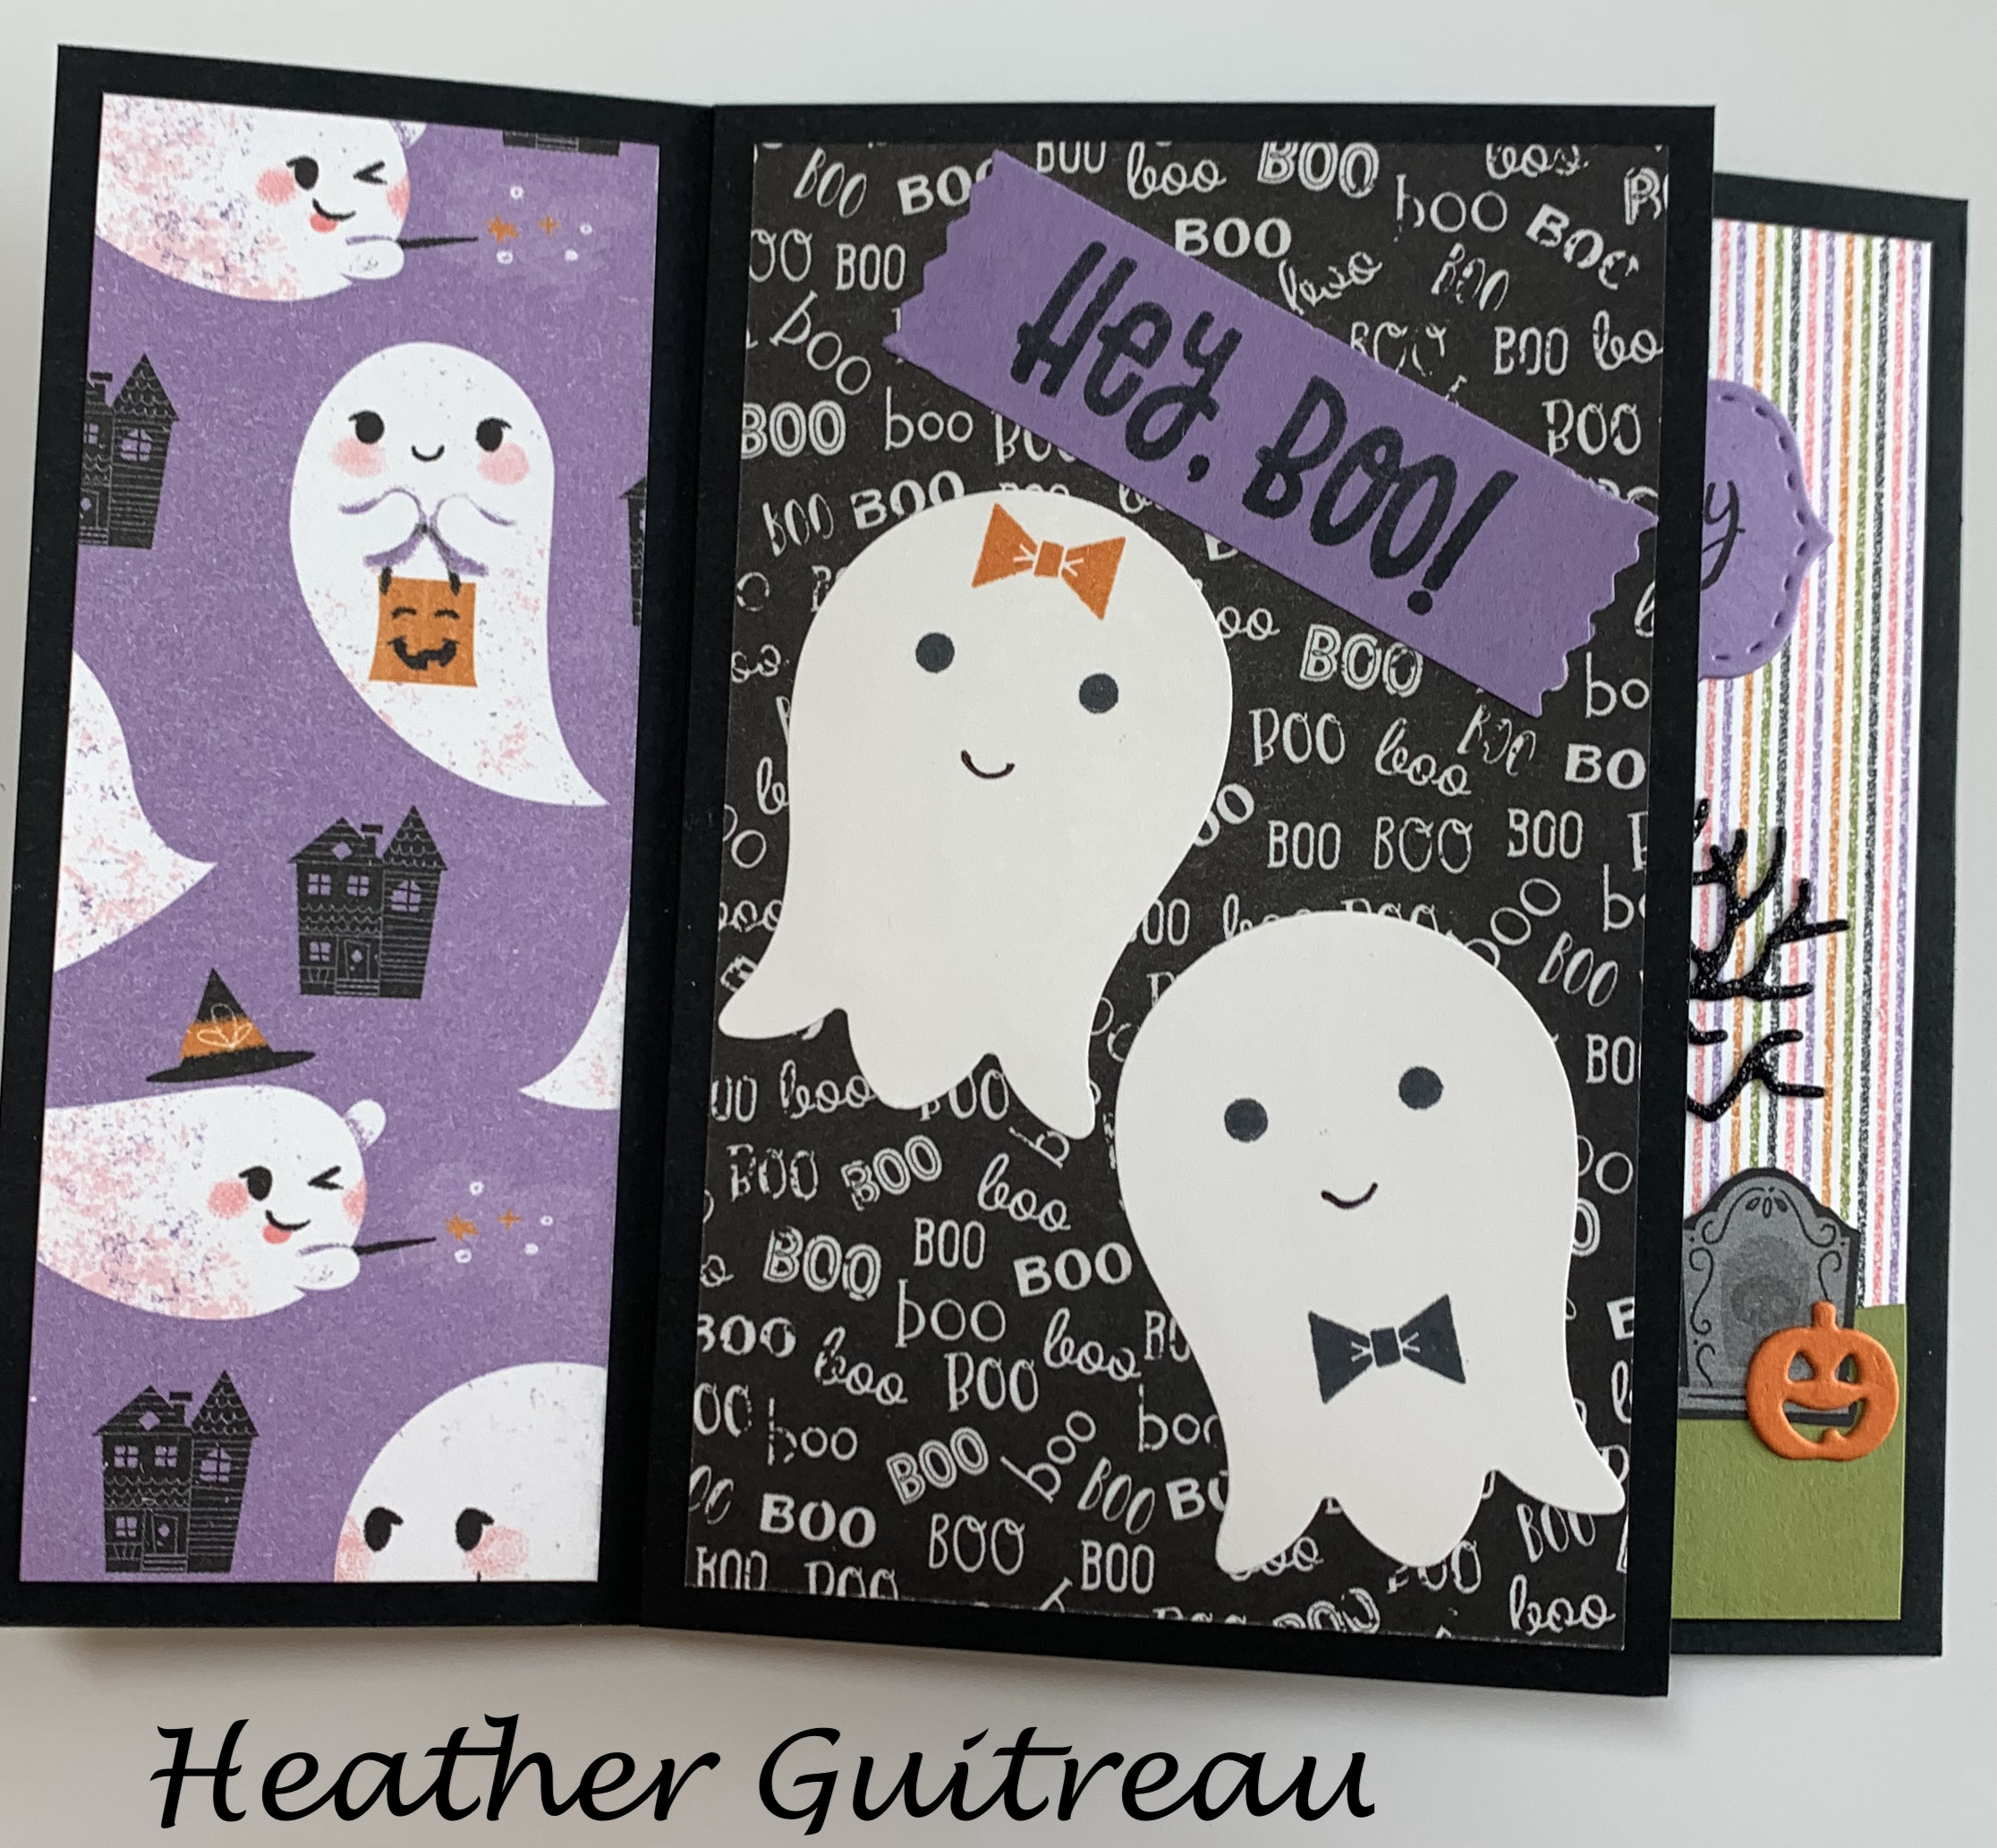
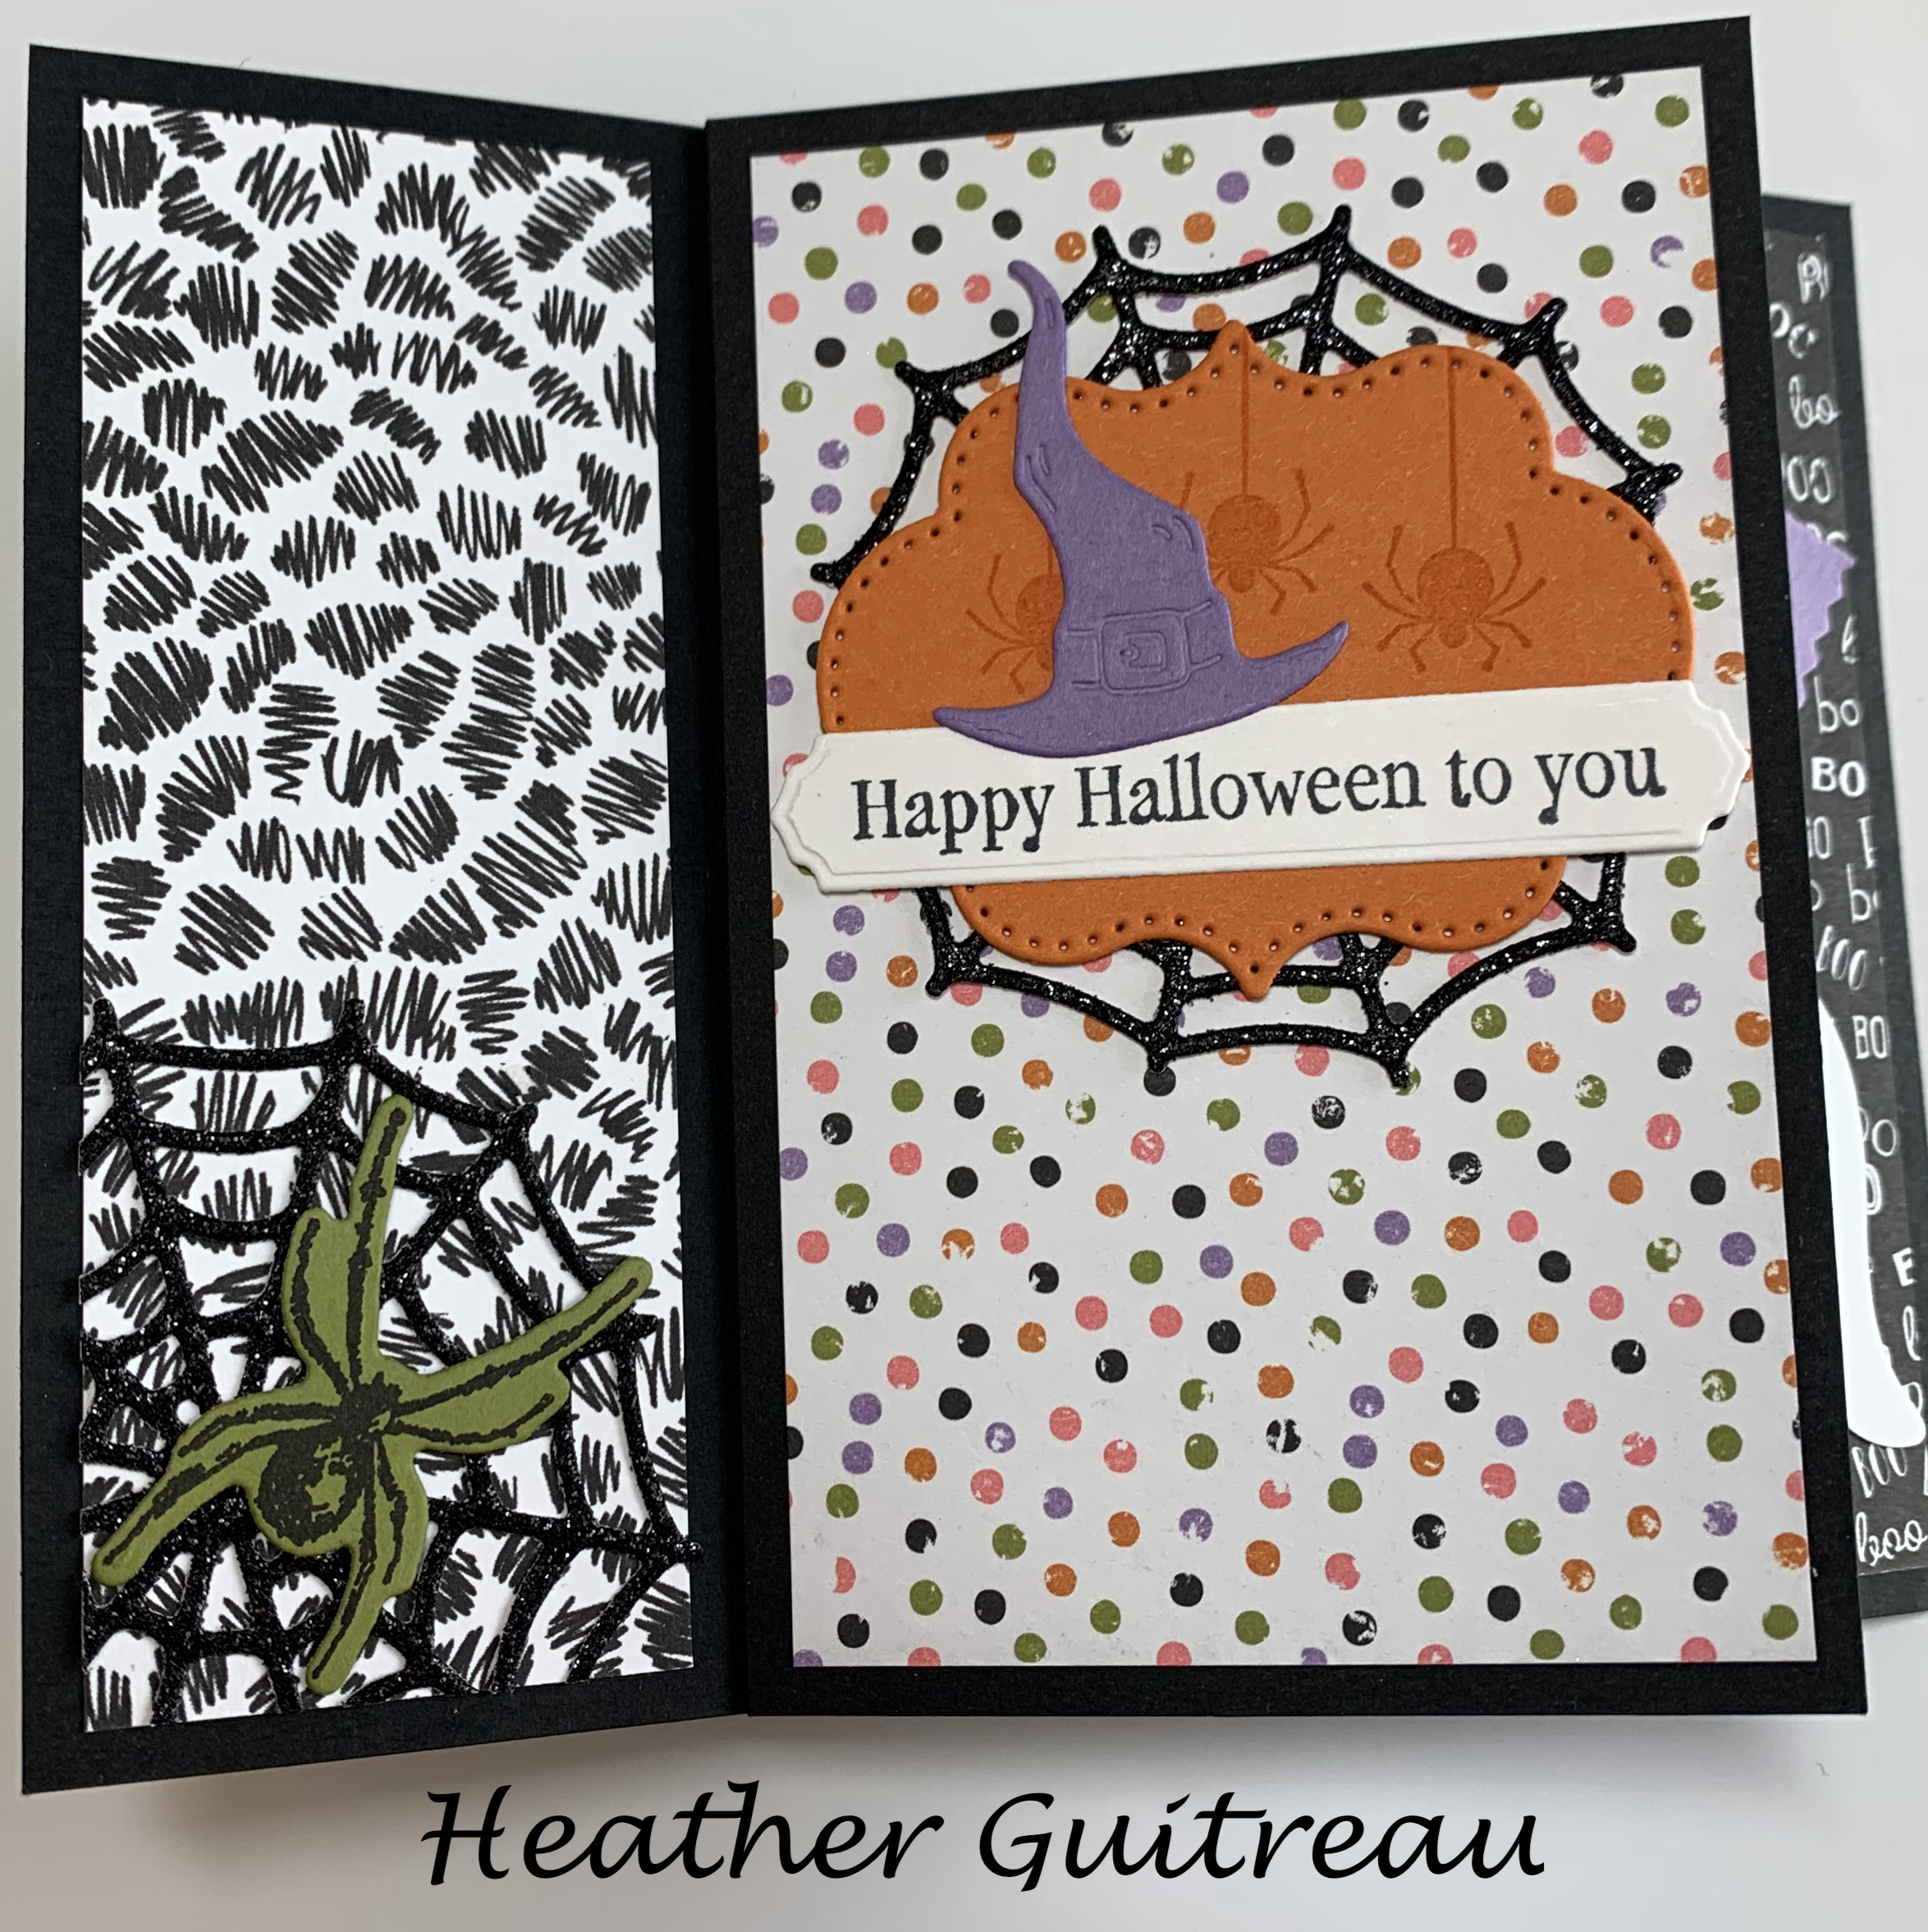
Heather Guitreau- for Halloween using the Cute Halloween Designer Series Paper, the Cutest Halloween Stamp set and the Frightful Tags dies with the Black Glitter Paper from Stampin’ Up! and other fun Halloween sets. Those ghosts are upside down tulip punches.
 .
. 
 .
. 
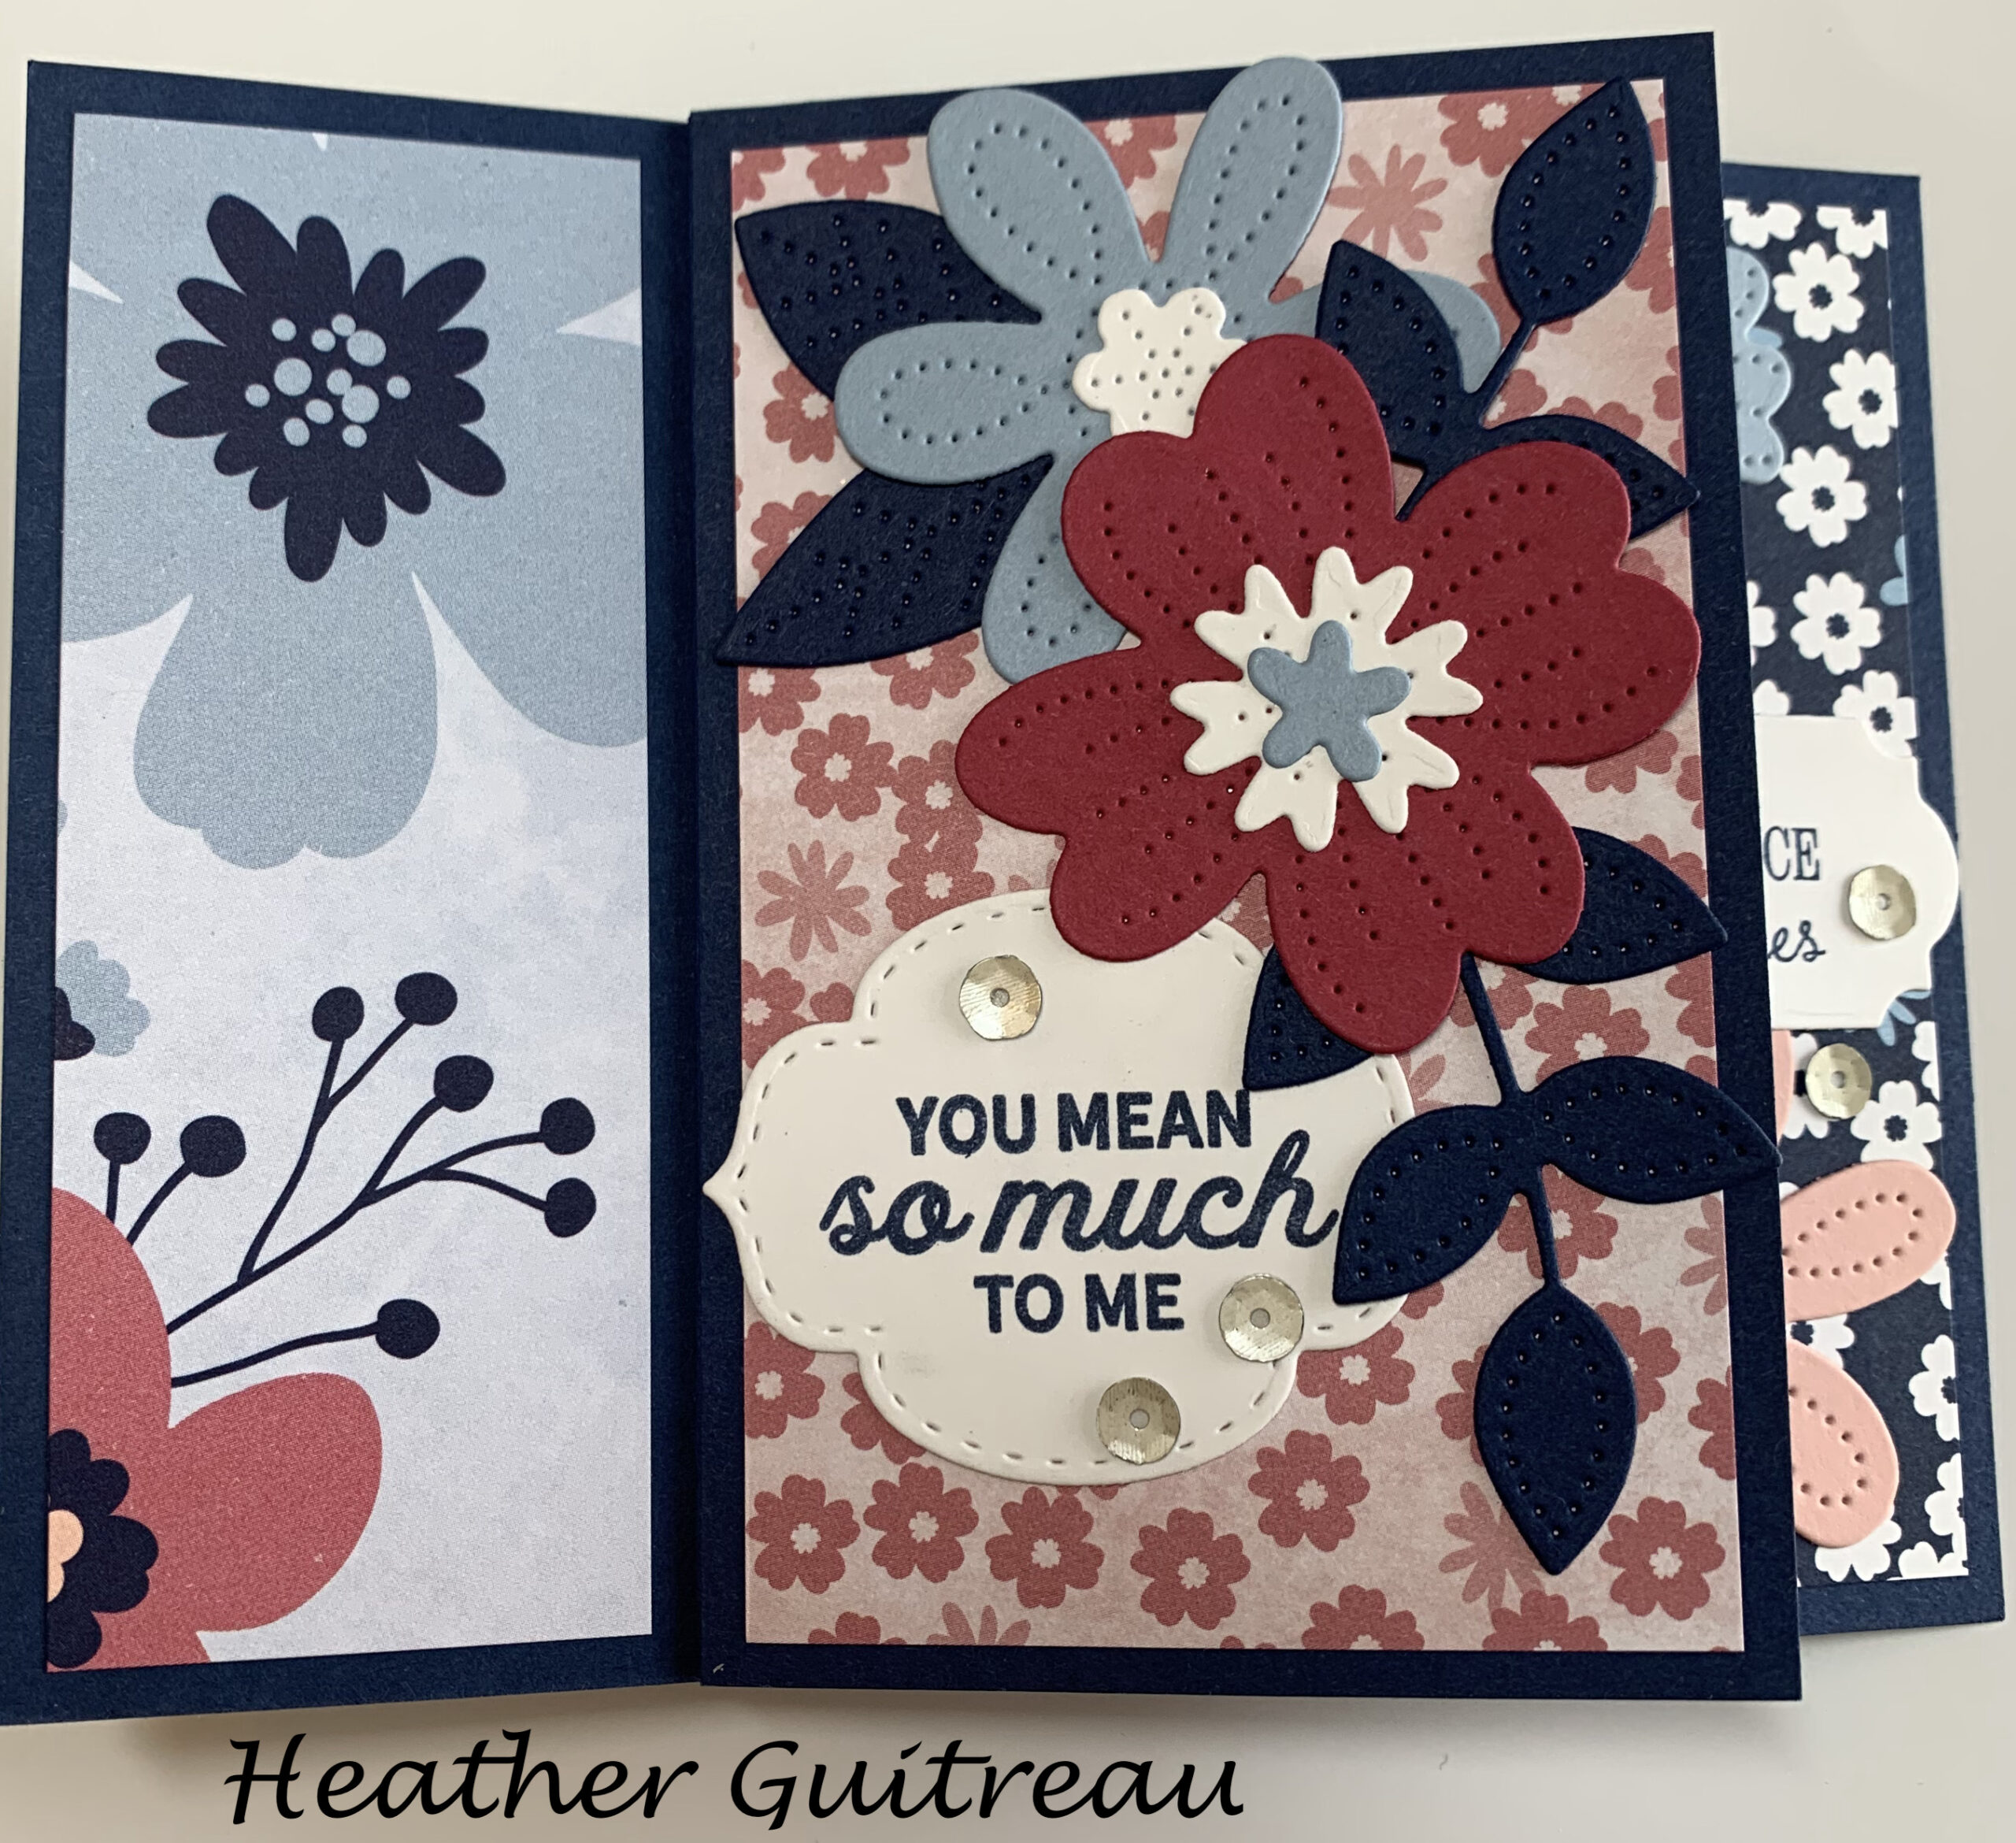
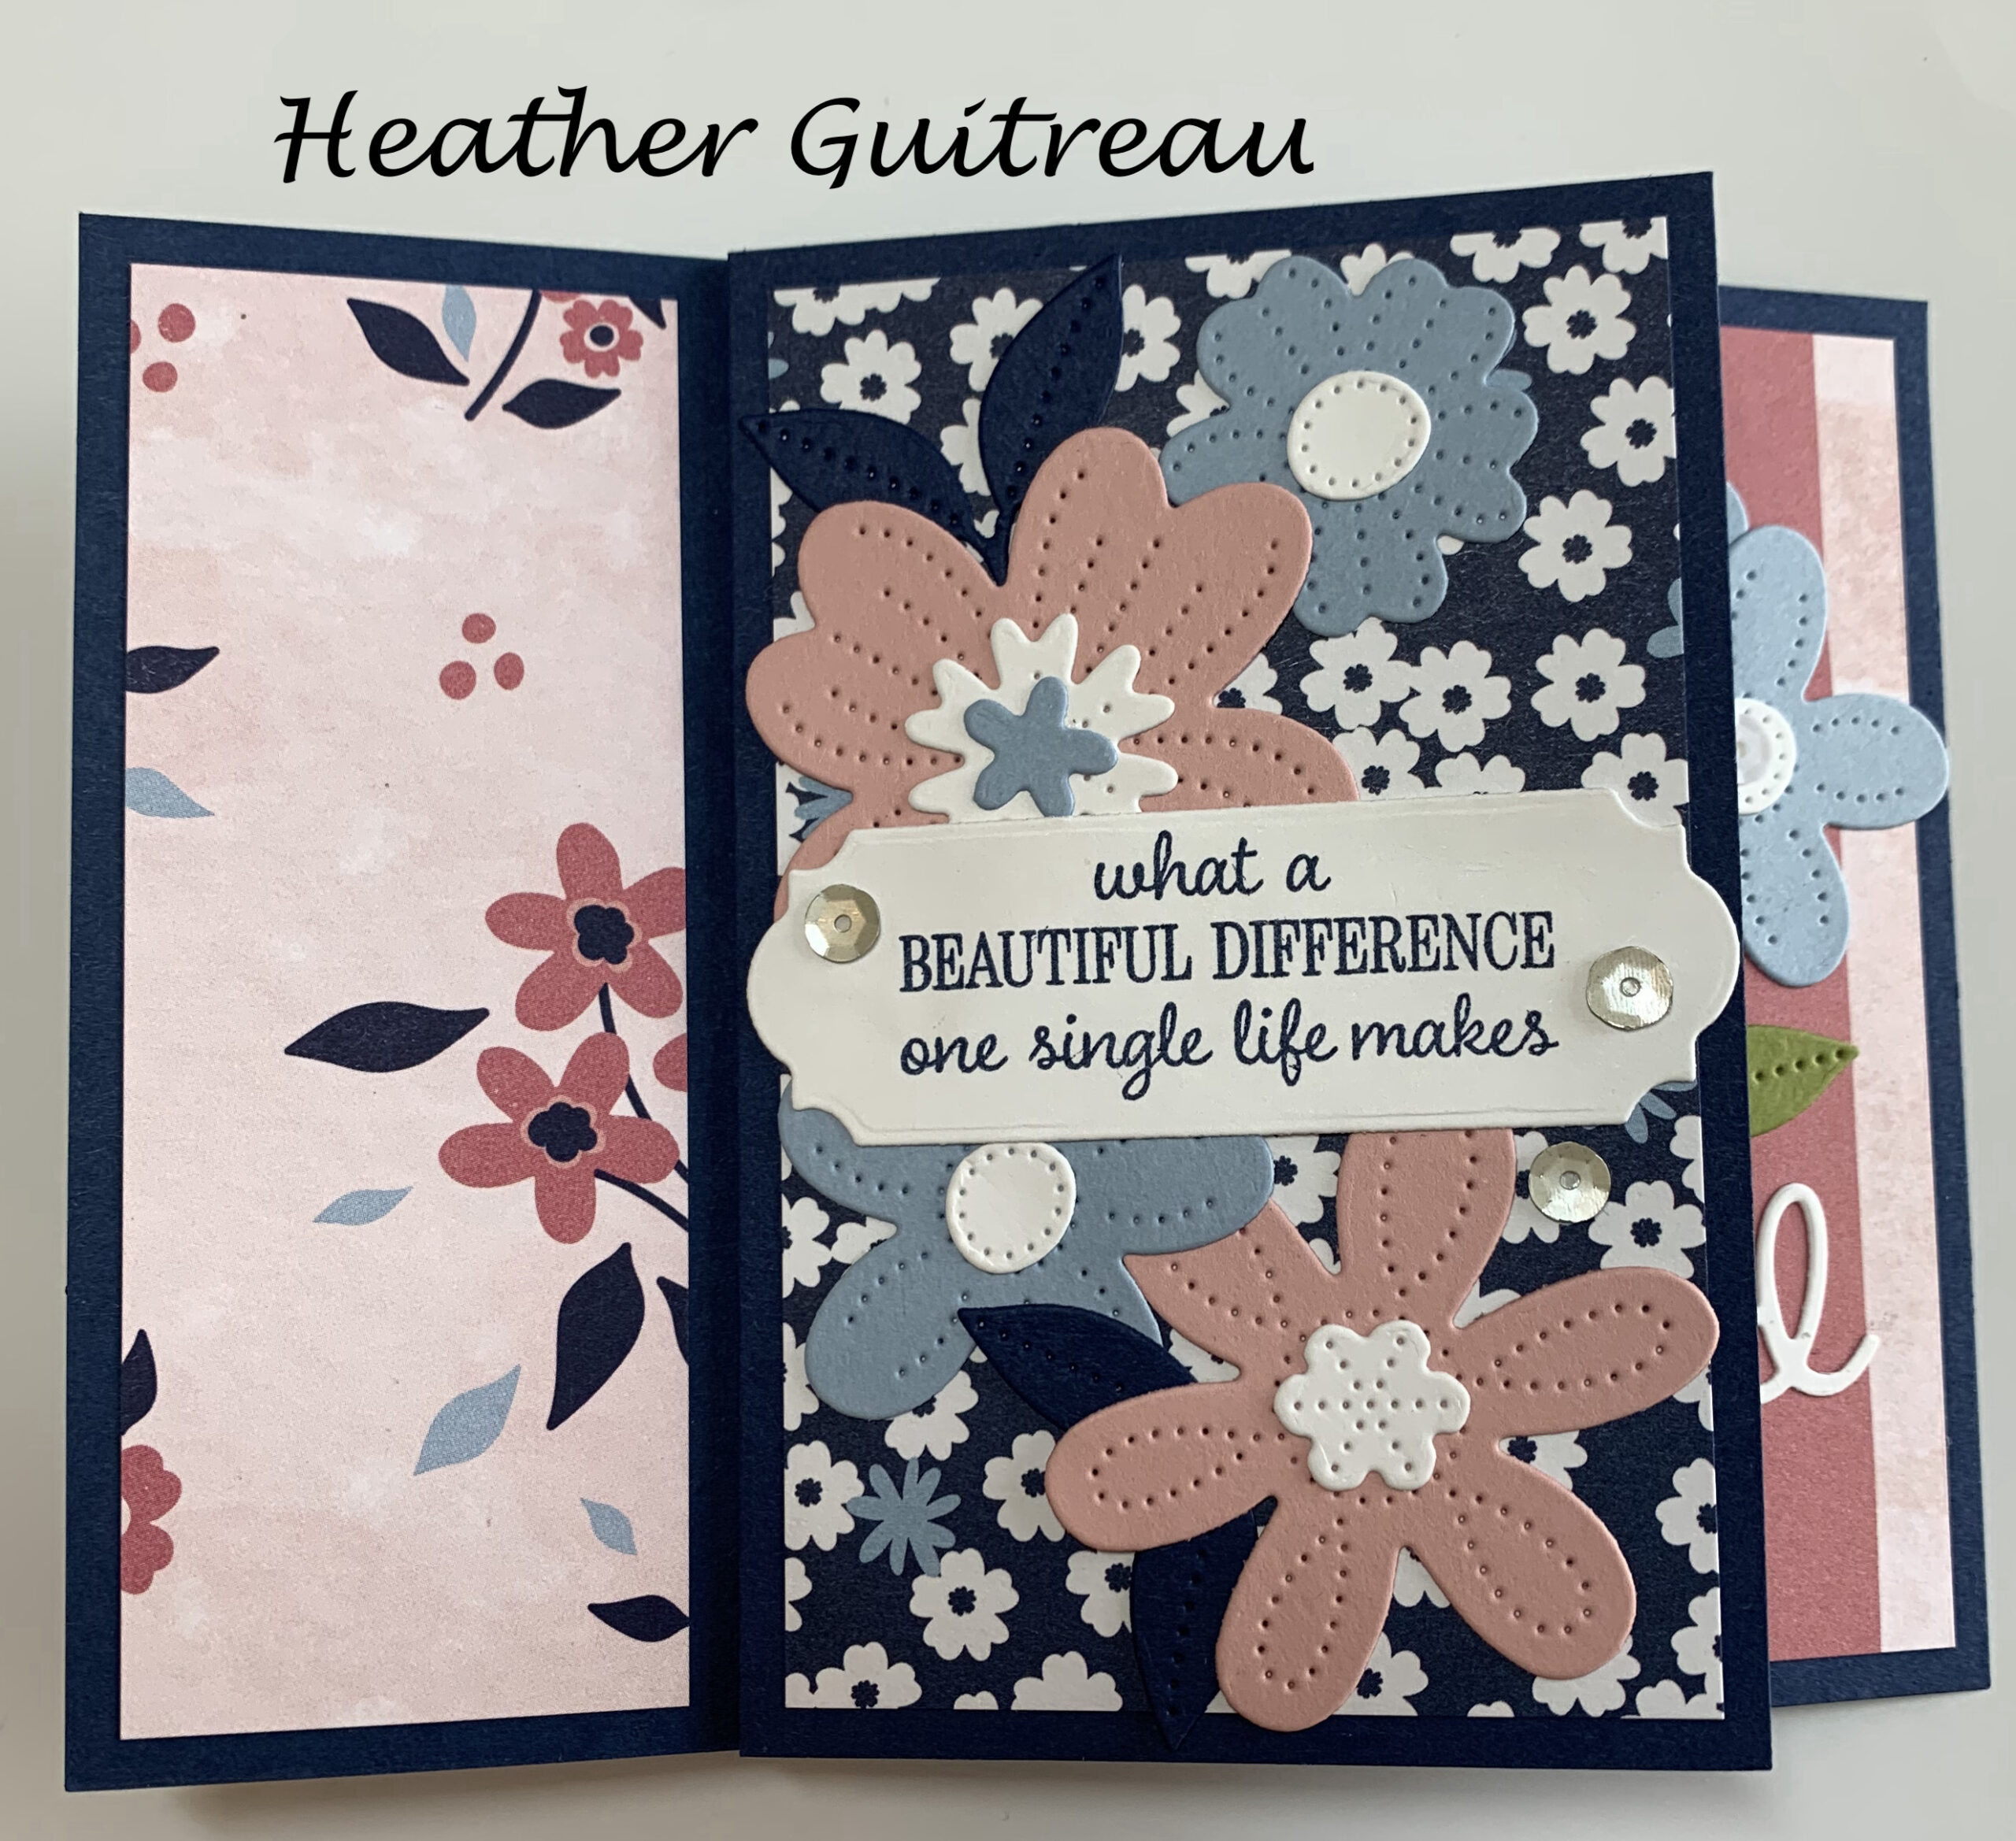
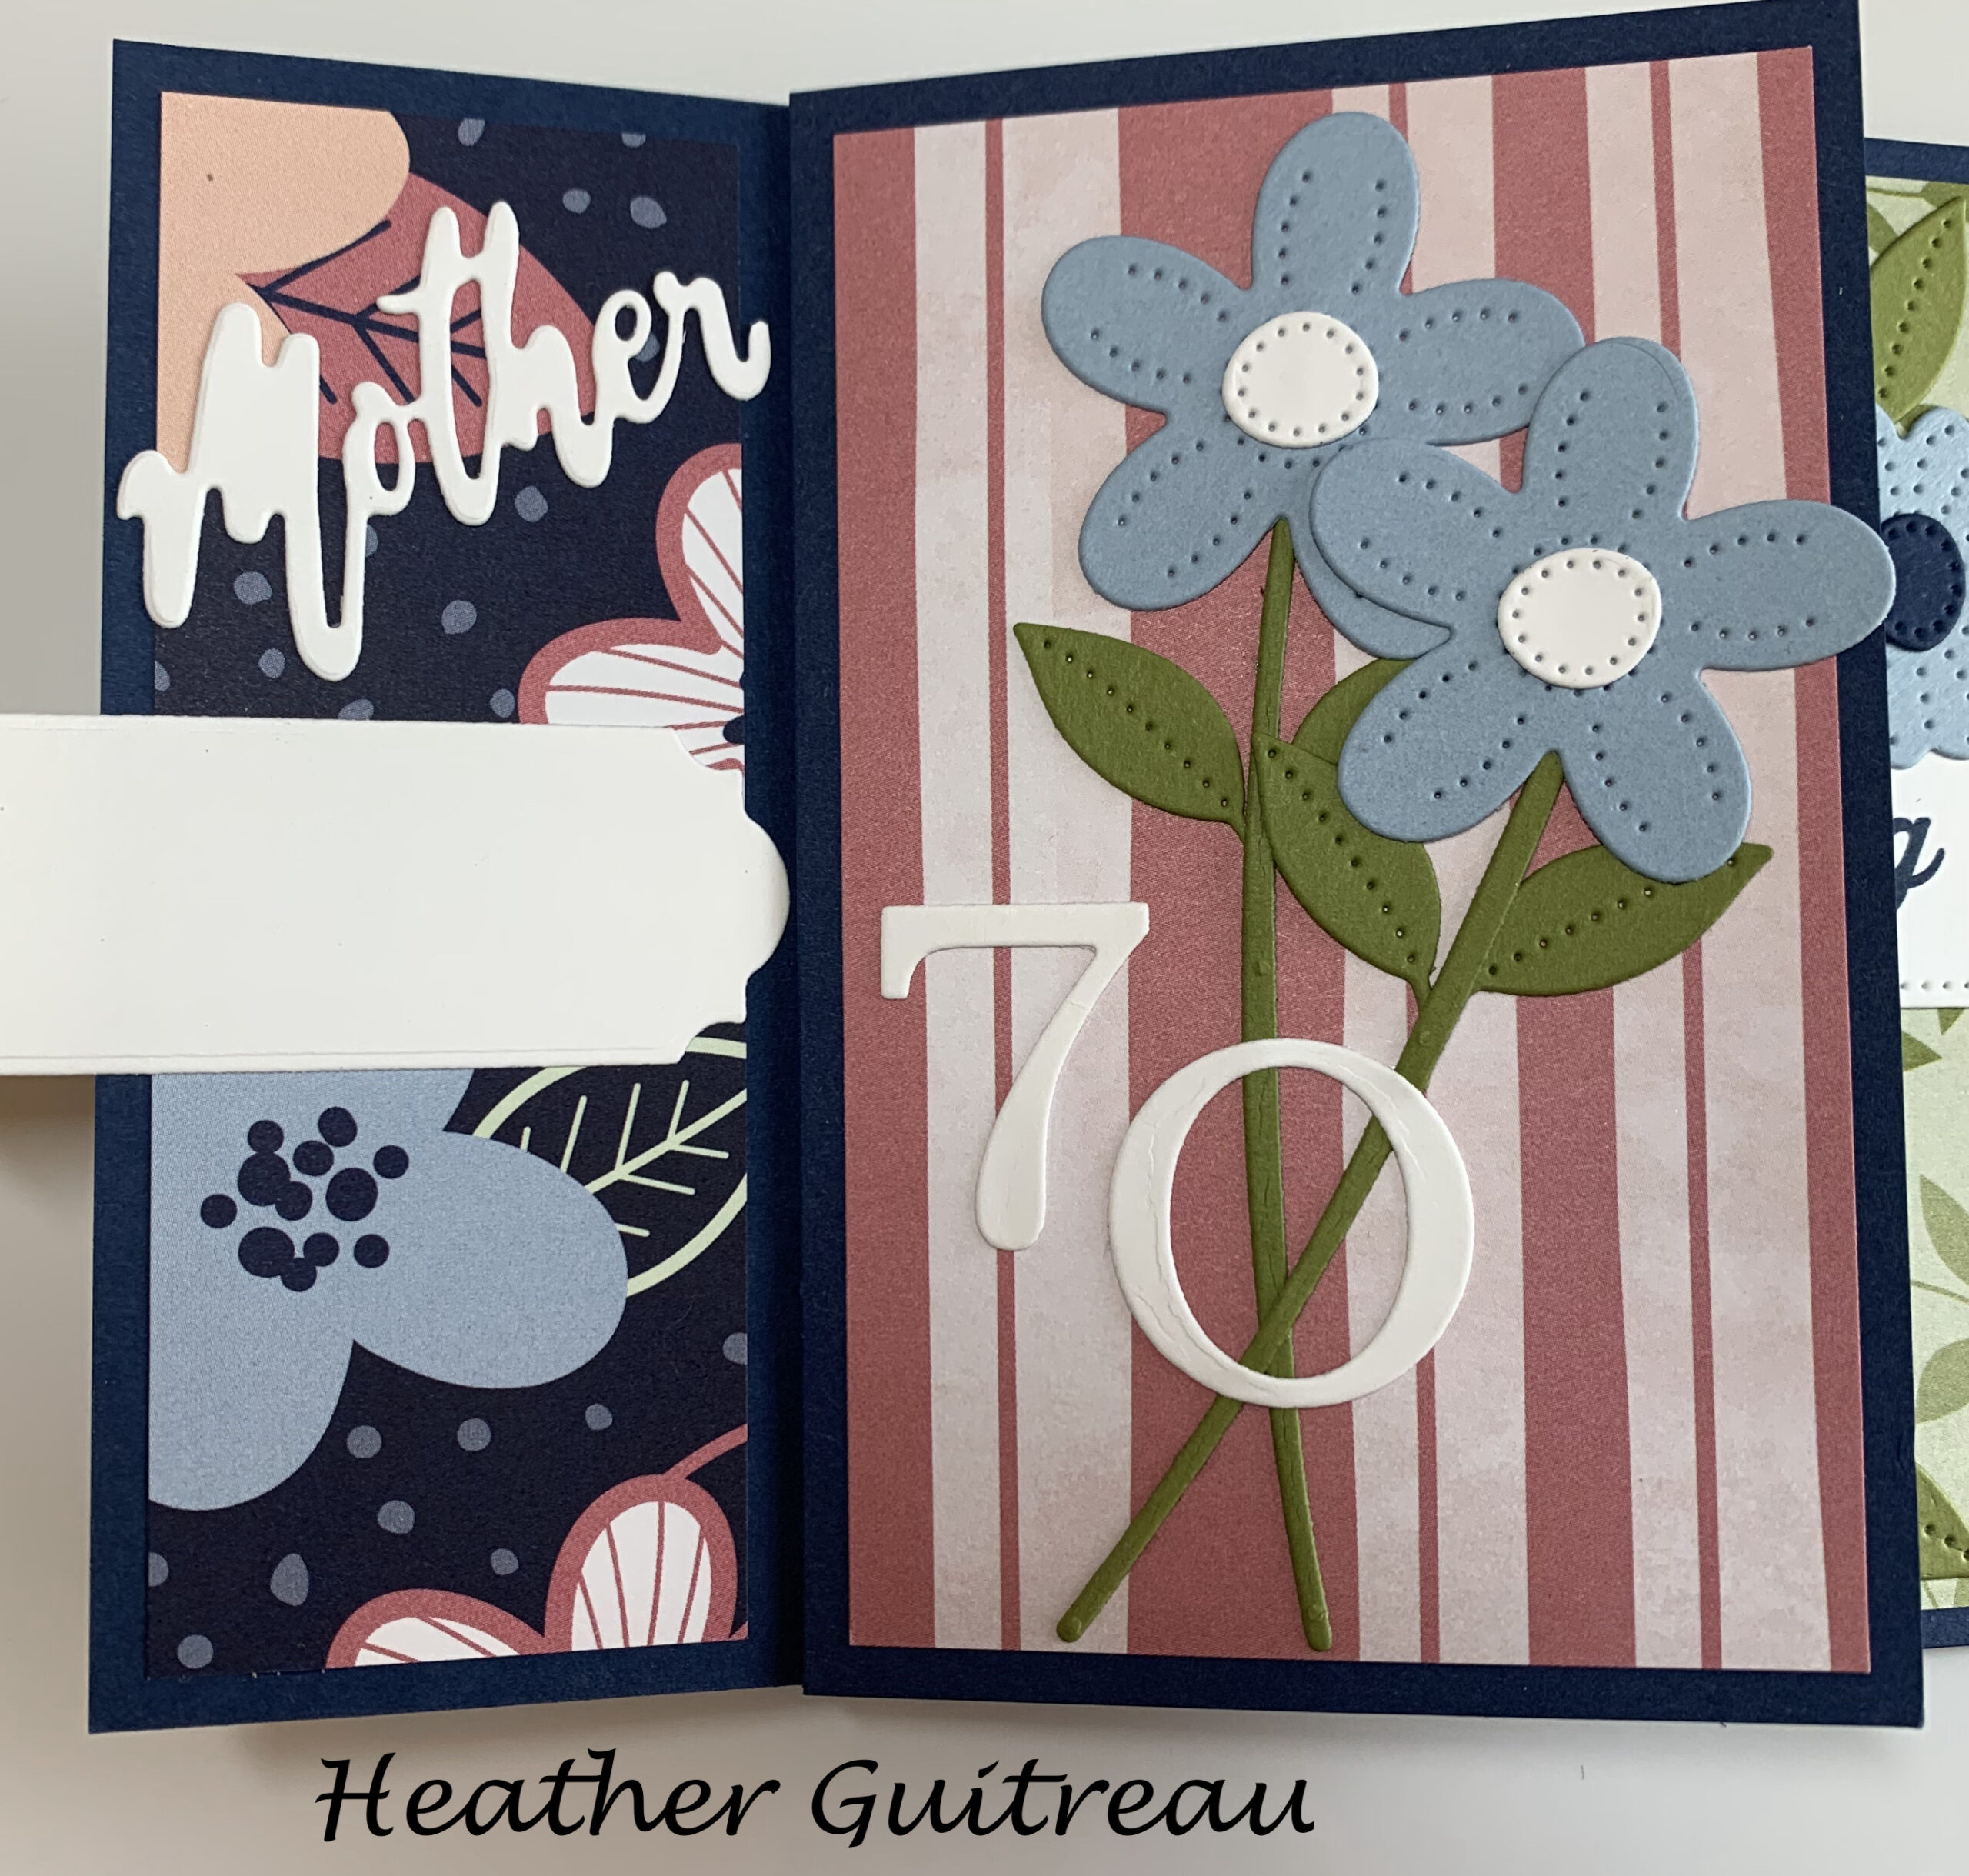
Heather Guitreau- for her Mother
 .
.  .
.
 .
.  .
.
 .
.  .
.
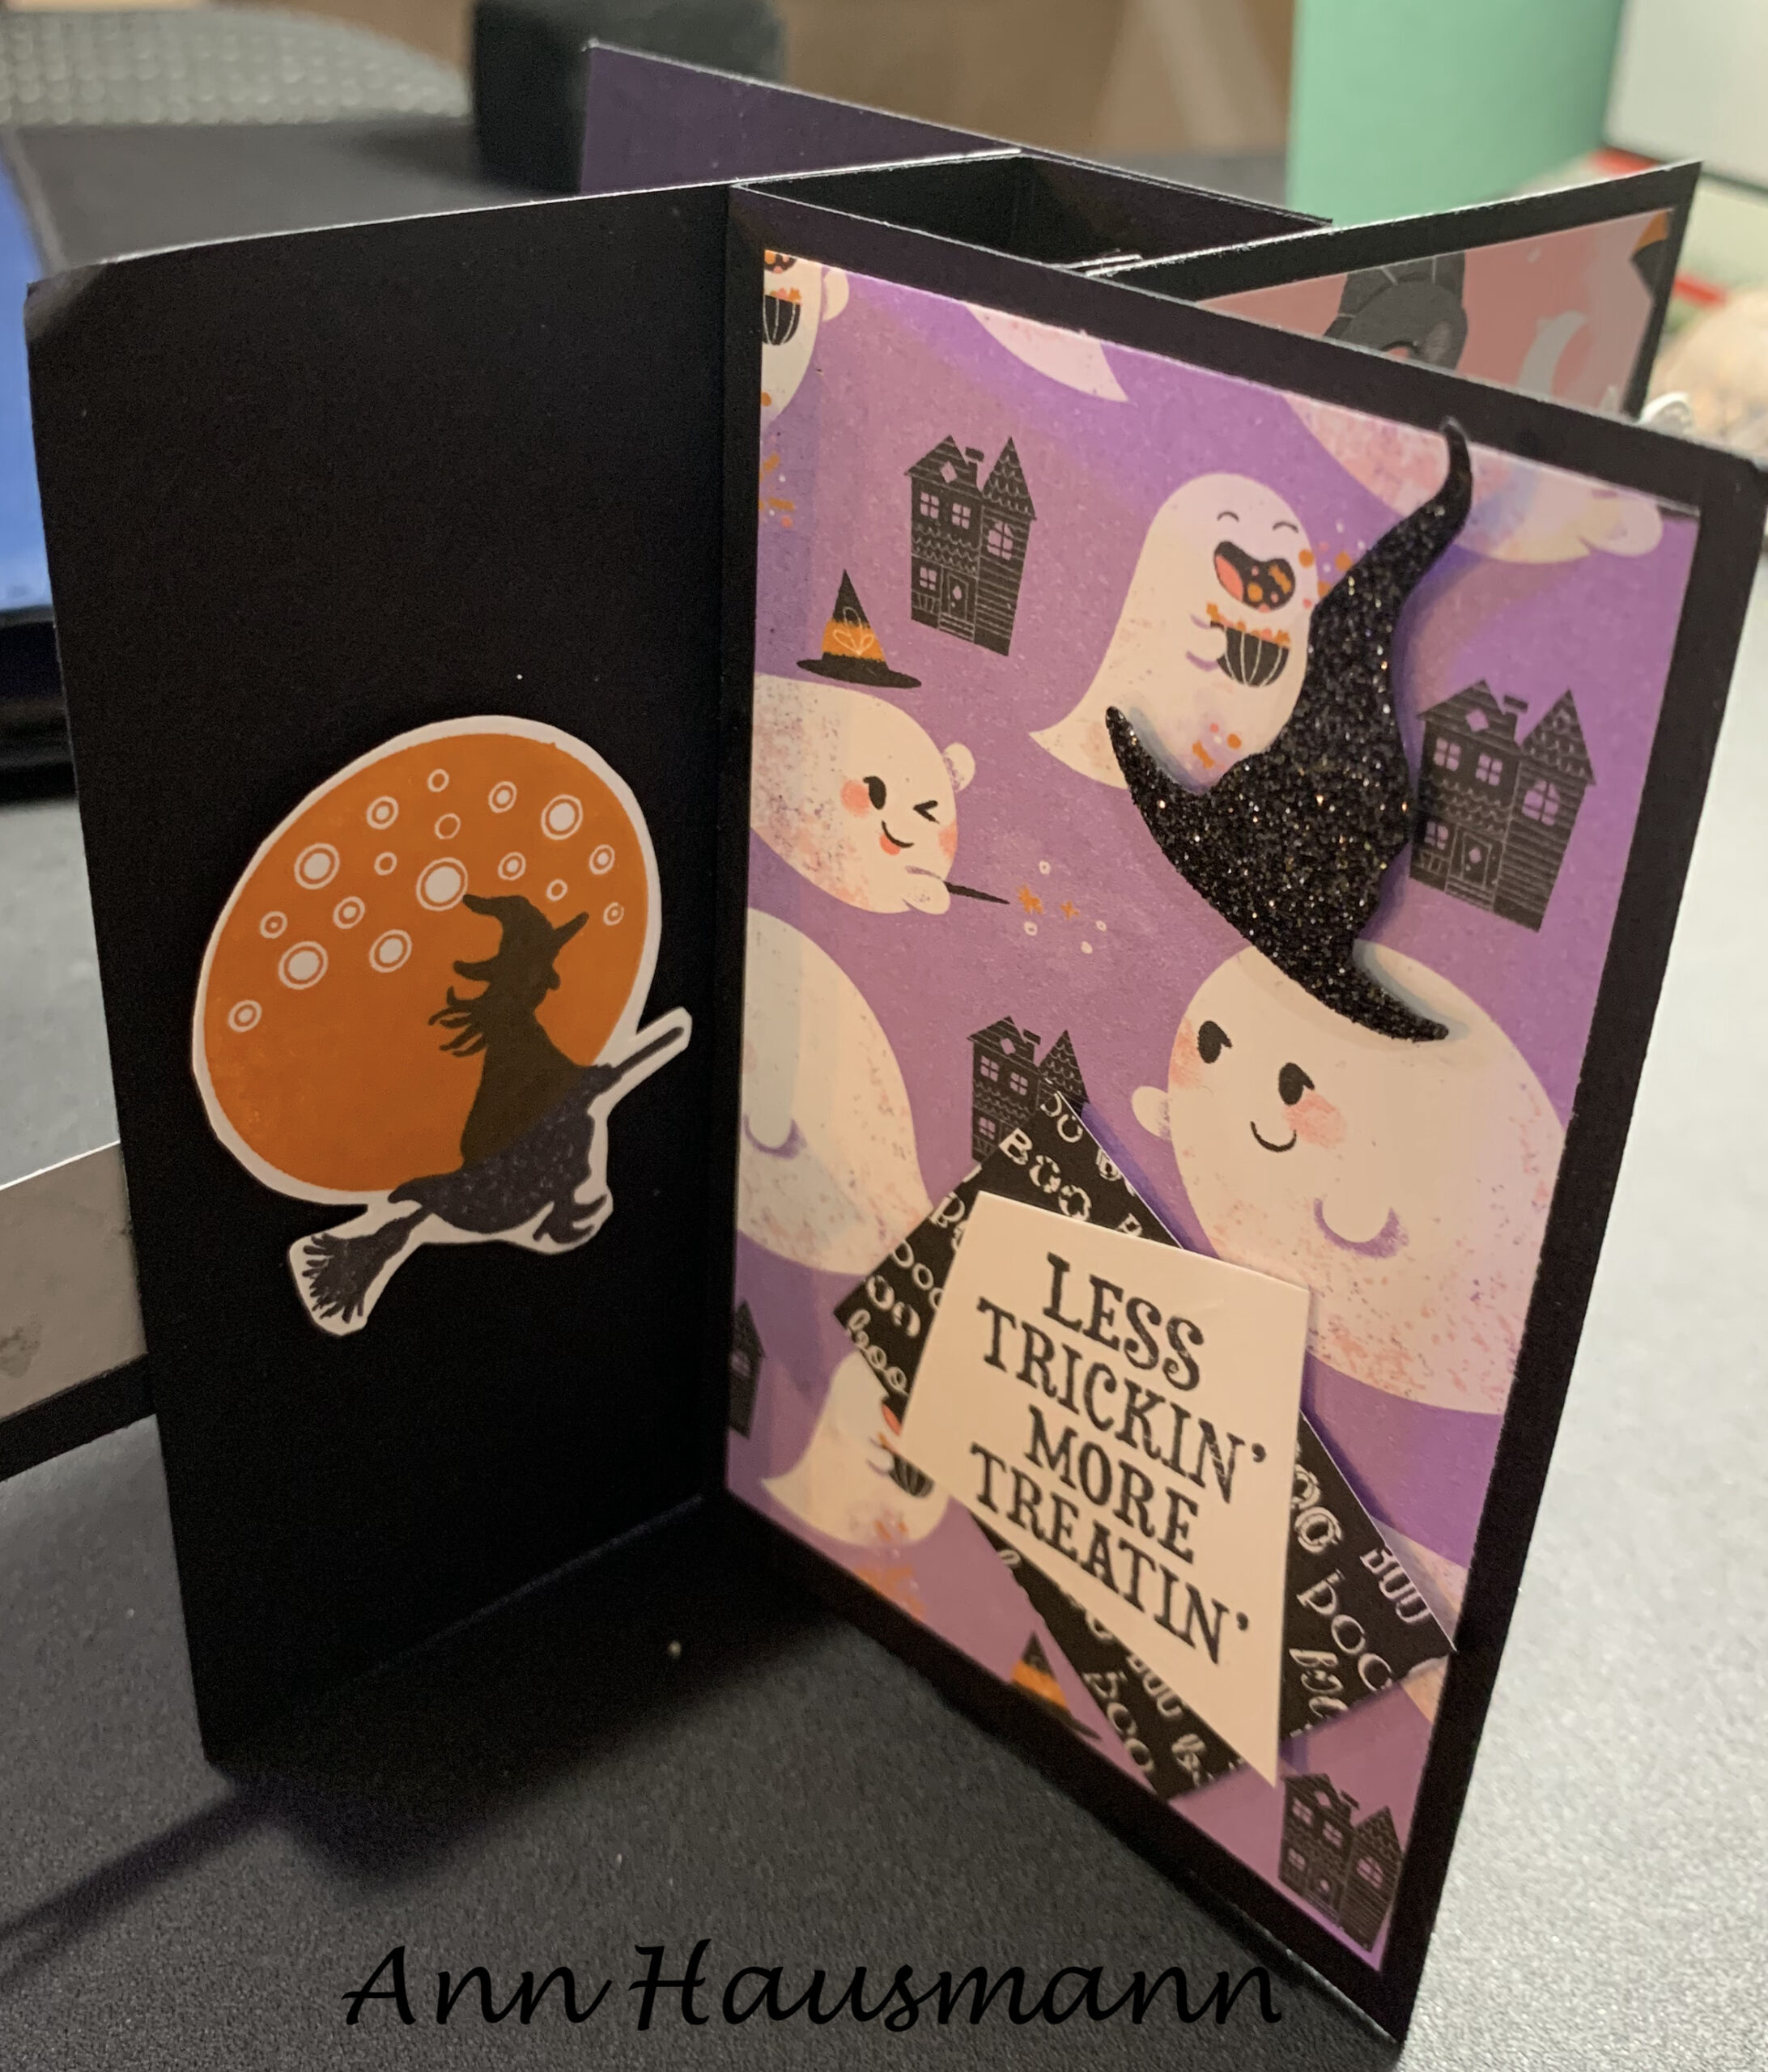
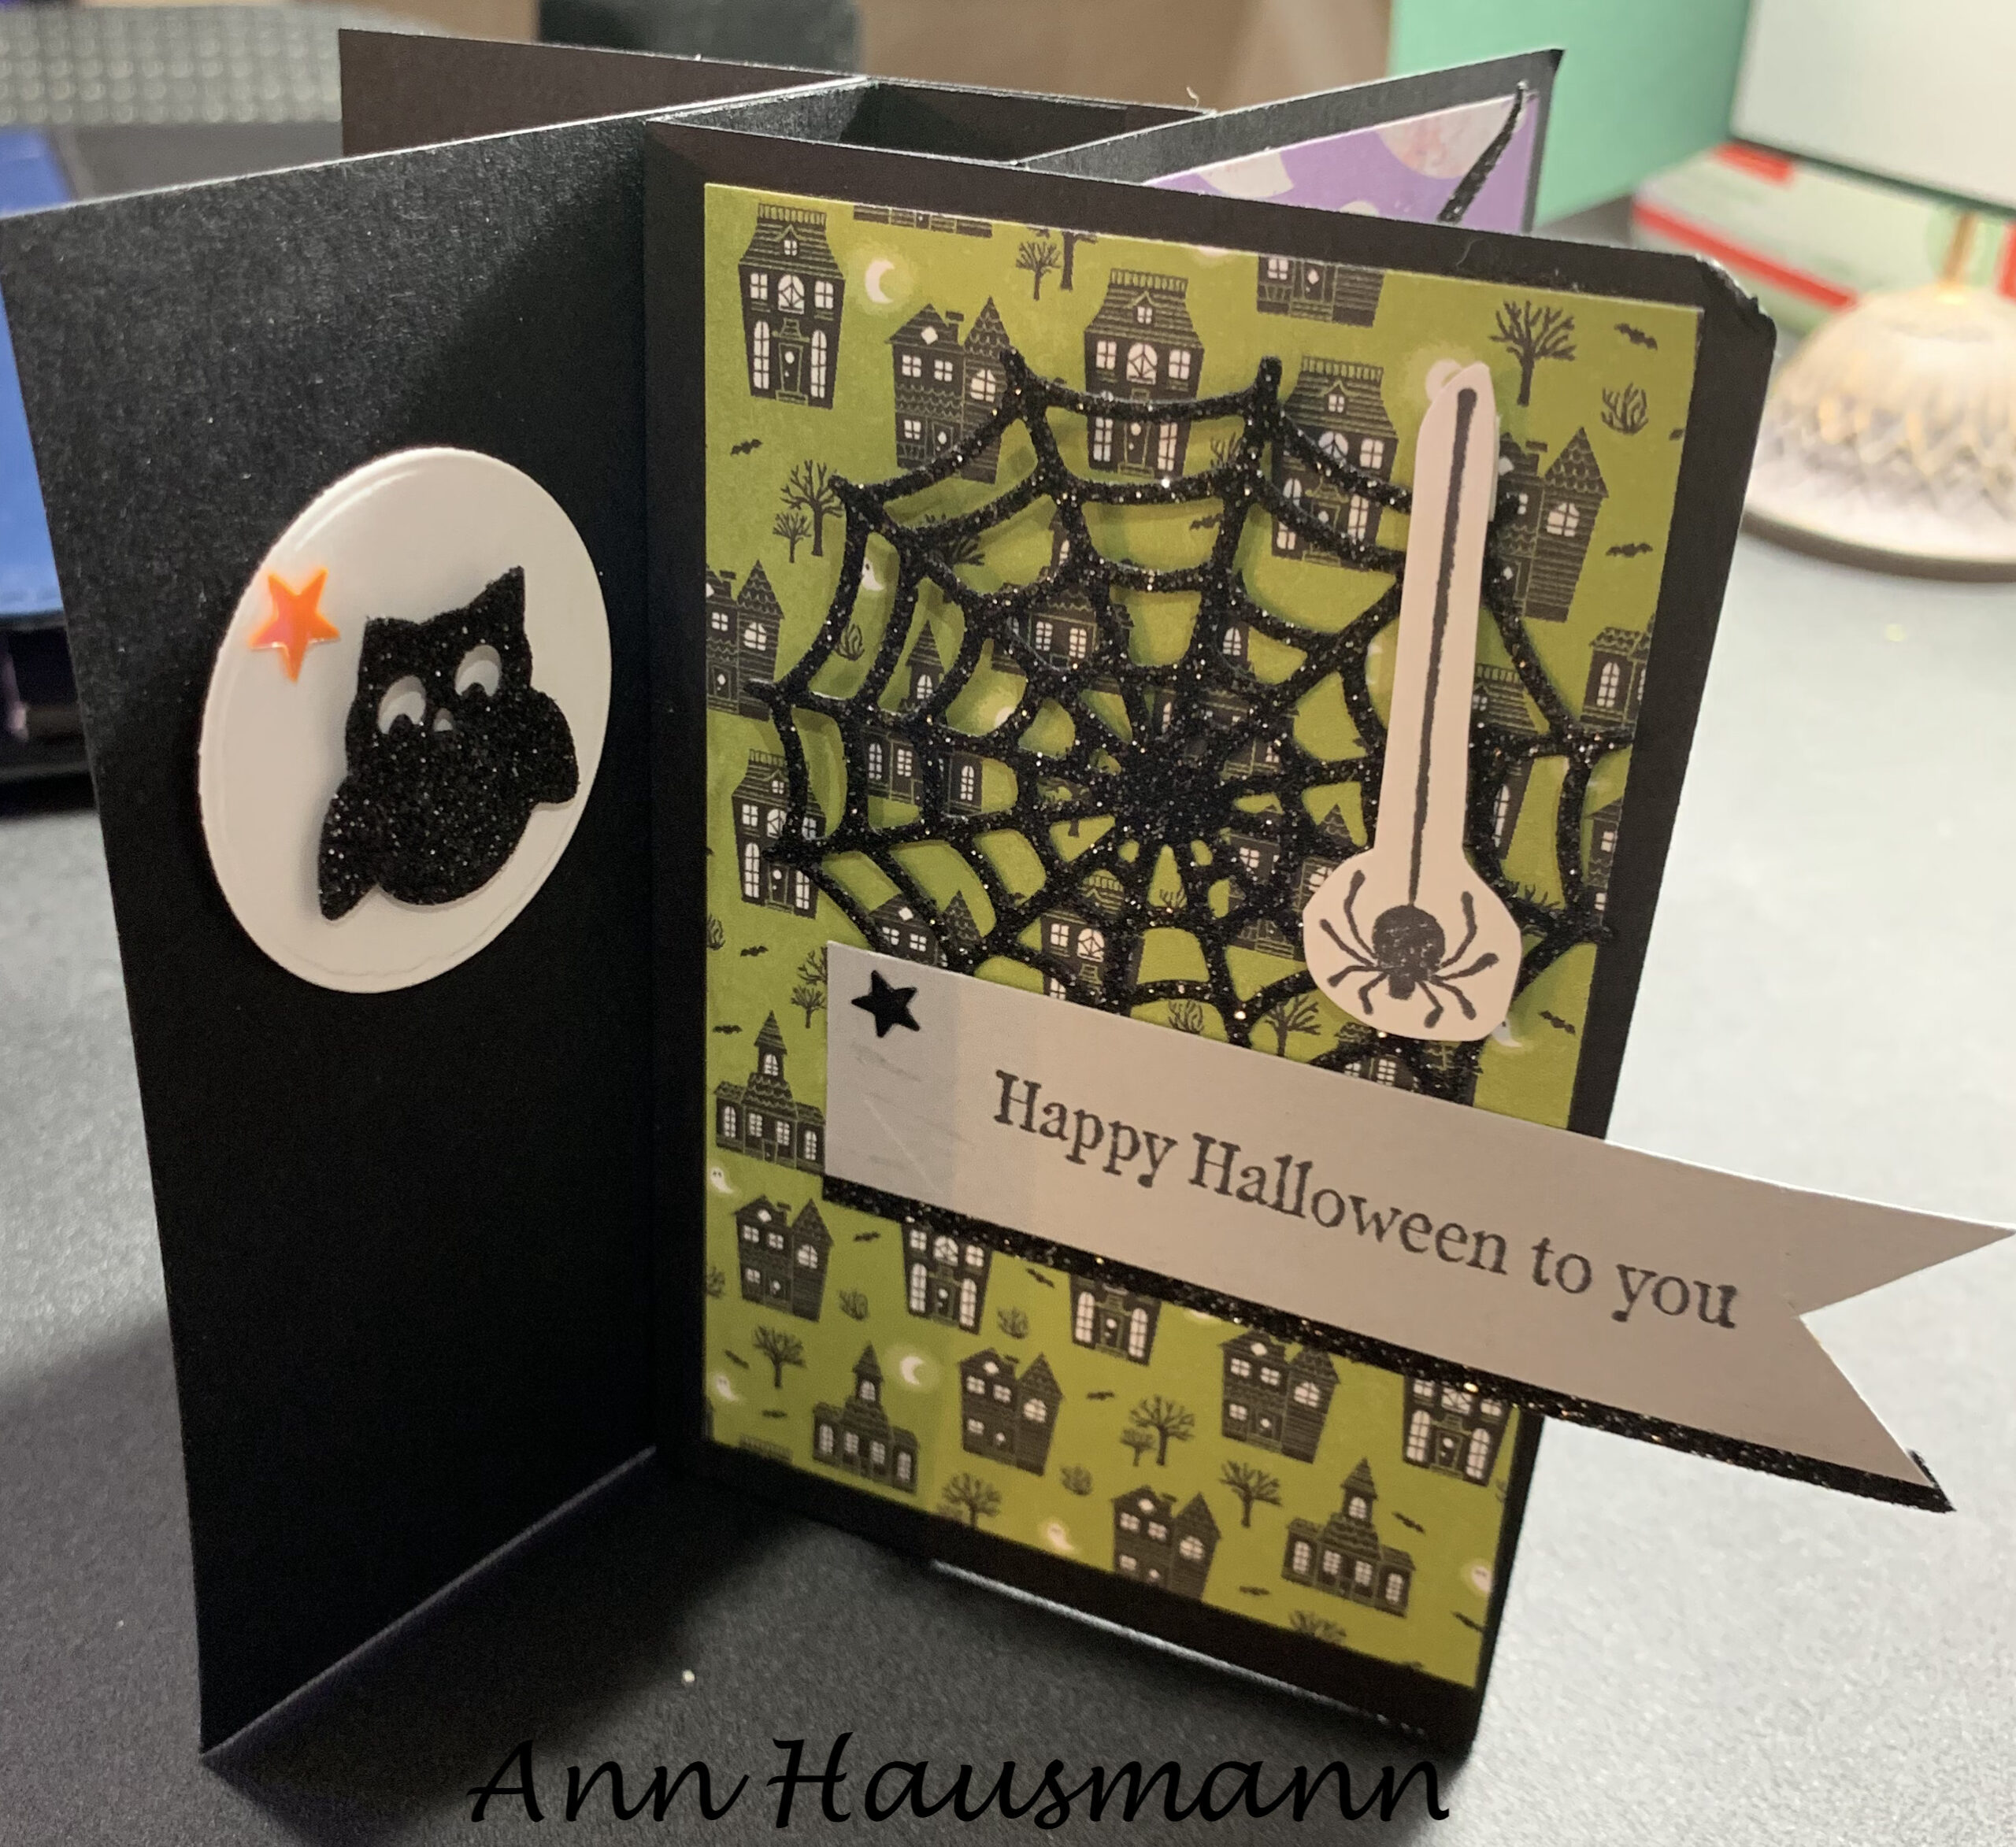
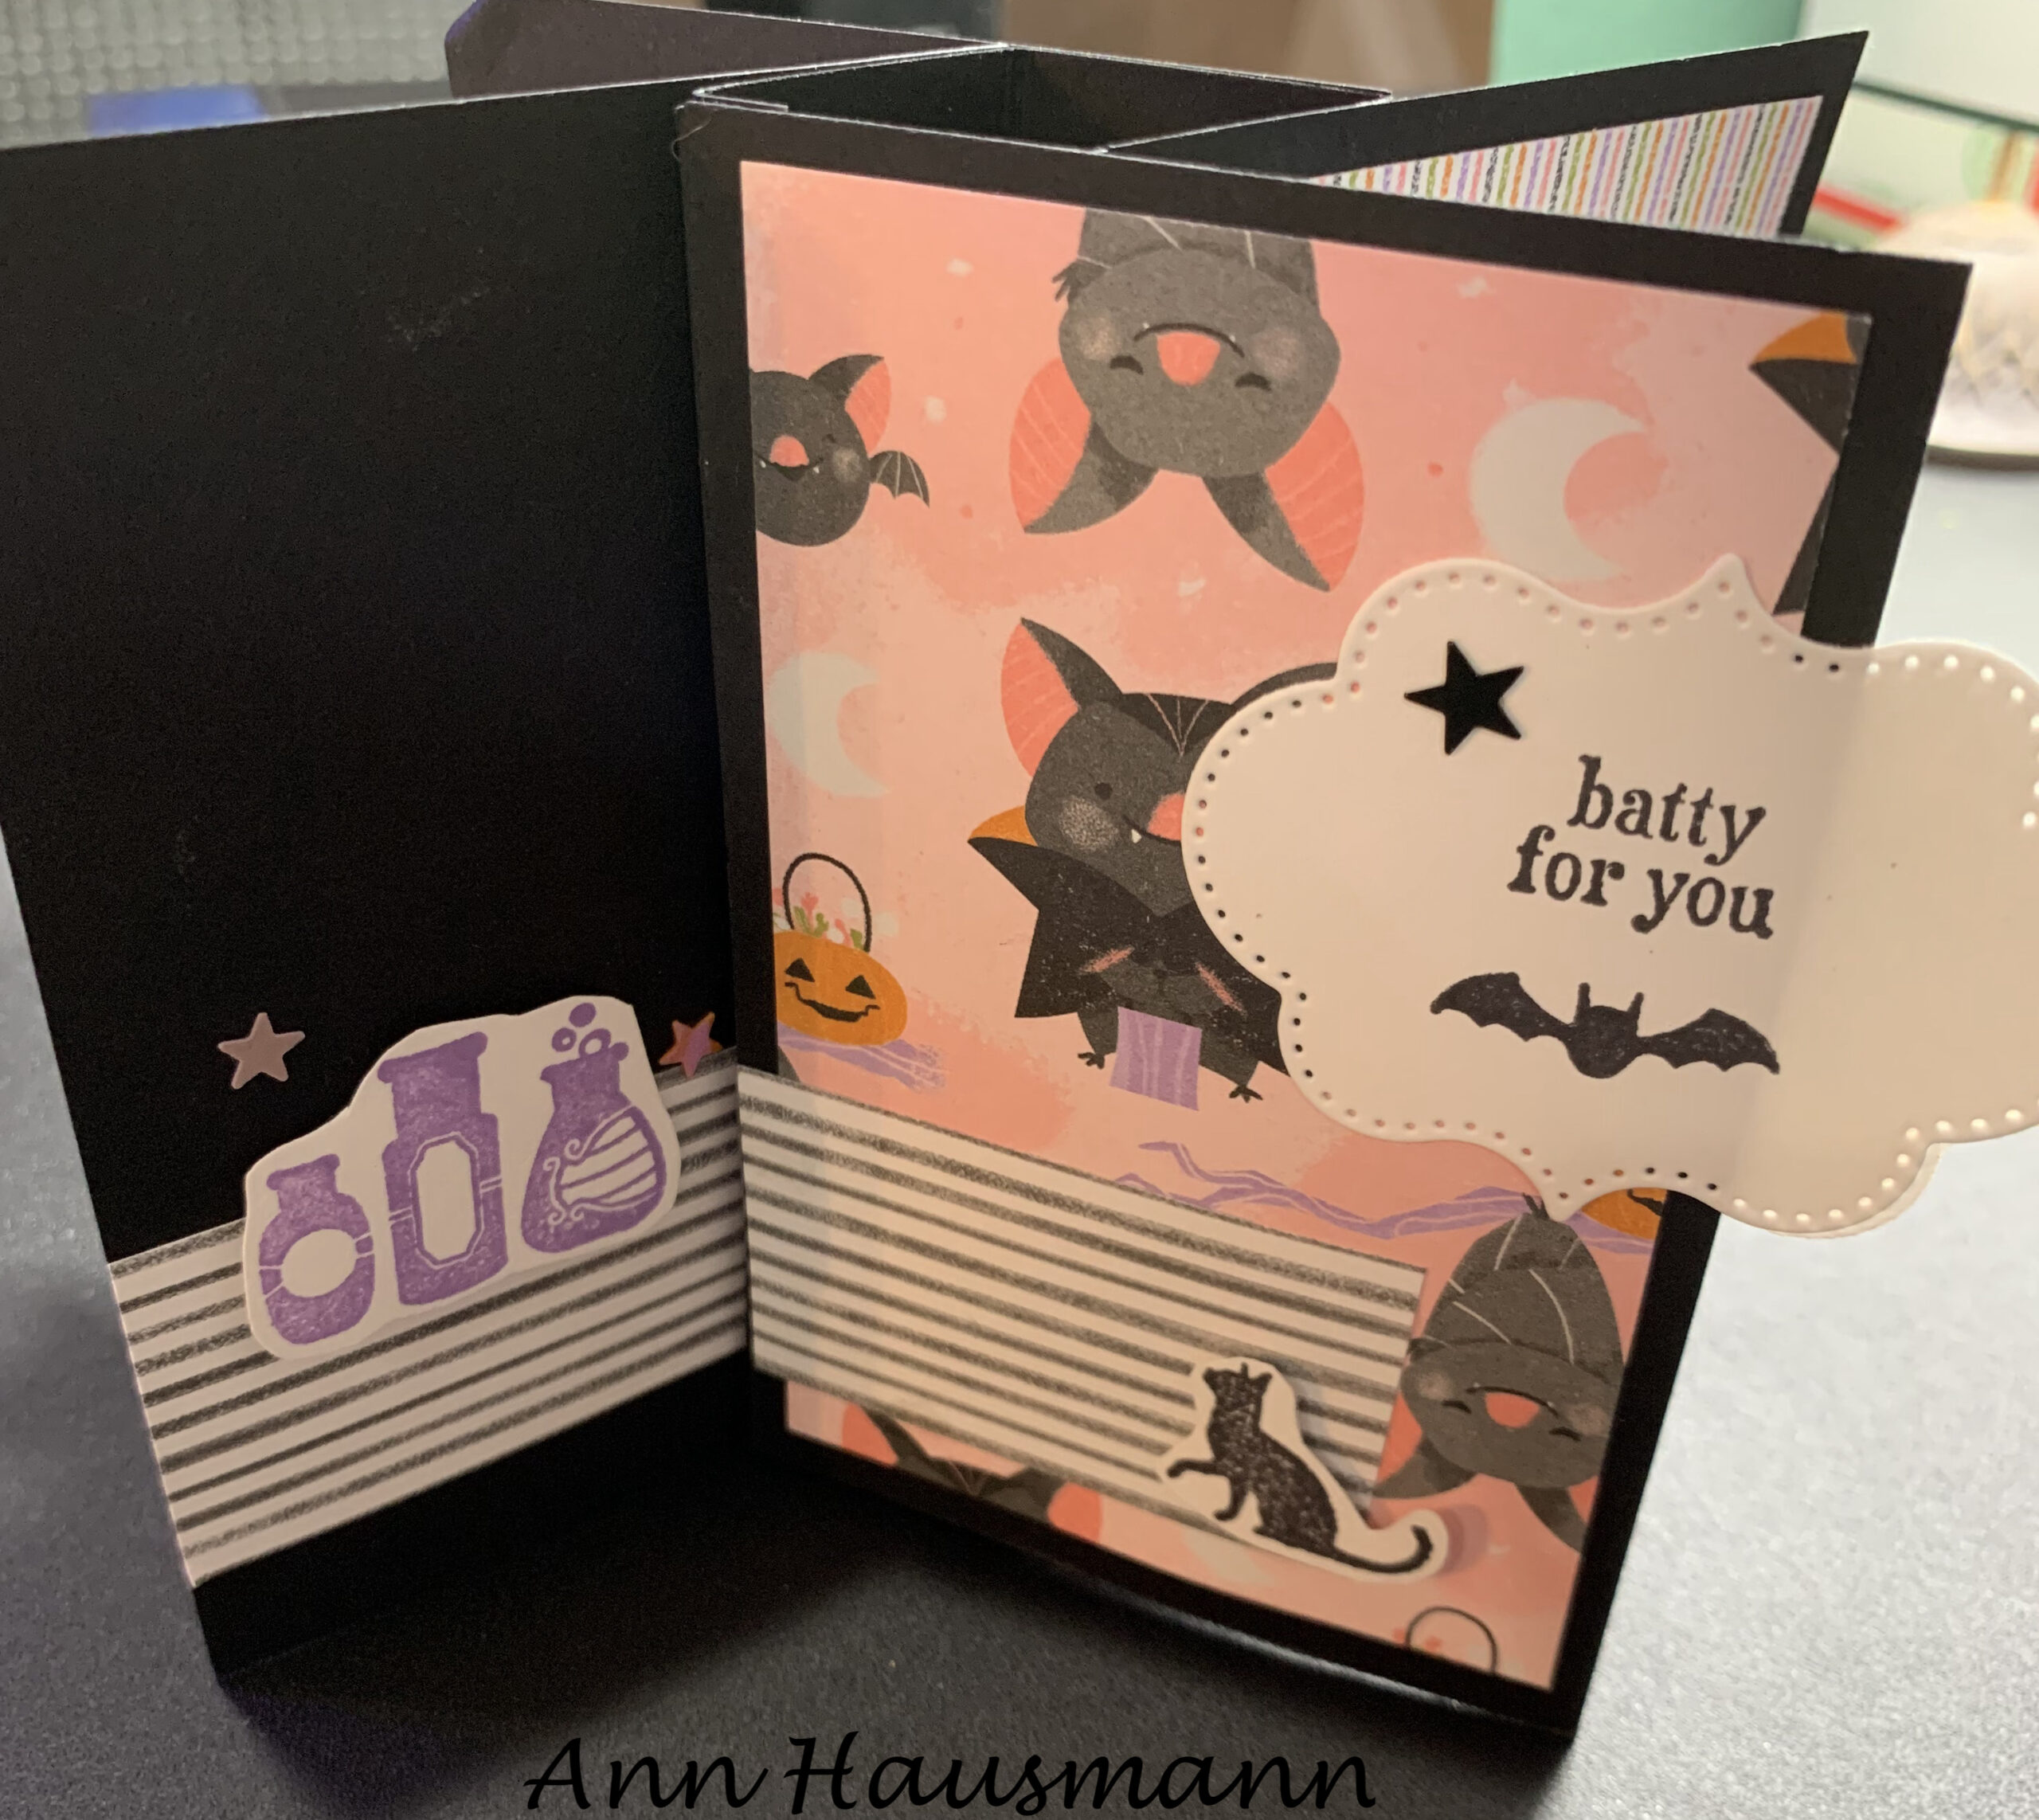
Ann Hausmann made a Halloween card as well! I must say, the Black Glitter Paper just makes the card awesome as does the Designer Series Paper with bats and cute little ghosts. Of course without the dies to cut the glimmer paper into owls and spider webs, and a witch hat and a tree and a fence, well — yes, my pretty, we must have dies! (she says in a witch’s voice!)
Did those wonderful cards inspire you to make your own Pinwheel Tower Card? When it is a very special occasion, it is worth taking time for a very special card!
SAL, Smile A Little as you stamp your way to Christmas- only 87 days away
Karen. (Click on little Sal in the computer to go to the online store)
Welcome to my blog!

Sal Window to Products


