
Home » Birthday Feminine
Category Archives: Birthday Feminine
January Shoebox with Christine Dillon as Hostess
What a great way to start the 2024 year of stamping with Christine Dillon as our hostess for the shoebox event. We take turns each month designing two cards and making card kits for each person to construct at the event.
 .
.

Christine used the Delicate Edge Dies to create the black borders on either side of the foiled Designer Series Paper- the foil isn’t showing in the picture but it is beautiful. The Deco Labels Framelits made a perfect greeting with a second cut to be a frame of the greeting. The little gold metallic butterfly was an ideal embellishment.
Her second card was a valentine card:


The Sunshine Wishes Die was used for the heart and love word. What a great combination of red and black to match the red and black in the Designer Series Paper. I love the layers of white on red and then layered on the Designer Series Paper. I left the inside blank so I could add a greeting later.
 You need to follow her example of using a button since you have so many buttons in your stash.
I do have a lot of buttons, Sal, and need to remember to use them. Thank you, Christine, for a great shoebox event.
SAL, Smiling A Lot
Karen
Whimsy Stamps Winter Friends-Digital Stamping
I was looking at digital stamps at ‘Whimsy Stamps’ – ‘Wee Stamps’ and found a perfect one for my little granddaughter! It is called Winter Friends.


Looks like a party of winter friends!
Yes, I found a Designer Series Paper – DSP, with all those characters and it was fun to add her name and her age and a happy birthday banner being held by the penguin and polar bear! The backside of the DSP was just the stars so I layered that plain piece under the image to keep the card from being a bit too busy. The card is 6 X 6 so I can have all the characters included. We have an envelope punch board so we could just custom make the envelope to fit the 6 X 6.
I printed the image on cardstock and then cut it with the Window Frames #4 die. I cut a second Window Frame in grey cardstock and cut it in half to frame the image.
Recipe
- Base: Textured White, 12 X 6, scored at 6
- Layer 1 (X2): Fresh Freesia, 5 3/4 X 5 3/4
- Layer 2: DSP with animals, 5 1/2 X 5 1/2
- Layer 3: DSP (back of the animal DSP), 5 1/2 X 2 1/2; place in middle 1 1/2 on each side
- Inside Layer 2: DSP 5 3/4 X 1 1/2
- Digital Image: Print on 8 1/2 X 11 cardstock and then cut with Window Frame Die (fourth from smallest)
- Frame for Digital Image: Grey cardstock, 4 1/4 X 4 1/4, with Window Frame Die #4, then cut in half
Coloring with Copic Alcohol Markers
- Hair: Y06, Y13, E00
- Pink on Coat, scarf stripes, boot stripes, gloves: RV23
- Green on Coat: YG13
- Face: E00
- Blush: RV10
- Scarf: C5
- Boots: E31
- Berries: R27
- Leaves: YG17
Use Lt Smokey Slate on the edges of the rabbit and then lighten with the color lifter alcohol marker.
Other products used:
- Happy Birthday: Birthday Chicks Stamp set
- Inside: Winter Wishes Reindeer Stamp set from Sweet November Stamps
- Banner: Bunch of Banners Framelits – Stampin’ Up!
- Name: Rosette Dies
- Age: Playful Alphabet stamps – Stampin’ Up!, stamped and cut with bitty banner punch
- Snowflakes: Snowfall Thinlits Dies – Stampin’ Up!

Here’s Joey learning to ski!
I can see why you picked the digital stamp! It does look like Joey.
And you can see why I didn’t try to replicate the colors of the coat on the digital image!
On the Whimsy Stamps site you can click on <Digital, then <Digital Products By Artist, then <Wee Stamps
Little Sal in the computer will take you there!
Thanks for stopping by!
Karen

Today’s riddle
Q: Why couldn’t the bike stand up?
A: Because it was 2 tired
Quilling Birthday Card
I pulled out all my quilling tools and found a youtube video to guide me in the making of a quilled birthday card. I found out that quilling (for me) is more like knitting. You do a little each day, you don’t sit down and complete it in the same time that you would complete a stamped card. I could never say, “You go ahead and watch that game, Paul, while I knit a pair of socks.” That just wouldn’t happen, and I found out it was the same with quilling. The youtube video was short but the production of the card was not! Was it fun? Yes. Was it rewarding? Yes. What do you think?
 .
.  .
.
Here are a few things I can point out to my dear stamping friends:
- Base: Thick Very Vanilla, 5 1/2 X 8 1/4, scored at 4 1/4
- Layer (2): Wood Tone DSP, 5 1/4 X 4; use Medallion Die to cut out the opening for the greeting on the inside; it was too big for my inside layer so I added a strip at the side.
- Happy Birthday on front: Blushing Bride cardstock with 3 die cuts layered together for dimension; die is a Kokorosa die
- Greetings on Inside:
- Birthday Wishes – Watercolor Trio Stampin’ Up!
- Happy Day…. – Basket of Wishes Stampin’ Up!
- So Glad – Gather Together Stampin’ Up!
- Embellishmensts: 3 clear jewels and 1 brass butterfly
For future reference in quilling:
- Large Flower (3): peach strip 12″ in length, marquee domed outward
- Center of Large Flower (3): yellow strip 4″ domed
- Small Flower (3): red strip 6″ teardrop domed inward
- Goldenrod (28): yellow strip 4″ domed outward
- Flower Base cup large (2): green 10″ cup shape
- Flower Base cup small (1): green 8″ cup shape
- Large Flowers in Base cup (6): pumpkin strip 6″, teardrop
- Small Flowers in Base cup (3): pumpkin strip 4″, teardrop
- Green Stems – Fold strip in half and glue to make double thick; glue to edge of flowers
- Green Leaves – Quilling comb, see video below
Now, let me introduce Meredith of The Paper Craftery and her easy to follow youtube videos:
Wow! That is really branching out from your norm.
I love learning new things, Sal, and quilled cards are showing up in many stores these days. They also sell for much more than a stamped card if I ever wanted to start selling cards; you can see why they are costly. With dies and stamps I can add a lot to the quilled cards and use my stash of tools! Win. Win.
Does Stampin’ Up! have quilling supplies?
Unfortunately not, Sal. Meredith said she gets her paper strips from Quilled Creations or Craft Harbor. I purchased a kit from Michaels and then more tools and paper from Hobby Lobby and Amazon.
SAL, Smile A Little
Karen
Click on little Sal in the computer to go to Meredith’s site.
September with Sharon Fincham
I have so much to show you today, so grab a cuppa and a pencil to take notes about the products in the awesome cards that we did at Sharon’s Shoebox Event.

 .
.
Products:
- Garden Green cardstock, Pearlescent paper and gold foil paper
- Merriest Moments bundle with a stamp set, a set of dies and a hybrid embossing folder
- Poinsettia Petals Stamp Set (outside greeting) & Dies, Ornate Layers Dies
- Farmhouse Christmas (inside greeting)
- Pearl bling and gold cord bow
 You were probably glad to do one more Christmas card!
Delighted, Sal!! And she had another Christmas card for us to make!


Just awesome! Thank you, Sharon.
Products:
- Navy Blue and Gold Foil paper, Gold Glimmer Paper for the star and brown for the stable scene
- Night in Bethlehem Edgelits Dies
- Candy Canes Die Set for the front greeting piece which has the ribbon run through each side
- Stitched Seasons Framelits Dies for the inside white background layer
- Star Of Light stamp set
Perfect choice of gold foil which catches the light!
Sure does, Sal! And Sharon had more for us. Check out the Halloween card kit she had for all of us:

So cute! I can’t help you with the products on this one. I loved that paper and needed a fall card before Halloween so I saved her cat for another card and made this one:
 .
.

I used the Nuts About Squirrels stamp set. The funky cut out for the front greeting is the fence post in the Grace’s Garden die set!
That’s thinking outside the box!
Well, so many of the dies were too big and this one fits the words nicely.
Sharon’s birthday was in September so I made her this birthday card:
 .
.
Sharon gave us a set of the flower blings you see in the card and I wanted to use them on her card so I used the die set I recently bought from Inlovearts and some fun fall designer series paper. The greeting is from the Pretty Petities stamp set with a matching punch. This hasn’t sold from the Bake Sale products so I pulled it out to use it.
You’ve pulled more than one set from those you are selling to use so why sell?
I know, Sal; call it sellers remorse but I have run out of room and need to purge.
Then Sharon sent me a thank you card! She loves bees and I found this die set at Simple Pleasures in Colorado Springs and I knew Sharon just ‘had to have it’!! It is a die set from Elizabeth Craft Designs.

Could you have a salt shaker die set made?
Hmmm……… that could be interesting.
Happy fall everyone! I hope you enjoyed the cards and they ..
I will say it… ….bring a pinch of creativity to spice up your crafting world.
Thanks, Sal!
SAL, Shoebox A Love of crafting
Karen
Click here to go to the Bake Sale Tab.
More Dainty Delight Cards
I have two more Dainty Delight cards to share today, one using the Dainty Delight stamps and one using the Dainty Delight Dies! This is a Triple Time Stamping Card where you layer the three white pieces together with temporary glue, stamp the images and color them, then take the three white pieces apart and layer them on the base and two purple pieces.

 .
.
Recipe for Triple Time Stamping Layers
- Stamps: Dainty Delight, Shaded Summer for the Happy Birthday
- Base: Highland Heather; 11 X 4 1/4, scored at 5 1/2
- Mats: same cardstock as bases
- 3 1/4 X 4 1/2
- 2 1/4 X 3 1/2
- Artwork Layers: Basic White, Temporarily adhere together with temp glue or use just a bit of snail and then use your fingers to rub the snail so the oil in your fingers makes the glue less sticky
- 2 X 3 1/4
- 3 X 4 1/4
- 4 X 5 1/4
- Inside Layer: Basic White, 4 X 5 1/4
- Embellishments: Highland Heather Open Weave Ribbon, Brass Butterflies;
- Copic Markers: BV00-flowers, Y06-centers, YG13 for the greenery
- Ink: Highland Heather and Shaded Spruce for front greeting; the flower stems are also stamped in Highland Heather
- Markers: I used Stampin’ Up! watercolor markers for the little inside flowers at the bottom
 Which do you like better for triple time- the Dainty, the Color Contour or the butterflies?
Dainty has its place depending on the person. I guess that is why we choose to make cards that we can personalize!
Click HERE to visit the prior post with two other Triple Time Stamping cards! Then vote for your favorite!
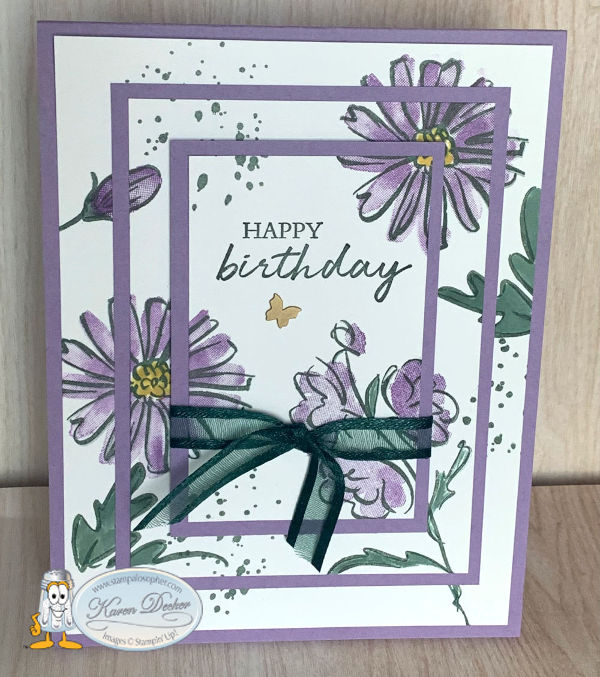
This next card uses the dies instead of the stamps:


For this card I cased a card made by Jan Clother of New Zealand!
Recipe
- Base: Thick Basic White, 5 1/2 X 8 1/2, scored at 4 1/4
- Layer (X2): Basic White, 5 1/4 X 4; Use the 3D Brick & Mortar Embossing Folder to emboss the front layer
- Flowers: Die cut with Dainty Delight dies
- Blushing Bride – 1 1/2 X 2, 4 full flower cut, 1 flower bud cut
- Vine: Old Olive, 8 X 2 1/2, die cut 3 with Dainty Delight vine die, use cut off edge of one for the inside
- Butterflies: Blushing Bride, 2 X 1, Butterfly Brilliance Dies, Die cut one tiny and one small
- Front Greeting: Basic White, I reached in my container of greetings from More Messages and then punched two backgrounds in Blushing Bride cutting them and layering them
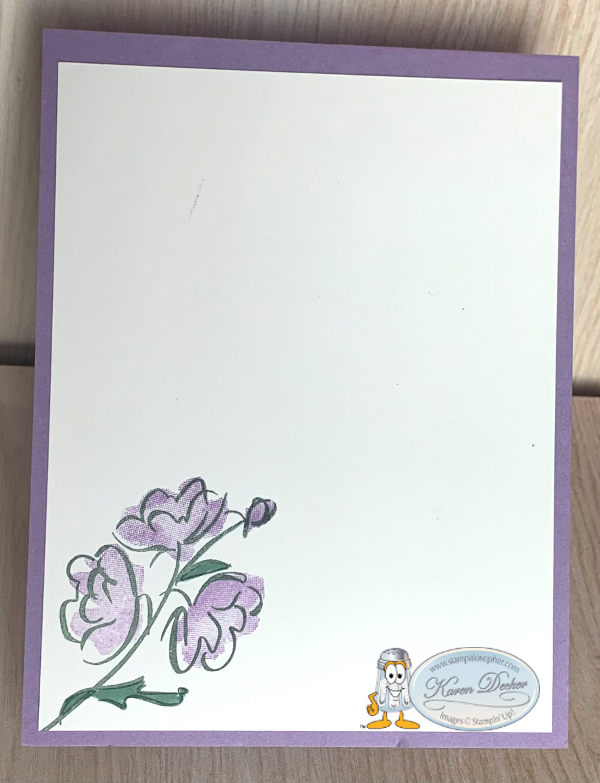
- The Thank You Greeting on the inside is from Go To Greetings stamped in Old Olive
- Embellish: clear jewels for the inside of the flowers and sparkly jewels for the butterfly and card front
So is the Dainty Delight bundle going to be put in the bake sale since you used it more than most?
Oh my, Sal, that is the best reason to keep it in the stash. So many of the BAKE SALE items I never used or only used for one workshop. Friends, if the item is in bold it is still available at http://stampinup.com
Check out the BAKE SALE today for great deals on products. I am listing the rest of the stamps on Facebook today.
Thank you for checking out my blog!
SAL, Sacrificing A Lot of the stash today
Karen
Copyright
Unless otherwise indicated, all stamped images are 2009-2023 Stampin’ Up! The projects shown are to spice up your personal creativity and may not be copied for publication or contest submission. The content of this website is my sole responsibility and the use of and content of classes, services or products offered are not endorsed by Stampin’ Up!
Dainty Delight Stampin’ Up!
The Dainty Delight bundle at Stampin’ Up! carried over into the new catalog and I am definitely delighted! I am casing a Wyermann’s Whimsey card design and she has a great tip for us on her youtube channel. I will include those links further down the blog.


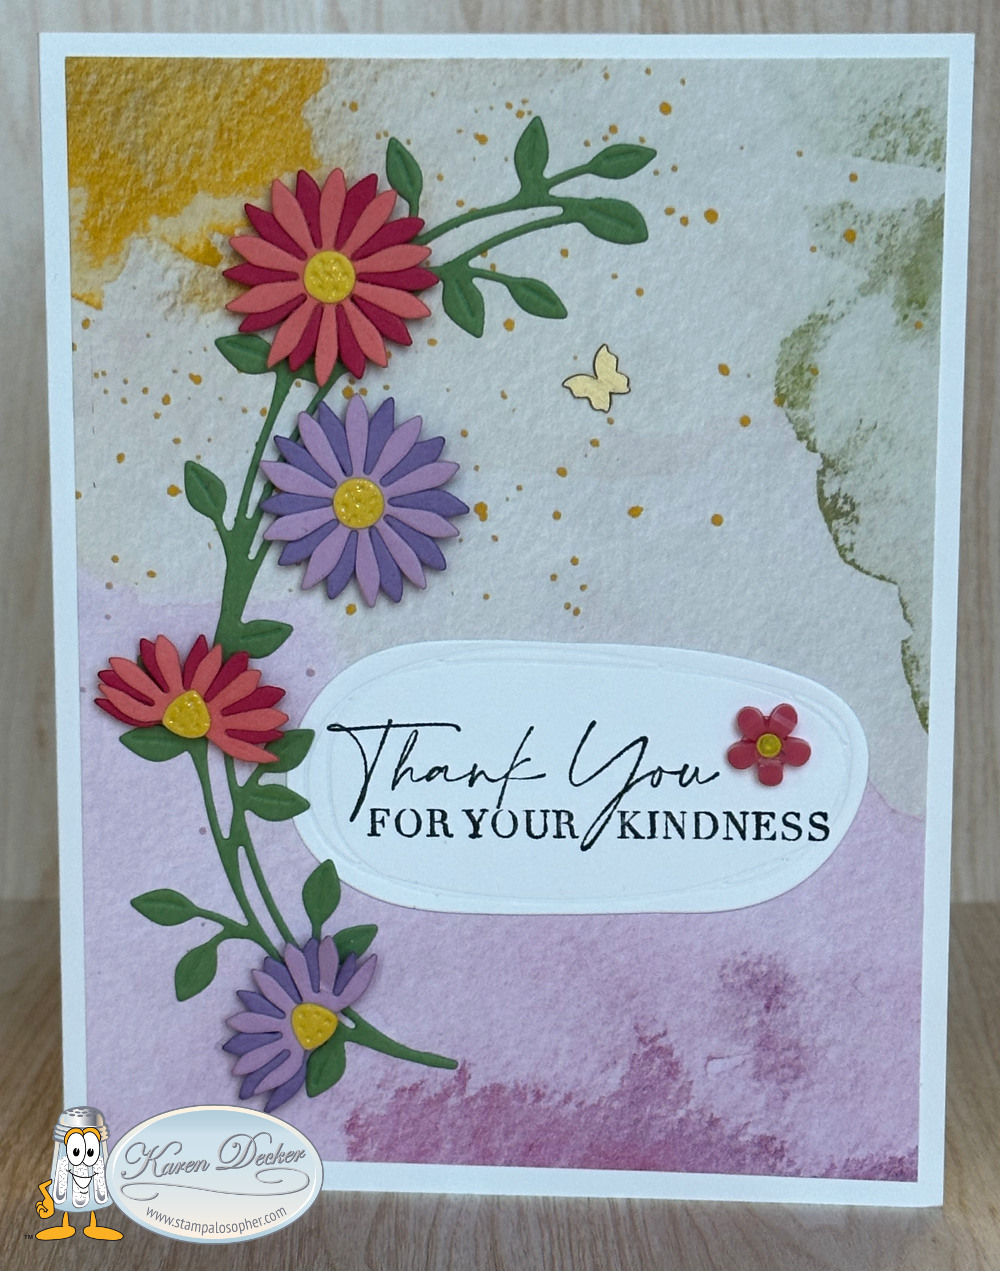
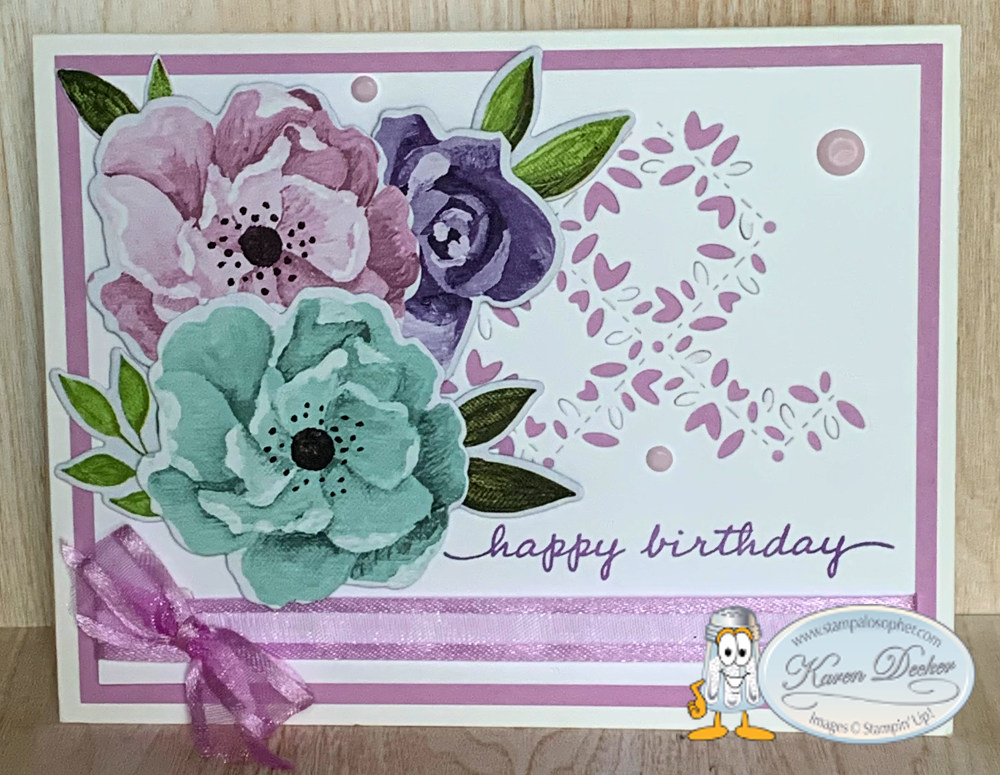
Here is a thank you card just like Lorraine Weyermann’s with just a few of my own changes:
 .
. 
Wait! You used a die cut for the greeting that isn’t symmetrical?!
Yes, Sal, it is from the Beautiful Shapes Dies from Stampin’ Up! – retiring May 3!
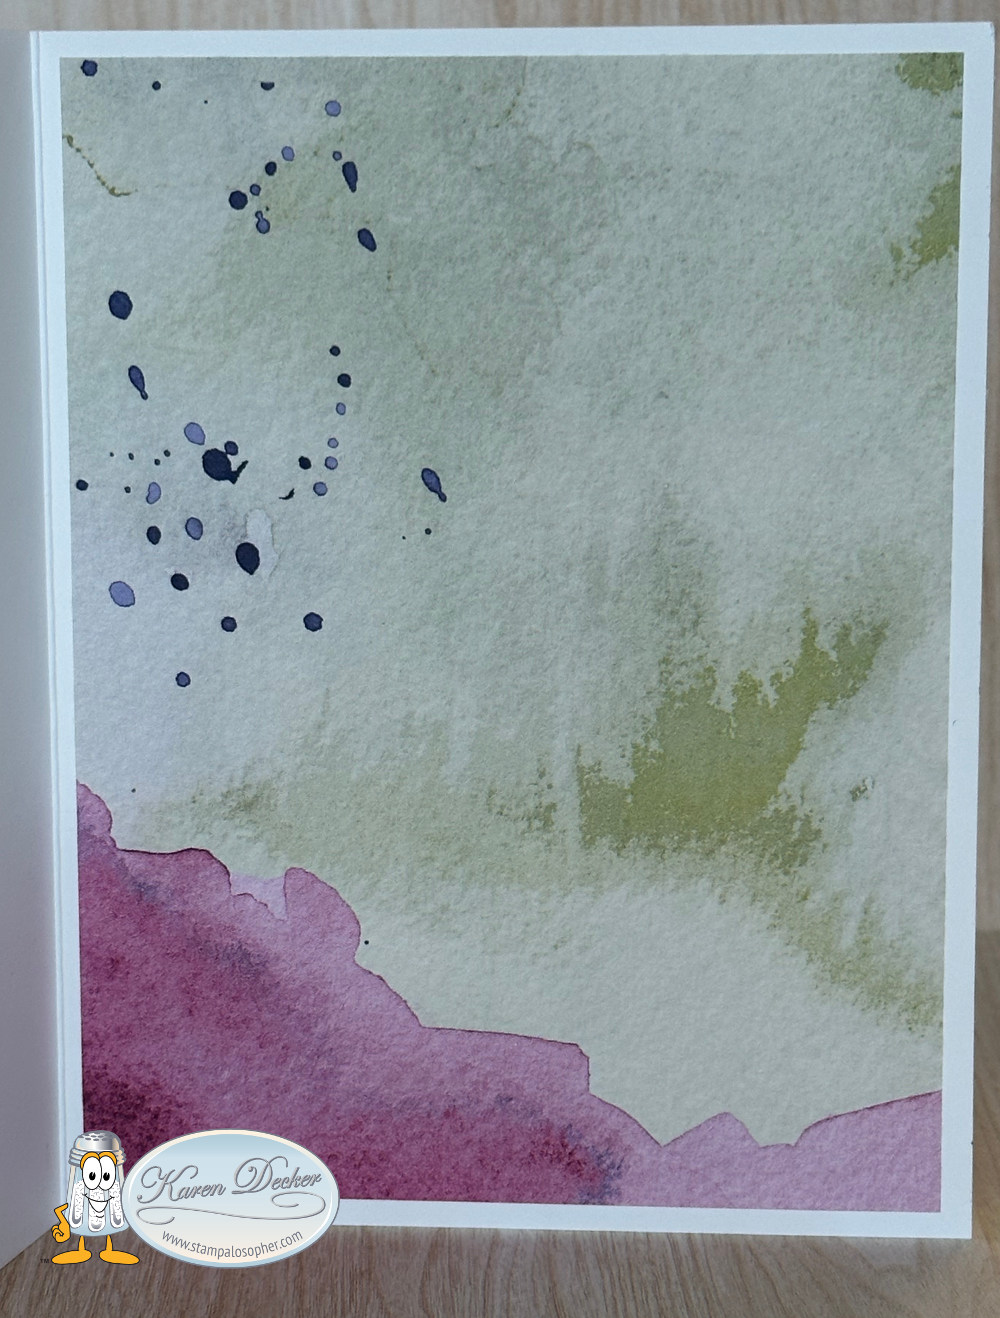
The stamping on the inside of the birthday card is from the Stampin’ Up! Artistically Inked Stamp Set and it is not retiring. The little flowers and grass at the bottom of the inside of the birthday card are from the Dainty Delight stamp set and I colored the back of the stamp with markers. The front greetings are both from the Dainty Delight stamp set stamped in Memento Black on a Basic White Beautiful Shapes Die- (the one I said I would never use-ha -never say never)!
Recipe
- Base: Basic White, 5 1/2 X 8 1/2, scored at 4 1/4
- Layer (X2): Designer Series Paper (DSP), 5 1/4 X 4 (cut with the yellow at top left for a bit of sunshine)
- Flowers: Die cut with Dainty Delight dies
- Flirty Flamingo – 1 1/2 X 2, 1 full flower cut, 1 half flower cut
- Melon Mambo – 1 1/2 X 2, 1 full flower cut, 1 half flower cut, layer behind Flirty Flamingo
- Fresh Freesia – 1 1/2 X 2, 1 full flower cut, 1 half flower cut
- Highland Heather – 1 1/2 X 2, 1 full flower cut, 1 half flower cut, layer behind Fresh Freesia
- Vine: Old Olive, 5 X 2 1/2, die cut with Dainty Delight vine die
- Centers: Daffodil Delight, 1 X 1, die cut with the center which has four centers together – 2 full and 2 half centers
- Greeting: Basic White, 3 1/4 X 1 1/2, stamp greeting in Memento Black, die cut with Beautiful Shapes die and adhere direct to the DSP
- Embellish: brass butterfly and flower resin shape – retired
The vine is glued direct to the DSP.
Layer the flowers with glue dots and then pop up with dimensionals.
Lorraine Weyermann’s video below shows this presentation of the dies:

And one more video from Melanie Coverston using a background with a brick embossing folder and sunflowers:
Yes, thanks to the ladies who post videos for us to learn from.
My Bake Sale tab now has the products I am selling so let me know if you would like anything. I will eventually post to Facebook and Ebay but I wanted to let my loyal followers have first pick. I accept paypal, so send me your requests and your zip code and I will invoice you. When I receive payment, I will immediatly ship the product(s).
Sal, Stamp A Lot
Karen
Copyright
Unless otherwise indicated, all stamped images are 2009-2023 Stampin’ Up! The projects shown are to spice up your personal creativity and may not be copied for publication or contest submission. The content of this website is my sole responsibility and the use of and content of classes, services or products offered are not endorsed by Stampin’ Up!
Triple Time Stamping
Have you ever tried ‘Triple Time Stamping’? It gives a fun look and is not hard to accomplish. You have three sizes of Basic White temporarily adhered together on which you stamp your images and then you pull them apart and add the borders. Easy peasy!
Color and Contour Triple Time Stamping Card (A)
 .
.
If you love a water color look, you will love this stamp set. You actually have one stamp for the outline and one stamp for the coloring. The stamps for coloring do not color in the flowers perfectly, use a Blender Pen or Water Painter if you prefer a perfectly colored flower with a water color look or use a marker in the same color.
I love those little dots you added!
They are part of the set, Sal, take a look-see:

The Scalloped Contour Dies go with the set. Where you see the stamps with a pinkish color, that is showing a die that cuts that stamp. This die set is a must for your stash!

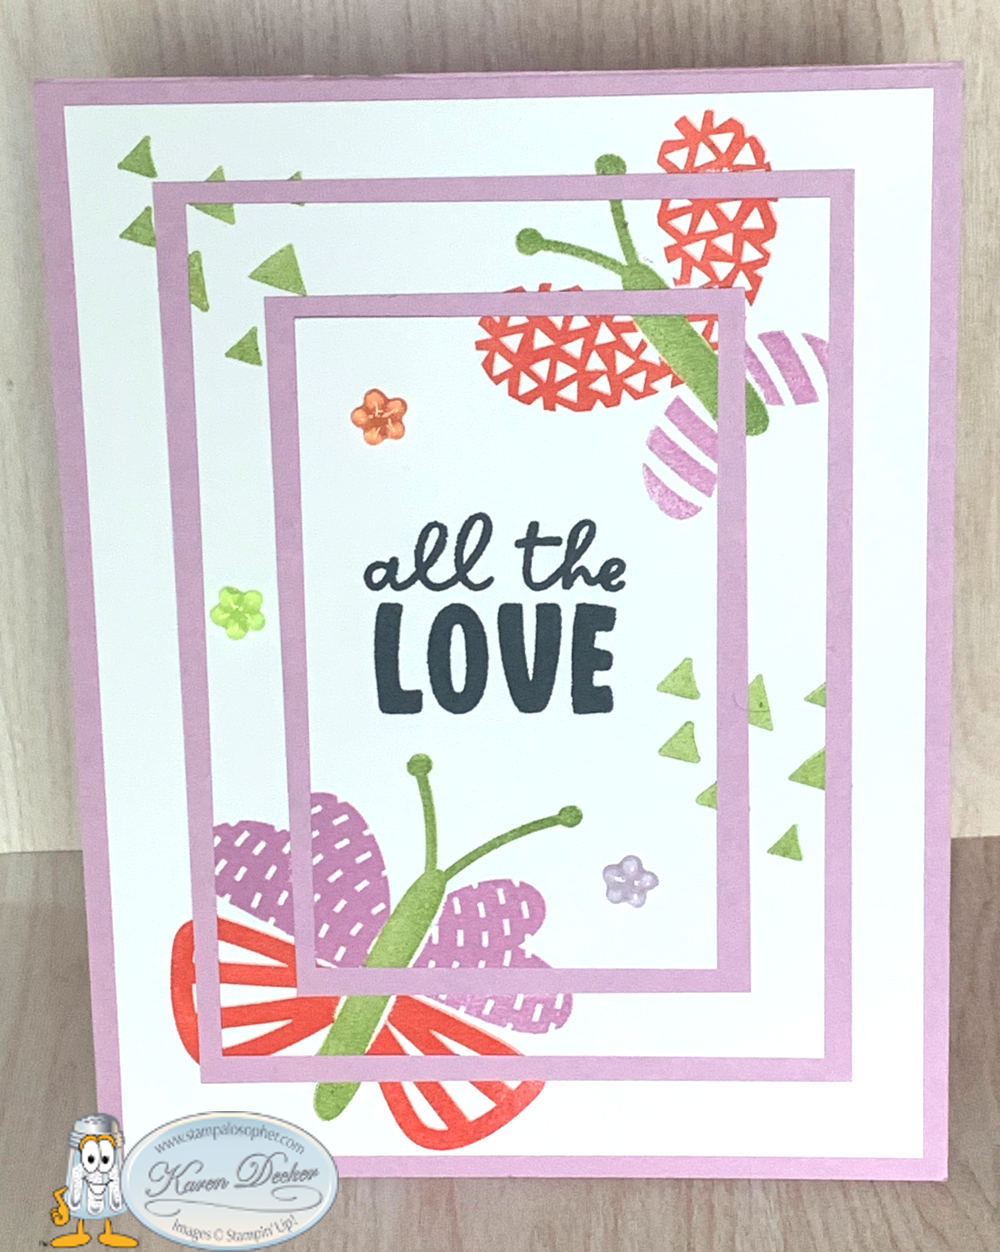
Best Butterflies Triple Time Stamping Card (B)
Design your own whimsical butterfly with the Best Butterflies stamp set! There’s big wings, small wings, big bodies, small bodies, big words, small words and triangles or dots for added interest! I used Fresh Freesia and Calypso Coral with Granny Apple Green on this card with a Fresh Freesia base. Those little flowers are Fun Flowers Resin Shapes.
 .
.  .
. For the butterfly card I found it best to use the Stamparatus to stamp the images; with the added layers it is a bit hard to get the images to stamp completely so you need to stamp a second or third time. However, remember there is a border that will cover 1/8 inch of the image so don’t fret too much about those incomplete edges right next to a layer where the mat will be.
For the Best Butterflies card, use one plate for the butterfly bodies- stamp this first then mask, a second plate for the calypso coral wings and a third plate (or the back of your plate) for the fresh freesia wings. It makes a workshop go quickly to have them all aligned on different plates for perfect stamping. I had several butterfly body masks already fussy cut with our new Masking Paper to lay over the bodies before stamping the wings. Post it notes work pretty well if you don’t have the masking paper, just stamp the image on the post it note and fussy cut.
For the Color and Contour card, I mounted the stamps on acrylic blocks to give the stampers opportunity to stamp and color only what they wanted. I had an Evening Evergreen marker available so if the image wasn’t stamped clear to the edge we could use the marker to complete it, if we saw it was necessary after adding the border mats. I also had a Highland Heather marker so those who didn’t like the watercolor look could color in their flowers.
Secondly, start with stamping your greeting on the center layer, then stamp the images around the greeting.
Recipe for Triple Time Stamping Layers
- Base: A – Highland Heather; B- Fresh Freesia; 11 X 4 1/4, scored at 5 1/2
- Mats: same cardstock as bases
- 3 1/4 X 4 1/2
- 2 1/4 X 3 1/2
- Artwork Layers: Basic White, Temporarily adhere together with temp glue or use just a bit of snail and then use your fingers to rub the snail so the oil in your fingers makes the glue less sticky
- 2 X 3 1/4
- 3 X 4 1/4
- 4 X 5 1/4
- Inside Layer: Basic White, 4 X 5 1/4
- Ink: A- Evening Evergreen, Highland Heather, Crushed Curry; B- Fresh Freesia, Calypso Coral and Granny Apple Green with the greeting in Tuxedo Black.
- Embellishments: A- Evening Evergreen Open Weave Ribbon, Brass Butterfly; B- Fun Flowers Resin Shapes
The recipe sounds pretty easy!
The beauty, Sal, is all in the stamping and adding the borders!
For the Color and Contour card I used a Happy Birthday greeting from the Shaded Summer Stamp Set.
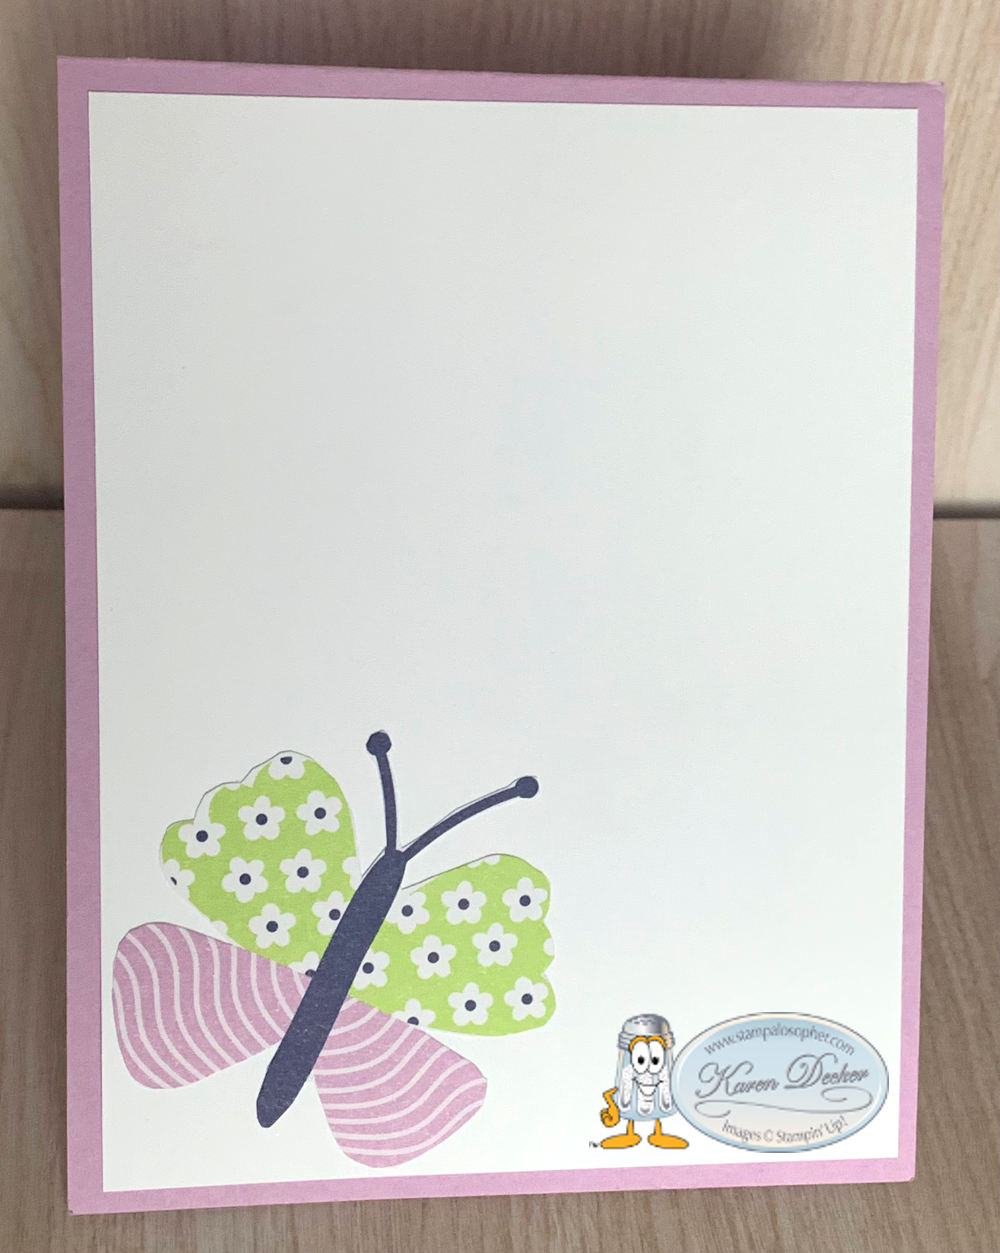
For the inside of the Best Butterflies card, I used a fussy cut butterfly from the Butterfly Kisses Designer Series Paper.
Click on little Sal in the computer to go to the online store.
SAL, Sharing A Love of stamping
Karen
Happiness Abounds, Flowering Tulips, Sending Smiles
Hello Stamping Friends, (double click the header if you are using a mobile device)
June’s Party Event included three cards:
1) Happiness Abounds

 .
. 2) Flowering Tulips
 .
.  .
. 3) Sending Smiles
 .
.  .
.
What a fun party! One lady said she was going to get a frame and make the card a wall hanging! There was lots of laughter as the stamping was going on!
My thank you gift to the hostess was a sweet bag made with the Butterfly Kisses designer series paper, casing Debra Harrison at www.simplysweetinkdesigns.com, by covering a white lunch bag with designer series paper. The guests received an Embossed Treat Bag of goodies with a Sweet Songbird flying through the air with clouds from Give It A Whirl dies.
 .
.  .
. 
The hostess received a card in her bag with a gift certificate to one of my events among other goodies. The greeting on the card is from Happy Hedgehogs. The ‘Hello Friend’ is the retired Friendly Hello. ‘So Happy You’re Here’ is from Sweet Songbirds.
 .
.  .
.
Those butterflies and birds just make me feel happy! So what is in the bags?
For the bags, I found a variety pack of M&Ms with hopes that they each would have a little of a flavor they liked and then I added a bag of flower seeds and a thank you card they could use; that way they went home with four cards from the event. For the thank you card I used the cards and matching envelopes from Sale A Bration. The door prize was a set of garden tools to help the winner plant her flower seeds.

The cardstock and matching envelope are so pretty that all I did is add the layering thank you from Amazing Thanks dies in the same colors of Pool Party and Soft Sea Foam, scored two lines at the bottom and then added some gems! I wish I would have taken a better picture.
Recipe for card #1) Happiness Abounds
- Base: Thick Whisper White, 5 1/2 X 8 1/2 scored at 4 1/4
- Layer 1(X2): Fresh Freesia, 5 1/4 X 4
- Layer 2 (X2): Basic White, 3 3/4 X 5
- Outside layer is die cut with Blossoming Happiness Die with the top point of die 1/4″ from top
- Stamp ‘happy birthday’ from Happiness Abounds Stamp Set in Gorgeous Grape Ink 3/4″ from bottom
- Wrap 6″ of Fresh Freesia 3/8″ Open Weave Ribbon around the bottom, add bow- 8″ of ribbon needed
- Inside uses a fussy cut flower from the side of Hues of Happinesss designer series paper, (don’t toss out those sides of your pretty paper); stamp greeting from Happiness Abounds Stamp Set in Gorgeous Grape ink
- Die cut three flowers, three double leaves and one many leaved stem from the Hues of Happinesss designer series paper with Blossoming Happiness Dies, attach flowers with Stampin’ Dimensionals and leaves with Glue Dots.
- Add bling
Recipe for card #2) Flowering Tulips (thank you Lindastamps.com)
- Base: Pool Party, 4 1/4 X 11, scored at 5 1/2
- Layer 1: Basic Black, 4 X 5 1/4
- Top Pieces:
- Flowering Fields DSP (retired) Tulips – 3 X 4 for middle
- Flowering Fields DSP (retired) Dots- 1 X 4 (X2) for top and bottom
- Mount the top and bottom first, flush to the black layer then mount the middle
- Banner: Vellum, 5 1/4 X 1 9/16 (1/16 beyond 1/2), punch with banner punch
- Tip: Build your banner with your tulip, stem and greeting then adhere to card front, I have vellum glue that doesn’t show but you can glue behind your tulip and greeting with just a touch under butterfly
- Tulip:
- Poppy Parade for main piece, 3 1/4 X 1 1/2 die cut with Tulips Dies
- Petal Pink for inside piece of tulip, 1 X 1 1/4 die cut with Tulips Dies; I used the top three dies shown in this picture with the first two pieces both done in Poppy Parade and sponged slightly with white ink and the third piece done in Petal Pink
- Greenery is Garden Green with the longer stem and leaf shown to the right in the picture and sponged with Garden Green to look like the DSP (designer series paper)

- Inside Layer 1:
- Poppy Parade, 4 X 5 1/4
- Basic White, 3 3/4 X 5
- DSP at bottom, 3 3/4 X 1
- Basic Black Strip, 3 3/4 X 1/8
- Greeting: Basic White, 2 X 2, stamp with greeting from Flowering Tulips Stamp Set and die cut with the scalloped Layering Circle Die, second to smallest that is 1 1/2 ” in diameter
- Brass Butterfly for bling
Recipe for card #3) Sending Smiles
- Base: Polished Pink, 8 1/2 X 5 1/2, scored at 4 1/4
- Layer 1 (X2): Basic White, 5 1/4 X 4
- Greeting:
- Basic White, 4 X 1, Stamp with Sending Smiles greeting in Polished Pink and die cut with Sending Dies greeting strip
- Sending:
- Background for ‘sending’ is Polished Pink, 1 5/8 X 3 5/8, Die cut with solid ‘sending’ in Sending Dies
- Top of ‘sending’ is Basic White, 1 5/8 X 3 5/8, layered on a piece of Adhesive Sheet 1 1/2 X 3 1/2, then die cut with the detailed ‘sending’ in the Sending Dies
- Brass Butterflies and In Color Jewels (retired)
- Inks:
- Polished Pink for flowers
- Pale Papaya for center of flowers
- Garden Green for stems of the flowers
- Granny Apple Green full strength and then second generation (no reinking just stamp) for grass
- Tips:
- Cut out your sending greeting and position it (without adhering) so you see where to stamp the flowers and stems. Be sure and move it out of the way before stamping
- Position the two flowers on the left on the same block by stamping the green stem made for the two flowers on a piece of scratch paper/ grid paper – and then positioning the flowers on the block so they will fit on the stem. If you stamp the stem first you may go off the paper with your flowers. The best option is to use a stamparatus with one plate for flowers and one plate for stems.
- Mask the flowers by stamping them on our Masking Paper and then fussy cutting them out. Place them on the flowers and then stamp the stem.
Hostess Bag
- White Lunch Bag base: Cut the bag off so it is 6″ tall
- Front: Butterfly Kisses designer series paper, 6″ X width of bag, adhere to front of bag
- Flap: Butterfly Kisses DSP (designer series paper), 3 X width of bag; score at 1″ on the short side and round the opposite corners. Adhere 1″ score section to back of lunch bag
- Label: Basic White, die cut with the Designer Tags Die, stamp sentiment in Starry Sky
- Label Strip: Fresh Freesia, 11/16″ (1/16 less than 3/4) X width of bag
- Fold over the top flap and adhere the label about half way down from flap
- Fussy cut and adhere 3 butterflies from the DSP and add Fun Flowers Resin Shapes, a clip and a bow in the clip made from Orchid Oasis 1/8″ Mettalic Woven Ribbon
Thank you for sharing part of your day with me.
SAL, Sharing A Lot
Karen

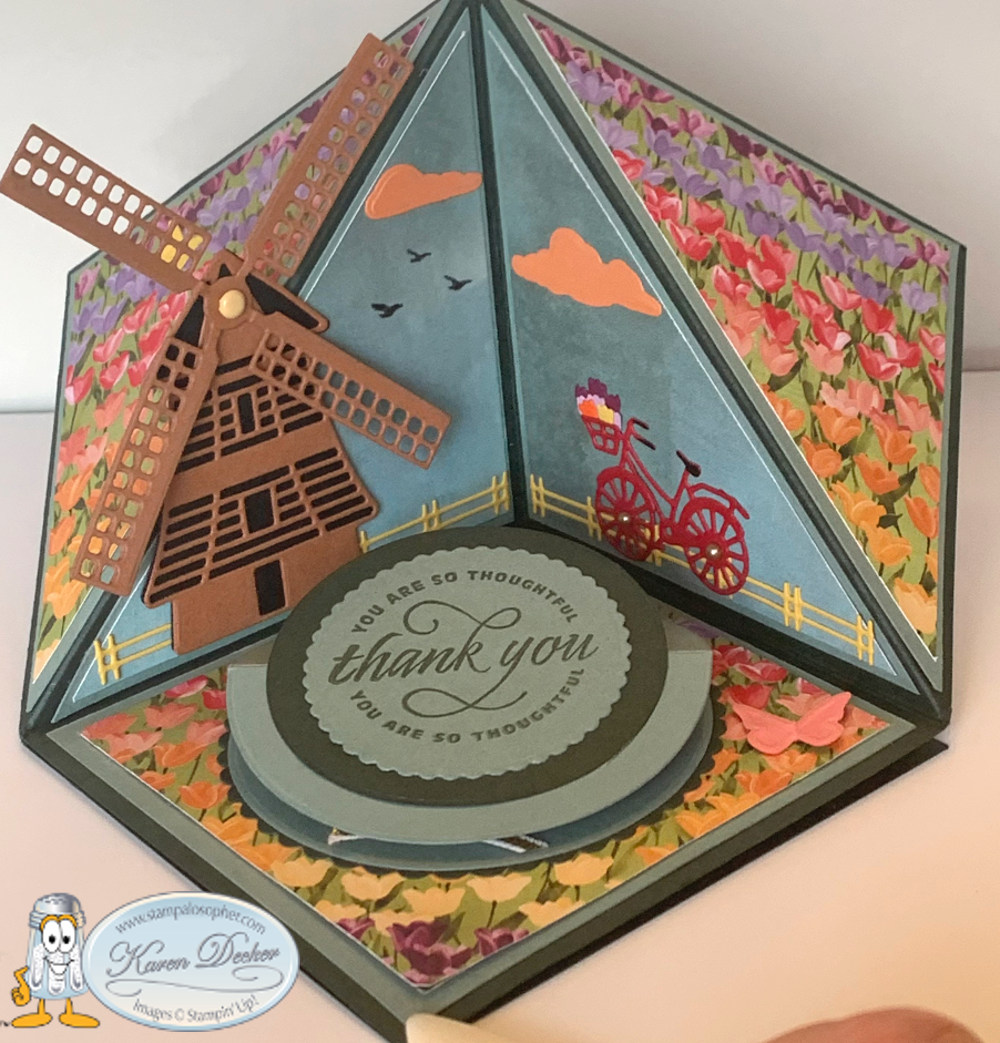
Triangle Corner Pop Up Card for Case The Creator (CTC) #3
Hello Stamping Friends,
Case The Creator Card Challenge
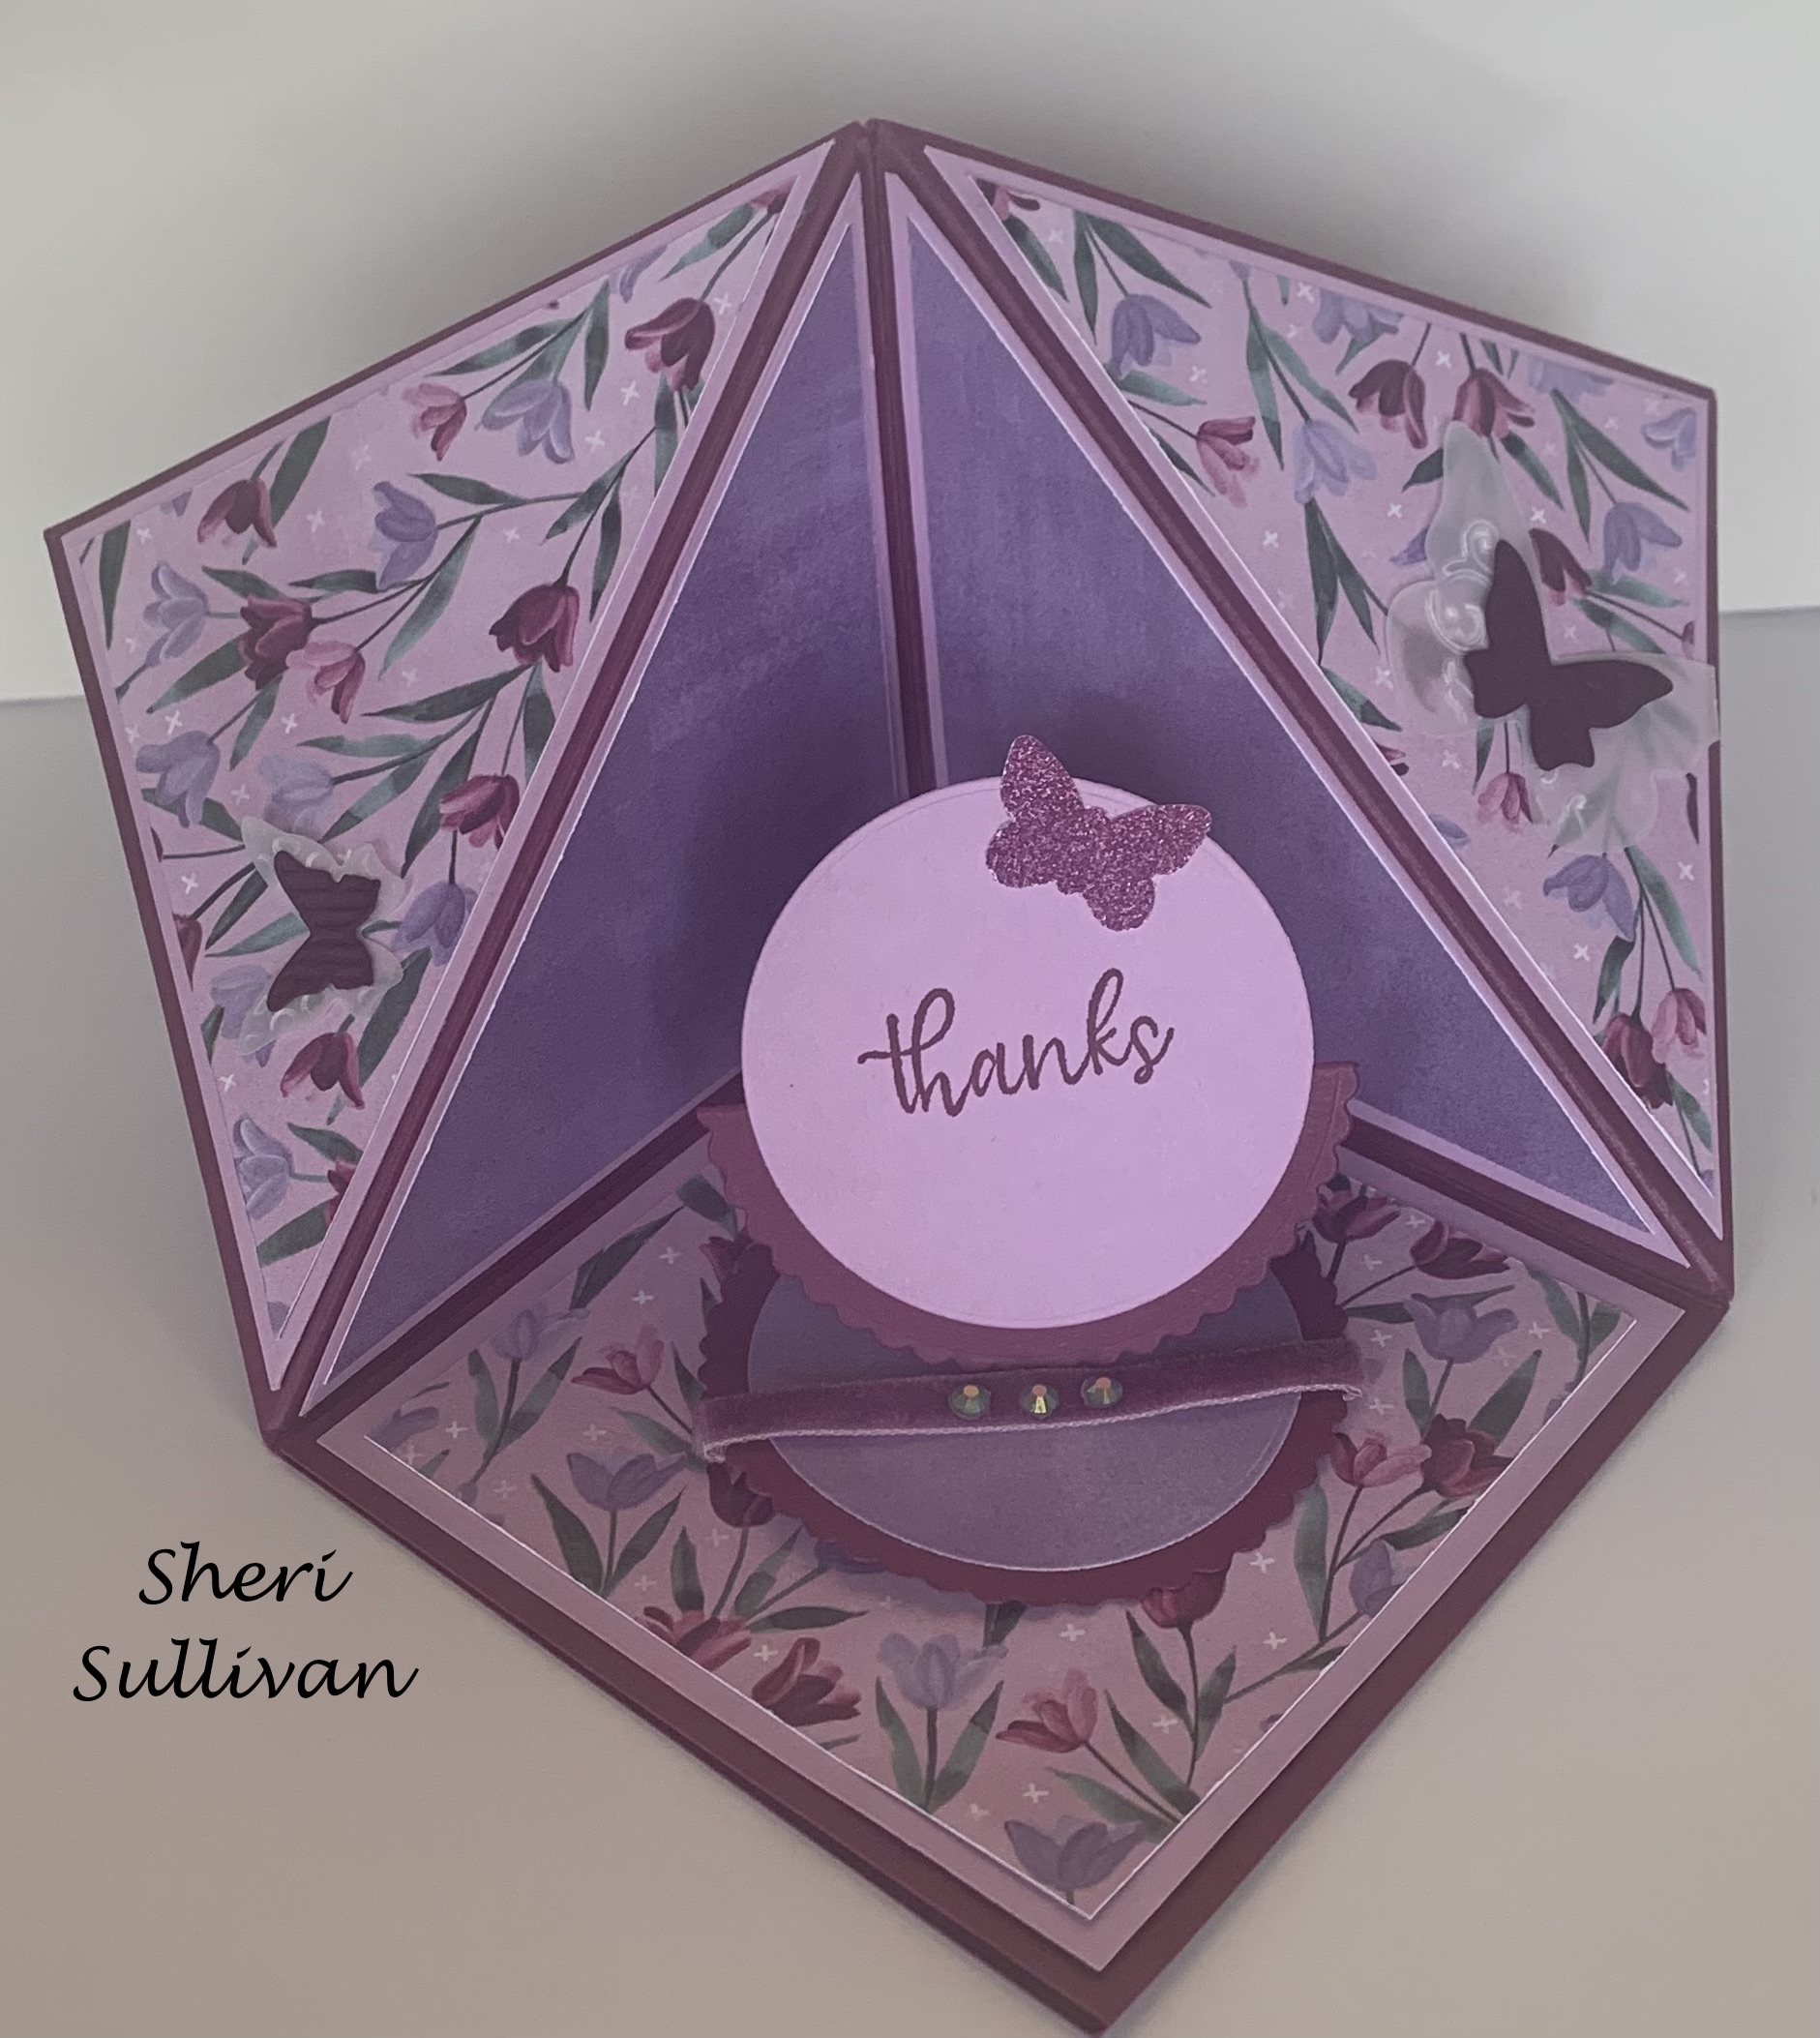
This month we cased Dawn Griffith’s Triangle Corner Pop Up Easel Card!
Yes, Dawn calls it a “Fancy, Schmancy Corner Fun Fold”! Her video is in the instructions.
Case The Creator #3 printable pdf file

I ordered the tiny magnets from Amazon:

 .
.  .
. 
The bicycle is hidden when you open up the easel so be careful with your design. I had a lot of fun with the bicycle! I used the long, tiny tulip die to create a basket of tulips! I will write my greeting under the ‘thank you’ since I went against protocol and made the bottom left another flower display instead of the place to write a note.
Heather made a fabulous graduation card with beautiful gold embossed paper and black! I love the diploma for the easel stand up!
 .
. 
Joy’s beautiful card uses the ‘Expressions In Ink’ designer series paper. We only have until May 2nd to get discontinuing items, like this DSP, from the annual catalog!
 .
.
Sharon’s uses the Tea Time stamp set and Tea Together dies- look at the little heart she put on the lid!

Sheri used the ‘Flowering Fields’ DSP and the ‘Simply Succulents’ stamp set for greetings:
. 
 .
.
Ann used the ‘You’re A Peach’ DSP and the ’Sweet As A Peach Bundle’. Those peaches even look fuzzy! The amazing “Dist ink tive” stamps! These are in the Annual catalog as well so order before May 2.

 .
.
Jo’s little rabbit made us all smile, and eggs from the Arrange A Wreath set and Wreath Builder Dies were perfect with the paper.
 .
.  .
.
 They followed instructions and had a large place for a message.
Indeed! Isn’t it fun to see all the different creations from one set of instructions?!
SAL, Seeing April Leave
Karen
Click on little Sal in the computer to shop.

Simple Side Step Card
Hello Stamping Friends,
Let’s look at a Simple Side Step Card. I saw this design on Lori Pinto’s Lollipop Paper & Ink blog and used it for my Case The Creator #2 Challenge with my stamping group. It is so cool to see all the different cards from one set of instructions!
Case The Creator #2 printable pdf file
And here is the file if you don’t want to print it out:

I used the SAB Daffodil Afternoon designer series paper for my background and the Daffodil Dies for my card:
 .
.  .
. 
Joy Meadows used the Pierced Blooms Dies for her beautiful card:

Ann Hausmann used the Sale A Bration Friendly Hello set with the Friendly Hello Designer Series Paper:
 .
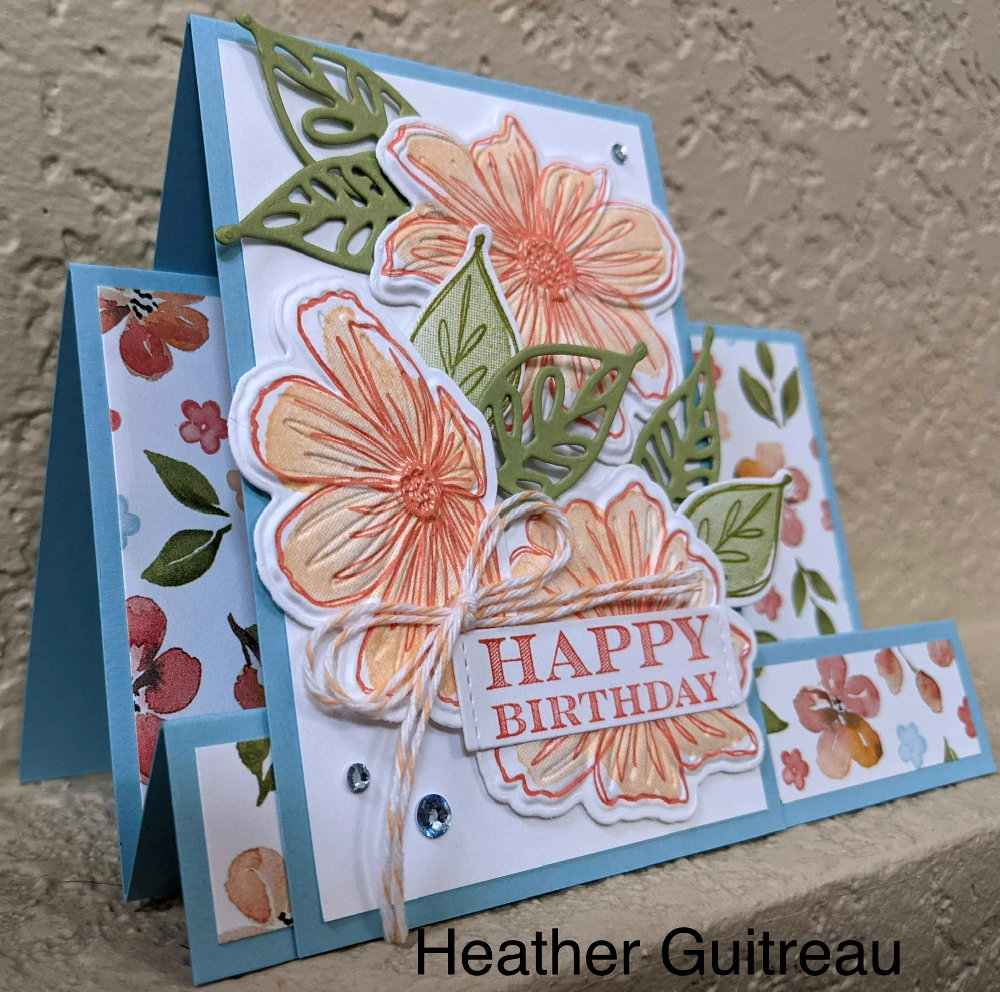
. Heather Guitreau used the Art In Bloom bundle with its Bloom Hybrid Embossing folder and dies:


They are all beautiful and so fun to see the variety! Thank you for participating!
I made a thank you card using this same style. I used the Happy Hedgehogs stamp set and the retired Love You Lots stamp set and the SAB Thoughtful Blooms set. I used the New Horizons DSP and then sponged the front to match the DSP after masking the stamped images. The hedgehog is the little one in the set and I used the reverse image technique to face him toward the right. Just use a silicone pad and your stamparatus, stamp the image several times in Memento on the silicon pad and then carefully lay your paper on top and burnish to get a nice reverse image.
 .
. 
Thank you for sharing some of your precious time with me!
SAL, Spring At Last
Welcome to my blog!

Sal Window to Products


