
Home » Birthday Masculine
Category Archives: Birthday Masculine
Paul’s Birthday Celebration
Time for birthday cards! I really can make simple cards! This one wasn’t a fun fold just a simple one, but I think the monochromatic look gives it a wow factor.

For our friend Dan!
 .
.
For Paul!
 .
.
Recipe
- Base: Starry Sky, 5 1/2 X 8 1/2, Scored at 4 1/4
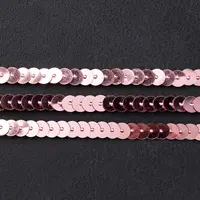
- Strips on Front (3): DSP, 1/2″ each, mount with 1/8″ borders between
- White Layer on Front: Basic White, 2 1/8 X 5 1/4
- White Layer Inside: Basic White, 4 X 5 1/4
- Side Strip on Inside: DSP, 1 X 5 1/4
- Stamp Sets:
- Just Believe Stampin’ Up! for greenery stamped in Blueberry Bushel
- Outside ‘Happy Birthday’ is from Go To Greetings Stampin’ Up!
- Inside ‘May Good Things Grow’ – Dragonfly Garden
- Inside ‘No One Deserves…’, ‘Love you so much’, – Flowering Tulips
- Embellishments
- 3 Brass Butterflies
- 3 Buttons with 3 navy blue gems for centers (attach with glue dots- the little glue dots on the gems won’t hold)
 Christine’s valentine card for the shoebox event must have given you a bug for buttons!
Yes, Sal! Before her card – see it here – I hadn’t used a button for years but I have a huge stash of them so I experimented and really liked the result.
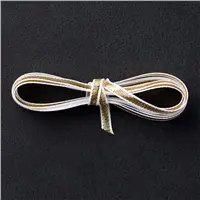
Paul received a card from Jo and Dan and it was so fun! He is looking forward to fishing trips this summer and Jo capitalized on his love of fishing. The pole has a layer of gold foil and the hooks on the outside and inside are silver foil but the camera didn’t ‘catch’ those details.


For Paul’s birthday we spent the weekend in Breckenridge, CO. It was spring break for many so the town was crowded but still fun to ride a gondola from where we were staying up on the mountain to the downtown restaurant. Stacia, Jonathan, Emma and Joey met us for supper Friday night. They live in Steamboat so they could have supper and then drive home. We had an evening meal here before we left with Amber, Tyler, Jaxson & Emmitt since it was too far for them to drive.

Swiss Haven fondue supper!

Dessert time!

Paul’s birthday was well celebrated and I know he felt loved!
Thanks for stopping by!
SAL, Scrapbooking A Little (digitally)
Karen

Riddle for the day:
Q= What goes up but never comes down?
A= Your Age
Best Friends’ Birthday Cards
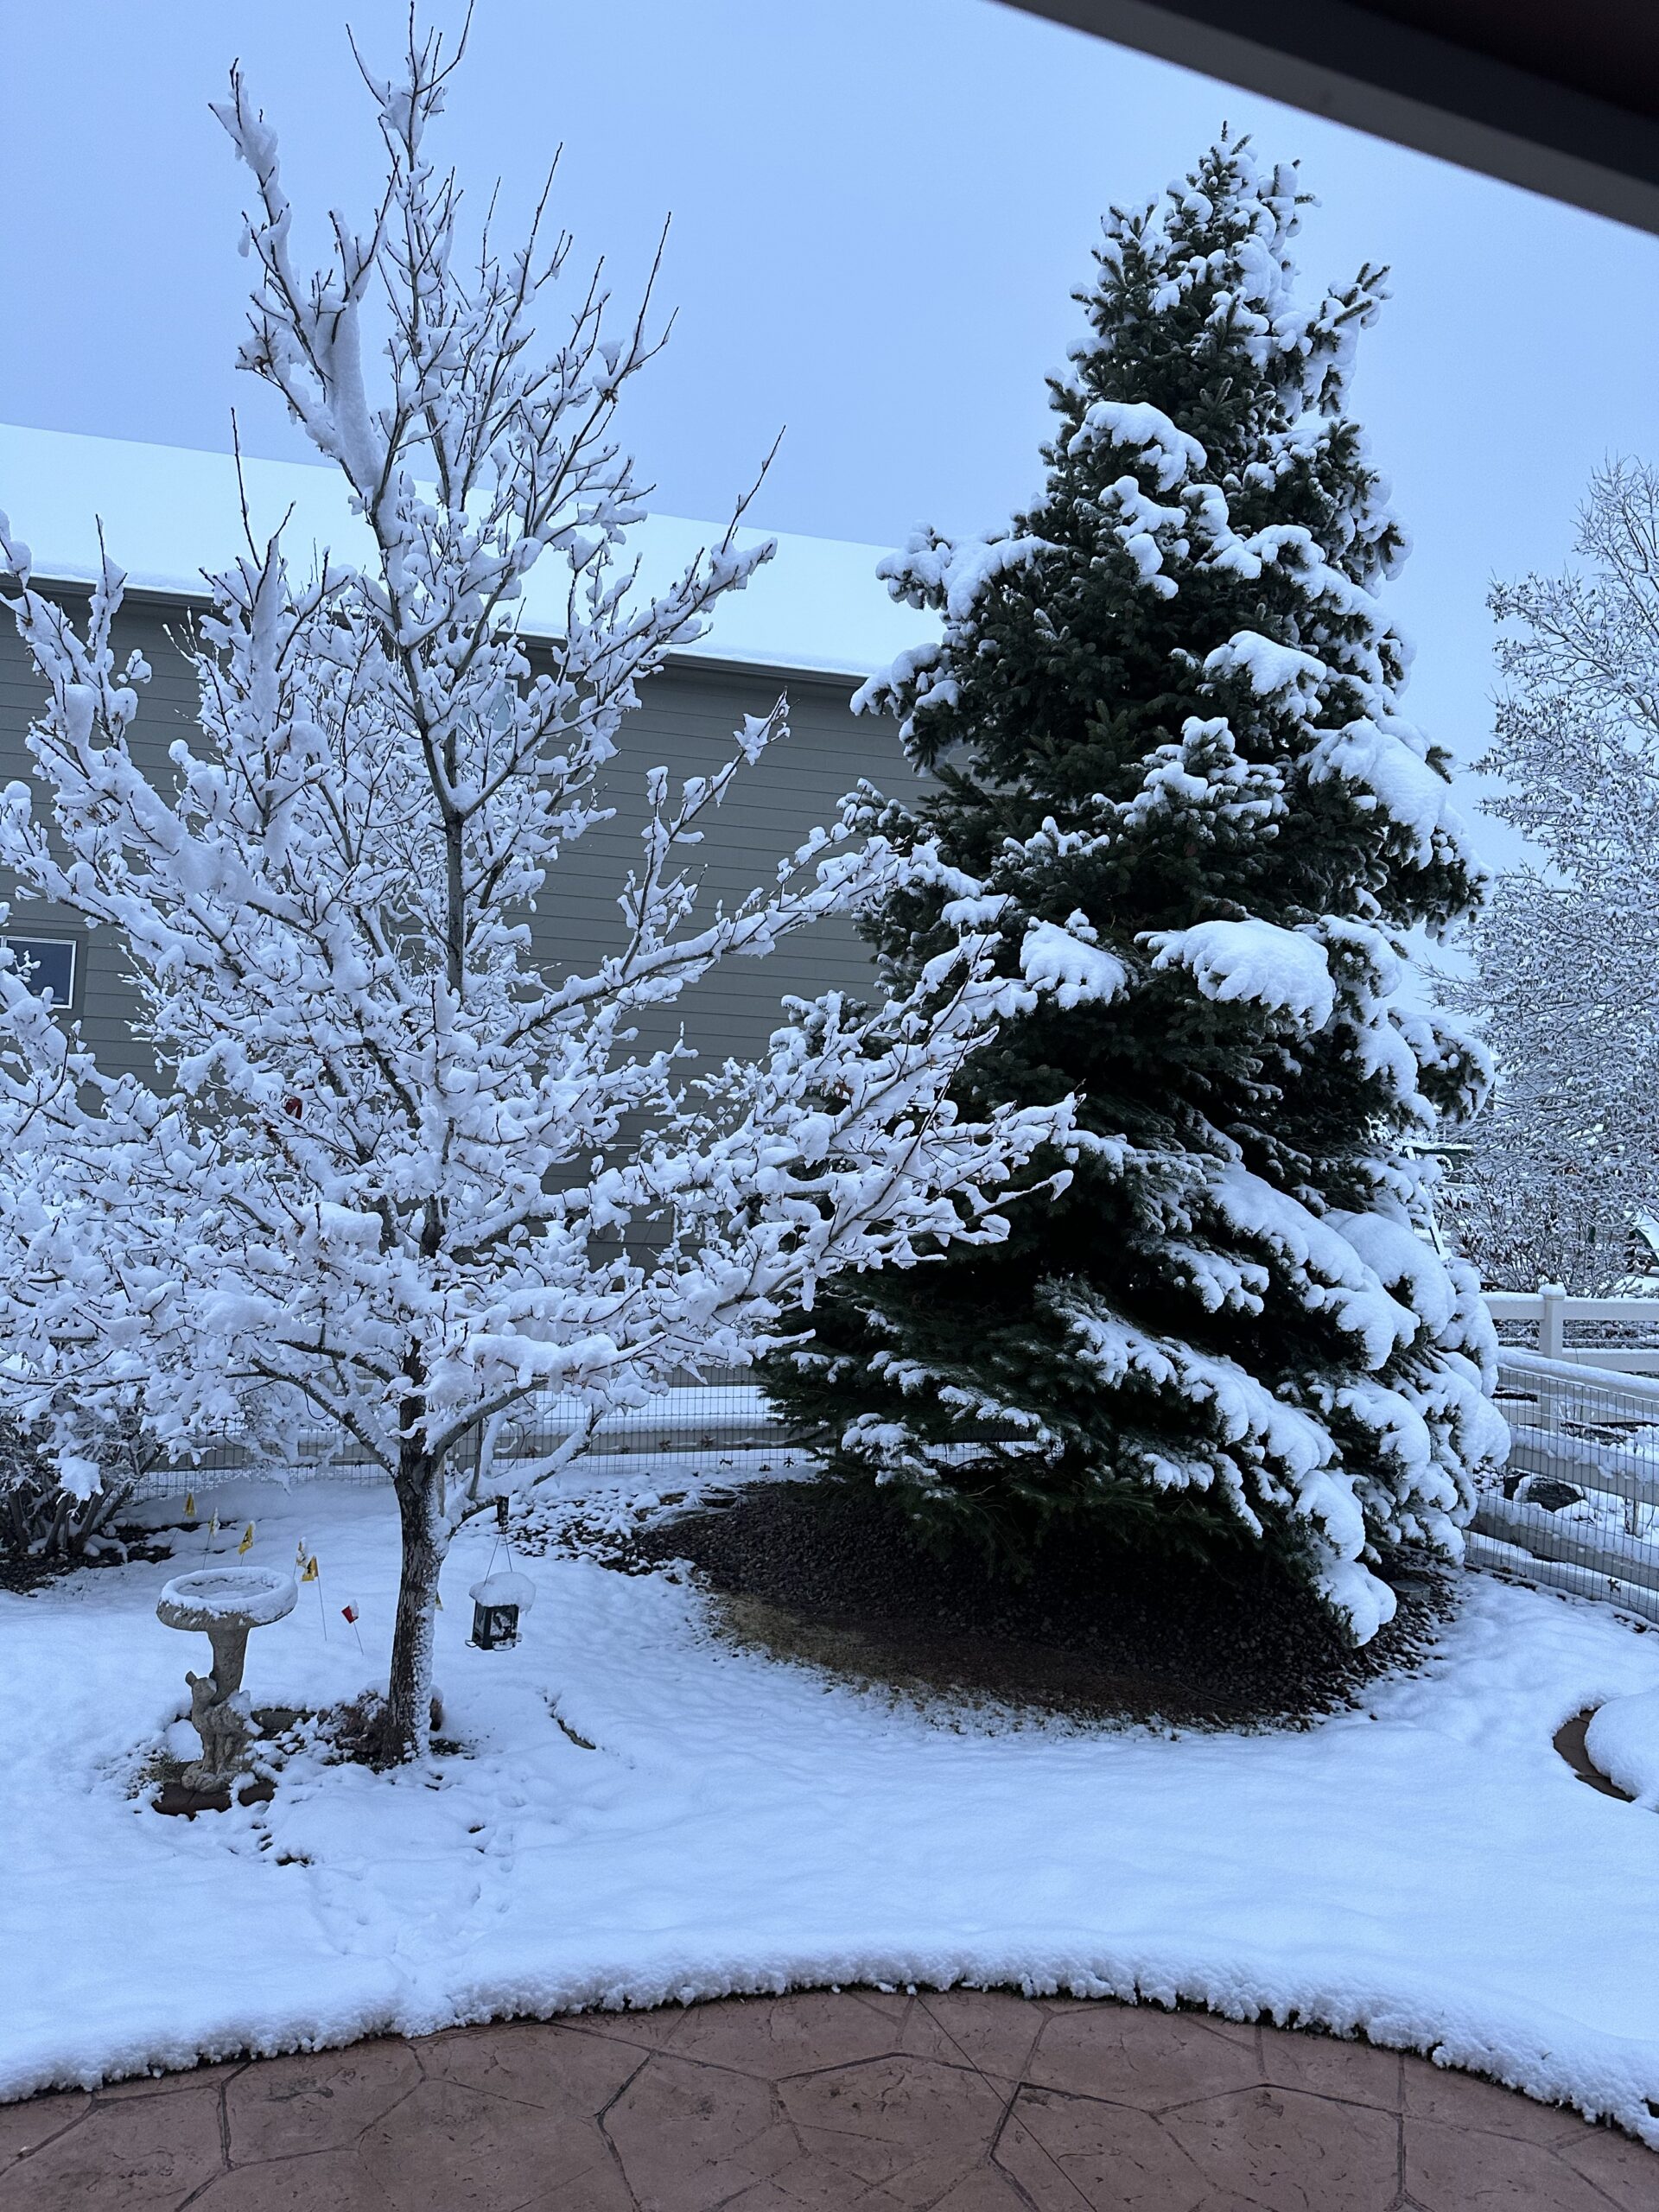
There are little daffodils poking up through the ground; poor things got covered with 4″ of new snow yesterday.


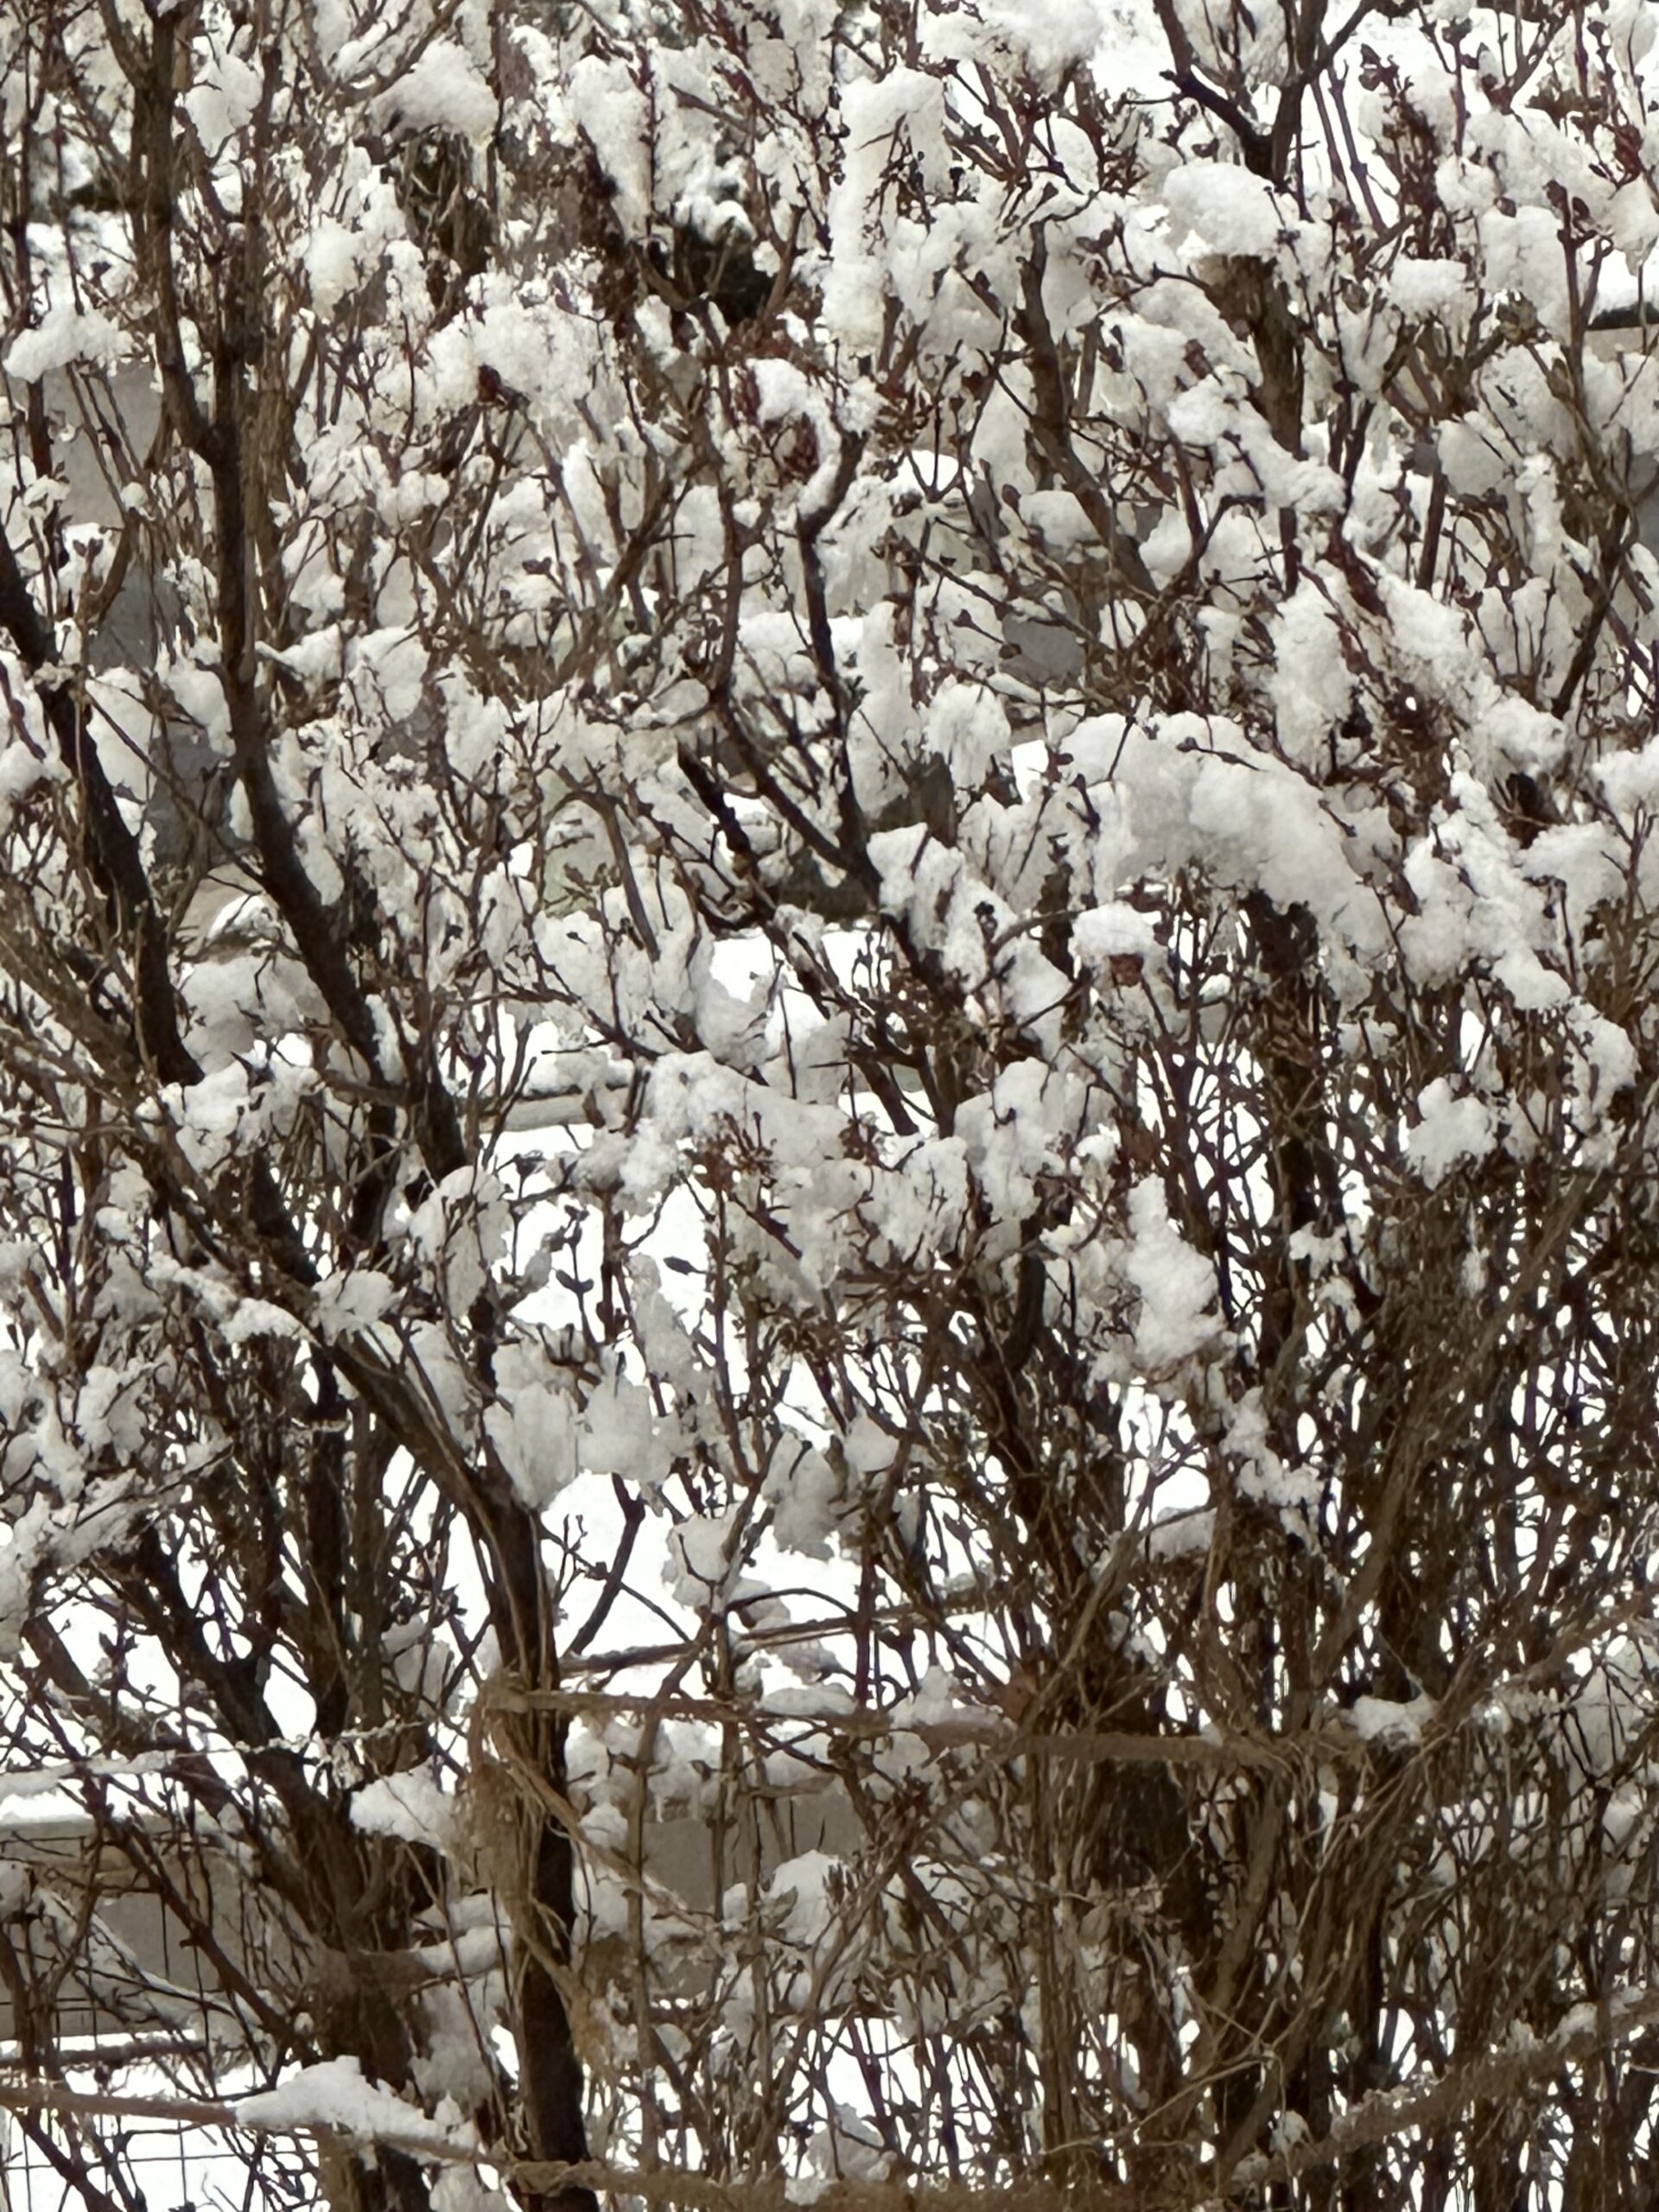
From a distance the bare branches of the bushes with clumps of snow look like we are growing cotton!

 Let’s head south! Way south!
Now Sal, this is just springtime in the Rockies! In another week we will be out getting flower beds ready for planting.
Today, I would like to show you a couple fun birthday cards and alert you to new postings in the ‘Bake Sale’ tab with many of the items I am purging.
You can’t call them ‘new’ postings when there haven’t been any postings of sale items for eons.
True! Folks, there are postings in the Bake Sale of items I am selling. Better, Sal?
Back to the birthday cards! The first is a slimline card for Paul’s birthday with a stamp set from Whimsy called “Best Friends”.


Recipe
- Base: Thick Basic White, 8 3/8 X 6 3/4 scored at 3 3/8; (Note: 8 1/2 X 7 scored at 3 1/2 is the standard slimline but I wanted a 1/16″ reveal of the base)
- Border (X2): Early Espresso, 8 1/4 X 3 1/4
- Top Layer: Designer Series Paper, 8 X 3
- Inside Top Layers:
- Designer Series Paper, 4 X 3
- Basic White, 4 X 3
- Blue Cut Outs: Pacific Point, 8 1/2 X 3 1/4, Die Cut 2 large and three small shapes with Stampin’ Up! Diorama Dies then emboss with Stampin’ Up! 3D Cane Weave embossing folder
- Outside Greeting: Rectangle Stitched Framelit in Early Espresso 2 3/4 X 1 1/2, with Basic White Top Layer, 1 X 2 3/8
- Inside Greeting: Rectangle Stitched Framelit in Early Espresso, 3/4 X 2 7/8 with Basic White Top of 1/2 X 2 1/2
- Images: Basic White, 4 1/4 X 5 1/2, stamp in Memento Black, Color with Copic Markers
- YG03-straw; C3-milk & egg outlines using 0 to lighten and blend; B000-Cup
- Y13-butter; C5-legs & arms; V15-Jelly; R00-Tongue; E33-PBtr & Bacon
- E31-Toast top & cookie; E18-Toast crust & Chocolate chips; E15-Syrup
- B24-Together coloring after stamping in memento ink
- Happy Birthday – Stampin’ Up Hey Chick stamp set, all other greetings are from Whimsy Best Friends set
- Embelishments – 5 swarovski crystals
The characters and hearts on the front are popped up, the other pieces are adhered directly to the paper.
Here are individual pictures for the sake of looking closely at the coloring – I am new to these Copics and will need to refresh my memory frequently until I get used to numbers- plus, they are just cute to look at separately.

 .
.  .
.
 .
.
 .
. If you stamped me in black, could you color me with Copics?
We’ll try someday! For now I have another birthday card to show and this time I used some foiling. I have a special friend’s husband who has the most adventurous stories imaginable and he was a pilot so I put the two together to make his birthday card. It is a ‘never ending card’. We made this card at club for Valentine’s Day in 2016. Here is a hint – to effectively use the blog, go to the recipe box and find the thumbnail picture of the card you remembered making and click on the picture and you will go to that posting so you can make another card like it.
https://www.youtube.com/watch?v=ZF-FGBX_Cis
 .
.

Don’t let the picture fool you- this is a standard A2 card! Fold the top flap up and the bottom flap down and voila:
 .
.
I stamped the plane from Stampin’ Up!’s retired ‘Sky Is The Limit’ stamp set onto Shrinky Dink Paper, colored the back side, cut it out, and then cooked it to make a cute little card size 3D plane!
I stamped the clouds and then decided they needed to be a little 3D also so I added our puff paint. It stuck to the top of the paper so that wasn’t the best idea but it gives the cloud a little blue dimension. Now let’s fold the card again:
 .
.
Then once more up with the top and down with the bottom so we go to the back for a greeting:
 .
.
The foiled paper is from a retired Stampin’ Up! designer series paper and the gold ADVENTURE was a card front sent with my new Minc machine that we ran through the machine with gold foil. Paul figured out how to get all the large letters on the front flaps by cutting and gluing each one separately. I’ve ordered more foils so stay tuned for fun cards with foil embellishments.
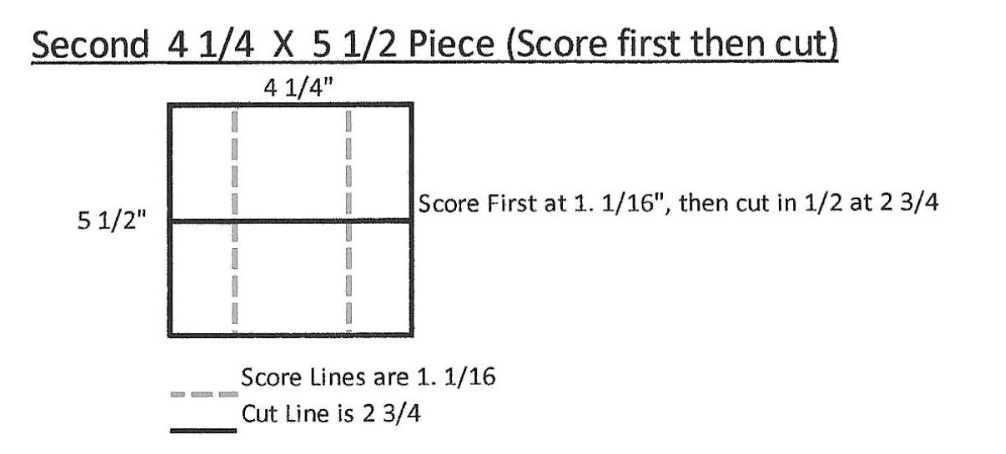
Never Ending Card Recipe Basics (watch the video for construction)
- Base: Basic White, 4 1/4 X 11
- Cut in half for two 4 1/4 X 5 1/2 bases
- Score one of the half pieces at 1 3/8″ on 4 1/4 top & bottom then cut that piece in half at 2 1/8,
- Score the other half piece on the 5 1/2 side at 1 1/16″ at top and 1 1/16″ at bottom, then cut in half at 2 3/4″

- Add two pieces of sticky tape right up to the score line on the two 4 1/4″ pieces

- Burnish all your score lines both ways
- Now the two pieces you cut in the first step that are 2 1/8″ X 5 1/2″ will go on top of the 4 1/4 X 2 3/4 pieces
- first adhere each piece to the bottom corner of the piece that has the sticky strip, laying your 4 1/4″ in line with the edge and bottom. The two pieces should meet in the middle
- then slide the top piece of the 2 3/4 X 4 1/4 piece in alignment with the bottom that now has the two pieces attached and then press the top onto the sticky strips


If you get all the pieces cut and scored with the sticky strip added, then it would be best to watch the video (at point 2:43) for how to lay the first two strips on top of the second two strips.
What the video doesn’t show is decorating the many sections and their dimensions so I will list those here. Note: If you like the design to exactly match, multiply the sections by 2 and then cut in half to match designs.
- Front Middle (X2): Blue foil DSP, 2 X 2 5/8
- Front Sides (X4): Blue Glimmer Paper, 7/8, X 2 5/8
- First Fold Middle (X2): Blue Sky DSP, 2 X 2 5/8
- First Fold Top & Bottom Sides (X 4): 7/8 X 1.1/4
- Second Fold Middle (X2): DSP, 2 X 2 5/8
- Second Fold Sides (X4): DSP, 7/8 X 1.1/4
- Back Middle (X2): DSP, 2 5/8″ X 2″
- Back Top and Bottom (X4): DSP, 1 1/4″ X 2″
And your next fold will bring you to the front again! Have fun. It should be marketed as a stress relief tool as you play with folding it back and forth! My first Never Ending Card (also called a Perpetual Card) was a Valentine card and I started with colored card stock bases so I could just add embellishments whilly nilly! You can click on the blue to see that card.
http://stampalosopher.com/?p=787
You had to make an extra base so you could give instructions so why not make another?!
Well, Sal, I do need a birthday card! Let’s do it!
 .
.
 .
.
 .
.

For this card:
- Basic White Base
- Purple Ombre Glimmer Paper
- How Sweet It Is Designer Series Paper
- “This Calls For Confetti”, So Sentimental stamp set with oval punch
- “Happy Birthday”, Birthday Chick Dies
- “Hope Your Day is…..” Postcard Pals with Tailored Tag punch
- “Hugs, Prayers, Love” Positive Thoughts with Peek A Hoot Dies Rectangle
- “Let’s Celebrate You” Birthday Chick Stamp Set
- Streamers, Birthday Chick Stamp Set
- Balloons with double balloon punch
- Vellum tiny envelope with punch and butterflies with retired butterfly thinlet
- Gorgeous Grape Ink
That could be your graduation cards, too!
A valid possibility!
I taught the Shrinky Dink technique several years ago in a technique club.

Are we able to go somewhere on your blog to see all your technique sheets?
That is a great idea, Sal! I will work on doing that, right after I get the products I am selling on the ‘Bake Sale’ tab. I could at least create a new tab and add this Shrinky Dink technique sheet. I need a short name to fit the tab so ‘technique’ is out – any suggestions?
Well, you have a ‘Recipe Box’ and a ‘Bake Sale’ so how about ‘Cookbook’?
Great idea, Sal! Consider it done!
The first of many products have been added to the Recipe Box!
Toodoloo friends! I hope you have found a pinch of creativity today to spice up your crafting world!
Karen
Triangle Tri-Fold Card for Case The Creator #6
A card that twists from portrait to landscape? Yes, really! This was our Case The Creator card #6 in July. The creator, Twila Davis, was featured on Splitcoast Stampers with this amazing fun fold card. For this card I am using the Painted Christmas Designer Series Paper. For the greeting, holly berries and greenery, I am using the Merriest Moments. It carried over from last year so you can check out last year’s creations with that set HERE.
 .
.  .
.  . And the “JOY” stays upright even when you open the card! That’s unique!
Definitely different. I had to make one to wrap my mind around how it worked. Here is a picture of the two diagonal pieces that are on the top and bottom and just look like strips from the front.

Here is a printable pdf of the instructions if you would like to case the case!!
Case The Creator #6 printable pdf file
 .
. My fellow stampers made some great cards for the Zoom meeting!
 .
.
 .
.
Joy Meadows used the Wonderful World Designer Series Paper.
 .
.
 .
.

 .
.
 .
.
 .
.
 .
.
Beautiful card creations! Thank you, ladies, for participating!
Thank you for spending time with me as Sal and I bring you a “pinch of creativity to spice up your crafting world!”
SAL, Sharing A Love of stamping
Karen Click on little Sal in the computer to go to the online store!

Rustic Retreat Waterfall Card
Hello Stamping Friends,
February hostess code: FPRJEPZJ
The card I am demonstrating today is not hard- just a bit hard to explain. I will use many pictures to help you see the process since I have yet to take on the challenge of Youtube videos.
 You just can’t find a way to animate me!
And a way to stabilize the camera and the time to learn to edit! Ah well….. It is good to have a goal.
This card will show you how you can think ‘outside the box’ to create stamped images of just pieces of a stamp. We are familiar with coloring on the back of our stamps to use only what we want but this card has the greeting stamped and then cut. Side-note: when you do color the back of your stamps, be sure and use the regular markers to color the stamps not the Stampin’ Blends as Stampin Blends will stain your stamps.


On page 49 of the 2019-20 annual catalog are the two stamp sets I used for this card, Rustic Retreat and Peaceful Place:

Patience, there is a way!
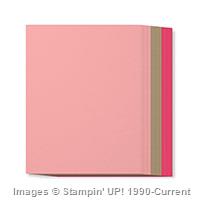
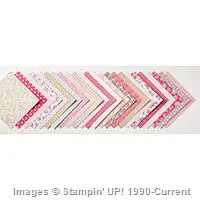
I used the Garden Lane Designer Series Paper (DSP) and Garden Green card stock layer on a Thick Whisper White Base. I have pictures of two different colors from the DSP. I made two cards and didn’t realize I hadn’t taken the main pictures of the one I mailed, but “serendipity” – you get to see two versions!
So let’s look at the waterfall:


Base: Thick Whisper White, 5 1/2 X 8 1/2 scored at 4 1/4
First Layer: Garden Green, 5 3/8 X 4 1/8
Designer Series Paper (DSP) Layer: Garden Lane, 5 1/8 X 3 7/8
Waterfall Strip: Regular Whisper White, 2* X 9 1/4 scored at 2″, 2 3/4″, 3 1/2″, 4 1/4″ (Basically, 3/4″ intervals); *I cut the 2″ width just a hair less so no white showed from the edge of the squares if they weren’t cut perfect. You could also sponge the edge garden green so the white isn’t obvious.
Belt: Garden Green, 4 1/8″ X 1″, punch two small holes 1/2″ from the bottom and 1/2″ from the left and right sides,
Background Squares for waterfall: Garden Green, make 4, 2″ X 2″
Background Bottom Layer for the “Loved”: Garden Green, 2″ X 3/4″
Top Squares for waterfall: Whisper White, make 4, 1 3/4″ X 1 3/4″
For the Braver, Stronger, Smarter, Loved banners: Whisper White, 1 3/4 X 4
Inside Strip Layer: Garden Green, 5/8 X 4 1/8
Inside Strip Top: DSP to match front, 3/8 X 3 7/8
Two brads and a 1/8″ hole punch
4″ of twine
Ink:
- Thinking Of You – Soft Suede, Garden Green pine boughs
- Deer-Chocolate Chip (retired) Garden Green trees at each side
- Bear- Early Espresso, Garden Green pine boughs
- Squirrel- Basic Gray, Garden Green leaves from the Peaceful Place Stamp Set
- River Scene – Memento Black so it can be colored if you like; I added one of the birds from the High Tide set and did color the back of the bird stamp with the Basic Black marker
- Happy Birthday – Soft Suede
- Cabin – Memento Black
- Banners – Soft Suede; stamped, cut apart, then mask just the words and stamp in Soft Suede with the Thinking of You stamp, pictures following
I used the Stamparatus for the Thinking of You and the A.A. Milne quote but mounted the other stamps on acrylic blocks.
We do a lot of cutting and assembling with dies and sometimes stamping is hardly used on our cards. Not this time!

Yes, Sal, that was exactly how my club ladies reacted when I showed them all the stamps they would use. But they seemed to have a really fun time stamping!
You will know for sure they didn’t when they drop out of club!
It is always a possibility but so far club is just growing so I think it is acceptable to do challenging cards. But as I said it really isn’t that hard. Let’s start by taking our waterfall strip and burnishing those score lines nicely. The folds all go one way so it looks like a candy cane:

Next, adhere all the green 2 x 2 layers to the strip like shingles. Put your adhesive on the white strip NOT the back of the green since only part of the green is adhered in all but the 2×2 section.

Now turn the strip over and stamp the river scene on the long part. Remember the candy cane shape? It seems like you are stamping on the wrong side but you aren’t. Take the ink to the stamp and don’t try and figure out what part is off the edge and not ink that part. Just ink the whole stamp completely and use grid paper to protect your work space. (We sell that!)
Use a sticky note to mask the bottom 3/4″ of the strip so that you have a nice white border between each of the pictures.


Also mask the bottom 5/8″ of the 1 3/4″ squares used for the bear and the squirrel to give that nice white border between pictures. The deer can be stamped without masking since you have three lines of words making the banner bigger to begin with. (Say that three times fast!)
Stamp each of your 1 3/4 X 1 3/4 white squares per the above details under inks used. I wanted a little more of the rock and flowers with the squirrel so I stamped the squirrel with his tail practically off the top, then masked him and stamped the rock only on the left side of the squirrel. Clean your stamp before inking the rock so you don’t get the squirrel’s paws on the left side.

Would you mind showing us the other squares so we don’t have to keep scrolling up and down?
I can do that!


Next, stamp the A. A. Milne quote on the Whisper White 1 3/4 X 4 strip in Soft Suede ink. I used the Stamparatus for this stamp and the Thinking of You stamp so I could restamp each to get a good image. With two Stamparatus plates I put a stamp on each plate.

Now cut each section of the saying. You will love the Stampin’ Up! cutter for this step, you can tell right where you are cutting.


Head back to the Stamparatus and put each of these sayings right where we stamped the ‘Thinking of You’. Mask the words, remembering the Thinking of You is a bit longer than some of the sayings so your sticky note will be as wide as the word ‘Thinking’ and then ink up the Thinking of You stamp in Soft Suede and stamp your banners.

Use a second sticky note to hold the mask in place since we can’t use a magnet.

Voila! You have banners with wood grain edges! Glue those at the bottom of your little white squares.
Take the little 2″ X 3/4″ Garden Green piece and mount the ‘Loved’ banner. Punch two little holes on each side of A. A. Milne and run a piece of twine up from the back and tie a double knot at the front leaving extra length down from the banner.

Glue this piece on the bottom of the river scene.
No, Sal, but this is a good place to stop and get some coffee and chocolate!!
The belt on the front is next and it is the critical piece to making the waterfall card work correctly and fit in our standard envelope.
Belt: Garden Green, 4 1/8″ X 1″, punch two small holes 1/2″ from the bottom and 1/2″ from the left and right sides. Each square on our grid paper is 1/4″ so that is helpful.

Is this a sign of your age that you are repeating yourself?!
Sal, be nice, you’re the one who didn’t want to keep scrolling up and down.
Once you’ve punched the little holes in the belt, adhere the DSP to the Garden Green layer and then position the belt 1″ from the bottom of the belt to the bottom of the Garden Green layer. Mark through your holes in the belt with a pencil to show where to punch the other layers.

Punch holes through the Garden Green and DSP layers. Be careful here: add tear and tape to the back of the belt on the 1/2″ width between the hole and the side of the belt for extra stability making sure no adhesive gets between the two holes. Attach the belt with the brads.
You are ready to attach your waterfall strip! Place two pieces of tear and tape at the very center of the belt and no longer than the 2″ width of the waterfall strip.

Slide the waterfall strip behind the belt, peel off the backing of the tear and tape, and glue the end of the waterfall strip – the squirrel in our case- on the center of the belt exactly lining up the bottom of the belt with the end of the waterfall strip.

Stamp Happy Birthday on the inside in Soft Suede and the cabin in Memento Black, if you want to color with the blends. Add the strips at the bottom, stamp your name on the back and you really do have a masterpiece!
So now you know another way to use stamps! I hope you enjoyed the detail and are ready to make your own Rustic Retreat Waterfall Card.
Would you like to join a stamp club to make cards like this? I will be starting new club rotations in May and would love to have you join us!
February hostess code: FPRJEPZJ
SAL, Snowing A Little, Sharing A Love
Karen (text 303-815-0838)
Click to order:

Hats Off Spinner Card
Hello Stamping Friends,
July is slipping away quickly and we have two specials that you don’t want to miss:
- For every $50 dollars spent in July you receive a $5 coupon code by email to be used on a purchase in August
- Sign up to join the fun and become a demonstrator – hobby or business – and get $72 of additional free merchandise. That is a total of $197 of merchandise for the joining fee of $99
Scroll down to the prior post for all the details! If you are reading this on your mobile device, click on the little SAL image at the top to be redirected to the full blog. This month’s hostess code is QHJHTKJQ
My hostess, Nicole, requested a masculine spinner card for her party which challenged my creativity. After giving the idea some thought I used the “Guy Greetings” stamp set on page 36 of the new catalog. It is available in wood mount # 138825, clear mount #138828 and photopolymer #137178.

And created this:

Yes, I did cut the stamp with the six hats into six pieces. The Designer Series Paper, DSP, beneath the Very Vanilla top layer is the new Foil Frenzy paper. The catalog picture doesn’t do it justice:
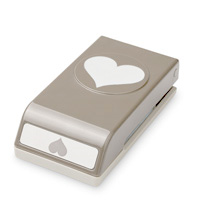
The Hats Off To You! from Guy Greetings is embossed with copper embossing powder and uses an upside down cutout from the Hearth and Home Thinlits:
 And of course one must put a feather in the cap and ‘Jar of Love’ had a great stamp, the one at the bottom right, which just needed a little extra feathering with a Chocolate Chip marker:
 To cut out the spinner path, you need a framelit or punch that is just a little narrower than a penny. The Bunch of Banners framelits had the perfect one, the little one at the bottom right:
Since the card is 6 1/2″ long it took four cuts across to make the spinner opening but well worth the time. Cut a 7/8″ wide strip of sticky note and place it at the bottom of the Very Vanilla layer to guide your four cuts.
 The inside brings in the foil paper behind another hat just like the spinner on front and adds the classic car and greeting! Scroll back up and check out the variety of greetings this set offers.
- Base – Early Espresso 6 1/2″ X 6 1/2″ scored at 3 1/4″
- Foil Frenzy DSP 6″ X 3″
- Top Layer -Very Vanilla, 5 1/2″ X 2 1/2″ , sponged with Crumb Cake ink and distressed with a finger nail (or distressing tool)
- Inside Layer – Very Vanilla 6″ X 2 7/8″ , sponged with Crumb Cake ink
- Spinner – Scrap of Very Vanilla for 3/4″ punch and Scrap of DSP for the 1″ punch- make a second one for the inside
- Stamps – Guy Greetings and Jar of Love
- Tools – 1″ circle punch, 3/4″ circle punch, Bunch of Banner Framelits, Hearth and Home Thinlits, Chocolate Chip Marker
- Inks – Early Espresso, Chocolate Chip, Crumb Cake, Soft Suede, Basic Black, Versa Mark and Copper Embossing Powder
- Embellishments – 3 Candy Dots or pearls colored with a brown Sharpie
- For Assembly – Foam Adhesive Strips (see page 203 for this great new product), two pennies and Stampin’ Dimensionals
- Envelope Punch Board for a perfectly sized envelope
Adhere your Very Vanilla top layer to the DSP layer and cut the path for the spinner on both layers at the same time. I used temporary glue to adhere the two layers for cutting the path, then took them apart, decorated the top and then glued them together permanently. For the spinner to work it is critical to mount these two layers to the base using Foam Adhesive Strips (or a lot of Dimensionals).
For temporary glue just use a bit of snail and pat it with your finger and the oils in your finger will keep it from sticking too hard.
For the spinner, place a dimensional in the very middle of a penny and place a second penny on top. Even though the dimensional isn’t round it works perfectly. Then place another dimensional on the top penny and add your hat spinner made from a 1″ circle punch of DSP and the hat stamped on a scrap of vanilla, punched with a 3/4″ circle punch and adhered to the DSP. Beware – don’t get your dimensionals mixed up when you lift the slot to slip the bottom penny inside the path. If you use the dimensional between the hat and top penny it won’t spin.
What do you think?
The catalog can be viewed in pdf form from the catalog tab at the top of the blog. If you would like a hard copy mailed to you, contact me at [email protected].
SAL (Sun A Little– on a beach or a boat or…..)
Karen Click on SAL to go to the online store

Window Shopping Bundle!
 Hurry Stamping Friends,
Don’t let the Window Shopping Bundle get away! It is on page 43 of the Occasions catalog and is just the cutest! It might get carried over in the big catalog come June 1st, however when Stampin’ Up! introduces a product with matching Thinlits it is bundled with 10% savings but not when it is carried over to the next catalog. The bundle is $50.25 which will qualify you for a free Sale A Bration product.
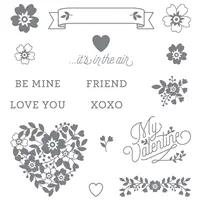
Remember, purchase $50 of anything from any catalog and get one item from Sale A Bration for free. Three additional items were introduced February 21:


Check out the sample items made with these products:

Click on the brochure picture below to see all the other Sale A Bration products. But hurry the Card Tin is already sold out and product is only available while supplies last!

Thank you, Deana, for a wonderful party to introduce the Window Shopping bundle and the Sale A Bration products.
Our project at the party was either a Birthday Box with matching card which uses the Window Shopping stamp set:

or a Thinking of You box and matching card:
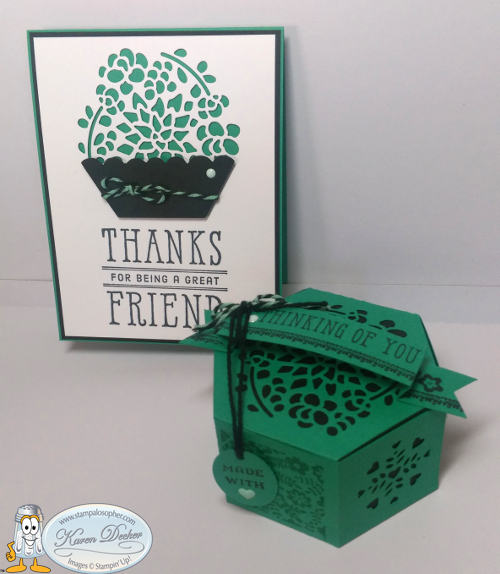
Notice the banners use the Delicate Details free stamp set from Sale A Bration:

The Emerald Envy box uses the third one down and the Dapper Denim box uses the second one down to be a bit more masculine. The flower and cupcake on the edges of the banner are part of the Window Box stamp set! The banner uses a 5 1/2″ X 7/8 inch piece of card stock and the little Thinlit from the set that scores and cuts the end! The video below will show that in detail.


For a thank you gift, I used the same Window Shopping Bundle and made a little St. Patrick’s Day basket.

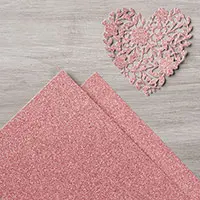
Hmmm…. It did have chocolate in it at one time; at least the tea light and mints are still there for the picture. I used Cucumber Crush paper and the Mint Macaron ribbon which is still in the Clearance Rack. Why a tea light? Because the door prize was a tea light holder made with Watermelon Wonder card stock:
 To make the tealight you use two pieces of the main Thinlit just as you do for the box:
 Remember the middle heart is directional so punch your windows accordingly.
I demonstrated the basket pieces with the same color. You only need one piece of the main box Thinlit for the basket and one piece 8 1/2 X 3/4 for the handle:
 The Thinlit set makes a basket just perfect for a little Easter gift!

The regular box uses two Thinlit cutouts which fit nicely on a 6 X 11 piece of paper:
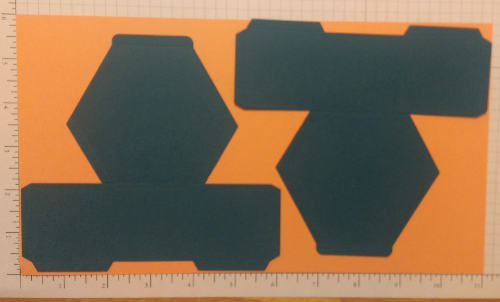 The home office has a wonderful video for construction of the box so rather than recreate the wheel I will insert it here. If you are viewing this on your smartphone you may need to click on the little SAL image at the top of the post to go to the main blog where videos work.
Drum roll please: Presenting The Window Box Thinlit dies:

One more quick note – check the bottom of your Big Shot machine once in awhile. The bottom screws need to be kept tightened as well as the screw on the handle. The machine comes with a little tool to keep the handle tightened but you will need a phillips screw driver to tighten the bottom screws.

Cheerio but be back soon! (I just went to the high school’s performance of Oliver. It was exceptional and I can’t get the songs out of my mind- but who would want too?!)
SAL,
Karen (Click on SAL to go to the online store)
May Club Cards and Stamp A Stack Cards
Hello Stamping Friends,
(This is a post; click on the SAL icon to go to the full blog)
Happy Memorial Day Weekend! Hopefully your vacation day is a sunny one.
This post will include cards from our bimonthly club and the Elizabeth Stamp A Stack. Check back in a couple weeks for recipes. Today I will just show you the cards so you can decide if you want to make that last purchase from the catalog before savings and product are gone forever! Tuesday, May 31, is the last day to place an order from the Occasions catalog and the big catalog. Several items have already sold out so hurry!
My favorite project was the Birthday Blooms Surprise Pull Out card. I saw this card on My Tanglewood Cottage and the directions are on Splitcoast Stampers. Scroll through the Splitcoast Stampers pictured instructions to go down to the video (click here) to get the measurements I used.
 The flower image is stamped with Stazon black on a piece of Shimmery White cardstock and colored with Blender Pens using Blushing Bride and Wild Wasabi Ink. The bottom parts of the image’s leaves are fussy cut and then the oval framelit #4 is slipped under the cutout and run through the Big Shot. When you run the stamped image through the Big Shot you will get a nice indentation to fussy cut the oval between the two large leaves. The little flowers in the corner are the top flowers of the image stamped a second time, fussy cut, and mounted on greenery from The Bird Builder Punch. The butterfly is from the hostess Best Thoughts set. It is stamped on vellum and then placed upside down on the Stampin’ Pierce Mat and rubbed with the Stylus to give a nice white color.
When you pull on the ribbon – Voila!

The inside words come from the Best Thoughts hostess set which has the butterfly we used on the front:
 Retiring Products: The Bird Builder Punch (117191), The Best Thoughts hostess set (139234), The Curvy Corner Trio Punch (139683) that made both the corner and the ribbon slider hole, and It’s My Party Designer Series Paper Stack (140552) from which I pulled the green striped paper. You will see more of this paper in another card. The Paper Stack has 48 sheets with 4 each of 12 double-sided 12X12 designs.
The masculine version of the Surprise Pull Out card uses Butterfly Basics, In The Meadow and Guy Greetings stamp sets, all of which carryover to the new catalog- Yay! Once again it uses the “Think outside the Framelit” technique to stamp an image, cut out a little of the image and then slip the framelit under the cutout part and run through the Big Shot.


 I will miss the Blackberry Bliss cardstock which is part of the retiring In Colors (see page 137).
Our technique sheet for club was the Mirror Image technique:

We mirrored the little yorky from the Hey Girl stamp set (#138706) which is retiring. I used the retiring Oval Scallop punch(#119856) to create the clouds. Join my team, or the bimonthly club, and you will make the technique sheets at our meetings. If you live far away or can’t make the meetings, I will mail you a completed technique sheet.
The Stamp A Stack held at the Elizabeth library was another fun time of stamping! Here is the first card:


The Sunburst Sayings stamp set and Sunburst Thinlits Die used on this card are currently bundled for a 15% discount. See page 25 of the Occasions catalog. Though both products are in the new catalog, there is no longer a bundle. Blackberry Bliss and Hello Honey are used together on this card and both are retiring colors in only three days. See page 137 for all the In Color retiring products.
The second card: (Stampers make six cards- two each of three designs for $20)


What could be better than Bermuda Bay with a black accent?! The flower is from the Butterfly Basics stamp set which is carried over to the new catalog, however the Honeycomb Embossing Folder (#129378) is retiring, as well as the Honeycomb Hello stamp set (#134075) which has the little “hello” and a cute little bumble bee that a couple of my stampers added to their card front. The Curvy Corner Trio punch is retiring (#139683) and the Candy Brads (page 161) are being replaced with shaped enamel dots.
The third card demonstrates the Drapery Fold Technique, modified from that found on Laura’s Stamp Pad:


Once again I have used the retiring It’s My Party Designer Series Paper Stack (#140552). Sadly, all the Scallop Circle Punches are retiring (see page 165). I used the 1 3/4″ scallop circle punch and punched the white inside layer of the card so that the main card stock showed. I then stamped “make a wish” in Basic Black with the Party Wishes retiring stamp set (#140651). The ‘It’s My Party’ enamel dots (#140554) are retiring as well. The Happy Birthday is from the Rose Wonder stamp set (#140697) and thankfully it is NOT retiring. If you wanted a stamp set with words that fit many different occasions, this set is a must have. See page 18 of the Occasions catalog. The more masculine version of this card:


The balloons are from the Balloon Bouquet punch (#140609) and will still be available in the next catalog but the mini balloon punch in the Party Punch Pack (#140608) on page 4 of the Occasions catalog is retiring. The punch pack and the Party Wishes stamp set used for the “make a wish” shown above is available as a bundle at a 15% discount in a wood mount (#141073) or clear mount (#141071).
The drapery fold starts with a piece of Designer Series Paper (DSP) that is 4″ X 11 1/2″ so you can get three cuts out of a 12X12. Be careful if your design is one that shouldn’t be upside down. (Yes, I learned that the hard way!)
Score your DSP on the long 11 1/2″ side at: 3″, 4″ , 6″ , 7″ , 9″ , and 10″ .
Turn the paper to the short 4″ side closest to the 10″ score line and make a small score mark or pencil mark at 1″.
Use your cutter to cut diagonally from the 1″ mark to the bottom of the 3″ score line. Make a z fold. I trimmed the right side of the top of the folded DSP to 5 3/8″ so I could have a border around each edge.
I love the way the drapery fold shows both sides of our pretty Designer Series Paper. There are many different fold sizes you can make. I would love to see one you have made!
My next event is the catalog launch on June 18 from 10:00 – 2:00, open house style. I will have catalogs, and you can make new In Color sheets, a bookmark for the catalog and a quick make and take with a new product. Retired product will be available for purchase.
Have a wonderful weekend and remember all those who gave the ultimate sacrifice for our freedom.
SAL (Salute A Life)
Karen
Click on SAL to be redirected to the online store:

March Cards
Hello Stamping Friends,
March was a fun month with the Elizabeth Stamp A Stack, the bimonthly club, and Sale A Bration events! You have through tomorrow, March 31, to place an order of at least $50 and get a free stamp set. Subscribe to Paper Pumpkin for three months and you would qualify for the free Sale A Bration set. The April Paper Pumpkin will include two stamp sets to celebrate Paper Pumpkin’s third birthday and shipment of their one millionth kit! The kits just keep getting better and the three month subscription is on sale for $55. Go to my online store and use item #137859. Instructions will be sent to your email with a redemption code for the 3 months you have purchased.

The most popular Sale A Bration free set in my events was the “What I Love” stamp set. I did a Triple Time Stamping card to demonstrate this stamp set.


For the next card, I used the Party Wishes stamp set, the Confetti Embossing Folder and the Party Punch Pack casing the card in the Occasions catalog:


The embossing folder is sponged in the three colors, Melon Mambo, Pool Party, and Crushed Curry before running it through the Big Shot. Sponge the side with the indents if you want the confetti to be white like it is here. The confetti behind the cake is created by coloring only the confetti of the Make a Wish stamp with a marker. For the inside Happy Birthday, I used the Wet Wipe Technique, placing several drops of reinker on a wet wipe (placed on a silicone sheet to protect your work surface) and then use that for your ink pad! Voila! Lots of random color! The Melon Mambo balloon is stamped and punched, the cupcakes are colored with a marker, stamped and punched, and the candle on the cake is colored, stamped and punched. All three punches come in the Party Punch Pack. The cake is fussy cut and popped up after attaching thick twine with glue dots! One stamper used Perfect Plum instead of Melon Mambo for a more masculine card.
The following card uses another embossing folder technique-Stamping With An Embossing Folder. This is simply inking up your embossing folder and then using it to stamp on your card. I used the Honeycomb Embossing Folder and Sahara Sand Ink and purposely left some areas of the folder uninked for a subtle background:

 The Whisper White paper is cut at 8″ X 5 1/4″ and scored at 4″. It is adhered to a piece of Blackberry Bliss cut at 4 1/4″ X 5 1/2″. This gives a nice alternative to our standard layering. The greetings are from the Rose Wonder stamp set and stampers could choose from a variety of greetings in that stamp set to create the perfect card. Kinda Eclectic was used for the sunbeams and greenery, and the butterflies are from the stamp set Papillon Potpourri. There are matching small and large punches to make quick and beautiful butterflies. The little flowers are from the Itty Bitty Punch set and gold metallic thread is looped behind the greeting. The silver metallic thread is used for antennae on the large butterfly.
My favorite card for this month is a birthday card using the Party Pop Up Thinlits Dies:

 The paper is from the “It’s My Party Designer Series Paper Stack”. Page 5 of the Occasions catalog. The Hip Hip Hooray is cut out using the Thinlit Die. The confetti pieces from cutting it out were used on the inside for a little extra bit of celebration!
“A Day All About You” is from the Birthday Blossoms stamp set on page 8 of the big catalog. It is cut out with one of the Handpicked Framelits. “make a WISH” is from the Party Wishes stamp set and the banners are made using the little banner punch. The “make a WISH” greeting is colored with a black marker and stamped on a piece of the Designer Series Paper which has matching confetti on a white background instead of black. A black frame is made with the 1 1/2″ circle punch. A piece of black confetti Designer Series Paper measuring 3 3/4″ X 5″ is placed behind the cut out, just down from the candle flames so the flames in the back of the cutout show the Crushed Curry cardstock. The strips on the side are 3/8″ X 5 1/4″. I was conserving paper by making strips. You could just as well have an 8 1/4″ X 5 1/4″ piece of the designer paper adhered to the main card stock. Cut a piece of copy paper 3 3/4″ wide to slip under the Happy Birthday cutout so that you can sponge the base, the words and the candles. Use sticky notes to protect the sides so you don’t sponge more than you want colored.
The balloons are punched with our new large balloon punch. The sides are sponged and a sparkle is added with the white gel pen. A glue dot holds the twine on the back of the balloon and a bow is added on top.
Main Cardstock: Crushed Curry 8 1/2″ X 5 1/2″ Scored at 4 14″
Black Confetti Designer Series Paper: 5 3/8″ X 4 1/8″
Shimmery White Cardstock for outside: 4 1/2″ X 3 1/2″
Scrap of same at least 3 1/2″ long for the greeting
Shimmery White for inside: 8 1/4″ X 5 1/4″
This is a fun card to make!
Click HERE to see a video from Stampin’ Up!
Have a great day and click below to go to the online store.
SAL,
Karen
Happy Valentine’s Day!
Hello Stamping Friends,
I have a Never-Ending Valentine for you today, (also called a Perpetually Folding Card). Love should be never-ending so it seems perfect! There will be a video from the Stampin’ Up! office at the end but here is the outside of our Never-Ending card:

Then the top folds up and the bottom folds down to reveal the first layer:

The little hearts are made with the blushing bride glimmer paper. The stamped images are all from the “Bloomin’ Love” Stamp set on page 17 of the Occasions catalog. The paper is on that same page – Love Blossoms Designer Series Paper Stack. Now lets open the Love You to reveal….

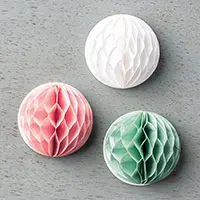
…a fun way to use the new Honeycomb embellishments on page 9 of the Occasions catalog. Now we flip the top and bottom again and have a new layer:

and all the stamps are in the same set! Here is the home office with a video:

Supplies Used (Click on any image to go directly to the online store):


Built for Free Using:My Stampin Blog


Built for Free Using: My Stampin Blog
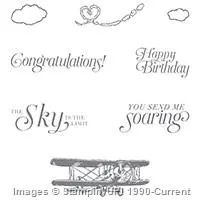
 Pay close attention to the last three items in the catalog. They are only available through February 15. Here is a card made using one of the Limited time stamp sets – the “Sky Is The Limit”:


Built for Free Using:My Stampin Blog


 Meanwhile, have a great Valentine’s Day and a fabulous February!
Get Well Soup, Bohemian Birthday, Bohemian Thank You, Beautiful Birthday, Thank You, Card Box
(Click on the little SAL PAL icon to go to the blog, this is just a post.)
Hello Stamping Friends,
Where did summer go? Paul can’t wait for hunting season and I am already thinking about all those Christmas cards we will make together!
Let me show you what we did at the August card buffet:
Get Well Soup-printable pdf instructions
Card #1: Bohemian Get Well:


Isn’t the Bohemian Designer Series Paper (DSP for short) just beautiful. The first card uses the left over Very Vanilla paper from cutting the oval to make an additional layer. My stampers at the card buffet made that creative change.
How did you make that soup bowl? I am so glad you asked.
 You start by stamping the Very Vanilla layer with the whole image.
Then mask the little heart on the soup bowl with a sticky note and ink up the bowl part of your stamp.
Remove the sticky note! (That was the hardest thing to remember) and then stamp your bowl on the DSP.
 Make a little cut at the right side of the bowl to cut out the soup section.
 When you glue the bowl on top of your full image it will blend perfectly. Be sure and use Tombow liquid glue so you can get it perfectly aligned.
Then color the soup section. I used the fine tip end of my Crushed Curry marker and it gave a nice “soupy” look. For the inside I used a strip of DSP and a stamp from the Thoughts and Prayers stamp set:

Full directions and all the sizing are on the printable pdf file at the top of the first picture.
Envelope Card Box printable pdf instructions
As a thank you gift for attending, each stamper received this Envelope Card Box. Three of the cards at the card buffet used the Bohemian DSP and the card box used the same DSP so the stampers could have a lovely gift for themselves or have a gift to give with matching Get Well, Happy Birthday, and Thank You cards.
 I love the new Lots of Labels Framelits with its straight sides used for the buckle of the belly band, and there are seven sizes so truly LOTS of labels. The greeting is from Watercolor Wings.
Card #2: Bohemian Happy Birthday:
 This was the Happy Birthday with the Bohemian Designer Paper on Blackberry Bliss with the new Boho Chic Embossing Folder. I used a framelit from the Project Life Cards and Labels framelits to punch out the middle of the DSP where I stamped the Happy Birthday from the Birthday Blossoms stamp set.
The Bohemian DSP measures 3 5/8″ X 2 7/8″ and is on a Very Vanilla layer that measures 3 3/4″ X 3″. Not much else tricky on this card. It takes 23″ of twine to go around twice. The embossed layer is the same color as the main card stock and a full size of 5 1/2″ X 4 1/4″. The DSP cut out makes a perfect border for the inside of the card which uses another greeting from the Birthday Blossoms stamp set:
 Card #3: Bohemian Thank You:
 This card comes straight from an example in the catalog. It is white embossing on the DSP with a base card stock of Rich Razzleberry and a Bermuda Bay Banner. The stamp set used is Another Thank You. For the inside, I stayed simple and used a greeting from the Crazy About You stamp set:

Card #4: Sprinkles of Life friend card
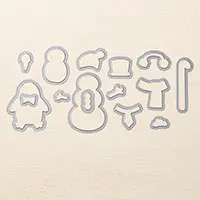
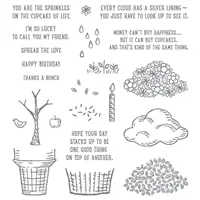
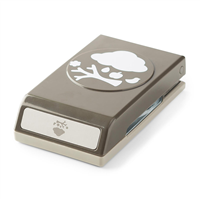
I couldn’t wait to play with the Sprinkles of Life stamp set inside the back cover of the catalog. It is this years Make A Difference stamp set. Stampin’ Up! donates $3 to the Ronald McDonald House Charities for each set they sell. But there’s more fun….. they have a punch that goes with the set! It is the Tree Builder Punch and punches out the clouds and tree leaves and the bird and the apple and the tree trunk! Here is my take on the set using Garden Green and Soft Suede:
 Kinda Eclectic is the stamp set with the sunshine and a Work of Art stamp makes quick work of adding green to the bottom. For the inside I broke my own rule and used a retired set from Sale A Bration called See Ya Later, it was just sooooo perfect for the card…..
 Nothing much you need help with on this card. The stamp sets do it all and the layers are the standard. What? You don’t have my Standard Layers worksheet? Let’s fix that:
Standard Layers-printable pdf file
Card #5: A Whole Lot of Lovely Thank You Card:
 This uses a hostess stamp set so now you really do want to have a party and earn this set – right?
There are only a couple tricky things to know on this card. The banner is the #4 banner framelit. Cut two of the same color and then cut 1/8″ off the top and the sides for a nice layered look. I used Versa Mark to add flowers to the top banner, glued it to the larger banner and then cut it in half, moved the halves 3/4″ apart, and glued the circle on top to lengthen the banner. You could also cut the paper exactly the width of the framelit, 1 7/8 “, and then run the banners only part way through the Big Shot to just cut the edges. We will do that with the next card but since this was behind a nice big circle I took the easy way. The stamped (colored with markers) Thank You is cut out with the Circle Framelit # 5 and the black border is punched with the 2 1/2 ” circle punch. This card was on Pinterest with Watermelon Wonder and Mint Macaron and looked great. This card uses Calypso Coral and last years In Color of Coastal Cabana. The inside used the same hostess stamp set:

Card #6: Birthday Blossoms:
 Hard as I tried to adjust the color this card looks blue but it is really a beautiful purple -Wisteria Wonder. It is also an example straight from the catalog with just a different card base and different ribbon and different twine. Okay, so it started out with an example from the catalog.
The tricky part is making the top layer longer than the largest framelit – easy peasy – if you remember to go through the Big Shot only part way to cut just the lovely curves and then back it out. You start with a Whisper White strip 2 13/16″ X 5 1/4″ to run just part way through the Big Shot using the largest of the new Lots of Labels framelits #7. The straight edges of this new set of framelits are perfect for adding ribbon. I put a strip of sticky tape on the back of each side of the label and used 4 1/2 ” White Organza ribbon which I trimmed after adhering. 12″ of Baker’s Twine gathered the ribbon nicely on the sides for a unique look. The stamps are all from the Birthday Blossoms stamp set, (we used two word stamps from that set on the Bohemian Happy Birthday) and the set is made for the pansy punch so no fussy cutting!

I won’t overwhelm you (or me) by listing every single item used in the six cards and the envelope box but please call or email me if there is something you can’t figure out. I would be glad to help, and if you don’t have a demonstrator I would love to earn your business!
As Always, SAL Stamp A Lot, Smile A Little, Share A Love
(and always be Salt And Light in your world!)
Karen
Welcome to my blog!

Sal Window to Products


