
Home » Gift Card Holder
Category Archives: Gift Card Holder
Letter Opener Quick Gift
Let’s end 2022 with a quick project that you could add as a little gift to a New Year’s card or birthday card or….. I am casing an idea by Jeanie Stark at Juststampin.com but adding Happiness Hues designer series paper and a stamped “mail” image from ‘Stamping Your Way To the Top’ stamp set to make a pocket which holds a letter opener. It could also be a gift card holder.

It is another project using the Pretty Pillowbox dies. This one isn’t as 3D as the last one I made for favors at the Christmas stamp camp but fun to make for a card insert.
 Did you ever use the Pretty Pillowbox die as it was intended to be used?
Well, ummmm…… I guess not! I used the greeting die in the die set for the Post It Note holder greeting. It has a stitched edge so it is perfect for this project and many others.

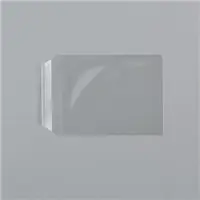
These are the letter openers I ordered from Amazon:

Recipe
- Base: Bermuda Bay, Melon Mambo or Gorgeous Grape, 4 1/4 X 4 3/8; die cut using both the large base die and the die with the two little holes at the same time. Fold on the middle score line and use tear and tape on the sides. NOTE: For these letter openers the tear and tape can’t go all the way to the top.
- DSP Layer: Hues of Happiness Designer Series Paper, 2 1/4 X 4 1/2, line up with the score line in the middle of the die and die cut just the bottom section. I selectively cut certain sections of the DSP that matched the base.
- Greeting: Basic White, 3 X 1, die cut with the long greeting die AFTER stamping the “Mail” image; you can glue it right on the score line at the top of the die which hides the score line and keeps the greeting straight
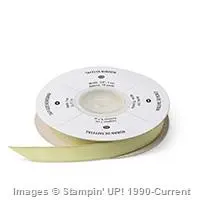
- Ribbon: 15″ of matching color
Here are individual close up pictures:
 .
.  .
.
 .
. And a group shot just for fun:
 .
. I hope you have had a successful 2022, however you define success, and that you are ready for a new year, with new challenges and new blessings!
“May the Lord bless you and keep you, may He make His face to shine upon you and be gracious to you, May He lift up His countenance upon you, and give you peace!” Numbers 6: 24-26
Sal and I wish you a very Happy New Year!
Karen

Thanksgiving Card with gift card holder
Thank you/ Thanksgiving Card
I used the Handmade Wishes stamp set for the greeting on this card.
I tried several coloring techniques with the Leaf Fall embossing folder but liked the embossed look without coloring the best:
 .
.
 .
.
I used a combination of gold and copper embossing on the greeting. The outside is gold, the inside is copper.
 .
.
 . Sorry, I still can’t see the difference.
Sigh…… it’s one of those days! The software I use to add the watermark froze up and the camera isn’t catching the colors. But you need to see the Handmade Wishes stamp set before it goes away and, more importantly, you need to see this die:
 .
.
This Mini Pocket Envelope Die! It is the perfect size for gift cards and look at all the other dies that are included:
 .
.
A miniature oval, branch of leaves die, scalloped rectangle, tags and tiny dies to punch circles or a slot for twine or ribbon! And check out the little bow you can make with two of the dies. You need this die – trust me – no more manually cutting and scoring to make a gift card holder, it is all done with the die.
 .
. Recipe for Thanksgiving Card
- Base: Thick Very Vanilla, 8 1/2 X 5 1/2, scored at 4 1/4
- Layer 1: Thick Very Vanilla, 4 3/4 X 3 1/2, (X2) outside and inside
- Layer 2: Thick Very Vanilla, 4 1/2 X 3 1/4, embossed with Leaf Fall 3D embossing folder
- Inside Gift Card Holder: Designer Series Paper (retired), 4 1/2 X 5, die cut with Mini Pocket Envelope Die; stamp the very top of the gift card holder in Versa Mark with ‘For You’ from Handmade Wishes and emboss with copper embossing powder.
- Greeting: Very Vanilla, Scrap, stamp with border from Handmade Wishes stamp set in Versa Mark and emboss with gold embossing powder. Stamp ‘Endlessly Grateful’ from Very Best Occasions stamp set and the scrolly from the Handmade Wishes stamp set in Versa Mark and emboss with copper embossing powder. Punch with the Handmade Tag Punch
- 7″ of ribbon folded in thirds and attached to the back of the greeting with glue dots
The small leaves I used on the inside are from the retired Square Pilllowbox dies and the front open leaf, die cut in gold, is from the retired Stitched Seasons Framelits dies. The two leaves at the bottom left of the greeting are from the retired Gathered Leaves Dies with the larger leaf die cut in copper foil and the smaller in brushed metallic foil.
SAL, Share A Love
Karen
Pansy Petal Product Class
Hello Stamping Friends,
Hostess Code: ZBP7XPBT
Have you been just thrilled with the new Annual Catalog? I held a catalog launch the day the catalog went live and later in the month a Pansy Product Class to use the new Pansy Patch Stamp Set and Pansy Dies with the gorgeous Pansy Petals Designer Series Paper (DSP).
We made a card that used the dies to cut out pansies from the DSP, a card using only the stamps, a gift card holder showcasing the Designer Series Paper (DSP) and a card using the dies to do awesome punch art— four cards, four different ways to use the bundle!
 Can we see the gift card holder first?
That is a beautiful one! I cased one I saw on Lynn’s Locker changing up the greeting and cut outs and……
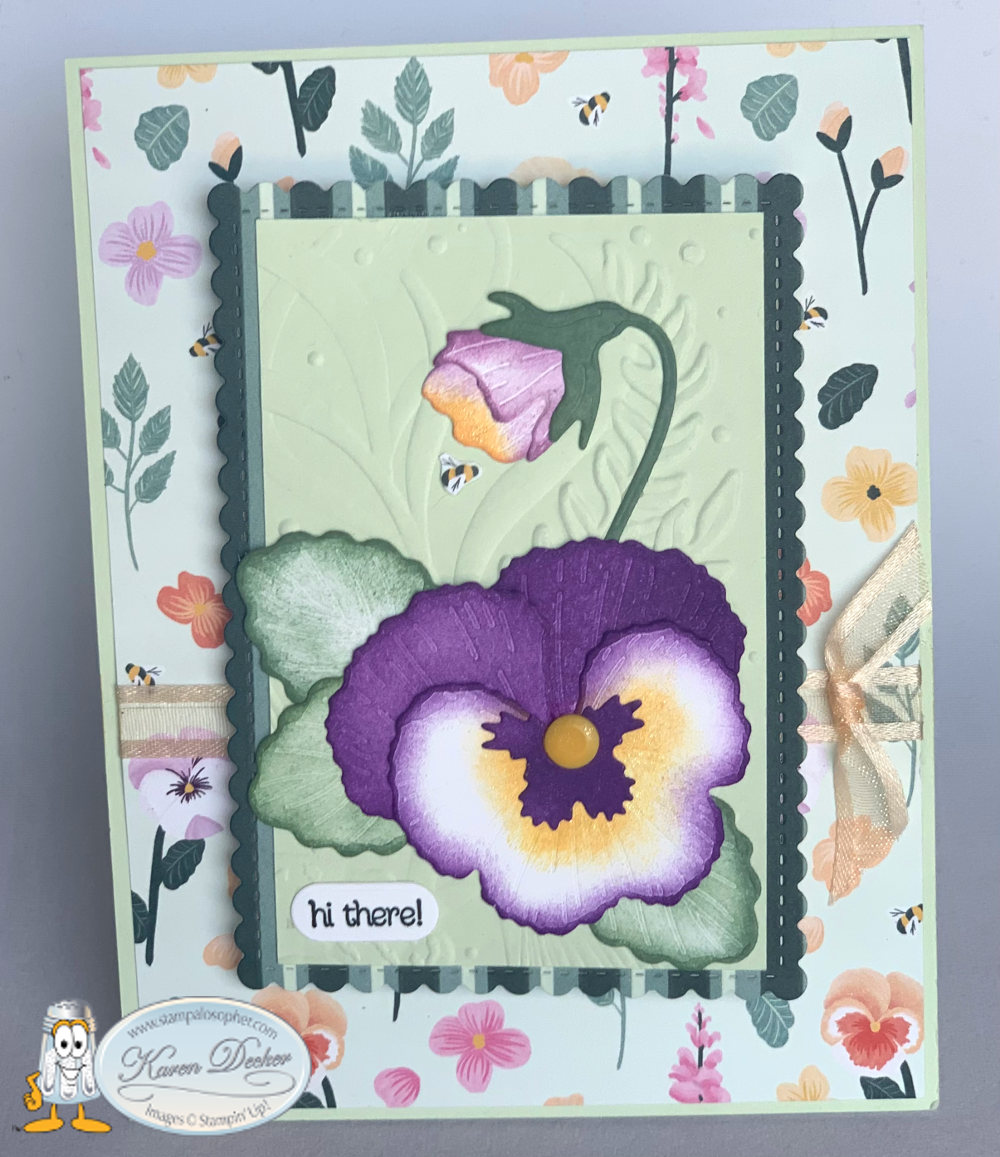
Pansy Petals Card #1 Gift Card Holder Showcasing the DSP

 .
. Recipe: Pansy Petals Card #1
- Base: Blackberry Bliss, 4 1/4 X 11, scored at 5 1/2
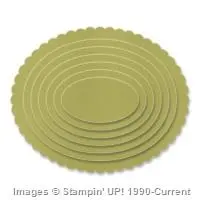
- Layer: Pansy Petals DSP, 4 X 5 1/2, die cut with the largest Scalloped Contour Die
- cut out the middle with the 3rd smallest Scalloped Contour Die
- Greeting: Basic White 3 1/2 X 3 1/2, stamp with the greeting from the Better Places stamp set and cut out with the Scalloped Contour Die that has the dots and dashes
- Pansies: Pansy Petals DSP, die cut one large and one small pansy from the DSP with Pansy Dies
- Leaves: Pansy Petals DSP, die cut three leaves, one of each color, from the DSP with Pansy Dies
- Card Holder: Soft Succulent, 2 3/4 X 4, die cut with largest Scalloped Contour die
- Adhere with tear and tape on sides and bottom as close to edge as possible
- Embellishment: Flower Flourish with a rhinestone in the middle
- Ink: Blackberry Bliss
- Stamps: Better Places hostess stamp set
Pansy Petals Card #2 with Die Cut pieces on Scalloped Contour Die Layer and then popped up on Designer Series Paper


Recipe – Pansy Petals Card #2
- Base: Calypso coral, 11 X 4 1/4, scored at 5 1/2
- Layer 1: Evening Evergreen, 4 1/8 X 5 3/8
- Layer 2: Pansy Petals DSP, 4 X 5 1/4
- Top Layer: Basic White, 4 X 2 3/4, die cut with 3rd from smallest Scalloped Contour Die
- Inside: Basic White, 4 X 5 1/4
- Inside Strip: Evening Evergreen, 1/8 X 5 1/4
- Flowers:
- Top of leaves and stem: Evening Evergreen, 2 X 2 1/2
- Leaves: Soft Succulent, 2 1/2 X 1 1/4
- Edges of pansy, beard and inside of bud: Calypso Coral, 3 1/2 X 2 1/4
- Inside of petals at back of pansy and outside of bud: Pale Papaya, 3 1/2 X 1 1/2
- Largest petal of the pansy: Basic White, 2 1/8 X 1 5/8
Note: for those of you who may want to teach this class- Save the above pieces with the cut outs already made for a template for your students to follow; glue to a basic black cardstock like this:

- Embellishments: An Elegant Faceted Gem in the middle of the flower and a fussy cut bumble bee and inside flower
- Ink: Evening Evergreen
- Stamp Set: Pansy Patch
- Dies: Pansy Dies, Scalloped Contour Dies
Not so fast, Sal, there are two more cards that we made. The next one uses my favorite die set – the Curvy Dies and greetings from the Quite Curvy Stamp Set. You can only get this for the next two days then it is gone gone gone.
Pansy Petals Card #3 using the Quite Curvy Stamp Set and Curvy Dies (on sale until June 30):


I love how the plain stripes and the very busy flowerdy DSP balance each other out. I saw this combo on Aromas and Art.com with Su Mohr. The inside bottom stripes are from the cutout on the front so die cut the front carefully.
Recipe – Pansy Petals Card #3
- Base: Thick Basic White, 8 1/2 X 5 1/2, scored at 4 1/4
- Top Layer: Pansy Petal DSP, 5 1/2 X 2 1/2, Cut with the Curvy Die on 5 1/2 length; the cut of the curve is 2 1/2″ down from the top on the left and 2″ down from the top on the right.
- Bottom Layer: Pansy Petal DSP-Stripes going vertical, 5 1/2 X 1 1/2; the cut of the curve is 3/4″ on the left and 1 1/4 ” on the right hand side.
- Pansy: Pansy Petal DSP, Die cut one large pansy
- Leaves X 3 : Soft Succulent, 1 X 3 1/2, Die cut three leaves- the die does the embossing of the veins!
- Glue the leaves to the back of the pansy and pop it all up with dimensionals
- Embellishments: Three of the Evening Evergreen In Color Jewels
- Ink: Evening Evergreen
- Stamp Set: Quite Curvy
- Dies: Curvy Dies
Use the Stamparatus to position the curved sentiment from Quite Curvy between the two DSP sections on the front matching the curves of the DSP. If you are concerned that you may not get it stamped correctly, temporarily adhere your top and bottom and then stamp so that you can add a piece of Basic White if you mess up. With the stamparatus, I was able to draw the placement of the card on the grid sheet and the stamp was adhered to the plate with the correct curve. No one had a problem getting it correct.
Pansy Petals Card #4, Stamping the Pansies and Leaves


Recipe – Pansy Petals Card #4
- Base: Thick Basic White, 8 1/2 X 5 1/2, Scored at 4 1/4
- Layer 1: Pacific Point, 5 1/2 X 4 1/4, Cut with the largest Ornate Layer Die (Remember to put a folded piece of dryer sheet underneath your cardstock- it pulls out almost all the little dots so you don’t spend time pocking them out) Layer the dryer sheet, then the cardstock, then the die. Glue this layer directly to the base being careful not to get glue close to the holes.
- Top Layer: Basic White, 3 3/8 X 4 7/8, This will be stamped and then popped up on the Ornate layer
- Embellishments: Three of the Holiday Rhinestone gems
- Inks: Pacific Point, Garden Green, Daffodil Delight, Crumb Cake
- Stamp Sets: Pansy Patch for the front greeting, Encircled In Friendship greeting for the inside
- Dies: Ornate Layers Dies
To stamp:
- Stamp your greeting first at the top so you know how close you can get with the large pansy, full strength in Pacific Point
- Use Pacific Point to ink up the full pansy images, STAMP OFF, then stamp, one large pansy a little left of center and two small pansies. “Ink up, stamp off, stamp on”,,,,,, “Ink up, stamp off, stamp on”. I have to sing that to remember!
- Position the bud so it is above the small pansy and yet not off the paper, ink up in Pacific Point, STAMP OFF, stamp on
- Ink up the detail shadowy stamps in full strength Pacific Point and stamp them over the images
- Using Night of Navy Ink stamp the little beards on the three pansies
- Using Daffodil Delight Ink stamp the centers on the pansies
- Use the Waterfront stamp set and Crumb Cake Ink to stamp the ground in the bottom 3/4″, or freehand with a blender pen
- Now MASK OFF the pansies and the ground to stamp the greenery
- Using Garden Green Ink, ink and stamp the stem going to the bud
- Using Garden Green Ink, ink and then stamp the single stem three times coming down to the ground from the large pansy; one time stamping to the shorter pansy and twice to the taller pansy; use a garden green marker to soften where the edges of the stamp meet when you stamp multiple times
- Using Garden Green Ink, Ink up the small leaves full background, STAMP OFF, stamp on
- Using Garden Green full strength, ink up and stamp the detail shadows of the leaves
- Mine looked funny with the stem to the bud going out of a leaf so I masked the leaves and stamped a little stem between the leaves.
Variety is the spice of life, Sal, and I think we held to our motto of ‘bringing a pinch of creativity to spice up their crafting lives’!
Don’t forget the other pansy cards we made in a previous post- click their picture to go to that post for directions. There’s ribbon on both of these, Sal! I think I liked this sponged pansy best.
 .
. 
And Joy’s swap card with the pansy:
 .
. You now have a seven card collection of pansy cards! If you feel overwhelmed with the number of dies check out this guide made by Gail Ellis of Blue Rose Paper Treasures. Isn’t it great to have others to help us?! Pinterest also has guides to different colors to use for the pansies.

July 1 is the start of the Designer Series Paper (DSP) sale and you can buy the Pansy Patch DSP at 15% off. Here is a cute gif showing the other papers offered in this sale:

That makes me dizzy – may we have a list?
How about a picture and a list?
 .
. 
Use Hostess Code: ZBP7XPBT if you do decide to order and you will help me to buy prizes with hostess dollars for upcoming events. Check out the JJ Mini one more time to make sure you don’t miss anything.
I thank you most sincerely!
SAL, Stamp A Lot, Smile A Little, and always be Salt And Light to those around you!
Karen

#2 of Twelve Cards of Christmas- Gift Card Slider
Hello Stamping Friends,
(If you are viewing this in your email, it is just a current blog post. For the entire blog where you will find other great ideas just click on the little SAL pal to the left to be redirected.)
Welcome to all my new blog followers! I plan on giving you lots of fun ideas for Christmas cards!
While at the Denver Merchandise Mart for a scrapbooking event I found a booth called PineconePress and they had a most interesting slider gift card. I immediately thought how nice the card would look with stamped images and beautiful Stampin’ Up! designer paper. So here is my creation resized to fit our SU products:

When you pull on the right side, the left side slides open:

I challenged myself to use all the greetings in the Versatile Christmas stamp set (page 26 of the holiday catalog). Stampin’ Up! listened to our request for more stamp sets with outside and inside greetings and this one is awesome with great fonts and verses! A gift card seemed the best way to use “The gift of LOVE, the gift of PEACE, the gift of HEALTH & HAPPINESS….. May all these be yours at CHRISTMAS”. Stay tuned for the next three cards which will use the other verses. Of course you must have a direction sheet which I will also post here and to the recipe box on the main blog!
Gift Card Slider Card Printable PDF – Two Pages
And here are the supplies:


Built for Free Using:My Stampin Blog

Welcome to my blog!

Sal Window to Products


