
Home » Sympathy
Category Archives: Sympathy
Sympathy & Get Well with Eden’s Garden
Oh how sad it makes us to need to prepare a sympathy card; but remember that as you craft your card you can pray for their family and friends. I am using the Eden’s Garden Suite from my Stampin’ Up! stash. I also had the Forever Gold Specialty Laser cut paper to use on the card and Lovely Words dies for the inside. Take a look:

SU Delicate Dahlias stamp set had the greeting I used.

I made a get well card at the same time:

The greeting is from SU Speedy Recovery.
 How did you get gold foil on the little leaves?
Well, Sal, it was the DSP itself that had gold foil. I didn’t use the Minc machine to foil, that would be a challenge! I do have a pen that I could use to color part of a DSP and then run it through the machine with gold foil but that is a challenge for another day.
Recipe
- Base: Soft Succulent, 4 1/4 X 11, Scored at 5 1/2
- Top: Ever Eden Foil Designer Series Paper (DSP), 3 1/2 X 4
- Top Middle: Ever Eden Cotton Paper, 3/4 X 4 1/4, gives the look of a belly band
- Top Bottom: Ever Eden plain DSP, 3/4 X 4
- Gold Flourish: Forever Gold Specialty Paper, already laser cut so just punch out
- Greeting: Soft Succulent, 2 1/2 X 2 1/2 stamp then cut with #4 circle die (4th from smallest)
- Stamp greeting in Evening Evergreen using stamparatus so you can stamp twice for darker greeting
- Sympathy: Delicate Dahlias stamp set; Get Well: Speedy Recovery stamp set
- Inside Layer 1: Cotton Paper, 4 X 5 1/4
- Inside Layer 2: Ever Eden plain DSP matching front bottom DSP, 3 3/4 X 5
- Inside Layer 3: Ever Eden Foil Side of DSP, 3 1/2 X 4 3/4, die cut ‘Hugs’ from Lovely Words die
- Hugs Layer: Gold Foil, 2 1/2 X 1 1/2, die cut the ‘Hugs’ only to layer on the DSP of layer 3
- Bow: Evening Evergreen, 8″
Easy Peasy! Especially if you have the measurements. Getting those correct took a bit of time.
Imagine what you could do with other DSPs!
Exactly, Sal, with two coordinating DSPs and two coordinating card stocks for the base and the band you could do a lot.
So you’re going to add to your stash of ready to go cards by making several?
Well, I really don’t have much of a stash, and I have a friend who thinks its bad luck to make sympathy cards, and you pray a lot longer when you aren’t just pulling from the stash, and….. So, the short answer is ‘no’, I need to move on to the next needed cards.
Thank you for spending a bit of time with me today as we…
bring a pinch of creativity to spice up your crafting world!
SAL, Sending A Little prayer with each card
Karen

Riddle for the day:
Q=What do you call a bear with no teeth?
A=A gummy bear!
Bee With Heart
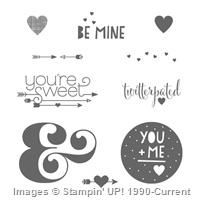
Let’s take a trip to a fantasy land where bees are pink! I used a digital stamp by Connie Fong called Bee With Heart! I saw this cute pink bee on a card by Gloria Shirr and just “had to have whatever stamp it was”. You all know that feeling! Little did I know it would lead me to a new world– digital stamping!
 .
.  .
. After printing the digital images on Basic White cardstock, I cut them out with a Stampin’ Up! ‘Deckled Rectangles Die’ and adhered to a layer of retired pink marble designer series paper. For the inside greeting I used Stampin’ Up!’s ‘Prized Peony’ stamp set. By duplicating the images and printing landscape I could print four fronts to a sheet of 8 1/2 X 11. The digital stamp set has a boy bee and a girl bee with two greetings and a flower. Here is the second greeting on a card for my mother.
 .
.  .
. The inside greeting is a stamp Lucille gave me before she moved far far away to New Jersey. Miss you, friend! The clear heart and pink pearls are retired Stampin’ Up! embellishments.
Well, Sal, we learned to do mirror images with regular stamps using the stamparatus and a silicon sheet, but with a digital stamp it is just a click of a button!
Recipe
- Base: Basic White 5 1/2 X 8 1/2 scored at 4 1/4
- Border Layer: Designer Series Paper (DSP), 5 3/8 X 4 1/8
- Top Layer: Basic White 5 1/2 X 4 1/4 cut with Second Largest Deckled Rectangle Die
- Inside Strip: DSP, 1/2 X 5 3/8
- Embellishments: 3 pink pearls for outside, 4 clear dots for middle of flowers and 1 clear heart on inside
- Copic Markers
- RV10 and RV23 for the bee’s body and heart
- RV09 for the Nose and Inside of the flowers
- R00 and a tiny touch of RV10 for the wings and then a coat of Wink Of Stella
I hope you enjoyed a trip to fantasy land!
Here I am adding a sympathy card made with one of the digital images from Connie Fong Art but this time in more traditional colors:
 .
. 
- Copic Markers
- R27 for the heart, flowers and tiny touch on nose
- Y13 Inside flower
- C9 Black on Bee
- YR12 Yellow on Bee
- E000 Face
- R00 and a tiny touch of RV10 for the wings and then a coat of Wink Of Stella
- Deckled Rectangle Dies are used to create the frame with a piece cut out of the middle of the front used to borde the back
- Inside Greeting: Kindness & Compassion stamp set, love how it ties to the digital greeting on the front.
By combining digital with the dies and stamps I have in my stash I have a new realm of card making!
SAL, Sending A Lot of Love
Karen

 I am confused! Why would you want to do something like quilling? You are a stamper!


Sending Smiles, Blossoming Happiness and New Horizons
Click a second time on the header to go to the blog.
The Tea Boutique Cards & Envelopes in the annual catalog use all five of the new In Colors with cards and matching envelopes. I challenged myself to make a card that matched the envelope!
 .
.


I chose the smaller of the flowers in the Blessings of Home stamp set and the long stem flower and greenery from the Sending Smiles stamp set cut out with the Sending Dies which even have a die for that itty bitty flower. The envelope has a Starry Sky little flower on the flap so I replicated that look. The Flowers of Home Dies cut out the flower image and the die set has many other images to add greenery!
Recipe for Sending Smiles Tea Boutique Cards
- Base: Tea Boutique Card in Orchid Oasis, Measures 8 1/2 X 5 1/2 folded at 4 1/4
- Layer 1: Basic White, 3 3/4 X 5
- Layer 2: In Color Designer Series Paper in plaid, 3 5/8 X 4 7/8
- Top for die cut pieces: Basic White, 6 X 4 1/2
- stamp smaller flower in Blessings of Home stamp set with Orchid Oasis ink, color with Stampin’ Blends- Lt Fresh Freesia, Lt Granny Apple Green, Lt Call Me Clover and use a Blender pen & Orchid Oasis ink
- stamp in Fresh Freesia ink 2 long stem flowers from Sending Smiles stamp set (outside & inside flower) and use the blender pen and Orchid Oasis ink to add color on the flowers
- stamp one green leaf for outside in Granny Apple Green and one double green leaf for inside, die cut
- Cut ‘sending’ background from the Basic White
- Stamp ‘Love & Big Hugs’ in Orchid Oasis and cut with die in Sending Dies, cut off right edge even with the DSP layer and leave a little on the left edge for a gem when you line up the greeting die
- ‘Sending’ Top Layer: Use the In Color Designer Series Paper left over from layer 2, 1 5/8 X 3 5/8, and add backing of double back adhesive paper 1 1/2 X 3 1/2
- You should have enough of the In Color Designer Series Paper to make two 1 1/8 X 1 1/8 squares to cut diagonally for inside corners
- Greeting on inside of second picture: Basic White, 3 X 3 , Flowering Tulips stamp set, stamped in Starry Sky and cut with a retired Hippo & Friends Die
- Greeting Layer: Starry Sky, 3 X 3, die cut with retired Hippo & Friends Die, cut in half and glue to back of greeting
- Little Flowers (X2): Starry Sky, 1 X 1, die cut with Sending Dies and glue on a scrap of Daffodil Delight
- Embellishments: 5 In Color jewels, 4″ of Fresh Freesia ribbon tied in a knot
The top pieces are all adhered with Stampin’ Dimensionals, inside corners and flowers are glued directly down.
 I remember you used the Parakeet Party and the Tranquil Tide Cards and Envelopes for the catalog launch and now you have used the Orchid Oasis. What are you going to do with the Starry Sky and Sweet Sorbet?

The Tea Boutique Cards & Envelopes have 20 bases with matching envelopes so I have some left of all the colors. (Click for Catalog Launch details). I would love to do more of what I have done here in all the colors!
Recipe for Blossoming Happiness Card
 .
.  .
.
The front of this card is from a kit sent to me when I played Bunco online with Debra Harrison at Simply Sweet In Ink Designs. I created the inside using matching Hues of Happiness DSP and Blossoming Happiness Dies.
Base: Thick Basic White, 4 1/4 X 11, scored at 5 1/2
Layer 1: Hues of Happiness DSP, 4 X 5 1/4
Top Layer: Basic White, 4 X 4, Die cut with large Blossoming Happiness Die; Stamp sentiment from Pansy Patch stamp set in Granny Apple Green in upper right of die cut piece
Flower & 2 sets of Leaves: Hues of Happiness DSP die cut with Blossoming Happiness Dies.
Inside Layer: Hues of Happiness DSP with center cut out using retired Ornate Layers Die and stamped in Melon Mambo using the Limited Edition stamp set.
Recipe for New Horizons Card
 .
.  .
.
Base: Misty Moonlight, 8 1/2 X 5 1/2, Scored at 4 1/4
Layer 1 (X2): Soft Succulent, 5 3/8 X 4 1/8
Top Layer: New Horizons DSP, 5 1/4 X 4, and 5 1/4 by 2; I wanted the lake in the middle so I cut 3/4″ off the top of the 6″ DSP, then cut the 6″ width into two pieces – 4″ wide with the remaining 2″ wide for inside
Use the Oceanfront stamp set for grass in Evening Evergreen and Boulders in Basic Gray. Note: Stamp the boulders first, mask them, and then stamp the grass
On the Horizon stamp set is used for the birds but stamp lightly or they become blobs -practice makes perfect!
Horizon Dies are used for the fence with a scrap of Basic White and the grass with a scrap of soft succulent.
Thank you for your order is the retired You Always Deliver stamp set.
Embellishments are the retired Pebbles Enamel Shapes.
I hope I have brought you a “pinch of creativity to spice up your crafting world!”
Have a wonderful day!
SAL, Sending A Lovely set of cards to inspire you
Karen (click on little Sal in the computer to go to my online store)

Simple Side Step Card
Hello Stamping Friends,
Let’s look at a Simple Side Step Card. I saw this design on Lori Pinto’s Lollipop Paper & Ink blog and used it for my Case The Creator #2 Challenge with my stamping group. It is so cool to see all the different cards from one set of instructions!
Case The Creator #2 printable pdf file
And here is the file if you don’t want to print it out:

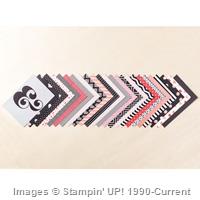
I used the SAB Daffodil Afternoon designer series paper for my background and the Daffodil Dies for my card:
 .
.  .
. 
Joy Meadows used the Pierced Blooms Dies for her beautiful card:

Ann Hausmann used the Sale A Bration Friendly Hello set with the Friendly Hello Designer Series Paper:
 .
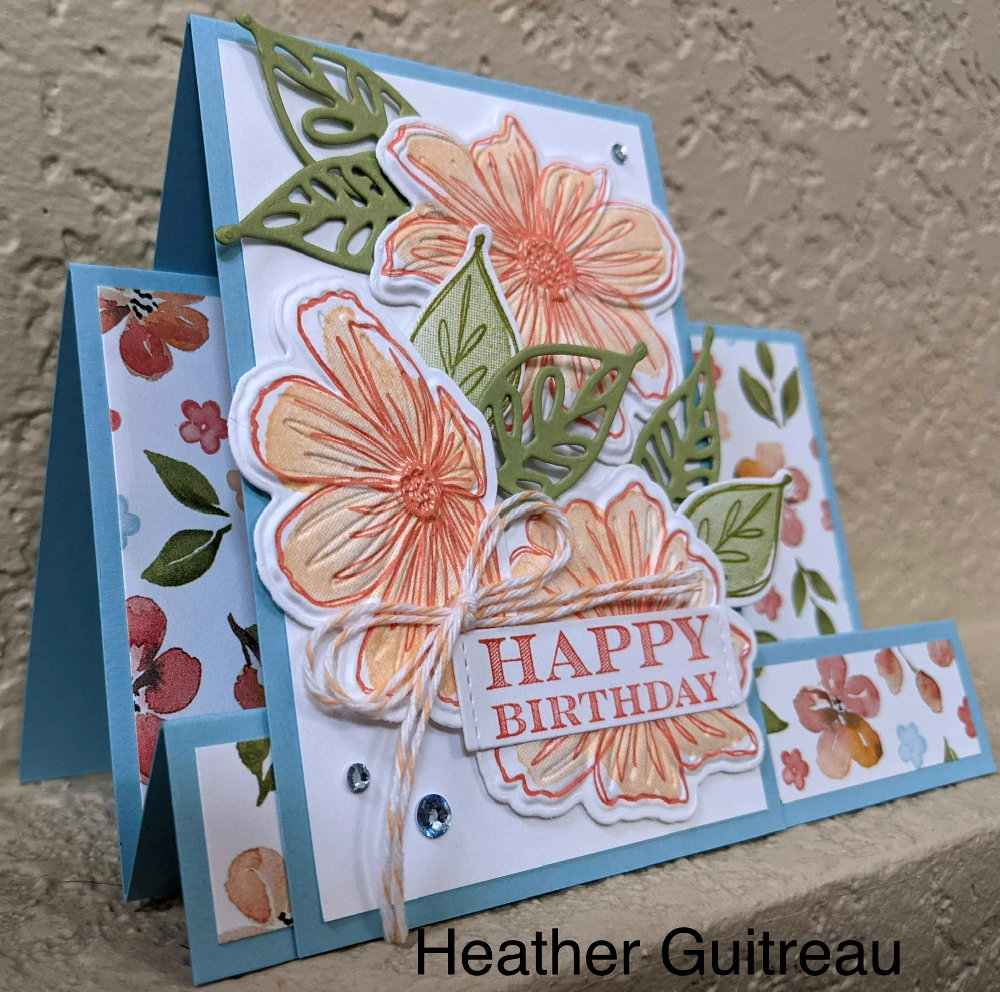
. Heather Guitreau used the Art In Bloom bundle with its Bloom Hybrid Embossing folder and dies:


They are all beautiful and so fun to see the variety! Thank you for participating!
I made a thank you card using this same style. I used the Happy Hedgehogs stamp set and the retired Love You Lots stamp set and the SAB Thoughtful Blooms set. I used the New Horizons DSP and then sponged the front to match the DSP after masking the stamped images. The hedgehog is the little one in the set and I used the reverse image technique to face him toward the right. Just use a silicone pad and your stamparatus, stamp the image several times in Memento on the silicon pad and then carefully lay your paper on top and burnish to get a nice reverse image.
 .
. 
Thank you for sharing some of your precious time with me!
SAL, Spring At Last

Pencil Box & Sympathy Cards/Eden Garden
If you are opening this blog post in your email be sure and click a second time on the header to go to the full blog. If you would like to receive an email when I add a new post be sure and put your email address in the box at the right on the blog.
Hello Stamping Friends,

The gold leaves are foil and just beautiful! I would like a whole pack of just that sheet! The sympathy greeting on Susie’s card is from the ‘Peaceful Moments’ stamp set.
 So if you haven’t been making cards with the new set, what have you been doing?
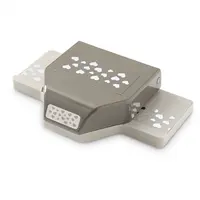
Well, I haven’t been slacking, Sal (Slave driver At Large). October is pastor appreciation month and we have three main pastoral staff at our church so I purchased a nice pen and refill for each of them and then created a Pencil Box. Check it out:
 .
.  .
.  .
.
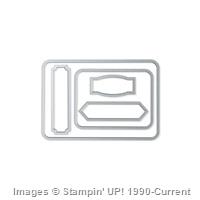
Here is the recipe for future pencil boxes to decorate with whatever you have in your stash:
Pencil Box Recipe
I started by measuring the pen and refill I was putting in the pouch. This takes a 12 X 12 cardstock.
- Base: 10 3/4 X 9 1/4; Score at 4, 4 1/2, 8 1/2, 9, 10 1/4

Fold and burnish all your score lines.
Place Tear & Tape on the 1/2″ flap at the right, fold over and corner round the edges.
I used the Crop A Dial to add an eyelet to the flap on two of the pencil pouches, the pink one I just tied with ribbon.
Angle your little side tabs when you cut them for ease and then glue them to the inside.
- First Layer (2): 3 3/4 X 8
- Second Layer (2): 3 1/2 X 7 3/4
- Envelope Flap: Gold Foil, 8 X 1 1/8 corner rounded
- Envelope Flap: DSP, 7 3/4 X 7/8 corner rounded
From there, I found the greetings I wanted and then let the creative juices flow.
“You make the ordinary extraordinary” – Simply Succulents
“You’re absolutely amazing” – Color & Contour
“Thank you”- Hand Drawn Blooms
“You Are So Special” – Tasteful Touches
Unfortunately, I also needed several sympathy/friend cards. Mary Ann Cowan used Soft Sea Foam on one she had made and it looked soft and comforting. The Hippo Dies gave me the layers and the Forever Fern Stamp Set and Forever Flourishing dies were used for the greenery. The Positive Thoughts stamp set has the ‘Hugs, Prayers, Love” greeting and the set also has the little flourish you see here under the ‘With Sympathy’ greeting from Lasting Lily(retired). The friend card uses the same little flourish and greetings from Welcoming Window (My Sweet Friend) and Seascape (I’m here for you …always).
- Base: Soft Seafoam, 8 1/2 X 5 1/2, scored at 4 1/4 and 2 1/8
- Layer: Soft Seafoam, 2 X 5 1/4, embossed with Tasteful Textile embossing folder
- Inside: Basic White, 4 X 5 1/4, emboss 2″ on the right hand side with Ornate Floral embossing Folder
- Vellum: 5 1/4 X 4
- Ink: Old Olive, stamped full strength on one leaf and stamped off on the second
- Dies: Forever Flourishing, Hippo Dies
- Stamp Sets: Positive Thoughts, Lasting Lily, Welcoming Window, Seascape


The greeting on the next one is from the Kindness and Compassion stamp set. Very Versailles was used for the vine and the words. The card stock used is Pale Papaya and Soft Succulent. It is so much prettier in real life. The die used is Detailed Bands. The sympathy greeting and rose are from the Painted Glass retired set.
 .
.  .
.
I need a scrapbook to look back on when I am designing cards and even if you are new to stamping, the layout can inspire you. I go to the blog Recipe Box when I need the measurements for a certain fold. Hopefully others find this useful as well. Please leave a comment if you have used the Recipe Box at any time. It is encouraging to know the time spent is valuable.
Did I sideline you with my ‘scrapbook’? I really want you to see Eden’s Garden so you don’t miss out on those beautiful papers!

Thank you, Brian, for a great view of the papers!!
SAL, Scrapbooking A Lot of ideas
Karen

Thank You or Sympathy Cards
Hello Stamping Friends,
January’s Hostess Code: UEEZKD2D Use this if your order is under $150. At $150 you receive the hostess rewards.
 . Lions and Dragons – Oh my! (Dandelions and Dragonflies-tee hee)
That image is a sneak peak of tomorrow’s Facebook Live to make January’s club cards. Join me at 9:30 AM at:
http://www.facebook.com/stampalosopher/videos
Not quite yet, Sal, I have a few more classes to watch to be able to have you join us. Soon!!
Thank You Cards
Are you wishing you had a quick and simple card layout for thank you notes? I have one from a Mystery Card Challenge in our Blended Stampers Group on Facebook. I used it for my club Zoom Mystery Card challenge #8.

I used ‘Feels Like Frost’ Designer Series Paper with coordinating bases, the Stitched Nested Labels and Metallic Mesh Ribbon.
‘Love & Thanks to a Dear Friend’ is from the Prized Peony stamp set with an inside greeting of ‘Your sweet friendship refreshes the soul’ also from Prized Peony. The ‘Thank You’ is from ‘Beautiful World’ using a Stampin’ Marker to color just the thank you of the stamp. Note: Always use a marker not a blend when coloring the back of a stamp since the blends are alcohol and would stain the stamp.

Here is a close up:

 .
.
 .
.
Now you can see the trick! You score at halfway-5 1/2 , and again at 6 3/4. Then you glue the 1 1/4″ section between the 5 1/2 and the 6 3/4 scores to the back half of the card. Punch out little notches on this glued section and you have a unique placement for your ribbon. I used the ‘Tailored Tag’ Punch.
Here are cards made by club members:


 .
.
This was the Christmas card I made for the Blended Stampers group. We could use all our left over Christmas paper and make this year’s cards!!

For sure!
Did you overlook the beautiful ‘Touched My Heart’ hostess set in the back of the Annual Catalog? I used it to make Sympathy and Thank You cards in December casing Dawn Michels’ post on Pinterest.

 .
.
 .
. The base is Just Jade and the brick background comes from Tasteful Touches.
Base: Just Jade, 8 1/2 X 5 1/2 Scored at 4 1/4
First Layer (X2): Whisper White, 5 1/4 X 4
Top Border: Just Jade, 3 1/4 X 3 1/4
Top: Whisper White, 3 X 3
Bow: 8″ of 3/8″ Old Olive/Pretty Peacock reversible ribbon
Stamp the heart, the bricks and the greetings in Soft Suede and color the leaves with Just Jade.
The inside greeting is from the set ‘Kindness and Compassion’ which is retired.
 What……Breaking your own rule of not using retired products?
Once in a while, what you want to say overrides the self imposed rule!


This was a swap card using ‘His Love’ stamp set. I made it months ago and it has been sitting on my desktop waiting to be posted. It seems a good place to post with these cards since it would be good for encouraging someone.
Base: Mint Macaron, 4 1/4 X 11, Scored at 5 1/2
Layer 1: Ornate Garden DSP in Mint Macaron with Gold Foil, 4 X 5 1/4
Layer 2: Mint Macaron, 3 X 4 1/2
Layer 3: Whisper White, 2 3/4 X 4 1/4, Embossed with Dainty Diamonds Embossing Folder
Ribbon: Pool Party Sheer 3/8″ Ribbon, 4″ to wrap the layer and 8″ to make a bow.
Medallion: Die Cut with Tasteful Labels a Large Circle in Gold Foil, 2 1/4 X 2 1/4 needed, a small circle with the Tasteful Labels Die, 1 1/2 X 1 1/2, in Whisper White, and punch a 1 3/8 circle from the matching DSP for the middle of the medallion.
Daisy: Punch a large daisy in the DSP and another with the Gold card stock. Use the small daisy punch with DSP for the top of the daisy and embellish with a Gold Gilded Gem.
For the inside: Stamp off the Bible and then stamp it on the card stock. (This is sometimes called ‘second generation’ stamping- you stamp off your freshly inked stamp on scrap paper before stamping on your card stock to create a lighter image.) Stamp ‘Always’ in full strength ink on top of the Bible.
I hope these cards have given you a ‘pinch of creativity to spice up your crafting world’.
That tag line is how I came to be!
Indeed! Thank you for your time in visiting today. If you don’t have a demonstrator, I would be honored to help you out with your crafting needs.
SAL, (So At Last – the new year begins)
Karen
January’s Hostess Code: UEEZKD2D Click on Sal in the computer to go to my onsite shop.

Music From The Heart
Today I am sharing three cards with several of my favorites:
First Card with my favorite- Music From The Heart:

Dawn Olchefske achieved one million dollars in sales and designed this stamp set as one of her many rewards!
 When you reach one million will you design a set with me?
Of course if Toons4Biz will allow it.


This is Whisper White with a white background and natural light just like I researched would be best for picture taking and now I have a bluish white instead of yellow.
Better go back to the Youtube videos on that one.
Sigh….
The hearts have Wink of Stella to add some sparkle. I felt like Cinderella with the birds making the bow.
Recipe:
Base: Basic Black 5 1/2 X 8 1/2 Scored at 4 1/4
Top: Make 2 – 5 7/16 X 4 3/16 I know, crazy, but I wanted just a little black. Go to the 5 1/2 mark and move back 1/16 to get 5 7/16. For 4 3/16, go to 4 1/4 and move back 1/16. That is easier than counting 16ths.
Piano: Whisper White 2 1/8 X 2 3/4
Two Keyboard Pieces to layer at the bottom: 3 X 2 1/4, stamp twice and fussy cut. Adhere to bottom and then fussy cut around the bottom inside and out.
6 ” of twine
To cut your white top piece:
- place a pencil mark from the top right corner over 3/4″ and from the corner down 2 1/4″
- place two pencil marks from the bottom left corner up 1/4″ and up 1/2″
- cut diagonally from the 1/4″ mark at the bottom to the 2 1/4″ mark at the top right
- cut diagonally from the 1/2″ mark at the bottom to the 3/4″ mark at the top right
- shave off 1/16″ on each side of the middle piece
Okay, let me grab the sketch book.

Once they are cut remember to cut off just 1/16″ from each side of the middle piece so you have the black showing.
Second Card with two Favorites: Beautiful You and Special Celebrations:

I have used a stamp from this set on so many different cards. Today I used it on a graduation card that I am casing from Sharon Armstrong.


The Congratulations is from the retiring Special Celebrations set:

Recipe:
Base: Gorgeous Grape 8 1/2 X 5 1/2 Scored at 4 1/4
Layer 1: Smoky Slate 3 3/8 X 4 5/8
Layer 2: Gorgeous Grape 3 1/4 X 4 1/2
Top Layer Outside and Inside: Whisper White 3 X 4 1/4 – make 2
Inside Layer: Smoky Slate 3 3/8 X 4 5/8
Cap: Gorgeous Grape 1/2″ square
Diploma: Copy Paper 1/2″ X 5/8″ rolled up and tied with a double wrap of 2″ of colored twine
Tassle: 8″ colored with the Highland Heather Stampin’ Blend
- wrap twine 4 times around 1″ of cardstock
- cut the bottom ends and remove from cardstock
- slip the top ends on the end of your Take Your Pick tool
- tie another short piece of twine twice around 1/4″ from the top
- Use a glue dot to adhere the top to the middle of the cap
- punch a 1/16″ circle from Gorgeous Grape and put on top of the tassle
I used the Highland Heather Stampin’ Blend to color the dress and create sleeves then used a black journaler pen to color the edges of the sleeves. Ivory Stampin’ Blend was used for the legs and arms and Smoky Slate for the shadow. Wink of Stella was used to color the slip.
‘Congratulations’ was stamped in Versa Mark and then sprinkled with Silver Embossing Powder and heat set. The inside greeting is a retired Stampin’ Up! stamp.
Third Card with Two Favorite Retiring Items – Flourishing Phrases and the Pretty Label punch:

The Flourishing Phrases greeting set and the Special Celebrations set are excellent additions to your collection and you will use them over and over. I used Flourishing Phrases for a sympathy card in a Mystery Card Challenge. That is a challenge where you are given a specific list of supplies and measurements and you create a card with just those supplies.


Recipe:
- 1/2 sheet cardstock
- Designer Series Paper 3 X 5.5
- Coordinating Card Stock 3.25 X 5.5
- Stamp Set with words
- Punched Shape
- Ribbon
- Matching Ink
- Adhesive
I know, Sal, it was a fun challenge but I found out none of us avid crafters can make a card without blinging it up. I even had to add a few jewels.
Here is a card I made for my upline’s Mystery Card challenge that meets most of the criteria. I did use two ink pads, though.

SAL, Sharing A Love of stamping
Karen
“All That You Are” Box Pop Up Card – most popular on Pinterest
Hello Stamping Friends,
Did you overlook the stamp set on the inside cover of the Occasions catalog? The flowers in this set are beautiful and the font on the greetings is lovely. Take a look see! (the blue means there is a framelit to cut it out):

I cased several people and watched FrenchieStamps.com do an inside pop up flower box.


Can you distinguish that cute little flower in the box? It would even look great as a focal point with one of the Vibrant Vases stamps. The crafters had a choice of three colors, Balmy Blue, Calypso Coral or Gorgeous Grape and they all turned out phenomenal! Pictures of those are after the recipe below.

Do you think I can talk Paul into putting on his tux and serving us appetizers throughout the event? Hmmmm….. it is a stretch. You will just have to come see for yourself!

Now back to that card I want to detail for you.
Stamp Set: All That You Are
Tools: Rectangle Stitched Framelits, Stamp A Ma Jig Sheet, Stamparatus
Card Base: Gorgeous Grape 5 1/2″ X 8 1/2″ Scored at 4 1/4″
First Layer: Gingham Gala DSP in Highland Heather 4″ X 5 1/4″
Top Layer: Whisper White 3 3/4″ X 4 7/8″
Paper for stamping all the images to be cut out: Whisper White 4 1/4″ X 5 1/2″, Stamp, color and fussy cut, except the greeting – it is cut with the stitched rectangle framelit:
- 1 medium flower
- 1 small flower, put a yellow center in the flower to match the rest of the flowers; if you don’t have a dot, punch a bit of yellow with a 1/8″ hole punch
- 4 single leaves – two for the front flower, two for the inside flower in the box
- 3 six leaf stems – Color outside the lines with your Stampin’ Blend and fussy cut to leave green around the black
- 1 multi flower stem
- Greeting – leave a 1 1/4″ X 1 3/4″ corner of the sheet to stamp Happy Birthday (or grab another scrap of white)
Window Sheet for mounting greenery: 1/4″ X 8″ Cut to length for each piece as you fill your box.
Stampin’ Blends – Highland Heather, Old Olive, Daffodil Delight
Embellishments: Ribbon 7″ X 2; I wrap one ribbon around the top layers, the white and the DSP, and then tie a bow with the other length and adhere with a glue dot. The bow holds the ribbon in place a bit better. It is the retired Sale A Bration organdy ribbon. If you attend the craft sale you might be able to buy some…. hint hint. I also used retired glitter enamel dots. New colors of glitter dots are in the catalog!
Inside Layer: Whisper White 5 1/4″ X 8″ Scored at 4″ but do NOT fold on the score line until after the images are stamped on the left first and then the right hand side of the score line. You need the score line for positioning the stamp.
Box: Whisper White 2″ X 8″; Score at 2″ – 4″ – 6″; Use your cutter and shave 1/16″ off each end; burnish all the score lines really well with your bone folder.
Box Flaps X 2: Gingham Gala DSP, 2 3/4″ X 2″ minus 1/6″ so 1 15/16″ to be technical, score the flaps at 2″ ; fold and use a dimensional to hold the fold in place.
Box Strips X 2: Whisper White 1/2″ X 4″ , score at 1″ and 3″ and yes, shave 1/16″ off the ends. The score line takes room and we need to adjust everything for the score lines by shaving off a bit on the ends. Z fold the strips and burnish your score lines. (That means rub the folds really well!) Now adhere your strips inside your box, one strip just down from the top and the second strip right below the first strip). The penciled words say “Glued Down” to show you where to glue the strips. I used Tear and Tape. Place a second piece of Tear and Tape on the other end of the Z strip facing up, remove the backing and then fold the sides over to perfectly adhere the box to the strips so that your card lays flat.


Now your box should look like this with cross pieces to attach your greenery and flowers. The sides are being held with a yellow sticky note for the picture. When you are through stamping your inside images those two sides will be glued on either side of the score line in the middle of your card. I used Tear and Tape to adhere them.

Put your box aside for now and stamp and color your images with Tuxedo Memento black ink.
Stamp your outside image and your image on the left side of the inside first.
Now stamp the inside mirror image by using the Stamparatus and the plastic sheet from the Stamp A Ma Jig. Secure the plastic sheet to the Stamparatus with magnets and stamp the image twice to get lots of ink. Carefully position your sheet on the right side of the inside layer matching the left image and then burnish really really well with your finger or your bone folder or both! You must hold the sheet firmly with one hand while you burnish with the other so the sheet doesn’t shift and give you a double image. Use the black Stampin’ Up! marker to darken any lines that need it. Memento ink and the marker are water based so you can color the images with the alcohol based Stampin’ Blends without smearing the black. I wish I would have tilted the bottom of the stamp a little more to the right in making my mirror image so that the green leaf was outside the box like the left hand side.
Note: Other mirror image techniques use the silicone sheet, plumber’s gasket or the flat side of a photopolymer stamp. Our flower image was too big for a photopolymer stamp and you can’t see through plumber’s gasket so a silicone sheet or the Stamp A Ma Jig sheet work best. If you don’t have a Stamparatus, place the stamp face up, ink it well and then place the silicone sheet on top of the inked stamp and burnish with your fingers.
The Happy Birthday rectangle greeting is popped up with dimensionals.
The medium flower on the front has two leaves attached with glue dots and then it is popped up so it sits at the edge of the greeting.
The greenery and flower in the box are mounted with glue dots to a 1/4″ strip of window sheet in various lengths and then the window sheet is adhered to the strips with glue dots.
At club, we decided it needed something more so we added butterflies!


Do you like the butterflies? They are from the Sale A Bration Designer Series Paper and punch out with the butterfly punch. I hope you stocked up on this paper!
If you want to send a bouquet of flowers in sympathy for someone passing this is the perfect card with a greeting from the “Kindness and Compassion” stamp set:


Comfort and Healing words are in “Flourishing Phrases”. The greetings go together perfectly and yet are in different sets!
SAL, Such A Lot of fun
Karen

Card Buffet January 2015
The specials this week are very “special”! Did you know you can use your reinkers and Dazzling Diamonds Glimmer Paper to make many different colors of glimmer paper?!
Technique Alert: Colored Glimmer Paper: Drip drops of ink on your glimmer paper and use your Aqua Painter to spread the color evenly. So easy!
Card Buffet Report:
We had a great time with Valentines, A Sympathy card, A St Patrick’s Day card, A Birthday Card and A Thank You Card. Each stamper took home a Treat Box Holder with a bookmark designed by Peggy Tassler and featured on Too Cool Stamping with Angie Leach. Click on the link for directions. Here is my version with our new Stack With Love Designer Series Paper:


Do you see those little bitty hearts on the bookmark? They are from our new Heart Confetti Punch. Before this punch, our smallest heart was the owl punch heart which I used here with red glimmer paper inside the heart with the arrow. There are two different ways to make the window for the nuggets. Angie Leech used the Modern Label punch, lining up the punch with punched sticky notes. After trying that technique (second image) I used the Project Life Framelit so I only had to make one cut (first image).
Supply List
Built for Free Using: My Stampin Blog


Remember the Thank You card from a previous post? Jennifer did a double punch on the paper piercing and used a candy dot to match the stem of the flower. I love seeing the creativity of my stampers.
Have a great day and use hostess code JEJ32FKT to be entered in February’s online drawing. Congratulations to Shanon who won the set of Rhinestones in January’s drawing and December went to Robyn for post comments.
Stamp A Lot,
Karen
Welcome to my blog!

Sal Window to Products


