
Home » Friendship
Category Archives: Friendship
Colorful Colorado Birthday Cards


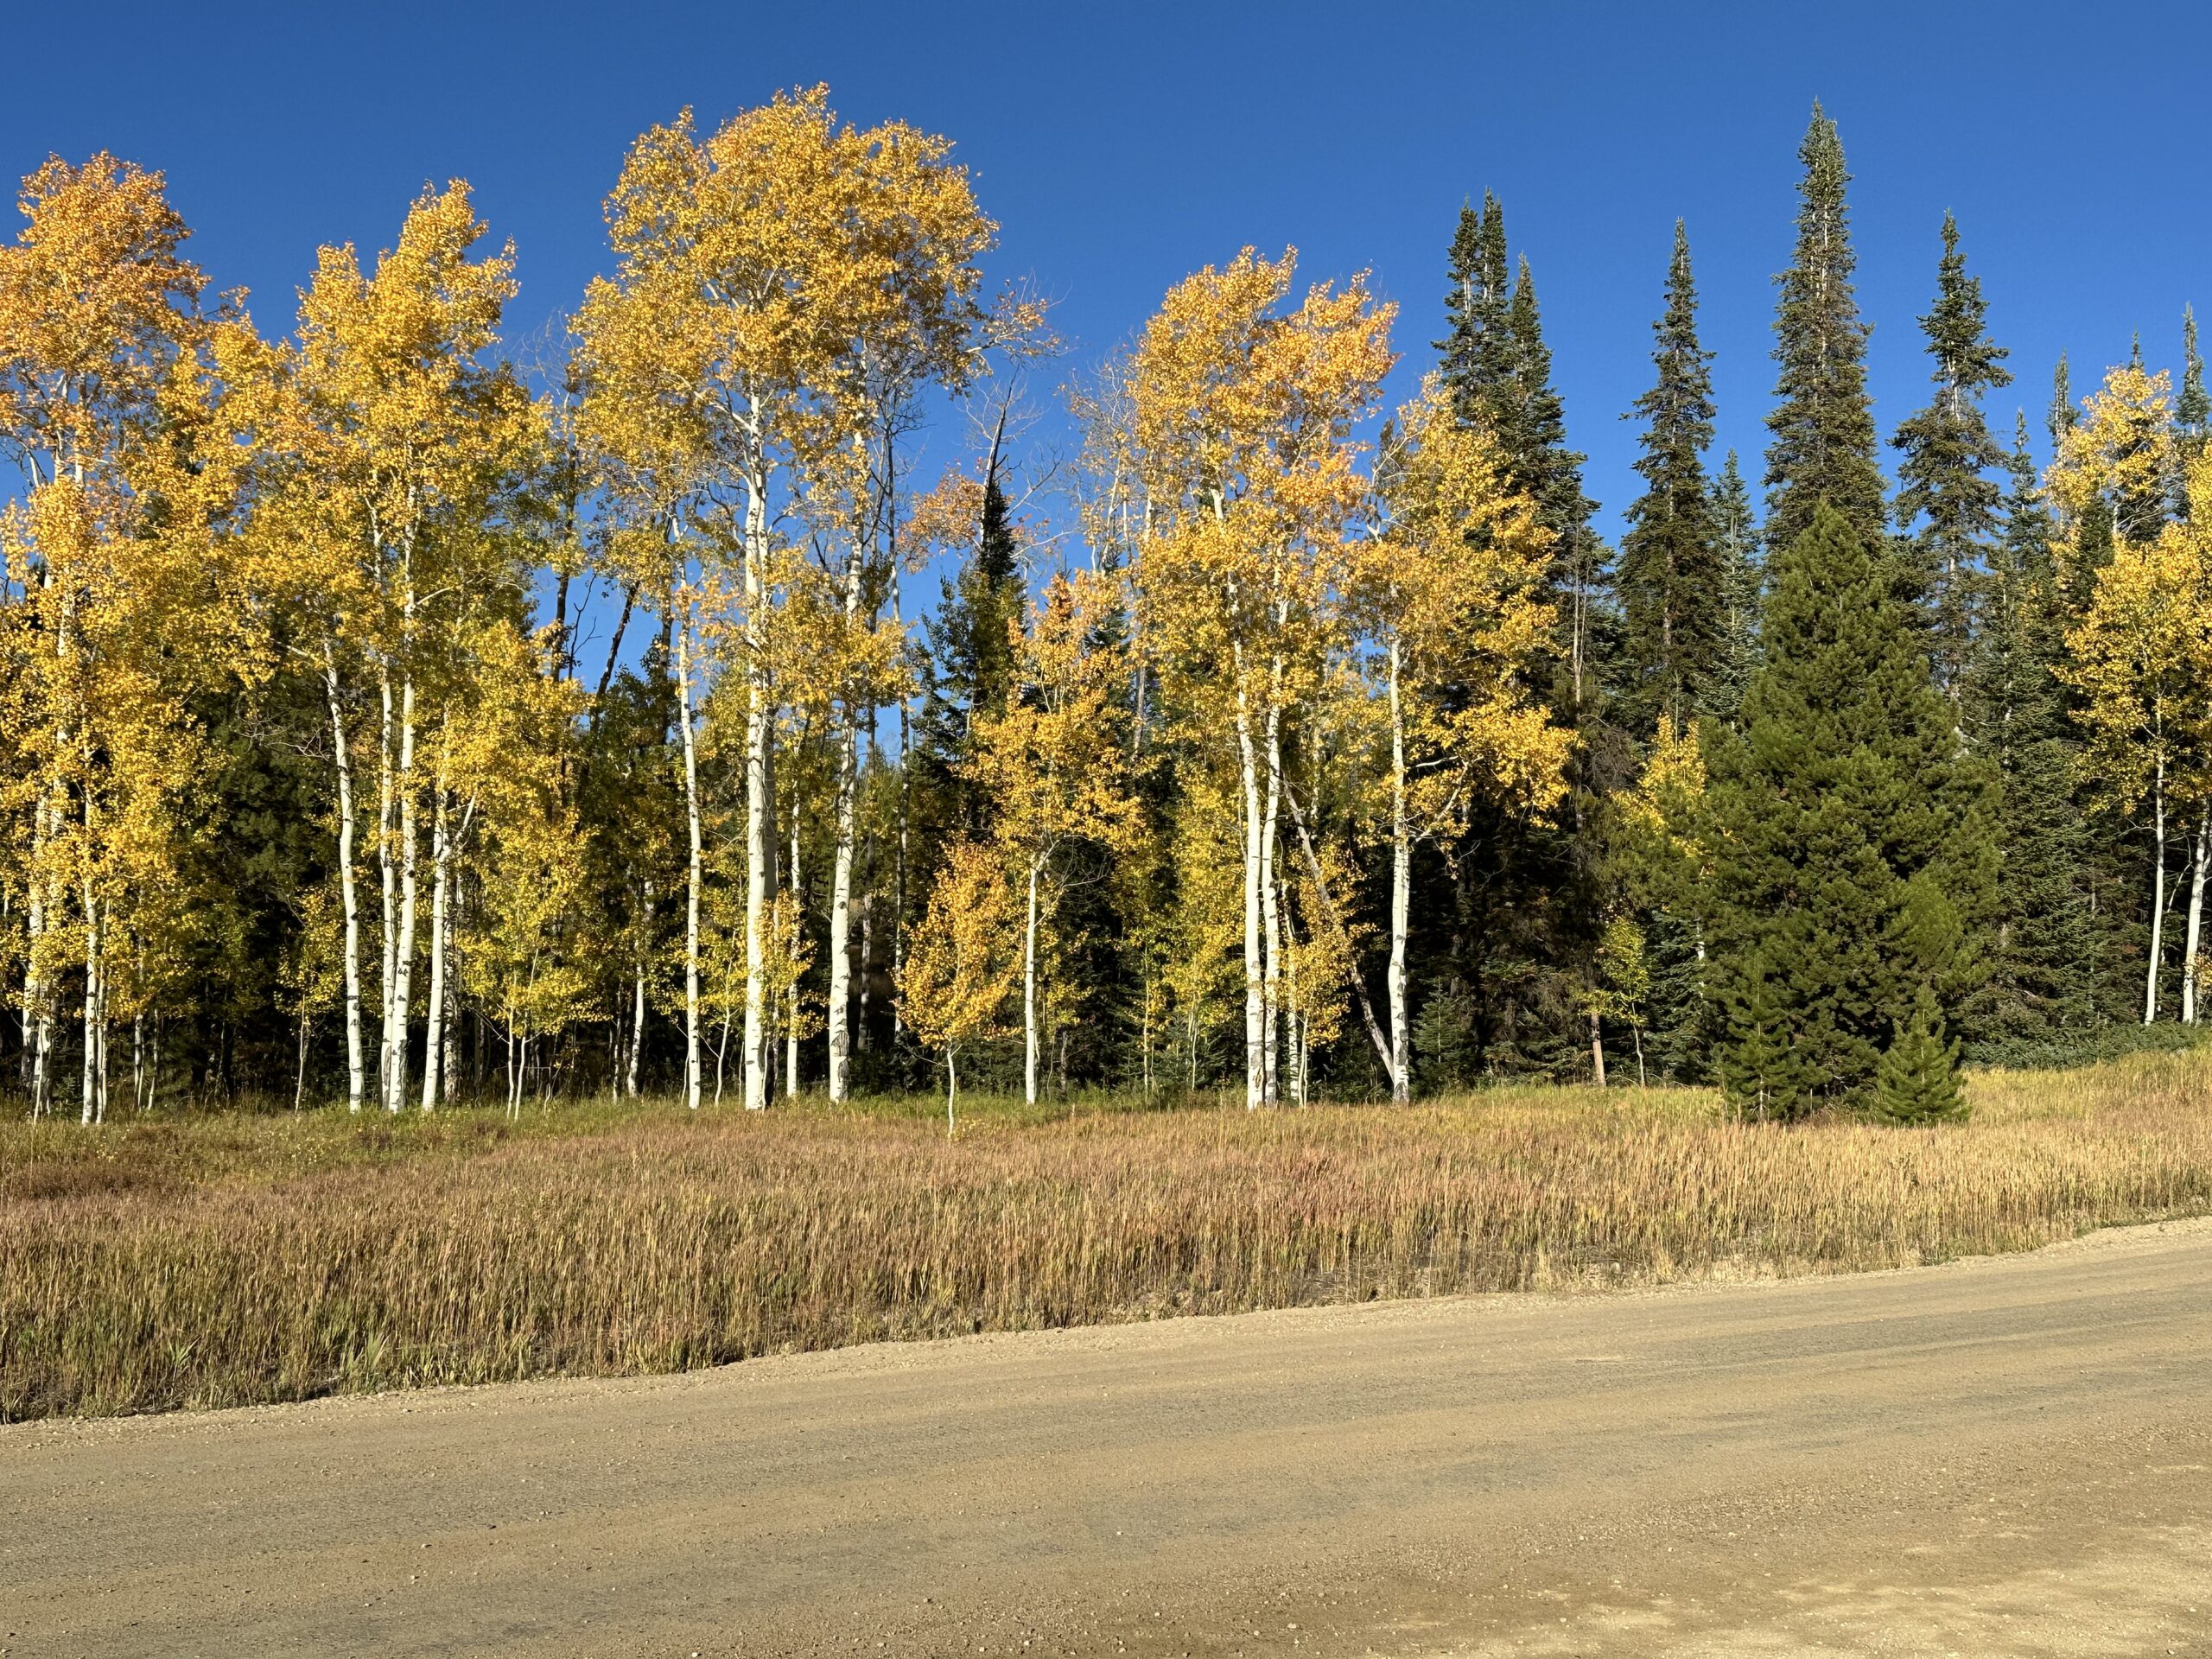
We were at Steamboat Lake for a week and watched as the colors were changing! It was glorious! The first picture is Pearl lake, another beautiful lake north of Steamboat Springs. The picture captured the various colors and the reflection in the lake.
 You must have had your daughter’s fancy camera!
No, Sal, just an iphone on a beautiful day!
Right before we left for camping I purchased a Colorado Stamp and die set ‘Colorful Colorado’ made by Memory Box and another Colorado stamp set, ‘Greetings from Colorado’ at Simple Pleasures in Colorado Springs. It is a design by Ann Corbiere-Scott. The store is a stamp and scrapbook store with an entire section of the store dedicated to products for each state. They market many of the major stamp and die companies’ products and have an amazing stock of scrapbook and card making paper.
ooohhhh, time for a field trip. Let’s see the card you made with what you bought!
Give yourself lots of time when you go to this store!
For the card, I had fun doing sunsets using sponging in different colors. Paul liked this sunset best which used Orchid Oasis for the blue.
 .
. My favorite was this sunset with the darker Pacific Point ink for the blue. I tried Marina Mist for ink sponging as well but it wasn’t much different than Pacific Point. Let’s take a vote…… which do you like best?

This is a picture of a Colorado sunset taken at Ridgway State Park in June. I talked Paul into taking us out on the boat to sit in the middle of the lake and watch the sunset.

The following picture is of columbines at Yankee Boy Basin outside of Ouray, Colorado.

I think you got the color of the columbine perfect. What did you use?
I used Copic marker BV00 which is close to Orchid Oasis.
Can you see the Kissing Camels (Garden of the Gods) in this stamp collage of Colorado?

The stamp set came with the die to cut out the the aspen frame, the mountain and the pinecones. The columbine was in the other set and was fussy cut. The pine bough came from the Poinsetta Petals Stampin’ Up! set with Poinsettia dies.
The hug greeting is the Limited Edition Stampin’ Up! stamp set and the Designer Series Paper (DSP) is birch paper from years ago in Stampin’ Up!
The die does not need to be cut apart. If the die is left intact, all the leaf and pinecone shapes will be cut out when you die cut the frame but you can easily stamp them afterwards. I stamped the leaves in Memento Black and the pinecones in Chocolate Chip.
One pointer for anyone who has this set – the set is photopolymer and the large aspen frame can stretch and not be perfect for the die which cuts it out.
I can guess how you found that out!
True, Sal, and to remedy this situation I used my Stamparatus and mounted the aspen stamp on the plate and then placed the die on the stamp to check that nothing was stretched out of the shape of the die, adjusting the stamp where necessary. This could work with any dies you have that have thin images to cut that might not stamp correctly if the stamp is stretched.
The other cool thing I found with the aspen frame is by stamping the frame on the piece of basic white that I was going to sponge and then popping up the die cut frame on top of the stamped image with white foam adhesive strips (don’t use dimensionals), I achieved a 3D effect for the tree.
I can see that in the right side on the first picture.
Recipe
- Base: Very Vanilla, 5 1/2 X 8 1/2 scored at 4 1/4
- Layer: Birch Bark DSP, 5 1/4 X 4
- Inside Bottom Strip: Birch Bark DSP, 1 X 4
- Background Layer: Basic White, 5 X 3 3/4; stamp the frame in Chocolate Chip, then fussy cut around the outer edges of frame.
- Sponge the sunset in Pacific Point, then Daffodil Delight, Crushed Curry, and ending with Calypso Coral.
- The mountain will be die cut when you cut the aspen frame, then ink the mountain stamp with Memento Black, wipe off the black ring around the sun with a wet wipe (or finger), or mask the black ring before you stamp. Fussy cut the tiny white around the mountains that the die will leave, then color the mountains with Copics B24, or BV00, and the sun in Y06 or Daffodil Delight. Mount directly to your background.
- Stamp the ‘Hugs from’ and ‘Colorful Colorado’ in Versa Mark, then heat emboss with white embossing powder – note – be sure the blue of your sunset comes down far enough to give a good background for Colorful Colorado or it will get lost in the yellows.
- Aspen Frame: Basic White, 5 X 3 3/4, Stamp in Chocolate Chip, die cut and then use a marker to color any white on the edges so you can achieve a 3D look with the background layer.
- Leaves: Stamp your cut out images in Memento Black and color with YG17 for green and Y13 for the tips. Note the placement on the pictures.
- Pine Bough: Stamp in Garden Green using the Poinsetta Petals stamp set and die cut with the Poinsettia Die. Cut the image apart to layer the small bough under the large bough. Top with a little pine cone stamped in Chocolate Chip.
- Columbine: Stamp image in Memento Black and color outside with BV00, or Orchid Oasis, and heat emboss the middle with Crushed Curry embossing powder. Pop up with a dimensional over the largest part of the mountain.
The ‘Greetings from Colorado’ set has a fun stamp for the back of your card that says ‘handmade in Colorado’.
May we see a picture of these stamp sets since they are so unique?
Of course, Sal!


Click on Little Sal in the computer to go to the Simple Pleasures stamp shop. They are happy to ship. Tell them I sent you!
SAL, Share A Love
Karen

For my copic marker users and myself to remember what I used.

‘
Best Friends’ Birthday Cards
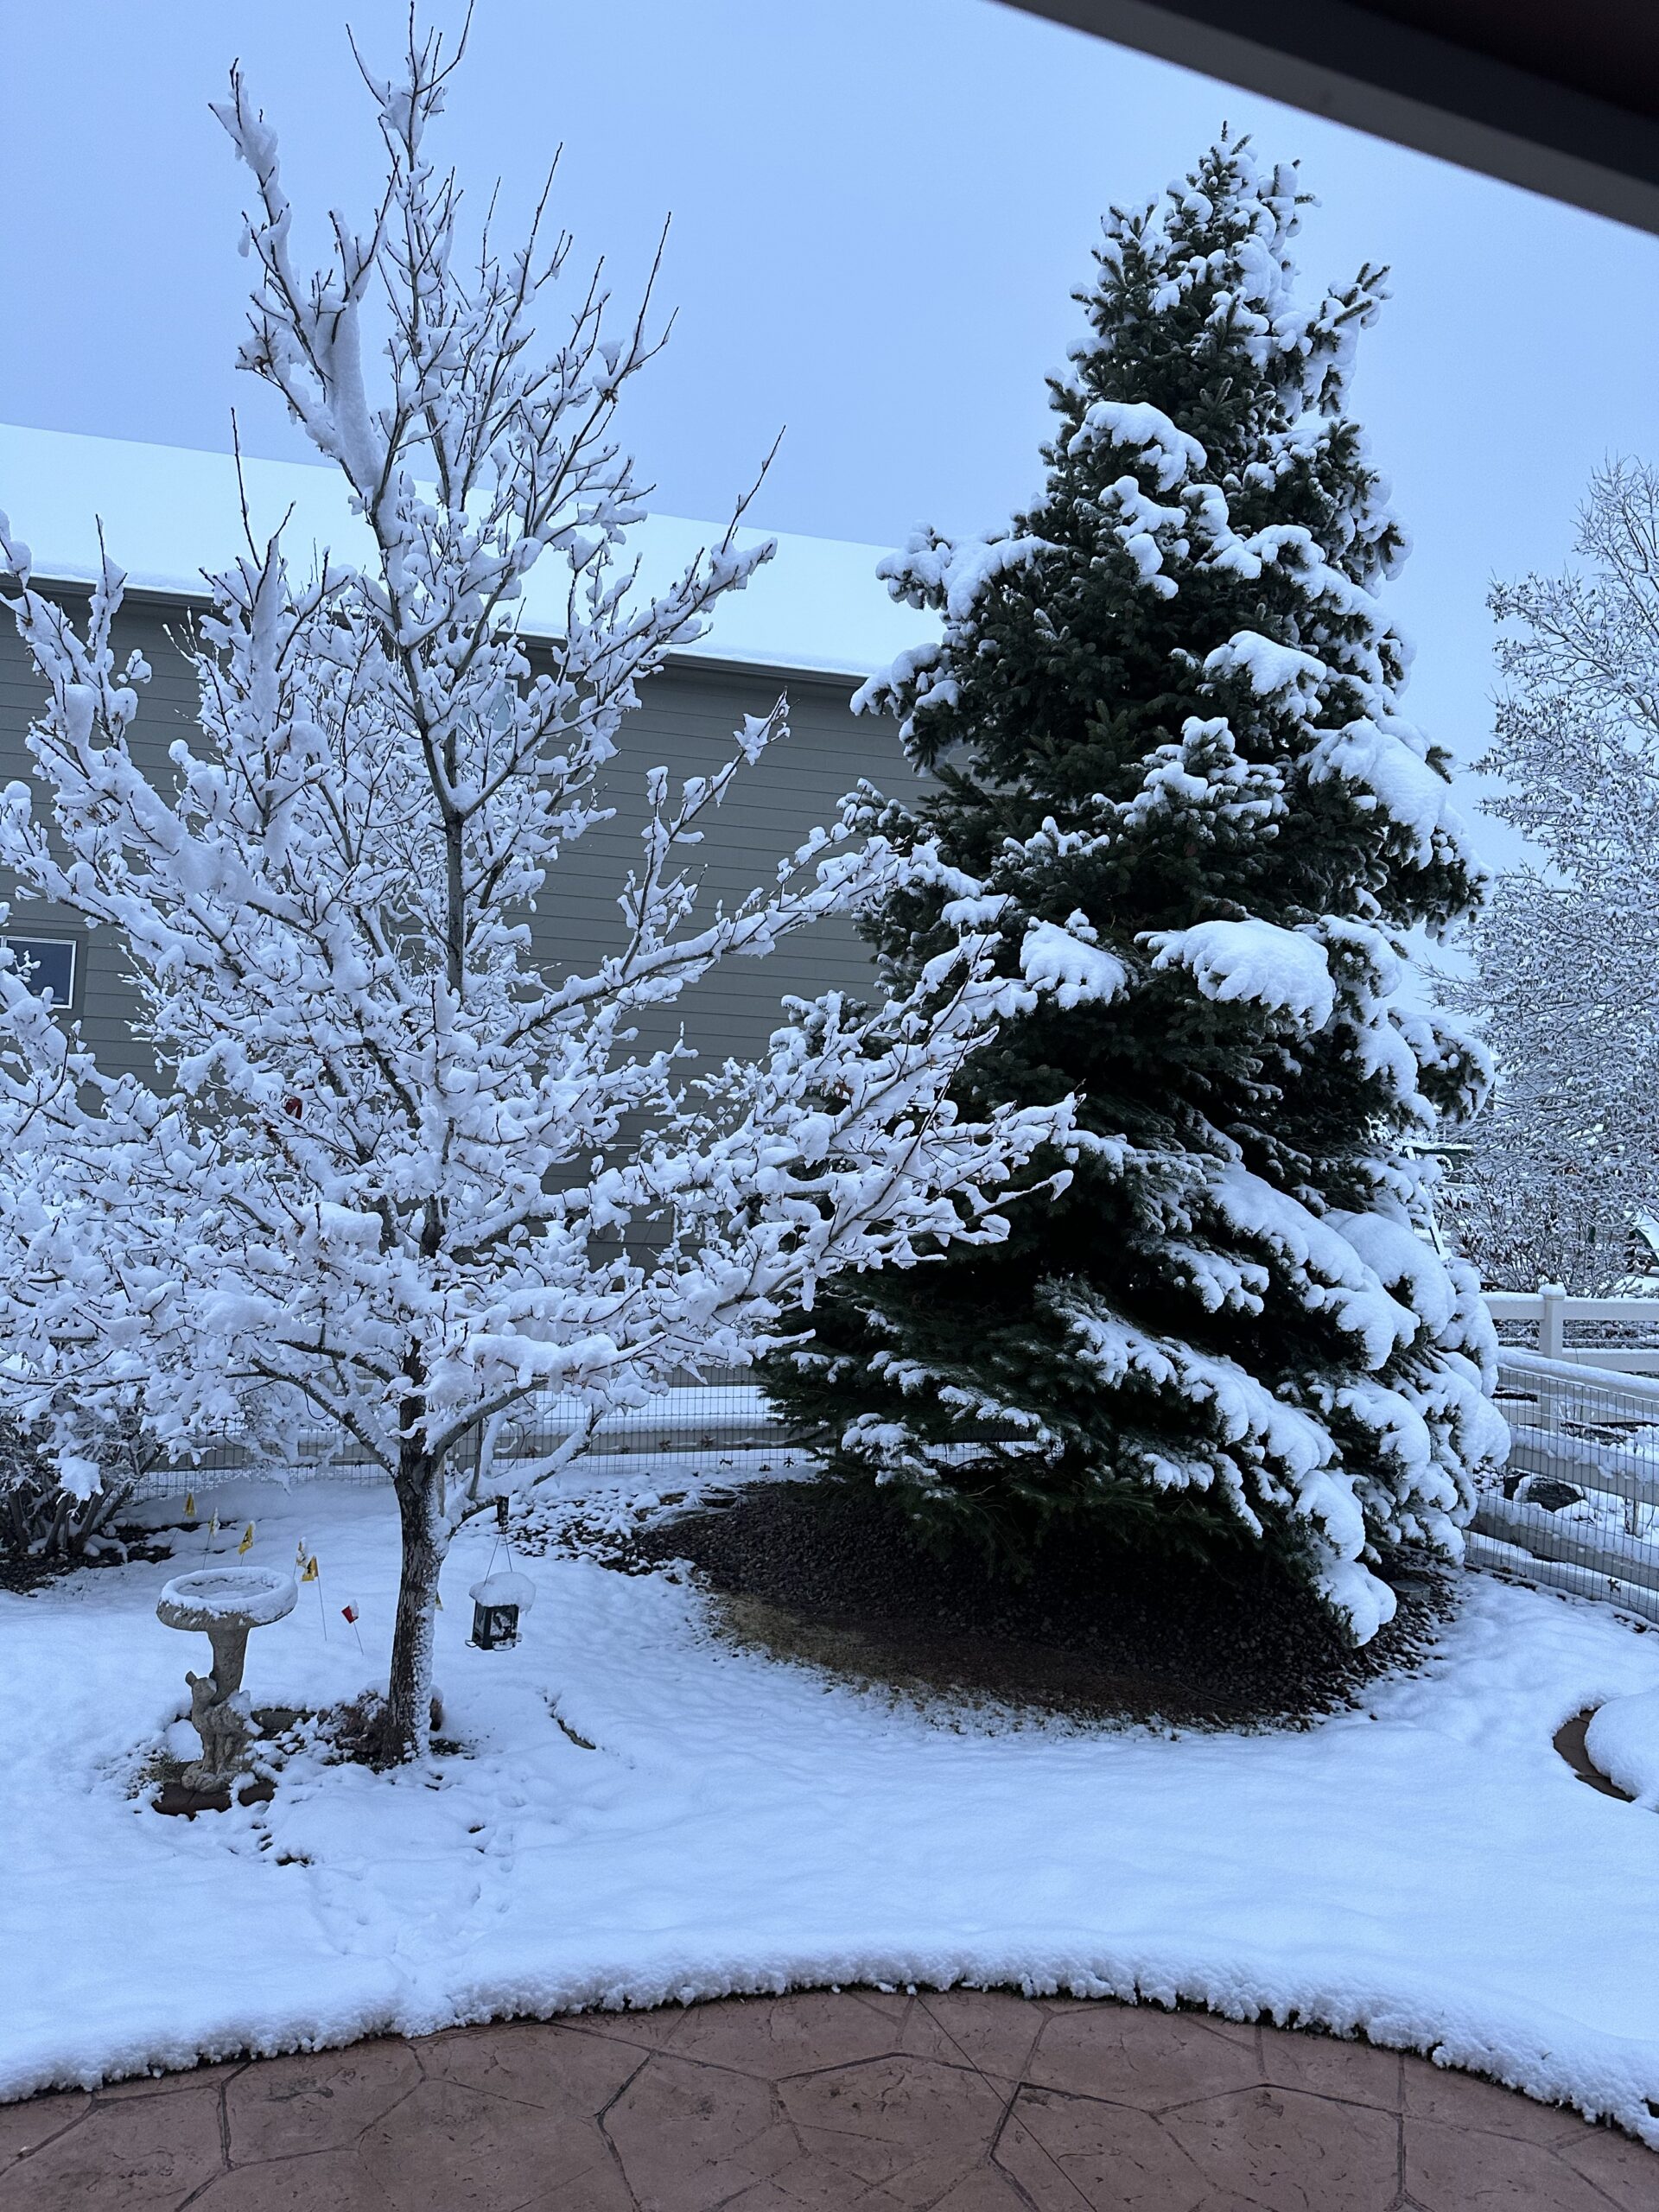
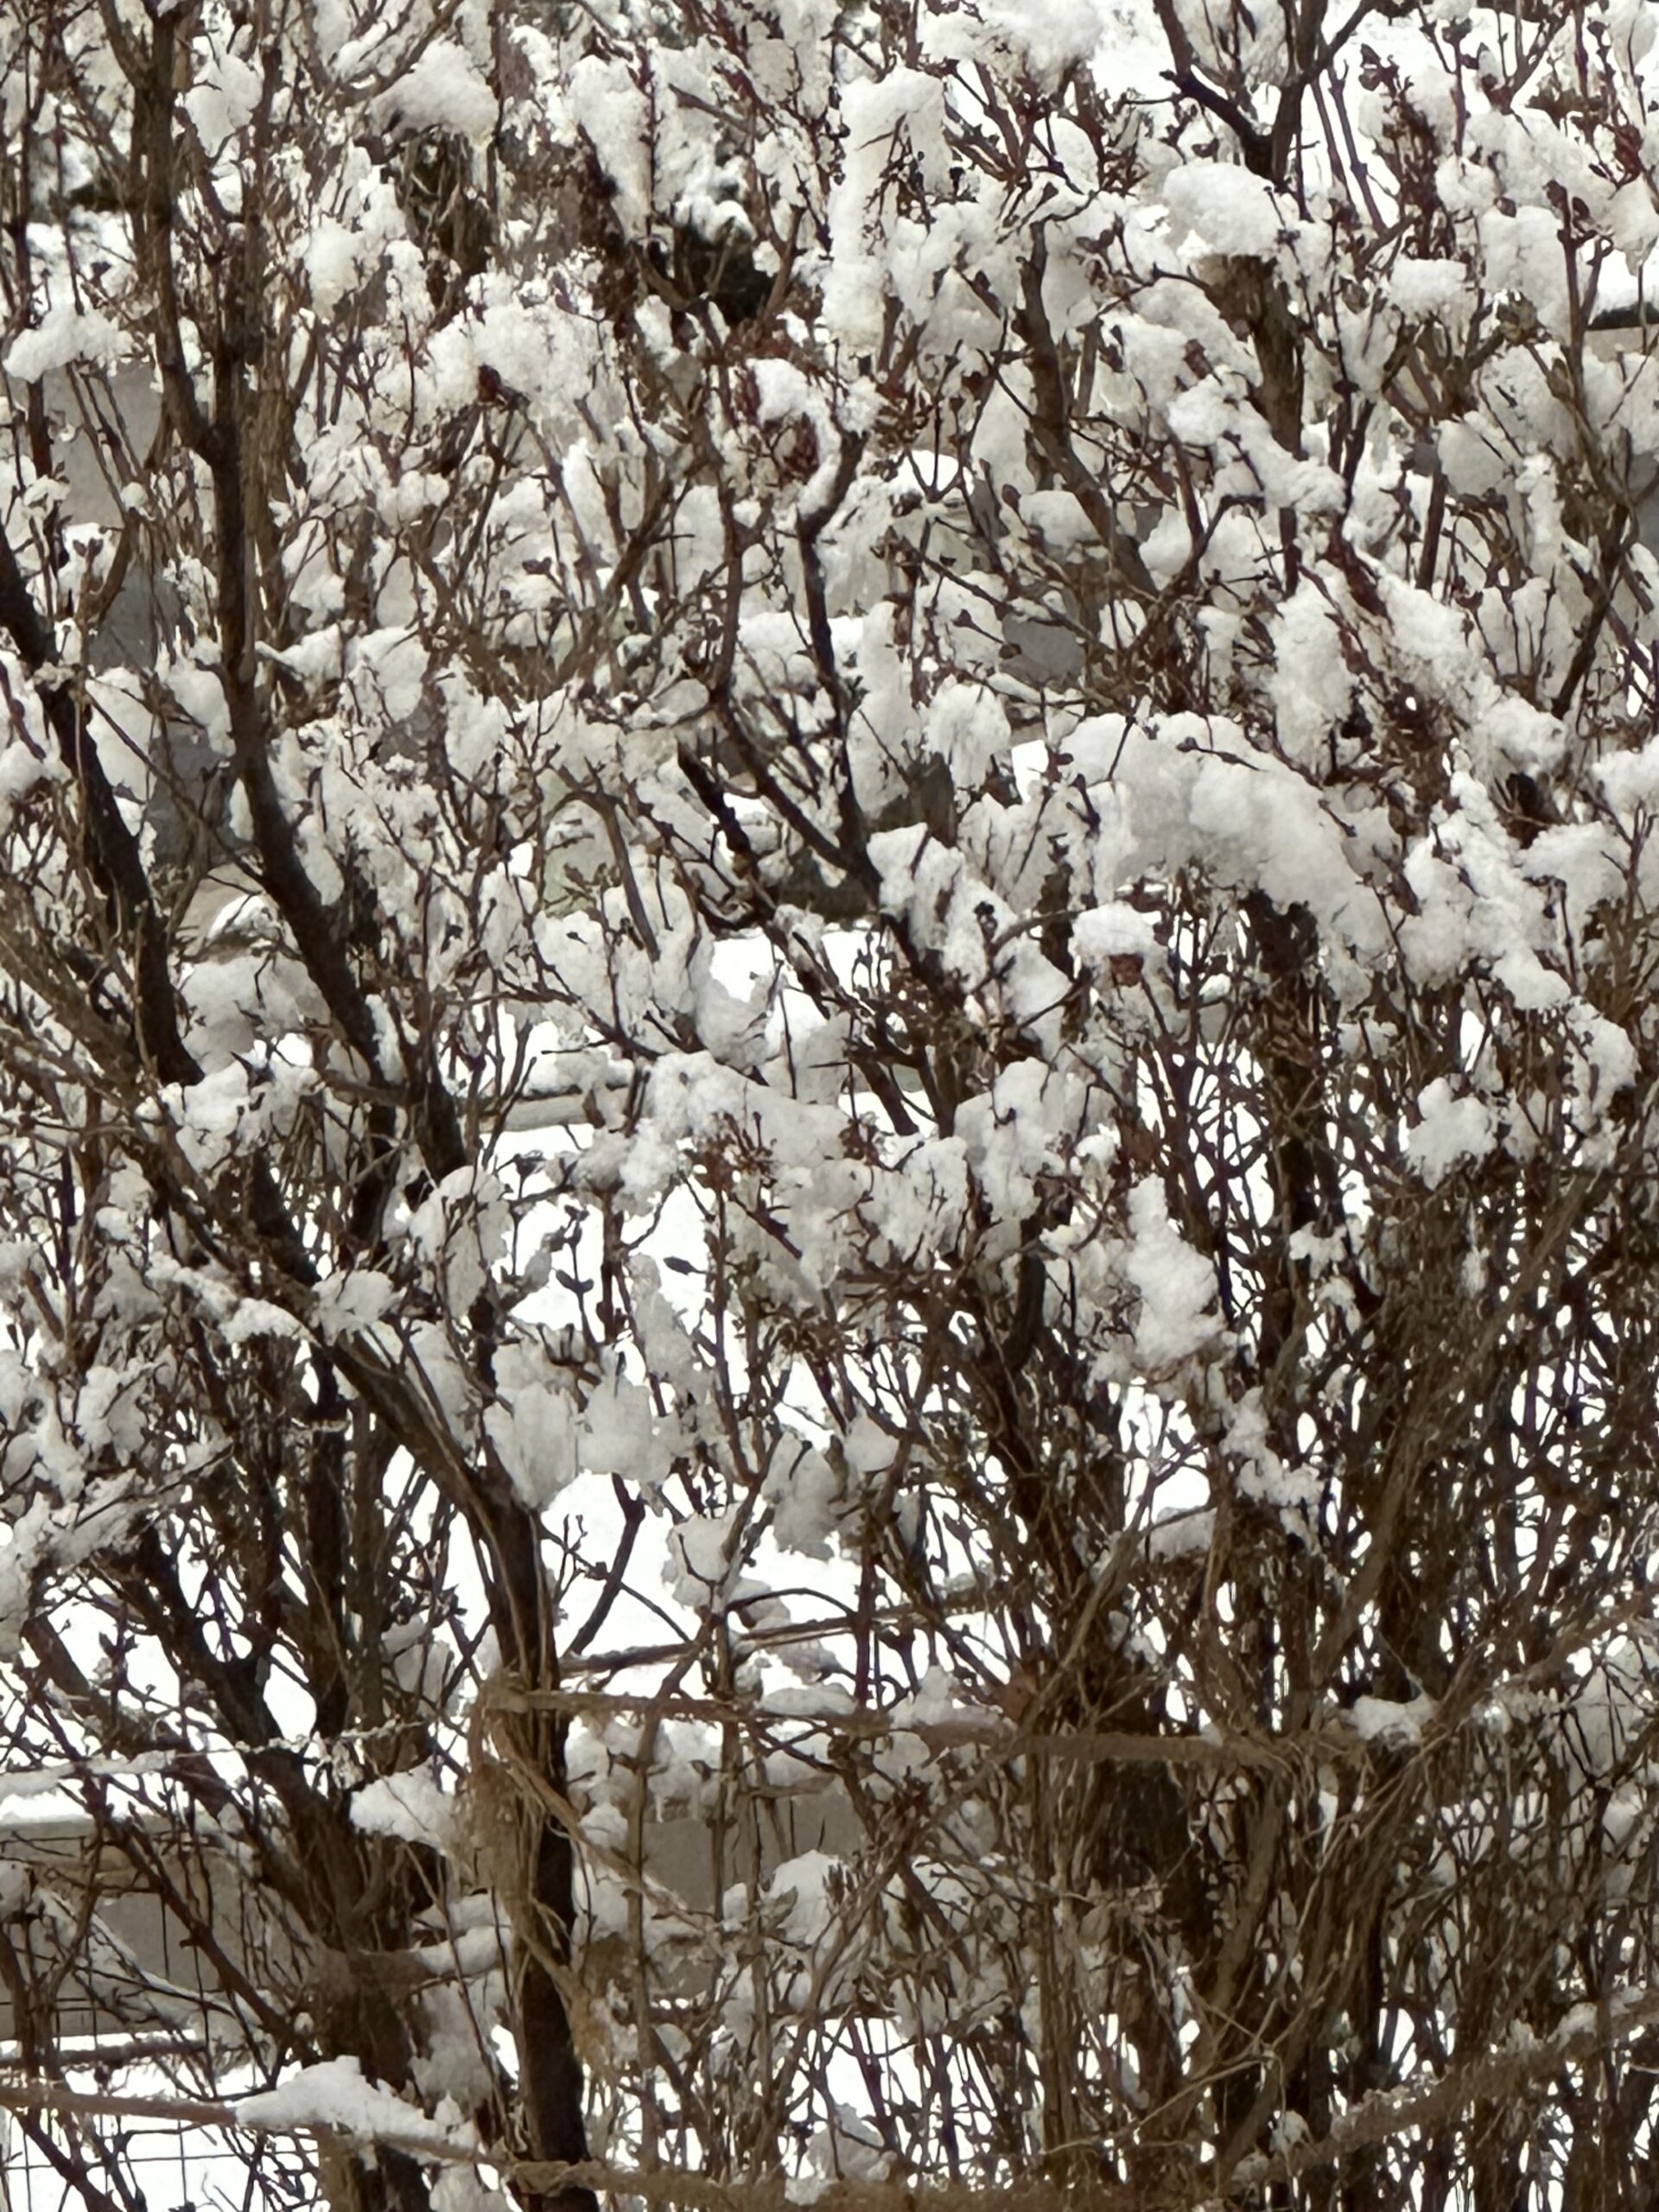
There are little daffodils poking up through the ground; poor things got covered with 4″ of new snow yesterday.


From a distance the bare branches of the bushes with clumps of snow look like we are growing cotton!

 Let’s head south! Way south!
Now Sal, this is just springtime in the Rockies! In another week we will be out getting flower beds ready for planting.
Today, I would like to show you a couple fun birthday cards and alert you to new postings in the ‘Bake Sale’ tab with many of the items I am purging.
You can’t call them ‘new’ postings when there haven’t been any postings of sale items for eons.
True! Folks, there are postings in the Bake Sale of items I am selling. Better, Sal?
Back to the birthday cards! The first is a slimline card for Paul’s birthday with a stamp set from Whimsy called “Best Friends”.


Recipe
- Base: Thick Basic White, 8 3/8 X 6 3/4 scored at 3 3/8; (Note: 8 1/2 X 7 scored at 3 1/2 is the standard slimline but I wanted a 1/16″ reveal of the base)
- Border (X2): Early Espresso, 8 1/4 X 3 1/4
- Top Layer: Designer Series Paper, 8 X 3
- Inside Top Layers:
- Designer Series Paper, 4 X 3
- Basic White, 4 X 3
- Blue Cut Outs: Pacific Point, 8 1/2 X 3 1/4, Die Cut 2 large and three small shapes with Stampin’ Up! Diorama Dies then emboss with Stampin’ Up! 3D Cane Weave embossing folder
- Outside Greeting: Rectangle Stitched Framelit in Early Espresso 2 3/4 X 1 1/2, with Basic White Top Layer, 1 X 2 3/8
- Inside Greeting: Rectangle Stitched Framelit in Early Espresso, 3/4 X 2 7/8 with Basic White Top of 1/2 X 2 1/2
- Images: Basic White, 4 1/4 X 5 1/2, stamp in Memento Black, Color with Copic Markers
- YG03-straw; C3-milk & egg outlines using 0 to lighten and blend; B000-Cup
- Y13-butter; C5-legs & arms; V15-Jelly; R00-Tongue; E33-PBtr & Bacon
- E31-Toast top & cookie; E18-Toast crust & Chocolate chips; E15-Syrup
- B24-Together coloring after stamping in memento ink
- Happy Birthday – Stampin’ Up Hey Chick stamp set, all other greetings are from Whimsy Best Friends set
- Embelishments – 5 swarovski crystals
The characters and hearts on the front are popped up, the other pieces are adhered directly to the paper.
Here are individual pictures for the sake of looking closely at the coloring – I am new to these Copics and will need to refresh my memory frequently until I get used to numbers- plus, they are just cute to look at separately.

 .
.  .
.
 .
.
 .
. If you stamped me in black, could you color me with Copics?
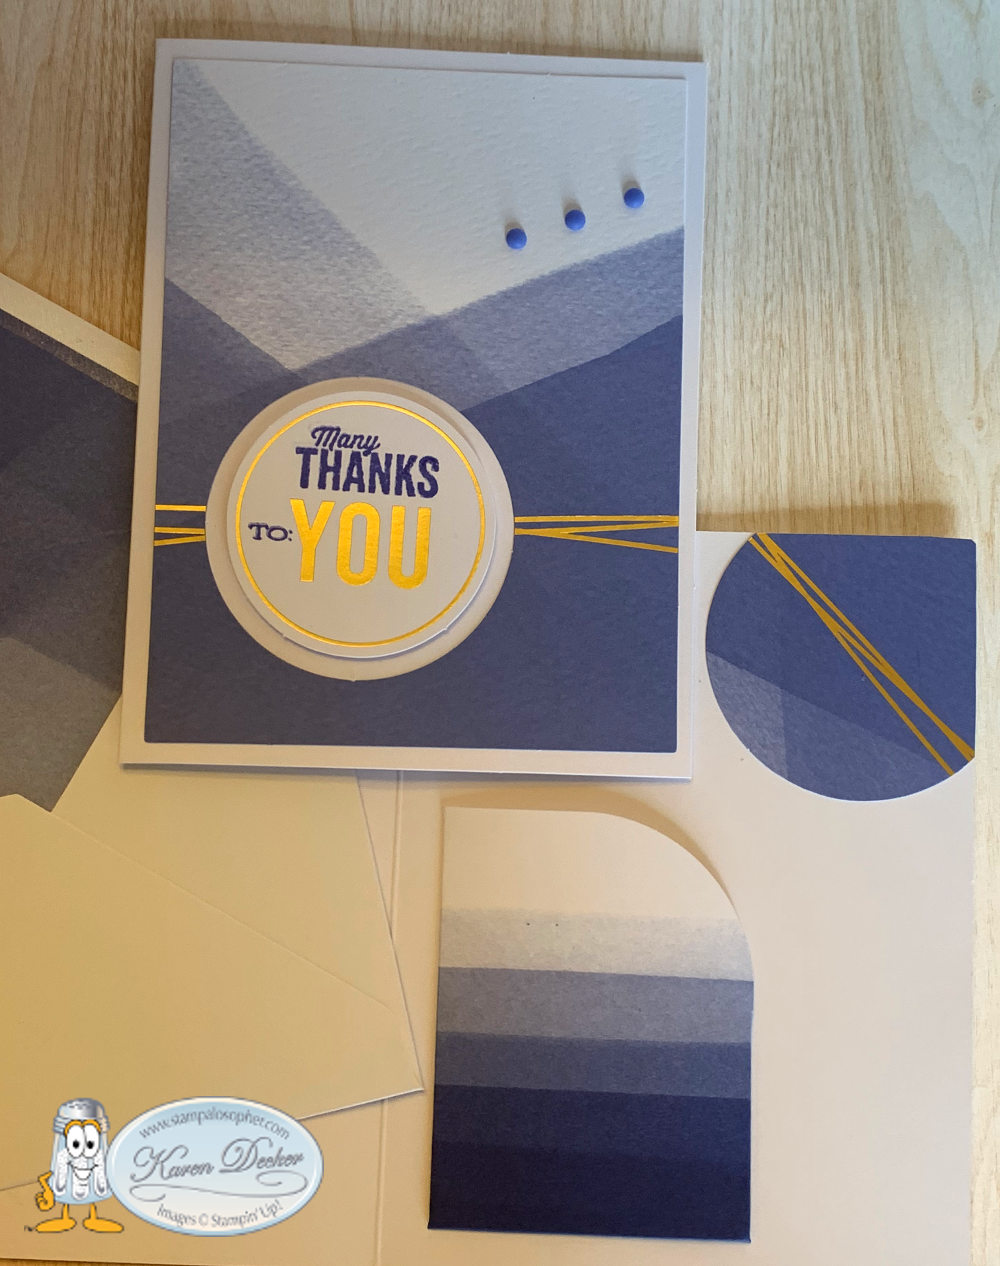
We’ll try someday! For now I have another birthday card to show and this time I used some foiling. I have a special friend’s husband who has the most adventurous stories imaginable and he was a pilot so I put the two together to make his birthday card. It is a ‘never ending card’. We made this card at club for Valentine’s Day in 2016. Here is a hint – to effectively use the blog, go to the recipe box and find the thumbnail picture of the card you remembered making and click on the picture and you will go to that posting so you can make another card like it.
https://www.youtube.com/watch?v=ZF-FGBX_Cis
 .
.

Don’t let the picture fool you- this is a standard A2 card! Fold the top flap up and the bottom flap down and voila:
 .
.
I stamped the plane from Stampin’ Up!’s retired ‘Sky Is The Limit’ stamp set onto Shrinky Dink Paper, colored the back side, cut it out, and then cooked it to make a cute little card size 3D plane!
I stamped the clouds and then decided they needed to be a little 3D also so I added our puff paint. It stuck to the top of the paper so that wasn’t the best idea but it gives the cloud a little blue dimension. Now let’s fold the card again:
 .
.
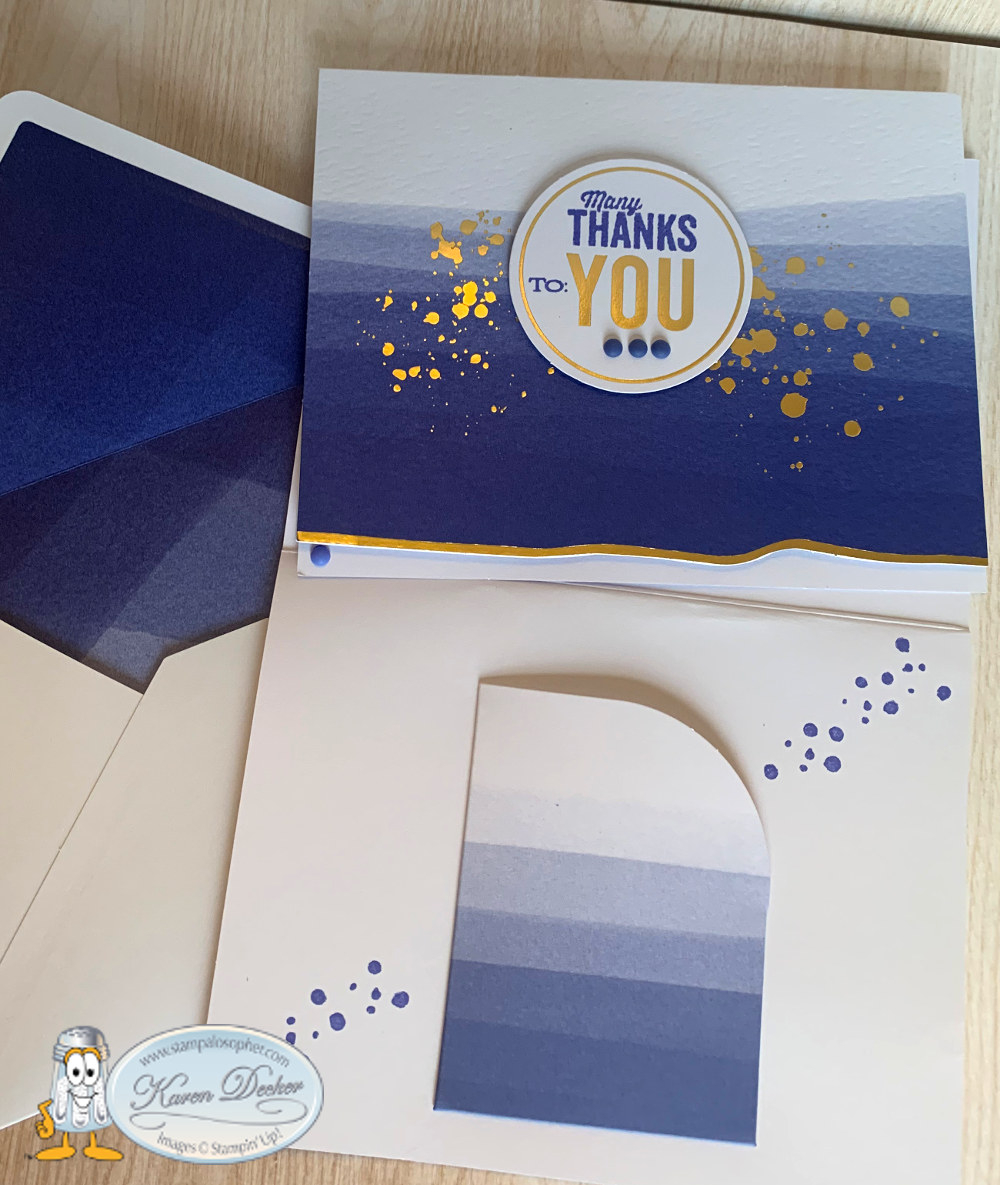
Then once more up with the top and down with the bottom so we go to the back for a greeting:
 .
.
The foiled paper is from a retired Stampin’ Up! designer series paper and the gold ADVENTURE was a card front sent with my new Minc machine that we ran through the machine with gold foil. Paul figured out how to get all the large letters on the front flaps by cutting and gluing each one separately. I’ve ordered more foils so stay tuned for fun cards with foil embellishments.
Never Ending Card Recipe Basics (watch the video for construction)
- Base: Basic White, 4 1/4 X 11
- Cut in half for two 4 1/4 X 5 1/2 bases
- Score one of the half pieces at 1 3/8″ on 4 1/4 top & bottom then cut that piece in half at 2 1/8,
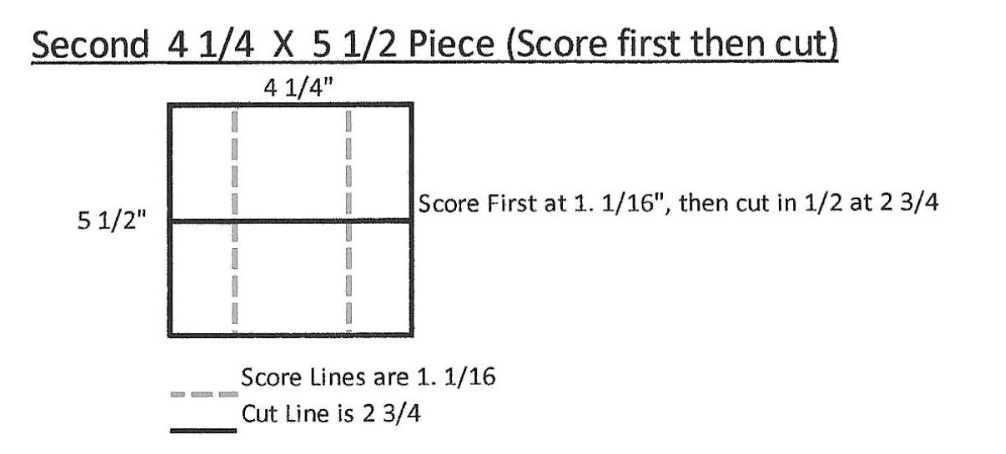
- Score the other half piece on the 5 1/2 side at 1 1/16″ at top and 1 1/16″ at bottom, then cut in half at 2 3/4″

- Add two pieces of sticky tape right up to the score line on the two 4 1/4″ pieces

- Burnish all your score lines both ways
- Now the two pieces you cut in the first step that are 2 1/8″ X 5 1/2″ will go on top of the 4 1/4 X 2 3/4 pieces
- first adhere each piece to the bottom corner of the piece that has the sticky strip, laying your 4 1/4″ in line with the edge and bottom. The two pieces should meet in the middle
- then slide the top piece of the 2 3/4 X 4 1/4 piece in alignment with the bottom that now has the two pieces attached and then press the top onto the sticky strips


If you get all the pieces cut and scored with the sticky strip added, then it would be best to watch the video (at point 2:43) for how to lay the first two strips on top of the second two strips.
What the video doesn’t show is decorating the many sections and their dimensions so I will list those here. Note: If you like the design to exactly match, multiply the sections by 2 and then cut in half to match designs.
- Front Middle (X2): Blue foil DSP, 2 X 2 5/8
- Front Sides (X4): Blue Glimmer Paper, 7/8, X 2 5/8
- First Fold Middle (X2): Blue Sky DSP, 2 X 2 5/8
- First Fold Top & Bottom Sides (X 4): 7/8 X 1.1/4
- Second Fold Middle (X2): DSP, 2 X 2 5/8
- Second Fold Sides (X4): DSP, 7/8 X 1.1/4
- Back Middle (X2): DSP, 2 5/8″ X 2″
- Back Top and Bottom (X4): DSP, 1 1/4″ X 2″
And your next fold will bring you to the front again! Have fun. It should be marketed as a stress relief tool as you play with folding it back and forth! My first Never Ending Card (also called a Perpetual Card) was a Valentine card and I started with colored card stock bases so I could just add embellishments whilly nilly! You can click on the blue to see that card.
http://stampalosopher.com/?p=787
You had to make an extra base so you could give instructions so why not make another?!
Well, Sal, I do need a birthday card! Let’s do it!
 .
.
 .
.
 .
.

For this card:
- Basic White Base
- Purple Ombre Glimmer Paper
- How Sweet It Is Designer Series Paper
- “This Calls For Confetti”, So Sentimental stamp set with oval punch
- “Happy Birthday”, Birthday Chick Dies
- “Hope Your Day is…..” Postcard Pals with Tailored Tag punch
- “Hugs, Prayers, Love” Positive Thoughts with Peek A Hoot Dies Rectangle
- “Let’s Celebrate You” Birthday Chick Stamp Set
- Streamers, Birthday Chick Stamp Set
- Balloons with double balloon punch
- Vellum tiny envelope with punch and butterflies with retired butterfly thinlet
- Gorgeous Grape Ink
That could be your graduation cards, too!
A valid possibility!
I taught the Shrinky Dink technique several years ago in a technique club.

Are we able to go somewhere on your blog to see all your technique sheets?
That is a great idea, Sal! I will work on doing that, right after I get the products I am selling on the ‘Bake Sale’ tab. I could at least create a new tab and add this Shrinky Dink technique sheet. I need a short name to fit the tab so ‘technique’ is out – any suggestions?
Well, you have a ‘Recipe Box’ and a ‘Bake Sale’ so how about ‘Cookbook’?
Great idea, Sal! Consider it done!
The first of many products have been added to the Recipe Box!
Toodoloo friends! I hope you have found a pinch of creativity today to spice up your crafting world!
Karen
Bee With Heart
Let’s take a trip to a fantasy land where bees are pink! I used a digital stamp by Connie Fong called Bee With Heart! I saw this cute pink bee on a card by Gloria Shirr and just “had to have whatever stamp it was”. You all know that feeling! Little did I know it would lead me to a new world– digital stamping!
 .
.  .
. After printing the digital images on Basic White cardstock, I cut them out with a Stampin’ Up! ‘Deckled Rectangles Die’ and adhered to a layer of retired pink marble designer series paper. For the inside greeting I used Stampin’ Up!’s ‘Prized Peony’ stamp set. By duplicating the images and printing landscape I could print four fronts to a sheet of 8 1/2 X 11. The digital stamp set has a boy bee and a girl bee with two greetings and a flower. Here is the second greeting on a card for my mother.
 .
.  .
. The inside greeting is a stamp Lucille gave me before she moved far far away to New Jersey. Miss you, friend! The clear heart and pink pearls are retired Stampin’ Up! embellishments.
Well, Sal, we learned to do mirror images with regular stamps using the stamparatus and a silicon sheet, but with a digital stamp it is just a click of a button!
Recipe
- Base: Basic White 5 1/2 X 8 1/2 scored at 4 1/4
- Border Layer: Designer Series Paper (DSP), 5 3/8 X 4 1/8
- Top Layer: Basic White 5 1/2 X 4 1/4 cut with Second Largest Deckled Rectangle Die
- Inside Strip: DSP, 1/2 X 5 3/8
- Embellishments: 3 pink pearls for outside, 4 clear dots for middle of flowers and 1 clear heart on inside
- Copic Markers
- RV10 and RV23 for the bee’s body and heart
- RV09 for the Nose and Inside of the flowers
- R00 and a tiny touch of RV10 for the wings and then a coat of Wink Of Stella
I hope you enjoyed a trip to fantasy land!
Here I am adding a sympathy card made with one of the digital images from Connie Fong Art but this time in more traditional colors:
 .
. 
- Copic Markers
- R27 for the heart, flowers and tiny touch on nose
- Y13 Inside flower
- C9 Black on Bee
- YR12 Yellow on Bee
- E000 Face
- R00 and a tiny touch of RV10 for the wings and then a coat of Wink Of Stella
- Deckled Rectangle Dies are used to create the frame with a piece cut out of the middle of the front used to borde the back
- Inside Greeting: Kindness & Compassion stamp set, love how it ties to the digital greeting on the front.
By combining digital with the dies and stamps I have in my stash I have a new realm of card making!
SAL, Sending A Lot of Love
Karen
Cherished Friend Valentine
Our stamping group met together on the traditional second Tuesday of the month and it just happened to be Valentine’s Day this year! I pulled out my ‘hearts’ collection and created a heart of hearts Valentine similar to a card made by Mary Herdt only monochromatic red and white with different embossing folders, a different background for the hearts and hearts instead of flowers for bling. I will note the products I used in the recipe.

 .
.
. Let me guess…. you forgot to take a picture of the inside before you wrote in them?!
Yes, and handwriting is not my forte.
Recipe
- Base: Thick Basic White, 4 1/4 X 11, scored at 5 1/2
- Stamp the lace look 1 1/2 down from the top and 1 1/2 up from the bottom with retired Delicate Details stamp (note: I used the Stamparatus so I could stamp twice for a darker image)
- Stamp ‘Cherished Friend’ with greeting from Lovely You stamp set
- Inside Layer: Basic White, 4 X 5 1/4, stamped with Real Red using 2 stamps from the retired Valentine Love
- Sparkly Background: Red Glitter Paper, 2 1/2 (minus a hair so 2 7/16) X 4 1/4 (minus a hair so 4 3/16)
- It is a good idea to cut your background paper just slightly smaller than the top layer
- Top Layer: Basic White, 2 1/2 X 4 1/4, die cut with Blooming Happiness Die
- after rolling out the little cuts, push the little leaves up from the backside for more texture
- Three Smallest Hearts: Basic White, 2 1/4 X 2 1/4, Cut and embossed using the retired Embosslits Fashionable Hearts
- Large Hearts (X2): Basic White, 2 X 2, punch with the retired heart punch which measures 1 3/4 across at the top
- Emboss one with the Ornate Flower 3D embossing folder
- Emboss the other with the Dainty Diamonds 3D embossing folder
- Bling it up!
- Two red Glossy Dots
- Two connected hearts die cut from the Many Hearts Die (from the long die of hearts cut just the two connected hearts fussy cutting the two away from the other hearts
I bet they can use any of their heart’s stash of stamps and dies to make a similar card!
Yes, Sal, and any embossing folder could be used!
Thank you for sharing a bit of your precious time today as Sal and I strive to bring a pinch of creativity to your crafting world!
Sal, Send A bit of Love
Karen
The hostess code is C3XMWVCS; click on Sal to order; Current products are in orange
Case The Creator #8, Spanner Card Fancy Fold
Let’s get fancy today and make a Spanner Card!
 .
. The top has a strip of window sheet attached to the two sides which were cut from the main card base. You lift the front to reveal a middle panel:
 .
. Then lift the middle panel to see the greeting:
 .
.
Here is the printable pdf file and if you open it you can click on the Youtube from Sharon Lim to see a video…
Case The Creator #8 printable pdf file with video link
…. and if you would prefer to just look at the directions here, this is a screen print of the pdf (so the link will not work):
 .
.
I used the scrumptious Rustic Harvest DSP (designer series paper) on a Cajun Craze base with a Basic Black mat. The Sending Dies and the Sending Smiles stamp set are a great addition to anyone’s stash. I did cut two additional 1 1/4 X 1 1/4 Basic Black squares to put over top of the back sides of the window sheet so the glue dots wouldn’t show. I die cut a little pumpkin and a branch of leaves from the Seasonal Swirls Dies. The greeting is from Blessings of Home stamp set.
 The greeting doesn’t look like what is in the stamp set?!
No, Sal, I masked off the ‘hello’ in ‘A CARD TO SAY HELLO’ and added three little dots with a marker. The greeting dies were longer than I wanted and I didn’t want to cover up the beautiful DSP so I masked, then stamped, then die cut half of the greeting, removed the die and then placed the die on the other end of the greeting to die cut a shorter length. The embossed edges kept the die in place.
Oh, yes! But practice makes perfect so its best to challenge ourselves to step out of our comfort zone so we get comfortable using our dies in various ways. It is nice to know we don’t need dies and punches in every size!
Let’s look at what my crafty friends came up with for challenge #8!
Ann used the Peaceful Deer Stamp Set and Deer Builder Punch:
 .
.
 .
.
Lucille’s card has a fall feel to it with a die cut bouquet from Penned Flowers dies.

Jo used the Delicate Edges Dies! Her flower is from the Color & Contour stamp set with the Scalloped Contours dies.
 .
.

You are so lucky to have such talented crafters playing along with your CTC challenges!
Blessed, Sal, blessed!
Thank you crafty friends for joining the challenge and sending pictures of your creations. Thank you, dear followers, for spending some of your day with me!
SAL, Sending A Lot of samples to spice up your crafting world!
Karen

Triple Time Stamping
Have you ever tried ‘Triple Time Stamping’? It gives a fun look and is not hard to accomplish. You have three sizes of Basic White temporarily adhered together on which you stamp your images and then you pull them apart and add the borders. Easy peasy!
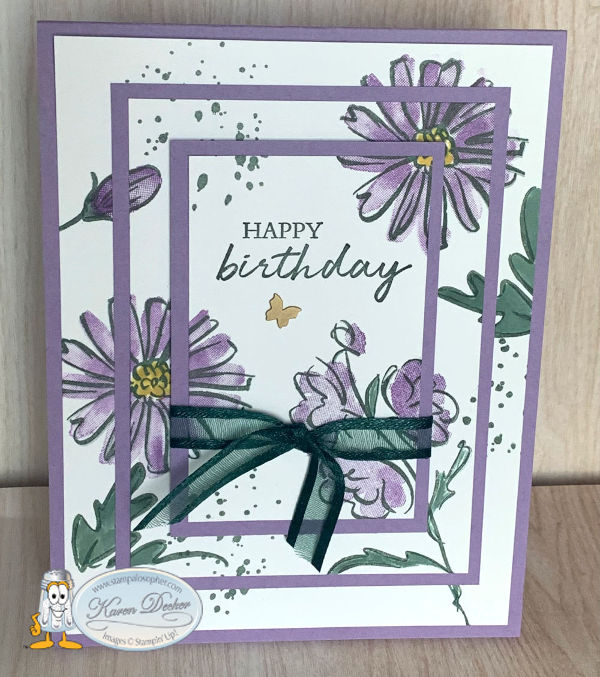
Color and Contour Triple Time Stamping Card (A)
 .
.
If you love a water color look, you will love this stamp set. You actually have one stamp for the outline and one stamp for the coloring. The stamps for coloring do not color in the flowers perfectly, use a Blender Pen or Water Painter if you prefer a perfectly colored flower with a water color look or use a marker in the same color.
I love those little dots you added!
They are part of the set, Sal, take a look-see:

The Scalloped Contour Dies go with the set. Where you see the stamps with a pinkish color, that is showing a die that cuts that stamp. This die set is a must for your stash!

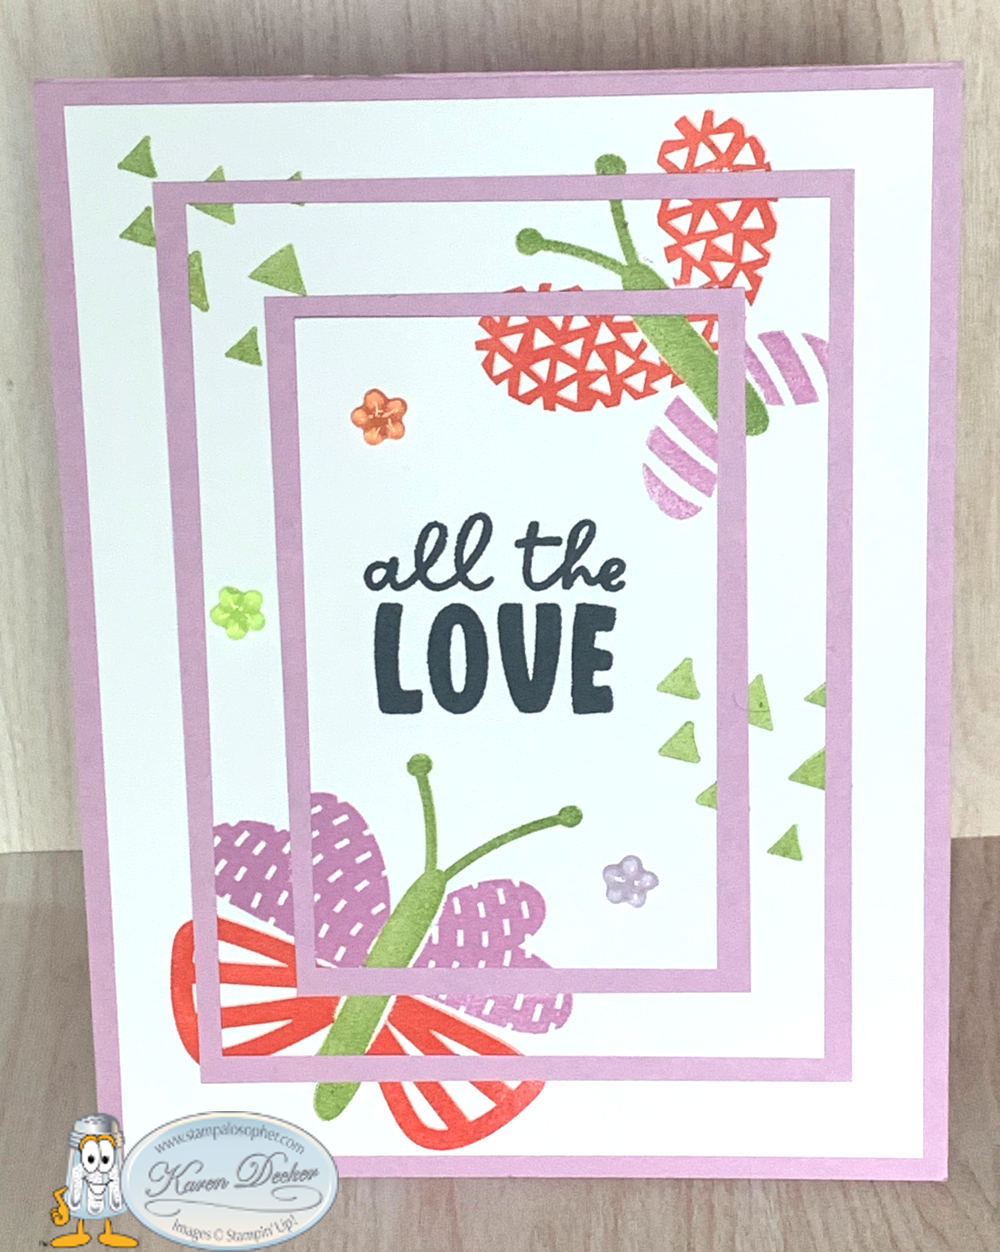
Best Butterflies Triple Time Stamping Card (B)
Design your own whimsical butterfly with the Best Butterflies stamp set! There’s big wings, small wings, big bodies, small bodies, big words, small words and triangles or dots for added interest! I used Fresh Freesia and Calypso Coral with Granny Apple Green on this card with a Fresh Freesia base. Those little flowers are Fun Flowers Resin Shapes.
 .
.  .
. For the butterfly card I found it best to use the Stamparatus to stamp the images; with the added layers it is a bit hard to get the images to stamp completely so you need to stamp a second or third time. However, remember there is a border that will cover 1/8 inch of the image so don’t fret too much about those incomplete edges right next to a layer where the mat will be.
For the Best Butterflies card, use one plate for the butterfly bodies- stamp this first then mask, a second plate for the calypso coral wings and a third plate (or the back of your plate) for the fresh freesia wings. It makes a workshop go quickly to have them all aligned on different plates for perfect stamping. I had several butterfly body masks already fussy cut with our new Masking Paper to lay over the bodies before stamping the wings. Post it notes work pretty well if you don’t have the masking paper, just stamp the image on the post it note and fussy cut.
For the Color and Contour card, I mounted the stamps on acrylic blocks to give the stampers opportunity to stamp and color only what they wanted. I had an Evening Evergreen marker available so if the image wasn’t stamped clear to the edge we could use the marker to complete it, if we saw it was necessary after adding the border mats. I also had a Highland Heather marker so those who didn’t like the watercolor look could color in their flowers.
Secondly, start with stamping your greeting on the center layer, then stamp the images around the greeting.
Recipe for Triple Time Stamping Layers
- Base: A – Highland Heather; B- Fresh Freesia; 11 X 4 1/4, scored at 5 1/2
- Mats: same cardstock as bases
- 3 1/4 X 4 1/2
- 2 1/4 X 3 1/2
- Artwork Layers: Basic White, Temporarily adhere together with temp glue or use just a bit of snail and then use your fingers to rub the snail so the oil in your fingers makes the glue less sticky
- 2 X 3 1/4
- 3 X 4 1/4
- 4 X 5 1/4
- Inside Layer: Basic White, 4 X 5 1/4
- Ink: A- Evening Evergreen, Highland Heather, Crushed Curry; B- Fresh Freesia, Calypso Coral and Granny Apple Green with the greeting in Tuxedo Black.
- Embellishments: A- Evening Evergreen Open Weave Ribbon, Brass Butterfly; B- Fun Flowers Resin Shapes
The recipe sounds pretty easy!
The beauty, Sal, is all in the stamping and adding the borders!
For the Color and Contour card I used a Happy Birthday greeting from the Shaded Summer Stamp Set.
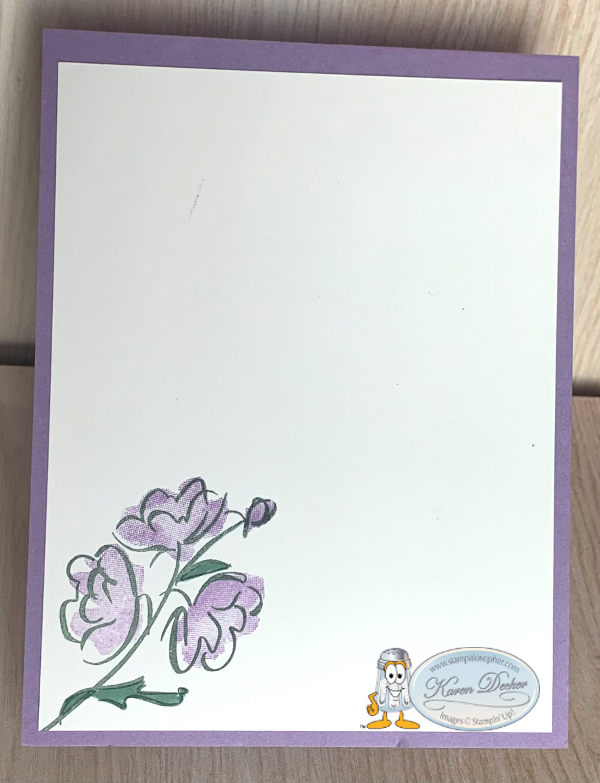
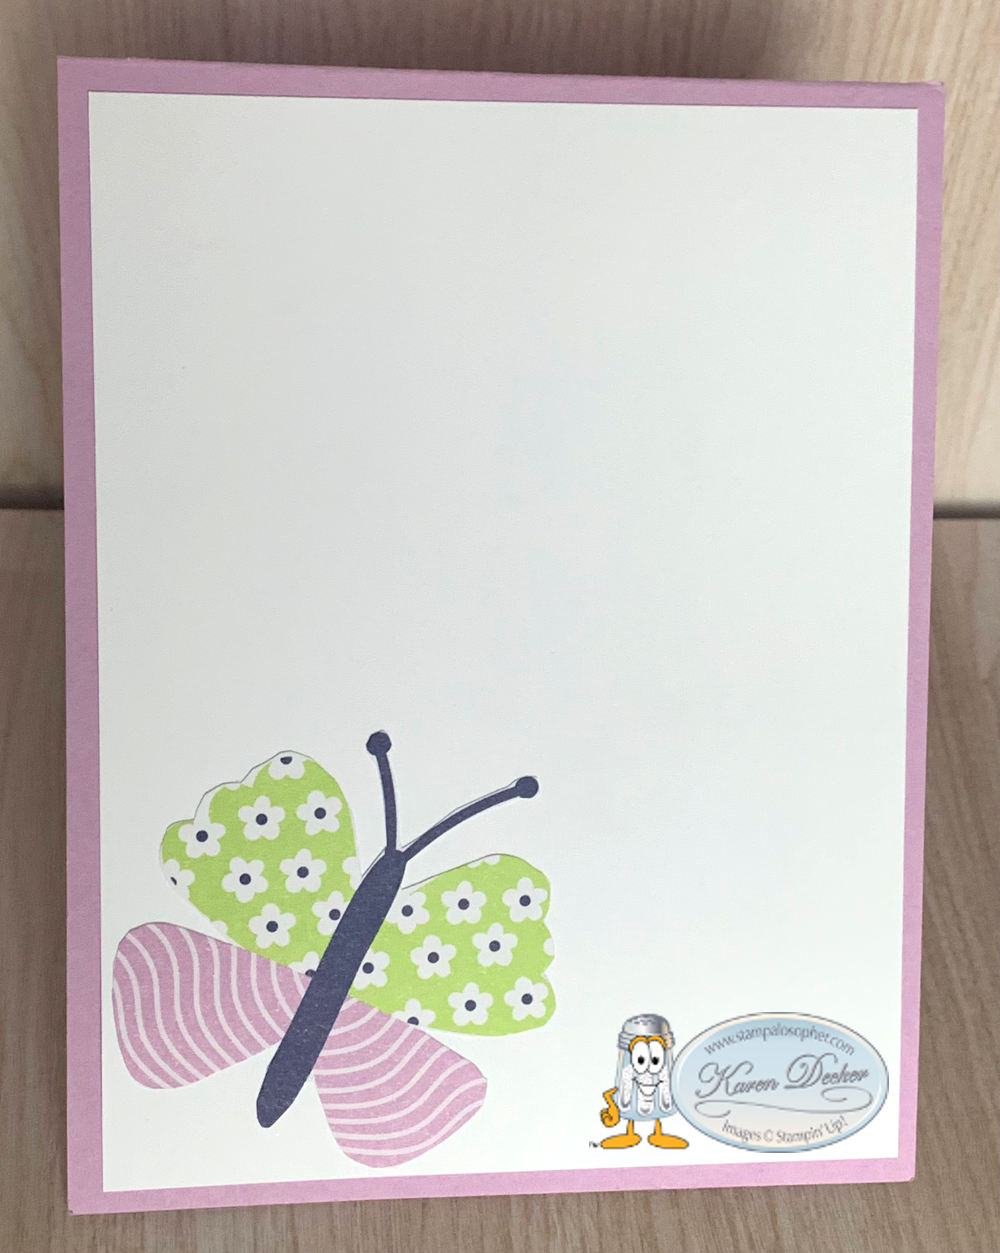
For the inside of the Best Butterflies card, I used a fussy cut butterfly from the Butterfly Kisses Designer Series Paper.
Click on little Sal in the computer to go to the online store.
SAL, Sharing A Love of stamping
Karen
Hues of Happiness Easel Card
Stampin’ Up!’s Hues of Happiness designer series paper (DSP) is beyond gorgeous. I made this bouquet easel card with one of the less used pieces of DSP that I thought was extra pretty with its yellow and black centers.
 .
. I started my fussy cutting focusing on those three little flowers on the right that I wanted to hang over the pot. The fresh freesia flower you see on the left was a separate fussy cut that I added so that a flower wasn’t hanging over too far on the pot where I wanted a couple leaves (fussy cut). The card itself is a tri-layer fold that I saw Jan B. make at janbcards.com. She was casing a lovely card from a Japanese demonstrator and translating the directions from Japanese to English. What a challenge! Thank you, Jan. From there I changed up the dsp, the embossing folder and altered the cuts a bit to come up with this Hues of Happiness Easel Card.
 .
.
The bottom flap folds out to give you a great place for a message!

Remember- don’t toss those edge pieces of your DSP! You can add them to the inside like in the picture above!
I started a bouquet card with cutting out the flowers in the Hues of Happiness DSP with the Blossoming Happiness Dies but it just lacked something and then I realized the piece of DSP I thought was much too busy was actually perfect. However, I did save the cutouts and used them on the back of the bouquet:

I think its the yellow in the DSP that made you prefer it over the other.
Maybe so, Sal, it definitely is eye appealing with yellow centers and little yellow flowers and added greenery which always enhances flowers. What a great job the Stampin’ Up! artists did in designing this paper!
Recipe
- Top Base 1: Bermuda Bay Cardstock, 4 1/4 X 11, scored at 5 1/2 and 2 3/4
- Bottom Base 2: Bermuda Bay Cardstock, 4 1/4 X 10 3/4, scored at 5 3/8;
- adhere to base 1 with the fold of base 2 aligned to the inside bottom edge of base 1. The length of base 2 is 1/4″ smaller to allow for the fold of base 1. The top of base 1 flips up and the bottom base 2 flips down. I didn’t get a picture but here is one from JanB’s blog post. I am using 1/8″ borders so my layers won’t look like hers

- Middle Layers for Base 2, (X2), Basic White, 4 X 5 1/8;
- one is for the inside of base 2, the other is for the outside of base 2 when it is folded in
- DSP for Card Base 2: Hues of Happiness DSP, 3 3/4 X 4 7/8, this is for the outside of base 2 when it is folded in
- Folded Layers of Base 1 (X2): Basic White, 4 X 2 1/2
- DSP Layer for the folded layers (X2): DSP, 3 3/4 X 2 1/4; make an effort to use the same color of DSP flowers on the right and left as you have on the Base 2 DSP that folds in so it has a continuous look
- Flower Pot Base: Basic White, 3 1/4 X 2 3/4
- pencil mark the top of the base 1/2″ in on the right and left sides
- pencil mark the bottom of the base 1″ in on the right and left sides
- cut from the bottom to the top mark on both sides
- Flower Pot Rim: Basic White, 3/4 X 4 1/4
- die cut both the base and rim with the Stitched Greenery Die
- Circle Stabilizer for flowers: Window Sheet, die cut with the 2nd largest of the plain layering circles
- Attach the window sheet circle between the base and rim of the pot making sure the top won’t go over the base of the card when closed. This also gives you a guide for mounting your flowers.
- Lay the pot on base 1, 1/8″ above the easel fold and pencil mark the pot on the base, then cut the base cardstock to match the pot. I tried to use the trimmer and found fussy cutting would have been better
- Adhere the pot to the base with a foam strip (you can see this in the picture of the back)
- The bottom of the pot should line up with the basic white layer (I had to trim mine a bit)
- Bouquet: Hues of Happiness Designer Series Paper cut to about 4″ X 3 1/2″ with added fussy cut greenery and flowers to make it fuller if necessary. I wanted those three little flowers on the bottom so I started there and used regular scotch tape to glue the extra pieces I wanted to fill it in with edge flowers and greenery
- Attach to the window sheet with glue dots
- cut additional flowers for the back with the Blossoming Happiness Dies or use the same sheet of DSP if you aren’t making numerous cards and have enough or don’t have the dies
- Sentiment Layer: Bermuda Bay Cardstock, 4 X 3/4, attach with a 1/2 X 3 3/4 foam strip 2 3/4″ from bottom
- Sentiment Top Greeting: Basic White, 3 3/4 X 1/2, stamp with greeting from Pansy Patch Stamp Set
- Bow: Scrap of Bermuda Bay cut with the Pierced Blooms Die (retired)
- Embellishment: In Color Rhinestone for center of the bow and a dragonfly punched from retired DSP

What!? You didn’t use the brass butterflies?
Not this time, Sal. I must be over-using them for you to say that!
This card and a triple time stamping card were for my July Stamp Camp.
And a lunch with something zucchini or green beans, right?


Hopefully all the zucchini will be shredded and frozen by then, and the green beans are already frozen. The cherry tomatoes are the best this year! So sweet, but I digress….
Well, it is not a ‘card buffet’ where you pick out which card to make from several kits, and it is not a ‘stamp-a-stack’ where you make several cards of each design, and it is not a ‘technique class’ which I have held before, and it is not a ‘club’ or ‘coffee and a card’, so I guess the closest title would be a ‘stamp camp’, just not an all day event. Does anyone have a better name I could use?
Click on little Sal in the computer to go to the online store.
SAL, Be Salt And Light out there folks, it’s a crazy world these days
Karen
Triangle Tri-Fold Card for Case The Creator #6
A card that twists from portrait to landscape? Yes, really! This was our Case The Creator card #6 in July. The creator, Twila Davis, was featured on Splitcoast Stampers with this amazing fun fold card. For this card I am using the Painted Christmas Designer Series Paper. For the greeting, holly berries and greenery, I am using the Merriest Moments. It carried over from last year so you can check out last year’s creations with that set HERE.
 .
.  .
. . And the “JOY” stays upright even when you open the card! That’s unique!
Definitely different. I had to make one to wrap my mind around how it worked. Here is a picture of the two diagonal pieces that are on the top and bottom and just look like strips from the front.

Here is a printable pdf of the instructions if you would like to case the case!!
Case The Creator #6 printable pdf file
 .
. My fellow stampers made some great cards for the Zoom meeting!
 .
.
 .
.
Joy Meadows used the Wonderful World Designer Series Paper.
 .
.
 .
.

 .
.
 .
.
 .
.
 .
.
Beautiful card creations! Thank you, ladies, for participating!
Thank you for spending time with me as Sal and I bring you a “pinch of creativity to spice up your crafting world!”
SAL, Sharing A Love of stamping
Karen Click on little Sal in the computer to go to the online store!
Sending Smiles, Blossoming Happiness and New Horizons
Click a second time on the header to go to the blog.
The Tea Boutique Cards & Envelopes in the annual catalog use all five of the new In Colors with cards and matching envelopes. I challenged myself to make a card that matched the envelope!
 .
.


I chose the smaller of the flowers in the Blessings of Home stamp set and the long stem flower and greenery from the Sending Smiles stamp set cut out with the Sending Dies which even have a die for that itty bitty flower. The envelope has a Starry Sky little flower on the flap so I replicated that look. The Flowers of Home Dies cut out the flower image and the die set has many other images to add greenery!
Recipe for Sending Smiles Tea Boutique Cards
- Base: Tea Boutique Card in Orchid Oasis, Measures 8 1/2 X 5 1/2 folded at 4 1/4
- Layer 1: Basic White, 3 3/4 X 5
- Layer 2: In Color Designer Series Paper in plaid, 3 5/8 X 4 7/8
- Top for die cut pieces: Basic White, 6 X 4 1/2
- stamp smaller flower in Blessings of Home stamp set with Orchid Oasis ink, color with Stampin’ Blends- Lt Fresh Freesia, Lt Granny Apple Green, Lt Call Me Clover and use a Blender pen & Orchid Oasis ink
- stamp in Fresh Freesia ink 2 long stem flowers from Sending Smiles stamp set (outside & inside flower) and use the blender pen and Orchid Oasis ink to add color on the flowers
- stamp one green leaf for outside in Granny Apple Green and one double green leaf for inside, die cut
- Cut ‘sending’ background from the Basic White
- Stamp ‘Love & Big Hugs’ in Orchid Oasis and cut with die in Sending Dies, cut off right edge even with the DSP layer and leave a little on the left edge for a gem when you line up the greeting die
- ‘Sending’ Top Layer: Use the In Color Designer Series Paper left over from layer 2, 1 5/8 X 3 5/8, and add backing of double back adhesive paper 1 1/2 X 3 1/2
- You should have enough of the In Color Designer Series Paper to make two 1 1/8 X 1 1/8 squares to cut diagonally for inside corners
- Greeting on inside of second picture: Basic White, 3 X 3 , Flowering Tulips stamp set, stamped in Starry Sky and cut with a retired Hippo & Friends Die
- Greeting Layer: Starry Sky, 3 X 3, die cut with retired Hippo & Friends Die, cut in half and glue to back of greeting
- Little Flowers (X2): Starry Sky, 1 X 1, die cut with Sending Dies and glue on a scrap of Daffodil Delight
- Embellishments: 5 In Color jewels, 4″ of Fresh Freesia ribbon tied in a knot
The top pieces are all adhered with Stampin’ Dimensionals, inside corners and flowers are glued directly down.
 I remember you used the Parakeet Party and the Tranquil Tide Cards and Envelopes for the catalog launch and now you have used the Orchid Oasis. What are you going to do with the Starry Sky and Sweet Sorbet?

The Tea Boutique Cards & Envelopes have 20 bases with matching envelopes so I have some left of all the colors. (Click for Catalog Launch details). I would love to do more of what I have done here in all the colors!
Recipe for Blossoming Happiness Card
 .
.  .
.
The front of this card is from a kit sent to me when I played Bunco online with Debra Harrison at Simply Sweet In Ink Designs. I created the inside using matching Hues of Happiness DSP and Blossoming Happiness Dies.
Base: Thick Basic White, 4 1/4 X 11, scored at 5 1/2
Layer 1: Hues of Happiness DSP, 4 X 5 1/4
Top Layer: Basic White, 4 X 4, Die cut with large Blossoming Happiness Die; Stamp sentiment from Pansy Patch stamp set in Granny Apple Green in upper right of die cut piece
Flower & 2 sets of Leaves: Hues of Happiness DSP die cut with Blossoming Happiness Dies.
Inside Layer: Hues of Happiness DSP with center cut out using retired Ornate Layers Die and stamped in Melon Mambo using the Limited Edition stamp set.
Recipe for New Horizons Card
 .
.  .
.
Base: Misty Moonlight, 8 1/2 X 5 1/2, Scored at 4 1/4
Layer 1 (X2): Soft Succulent, 5 3/8 X 4 1/8
Top Layer: New Horizons DSP, 5 1/4 X 4, and 5 1/4 by 2; I wanted the lake in the middle so I cut 3/4″ off the top of the 6″ DSP, then cut the 6″ width into two pieces – 4″ wide with the remaining 2″ wide for inside
Use the Oceanfront stamp set for grass in Evening Evergreen and Boulders in Basic Gray. Note: Stamp the boulders first, mask them, and then stamp the grass
On the Horizon stamp set is used for the birds but stamp lightly or they become blobs -practice makes perfect!
Horizon Dies are used for the fence with a scrap of Basic White and the grass with a scrap of soft succulent.
Thank you for your order is the retired You Always Deliver stamp set.
Embellishments are the retired Pebbles Enamel Shapes.
I hope I have brought you a “pinch of creativity to spice up your crafting world!”
Have a wonderful day!
SAL, Sending A Lovely set of cards to inspire you
Karen (click on little Sal in the computer to go to my online store)
Butterflies & Flowers Decorative Stencils & Thank You Cards
Hello Stamping Friends, (click on the header if you are on a mobile device to view full blog)
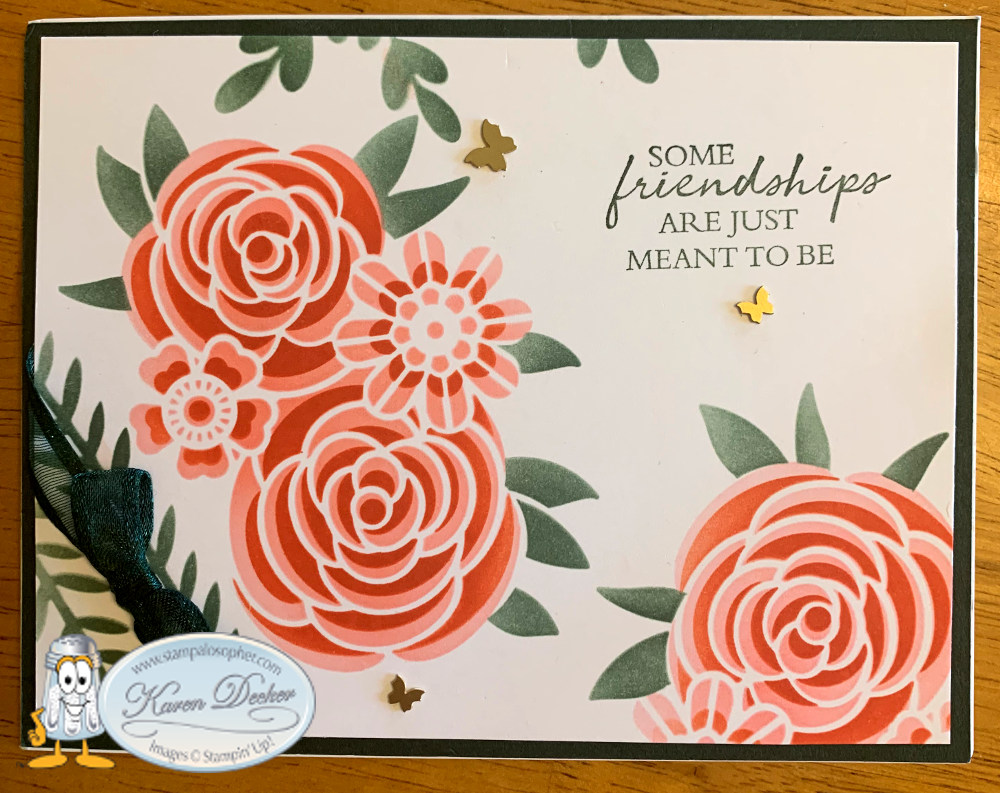
In June I took a turn at hosting the shoebox swap and we had so much fun using the Stampin’ Up! Butterflies & Flowers Layering Decorative Masks.

 .
. I saved so many ideas from Pinterest but I really liked what Jen Morgan of cardmum.com did with one full layered set of flowers and then a partial flower at the bottom right. I did a bit more greenery, used different colors of ink and added the Brass Butterflies- my new favorite bling!
Recipe For Layered Flowers
Note: Don’t attach your green layer to the base until the top art work is done and attached to the green layer so you can wrap the ribbon on the artwork and the green layer.
- Base: Thick Basic White, 11 X 4 1/4 scored at 5 1/2 (opens like a book)
- Layer 1 (X2): Evening Evergreen, 4 3/16 X 5 7/16 (I know, I know, but I wanted just a tiny bit of white base- just think – one tick less than 1/4 and one tick less than 1/2)
- Top Layer (X2): Basic White, 4 X 5 1/4
- Three Brass Butterflies and 12″ of Evening Evergreen Open Weave Ribbon
- Greeting: Shaded Summer Stamp Set stamped with Evening Evergreen Ink
- Inks: Evening Evergreen, Flirty Flamingo, Calypso Coral, Soft Succulent for greenery
Tips For Stamping with the layered masks:
- Mark the shiny side of your masks and sponge with the shiny side up
- Each step, completely cover any and all white that is showing with sticky notes, outside the mask and on the mask where the flowers/greenery are cut that you are not sponging
- Use the thin looking flower mask first sponging with Flirty Flamingo
- Use the thick looking flower mask second sponging with Calypso Coral
- There is a set of leaves that exactly matches the large flower -sponge this with Soft Succulent
- Using the vine mask, sponge two Soft Succulent vines at bottom left
- Wrap the corner with ribbon, then add a bow with a glue dot
- If you have any ink smudges you can add greenery to cover them up
 .
. 
Recipe For Layered Butterfly
Note: Don’t attach your pink layer to the base until the top art work is done and attached to the pink so you can wrap the ribbon on the artwork and the pink layer.
- Base: Smoky Slate, 5 1/2 X 8 1/2, scored at 4 1/4
- Layer 1 (X2): Polished Pink, 4 3/16 X 5 7/16 (I know, I know, but I wanted just a tiny bit of white base- just think – one tick less than 1/4 and one tick less than 1/2)
- Top Layer (X2): Basic White, 4 X 5 1/4
- Three Rhinestone Basic Jewels and of Polished Pink Open Weave Ribbon 6″ to wrap and 8″ for bow
- Greeting: Hello from Forever Fern and ‘Love You Much’ from Pansy Patch and Amazing Silhouettes for the inside
- Inks: Smoky Slate and Polished Pink
Tips For Stamping with the layered masks:
- Mark the shiny side of your masks and sponge with the shiny side up
- Each step, completely cover any and all white that is showing with sticky notes, outside the mask and on the mask where the flower is cut that you are not sponging
- Sponge the full background butterfly mask with polished pink
- Sponge the butterfly detail mask with smoky slate
- Using Masking Paper, stamp a butterfly mask and cover your butterfly
- Using the background mask, sponge heavy on the corner and very lightly around the butterfly
- Stamp the outside greeting in Smoky Slate and the inside greeting in Polished Pink
- Use a Smoky Slate Marker to add a bit of artwork to make the butterfly look like he is fluttering
- Stamp your silhouettes, wrap the ribbon around the pink and white layers and add a bow and rhinestones
May 2022 Paper Pumpkin – Celebrating In Colors
The following pictures are my alternatives since I needed thank you notes:
I used the Amazing Thanks Dies and a thank you set from years ago.
Orchid Oasis and Sweet Sorbet:


Tranquil Tide and Parakeet Party:
 .
.  .
.
Starry Sky:

I like all those little dots! Where is that stamp from?
That stamp was in the May kit! Such fun!
Thank you for giving me a bit of your precious time! I hope you found some inspiration today.
SAL, Share A Love,
Karen. Click on little Sal in the computer to go to an online store.
Welcome to my blog!

Sal Window to Products


