
Home » Get Well
Category Archives: Get Well
Sympathy & Get Well with Eden’s Garden
Oh how sad it makes us to need to prepare a sympathy card; but remember that as you craft your card you can pray for their family and friends. I am using the Eden’s Garden Suite from my Stampin’ Up! stash. I also had the Forever Gold Specialty Laser cut paper to use on the card and Lovely Words dies for the inside. Take a look:

SU Delicate Dahlias stamp set had the greeting I used.

I made a get well card at the same time:

The greeting is from SU Speedy Recovery.
 How did you get gold foil on the little leaves?
Well, Sal, it was the DSP itself that had gold foil. I didn’t use the Minc machine to foil, that would be a challenge! I do have a pen that I could use to color part of a DSP and then run it through the machine with gold foil but that is a challenge for another day.
Recipe
- Base: Soft Succulent, 4 1/4 X 11, Scored at 5 1/2
- Top: Ever Eden Foil Designer Series Paper (DSP), 3 1/2 X 4
- Top Middle: Ever Eden Cotton Paper, 3/4 X 4 1/4, gives the look of a belly band
- Top Bottom: Ever Eden plain DSP, 3/4 X 4
- Gold Flourish: Forever Gold Specialty Paper, already laser cut so just punch out
- Greeting: Soft Succulent, 2 1/2 X 2 1/2 stamp then cut with #4 circle die (4th from smallest)
- Stamp greeting in Evening Evergreen using stamparatus so you can stamp twice for darker greeting
- Sympathy: Delicate Dahlias stamp set; Get Well: Speedy Recovery stamp set
- Inside Layer 1: Cotton Paper, 4 X 5 1/4
- Inside Layer 2: Ever Eden plain DSP matching front bottom DSP, 3 3/4 X 5
- Inside Layer 3: Ever Eden Foil Side of DSP, 3 1/2 X 4 3/4, die cut ‘Hugs’ from Lovely Words die
- Hugs Layer: Gold Foil, 2 1/2 X 1 1/2, die cut the ‘Hugs’ only to layer on the DSP of layer 3
- Bow: Evening Evergreen, 8″
Easy Peasy! Especially if you have the measurements. Getting those correct took a bit of time.
Imagine what you could do with other DSPs!
Exactly, Sal, with two coordinating DSPs and two coordinating card stocks for the base and the band you could do a lot.
So you’re going to add to your stash of ready to go cards by making several?
Well, I really don’t have much of a stash, and I have a friend who thinks its bad luck to make sympathy cards, and you pray a lot longer when you aren’t just pulling from the stash, and….. So, the short answer is ‘no’, I need to move on to the next needed cards.
Thank you for spending a bit of time with me today as we…
bring a pinch of creativity to spice up your crafting world!
SAL, Sending A Little prayer with each card
Karen

Riddle for the day:
Q=What do you call a bear with no teeth?
A=A gummy bear!
Get Well Card and Fun Folds by Joy

 .
.
What?! Two posts in one week? Are you leaving again soon?
Not soon, Sal, but we are having a shoebox event next Tuesday with Christine as our hostess and it seemed wise not to get too far behind in my scrapbooking of cards!
Do you think anyone follows you anymore?
Well, Sal, on Facebook we call people who follow posts but never comment – stalkers- so maybe I have a few of those left. I know I use the blog frequently for recipes and sometimes to remind myself that I can do this on those days when the mojo just isn’t there.
Enough of that – let’s look at this card and the fun products I used. I saw the faith, hope, love die with daisies and said “That is my style”! It is from inloveartshop.com
Oops, sorry, I went to verify the link and got lost looking at their site! This die is currently still available for $4.99. It is called ‘Inlovearts Sunflower with “Love, Faith, Hope” Word Cutting Dies’.
Recipe:
- Base: Daffodil Delight 5 1/2 X 8 1/2 scored at 4 1/4
- Layer 1 (X2): Basic White 3 7/8 X 5 3/8, use Corner Rounder Punch on each corner
- For the inside layer use Delicate Details stamp set for the bottom (it sort of matches the black die cut edges on front)
- Use Thoughts & Prayers for the greeting
- Use His Love for the praying hands
- Layer 2: Basic Black 4 X 5 1/2, Place a dryer sheet under the paper and die cut with Ornate Layers Die
- Words & Flowers: Basic White 4 X 4 1/2 for 1 die cut – I used 3 for extra pop of the words
- Daisies on Top: Basic White 6 X 2, punch 3 daisies with small daisy punch
- Middle of the flowers: Daffodil Delight, 2 1/2 X 1, cut the three middles with the die in the set; note: I left the die intact and did not separate the circles from the flowers
- Use Places In The Heart stamp set for the little dots on the middles
- Sponge the edges with Crushed Curry, a little heavy on one side
- Embellish with the clear raindrop dots to look like morning dew
So you used the new die set and the ornate layers die and 4 stamp sets?
And two punches, Sal, a corner punch and a small daisy punch. What fun to not be tied to using just the current products. I knew this day would come and I am loving it! Now let’s look at what Joy had for us at her shoebox event; you will be thrilled!

This is called a Flying Seagull Fun Fold. A video is at this link.
https://suestampfield.com/2023/02/flying-seagull-fun-fold-cards/#more-12186
Joy’s second card is a Lattice Split Card!
 .
. 
There is a tutorial by Brandy Cox here:
https://brandyscards.com/lattice-split-card-tutorial/
Lovely, Joy, your cards are prettier than the tutorials! Thank you!
Does this bring a
pinch of creativity to spice up your crafting world!
Have fun,
Karen
.
Speedy Recovery Get Well Card
Do you love the soft pastels of Easter and spring? Then you must have this packet of ‘Dandy Designs Designer Series Paper’ which has delightful pastels! This packet of 48 sheets of 12X12 paper is only available for two more days because it is a Sale A Bration product and Sale A Bration for this session ends February 28!
 You didn’t give much warning!
No, but I am here now! I needed a get well card and knew I could do double duty by showing a card and highlighting the paper, as well as mentioning a wonderful stamp set called ‘Speedy Recovery’ from the annual catalog.


.

Check out this paper!

Wow! Green combinations, blue combinations, oranges and purples and some with all of the colors!
Yes, Sal, and perfect for those cards where we need a front and back to match or at least blend, like these! Click on the image to go to the blogpost for that card:
 . .
. .  .
.
ooohhh, make us a starburst card with all those pastels! Please…..
Maybe someday but for now the time is crucial to post this card to show the beauty of the Dandy Designs DSP (Designer Series Paper) only available during Sale A Bration which ends Februray 28.
Recipe
- Base: Highland Heather, 5 1/2 X 8 1/2, scored at 4 1/4
- Border: Dandy Designs DSP, 3 3/4 X 4 3/4, Die cut with 2nd largest Scalloped Contours Die
- Inside Strip: Dandy Designs DSP, 4 X 1/2
- Top Layer: Basic White, 3 1/4 X 4 1/2, Die cut with 4th largest Deckled Rectangle Die
- Stamp greeting in Memento Black Ink at bottom
- Stamp cup on a 2 X 2 1/2 piece of Dandy Designs DSP, Fussy Cut, for a left handed version like I used here, be sure the design you want is on the backside of the side you stamp.
- Stamp the flowers from Speedy Recovery directly on the Basic White toward the top
- Stamp the little tag on the flowers on a scrap of Basic White, fussy cut
- Adhere the cup over the flowers
- Make a tiny bow of twine and glue a length of twine at top of cup
- Using glue dots adhere the tag to the cup
- Pop up the layer with stampin’ dimensionals
- Embellish! I used Wink of Stella on the tag and three pearls in matching colors.
Thank you for spending a little time with me today! March 1st I will be ordering the new annual catalogs (May ’23 – April ’24) to be mailed directly to you so please let me know if you would like a hardcopy. text: 303-815-0838 or email [email protected].
The hostess code is C3XMWVCS. Using the code, you will automatically be shopping with me, otherwise you may need to select me as your demonstrator. Click on little Sal in the computer to shop:
SAL, Spring is not A Long ways away
Karen
Love Cats Card
The cutest kitty cat stamp set is available in the Stampin’ Up! Mini Catalog! It is callled ‘Love Cats’ -quite appropriate for a title!
I saw a card made by Jenny Boyle with one cat holding the tail of another cat and loved that idea so I changed colors, flowers, background, bling and greeting to make this:

The flowers and paper for the oval frame are from the Hues of Happiness Designer Series Paper. The flowers are fussy cut and the oval frame is made using the Oval Framelits. It is amazing how one little idea can lead to a very different card! I was making this for a get well card and used a greeting from the ‘Beautifully Happy’ Stamp Set in the Sale A Bration catalog:

I was experimenting with oval sizes and had an extra oval so I stamped the third kitty cat on it, put tear and tape around three edges and added it to the inside left of the card for the gift card.

This is the stamp set:

It is a great stamp set, and with the Stamparatus you can get perfect placement of the kitty so that you can stamp a couple of times for a nice black image.
The ‘Beautifully Happy’ Stamp Set is free with a $100 purchase. It has 17 stamps and is a two step so you can ‘stamp to color’ the flowers and leaves after first stamping the outside!

Stampin’ Up! has a new set of ovals which you can get separately or as a bundle:

 Wow, that is tiny – I need a magnifying glass to see the ovals!

Better?!
Yes!
So let’s look at this from a Sale A Bration standpoint.
-Framed Florets Bundle. $54. #162407. This has the oval you need, mine is retired.
-Hues of Happiness DSP. $12.00 #158822
-Love Cats Stamp Set. $21.00 #160410
-Cane Weave Embossing Folder. $10 #160580. Mine is the retired basket weave but quite similar.
-Opal Rounds for Bling. $8.50. #159185
If you purchased all those items (assuming you have Thick White Cardstock for the base and a Cut and Emboss machine) you would get the ‘Beautifully Happy’ Stamp Set for free and you could make this card and dozens more with various sayings and flowers and dies to cut out what you need. Birthday, thank you, get well, friend and generic sayings in these sets cover most times you need a card.
Recipe
- Base: Thick Basic White 5 1/2 X 8 1/2 scored at 4 1/4
- Layer (X2), Inside and Outside: Basic White 5 1/4 X 4, Emboss with Cane Weave 3D embossing folder for outside
- Kittys Outside: Basic White, 5 1/2 X 4 1/4, stamp in Memento Black with Stamparatus so you can stamp twice; fussy cut
- Oval: Basic White, 4 X 3 1/4, cut with oval framelit #4 for background of kittys
- Oval with DSP: Hues of Happiness DSP, 4 X 3 1/4, Cut with framelits 3 & 4 to make the frame
- Flowers: Fussy cut about 3 1/2 X 2 from the Hues of Happiness DSP for front and two flowers for inside
- Bling it up!
You thought that sheet of DSP was something you would never use and look at you!
Yes, indeed! Check out the other card I made with this one sheet of paper – Easel Card with Hues of Happiness.
Sale A Bration ends on February 28 so don’t delay! Check out the Catalog Tab here on the blog if you don’t have a hardcopy of the catalog.
The hostess code for February is C3XMWVCS. This code is used if your order is under $150 so all the little orders add together to give someone (might be you) hostess dollars! Over $150 and you get the hostess dollars yourself to spend on anything you would like from the Annual Catalog or the Mini Catalog. Both these catalogs end on May 1 when the new Annual Catalog comes out.
Click on little Sal in the computer to go to the Stampin’ Up! site and order. Thank you so much for supporting me! If you don’t use the host code you will need to select me as your demonstrator.
SAL, Stamp A Lot, Smile A Little and always be Salt And Light to those in your world
Karen

The March Paper Pumpkin will have a second stamp set as a celebration of their 10th anniversary.

Subscribe here:
https://www.paperpumpkin.com/en-us/sign-up/?demoid=2048560
or order online with a prepaid subscription purchase! A three month subscription will get you one free $50 Sale A Bration item.
1 month: $22.50. item #137858
3 months $67.50. item #137859
6 months $122.50. item #137860 (save $1 per month)
12 months $235, item #137861 (buy 11 get one free)
Sending Smiles, Blossoming Happiness and New Horizons
Click a second time on the header to go to the blog.
The Tea Boutique Cards & Envelopes in the annual catalog use all five of the new In Colors with cards and matching envelopes. I challenged myself to make a card that matched the envelope!
 .
.


I chose the smaller of the flowers in the Blessings of Home stamp set and the long stem flower and greenery from the Sending Smiles stamp set cut out with the Sending Dies which even have a die for that itty bitty flower. The envelope has a Starry Sky little flower on the flap so I replicated that look. The Flowers of Home Dies cut out the flower image and the die set has many other images to add greenery!
Recipe for Sending Smiles Tea Boutique Cards
- Base: Tea Boutique Card in Orchid Oasis, Measures 8 1/2 X 5 1/2 folded at 4 1/4
- Layer 1: Basic White, 3 3/4 X 5
- Layer 2: In Color Designer Series Paper in plaid, 3 5/8 X 4 7/8
- Top for die cut pieces: Basic White, 6 X 4 1/2
- stamp smaller flower in Blessings of Home stamp set with Orchid Oasis ink, color with Stampin’ Blends- Lt Fresh Freesia, Lt Granny Apple Green, Lt Call Me Clover and use a Blender pen & Orchid Oasis ink
- stamp in Fresh Freesia ink 2 long stem flowers from Sending Smiles stamp set (outside & inside flower) and use the blender pen and Orchid Oasis ink to add color on the flowers
- stamp one green leaf for outside in Granny Apple Green and one double green leaf for inside, die cut
- Cut ‘sending’ background from the Basic White
- Stamp ‘Love & Big Hugs’ in Orchid Oasis and cut with die in Sending Dies, cut off right edge even with the DSP layer and leave a little on the left edge for a gem when you line up the greeting die
- ‘Sending’ Top Layer: Use the In Color Designer Series Paper left over from layer 2, 1 5/8 X 3 5/8, and add backing of double back adhesive paper 1 1/2 X 3 1/2
- You should have enough of the In Color Designer Series Paper to make two 1 1/8 X 1 1/8 squares to cut diagonally for inside corners
- Greeting on inside of second picture: Basic White, 3 X 3 , Flowering Tulips stamp set, stamped in Starry Sky and cut with a retired Hippo & Friends Die
- Greeting Layer: Starry Sky, 3 X 3, die cut with retired Hippo & Friends Die, cut in half and glue to back of greeting
- Little Flowers (X2): Starry Sky, 1 X 1, die cut with Sending Dies and glue on a scrap of Daffodil Delight
- Embellishments: 5 In Color jewels, 4″ of Fresh Freesia ribbon tied in a knot
The top pieces are all adhered with Stampin’ Dimensionals, inside corners and flowers are glued directly down.
 I remember you used the Parakeet Party and the Tranquil Tide Cards and Envelopes for the catalog launch and now you have used the Orchid Oasis. What are you going to do with the Starry Sky and Sweet Sorbet?

The Tea Boutique Cards & Envelopes have 20 bases with matching envelopes so I have some left of all the colors. (Click for Catalog Launch details). I would love to do more of what I have done here in all the colors!
Recipe for Blossoming Happiness Card
 .
.  .
.
The front of this card is from a kit sent to me when I played Bunco online with Debra Harrison at Simply Sweet In Ink Designs. I created the inside using matching Hues of Happiness DSP and Blossoming Happiness Dies.
Base: Thick Basic White, 4 1/4 X 11, scored at 5 1/2
Layer 1: Hues of Happiness DSP, 4 X 5 1/4
Top Layer: Basic White, 4 X 4, Die cut with large Blossoming Happiness Die; Stamp sentiment from Pansy Patch stamp set in Granny Apple Green in upper right of die cut piece
Flower & 2 sets of Leaves: Hues of Happiness DSP die cut with Blossoming Happiness Dies.
Inside Layer: Hues of Happiness DSP with center cut out using retired Ornate Layers Die and stamped in Melon Mambo using the Limited Edition stamp set.
Recipe for New Horizons Card
 .
.  .
.
Base: Misty Moonlight, 8 1/2 X 5 1/2, Scored at 4 1/4
Layer 1 (X2): Soft Succulent, 5 3/8 X 4 1/8
Top Layer: New Horizons DSP, 5 1/4 X 4, and 5 1/4 by 2; I wanted the lake in the middle so I cut 3/4″ off the top of the 6″ DSP, then cut the 6″ width into two pieces – 4″ wide with the remaining 2″ wide for inside
Use the Oceanfront stamp set for grass in Evening Evergreen and Boulders in Basic Gray. Note: Stamp the boulders first, mask them, and then stamp the grass
On the Horizon stamp set is used for the birds but stamp lightly or they become blobs -practice makes perfect!
Horizon Dies are used for the fence with a scrap of Basic White and the grass with a scrap of soft succulent.
Thank you for your order is the retired You Always Deliver stamp set.
Embellishments are the retired Pebbles Enamel Shapes.
I hope I have brought you a “pinch of creativity to spice up your crafting world!”
Have a wonderful day!
SAL, Sending A Lovely set of cards to inspire you
Karen (click on little Sal in the computer to go to my online store)
September Swaps and Mystery Card #16-Origami Frame Card
Hello Stamping Friends,
It is almost over- September – and summer – and ….. boo hoo
 . NO it is “Woo hoo” – that means fall is here, with its pumpkins and scarecrows and pumpkin spice lattes and …..
 . And only 86 days until Christmas! Just sayin……
We will be ready!!
Mystery Card Challenge #16 printable pdf file

It is an Origami Frame Card (also called Shadow Box Technique, Folded Paper Frame, and Origami Window Frame)!
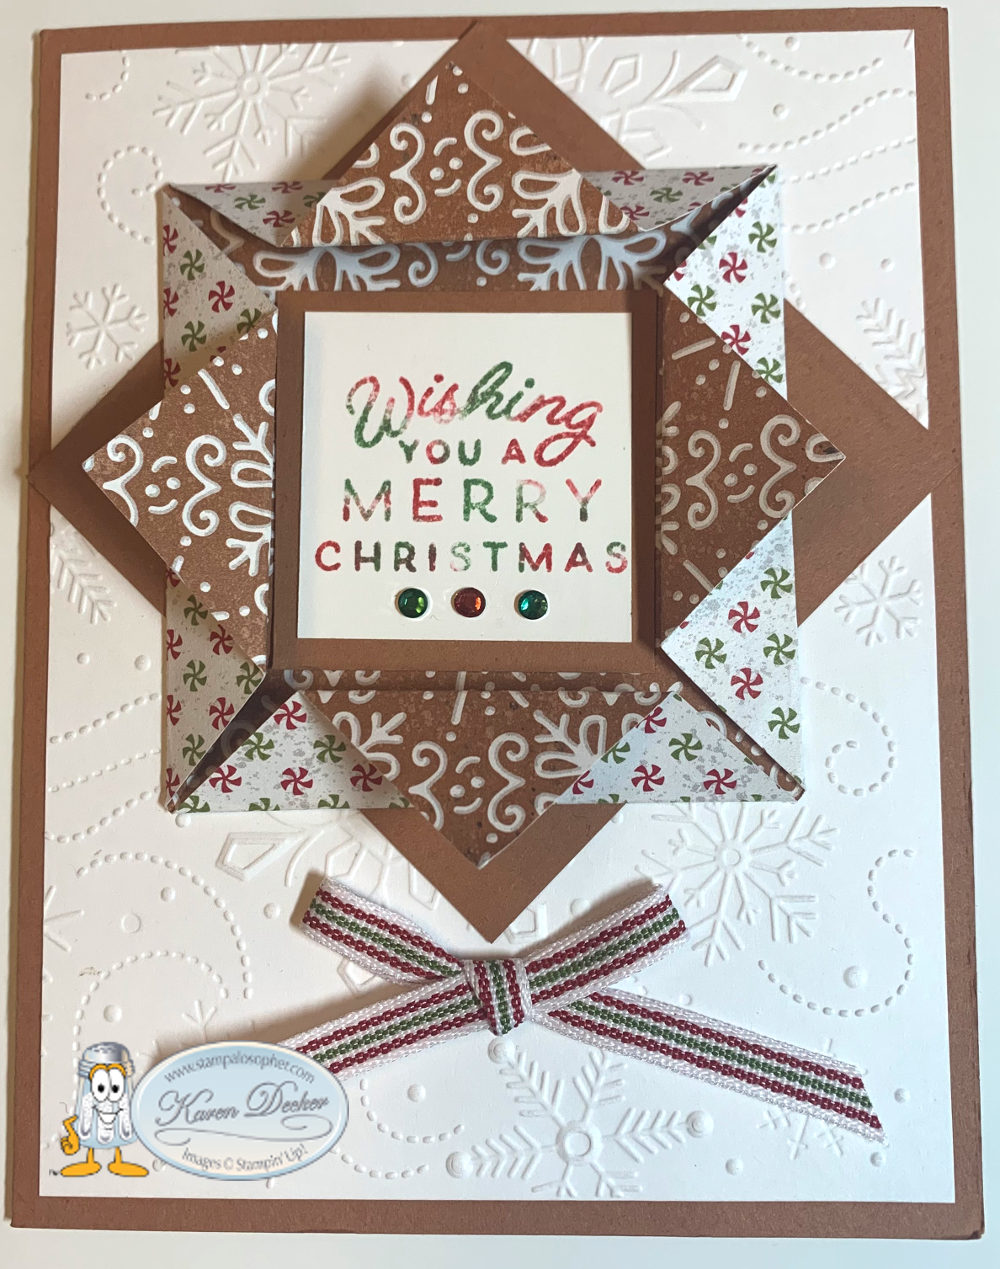
This is the one I created with the specific instructions. I used the wintry 3D embossing folder and since it is made for the mini machine, I just rotated the folder 180 degrees so there were no half embossed images and ran it a second time. I used the Baby Wipe Technique for the greeting from the Frosted Gingerbread stamp set by placing a baby wipe on our largest acrylic block and then drip dropping red and green ink from the reinkers on the baby wipe to create my own mixed color ink ‘pad’. The base is Cinnamon Cider and the DSP is Gingerbread & Peppermint DSP from the mini catalog.
- The 4X4 DSP is folded lightly in half and then opened up and folded lightly in half again to find the middle point, or use a pencil and a ruler to draw diagonal lines from each corner to corner to find the middle, then erase the pencil mark.
- Unfold and fold each corner with its point exactly in the center. Burnish well with your bone folder (1st folds)
- Fold back the corner points to about 1/8″ over the 1st folds and burnish well.
- Place at least two glue dots underneath the frame folds at the very edge of the 1st fold, you want the folds to pop a little at the second fold but be held in place at the first fold. Glue dots were less visible than when I used the mini dimensionals.
There are several different ways to place the frame on your card. In the card above, I used the 3X3 square offset from the frame to make added points to the frame but in this card I placed the 3X3 exactly under the frame for just a border:
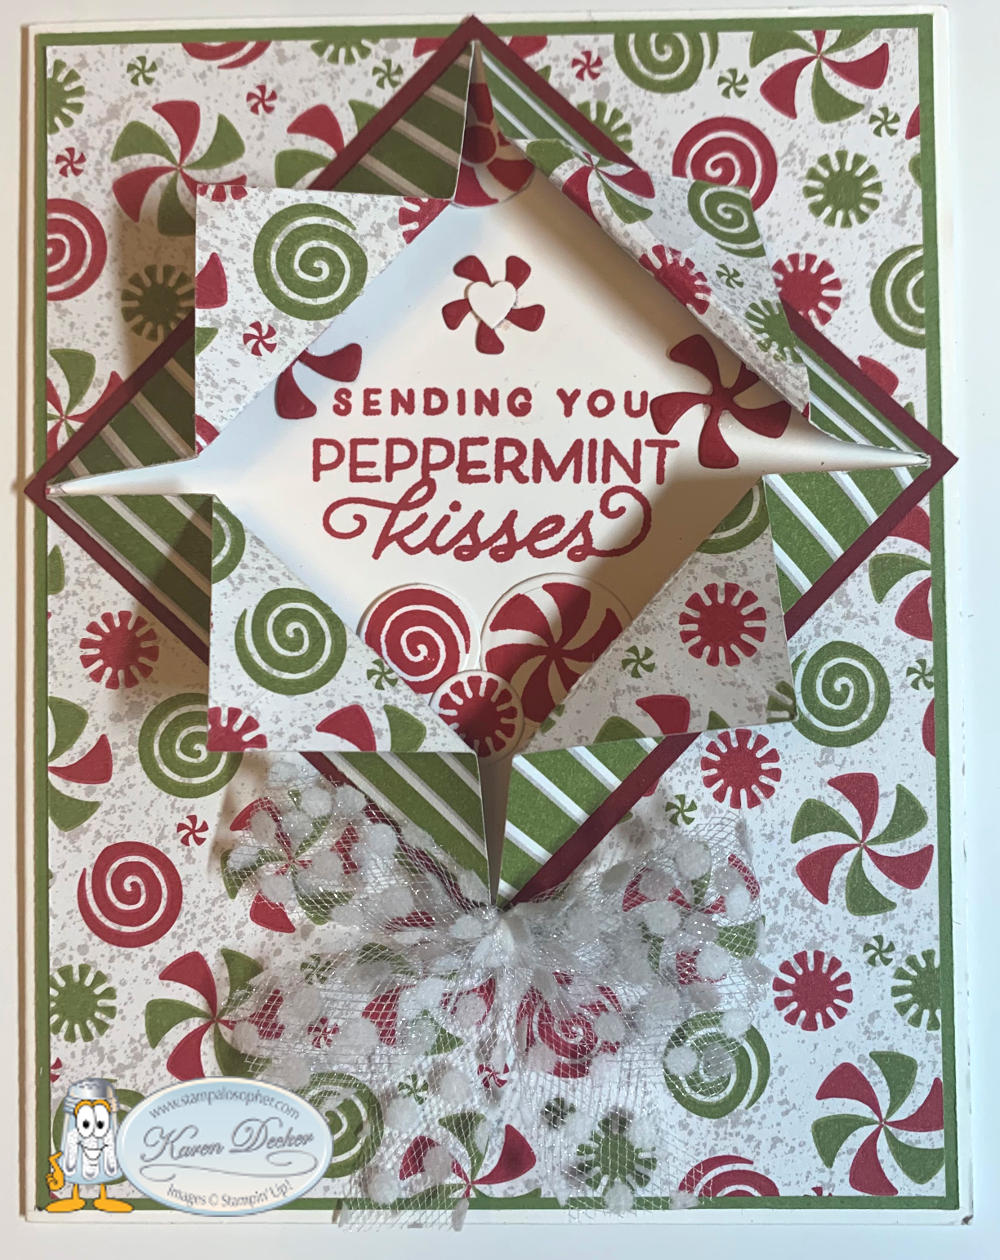
I used an extra layer of Old Olive since I was using DSP from the Gingerbread & Peppermint DSP which was a bit busy.
- Old Olive Layer, 4 1/8 X 5 3/8
- DSP Layer, 4 X 5 1/4
- Basic White for stamping the greeting, 2 3/4 X 2 3/4 (I had fun with all the dies in the Gingerbread Dies!)
This next card uses the 3X3 for a border again instead of extra points since the back of the DSP that folds out is the same blue and got lost when I looked at having the extra points with blue on blue. This uses the Back On Your Feet stamp set.

Differences from the original:
- Beauty of The Earth DSP, 4 X 5 1/4
- Cinnamon Cider, 3 3/4 X 5, embossed with Painted Texture 3D embossing folder
- Basic White for stamping the greeting, 2 3/4 X 2 3/4
The Origami Frame would also fit on a card with a horizontal alignment.
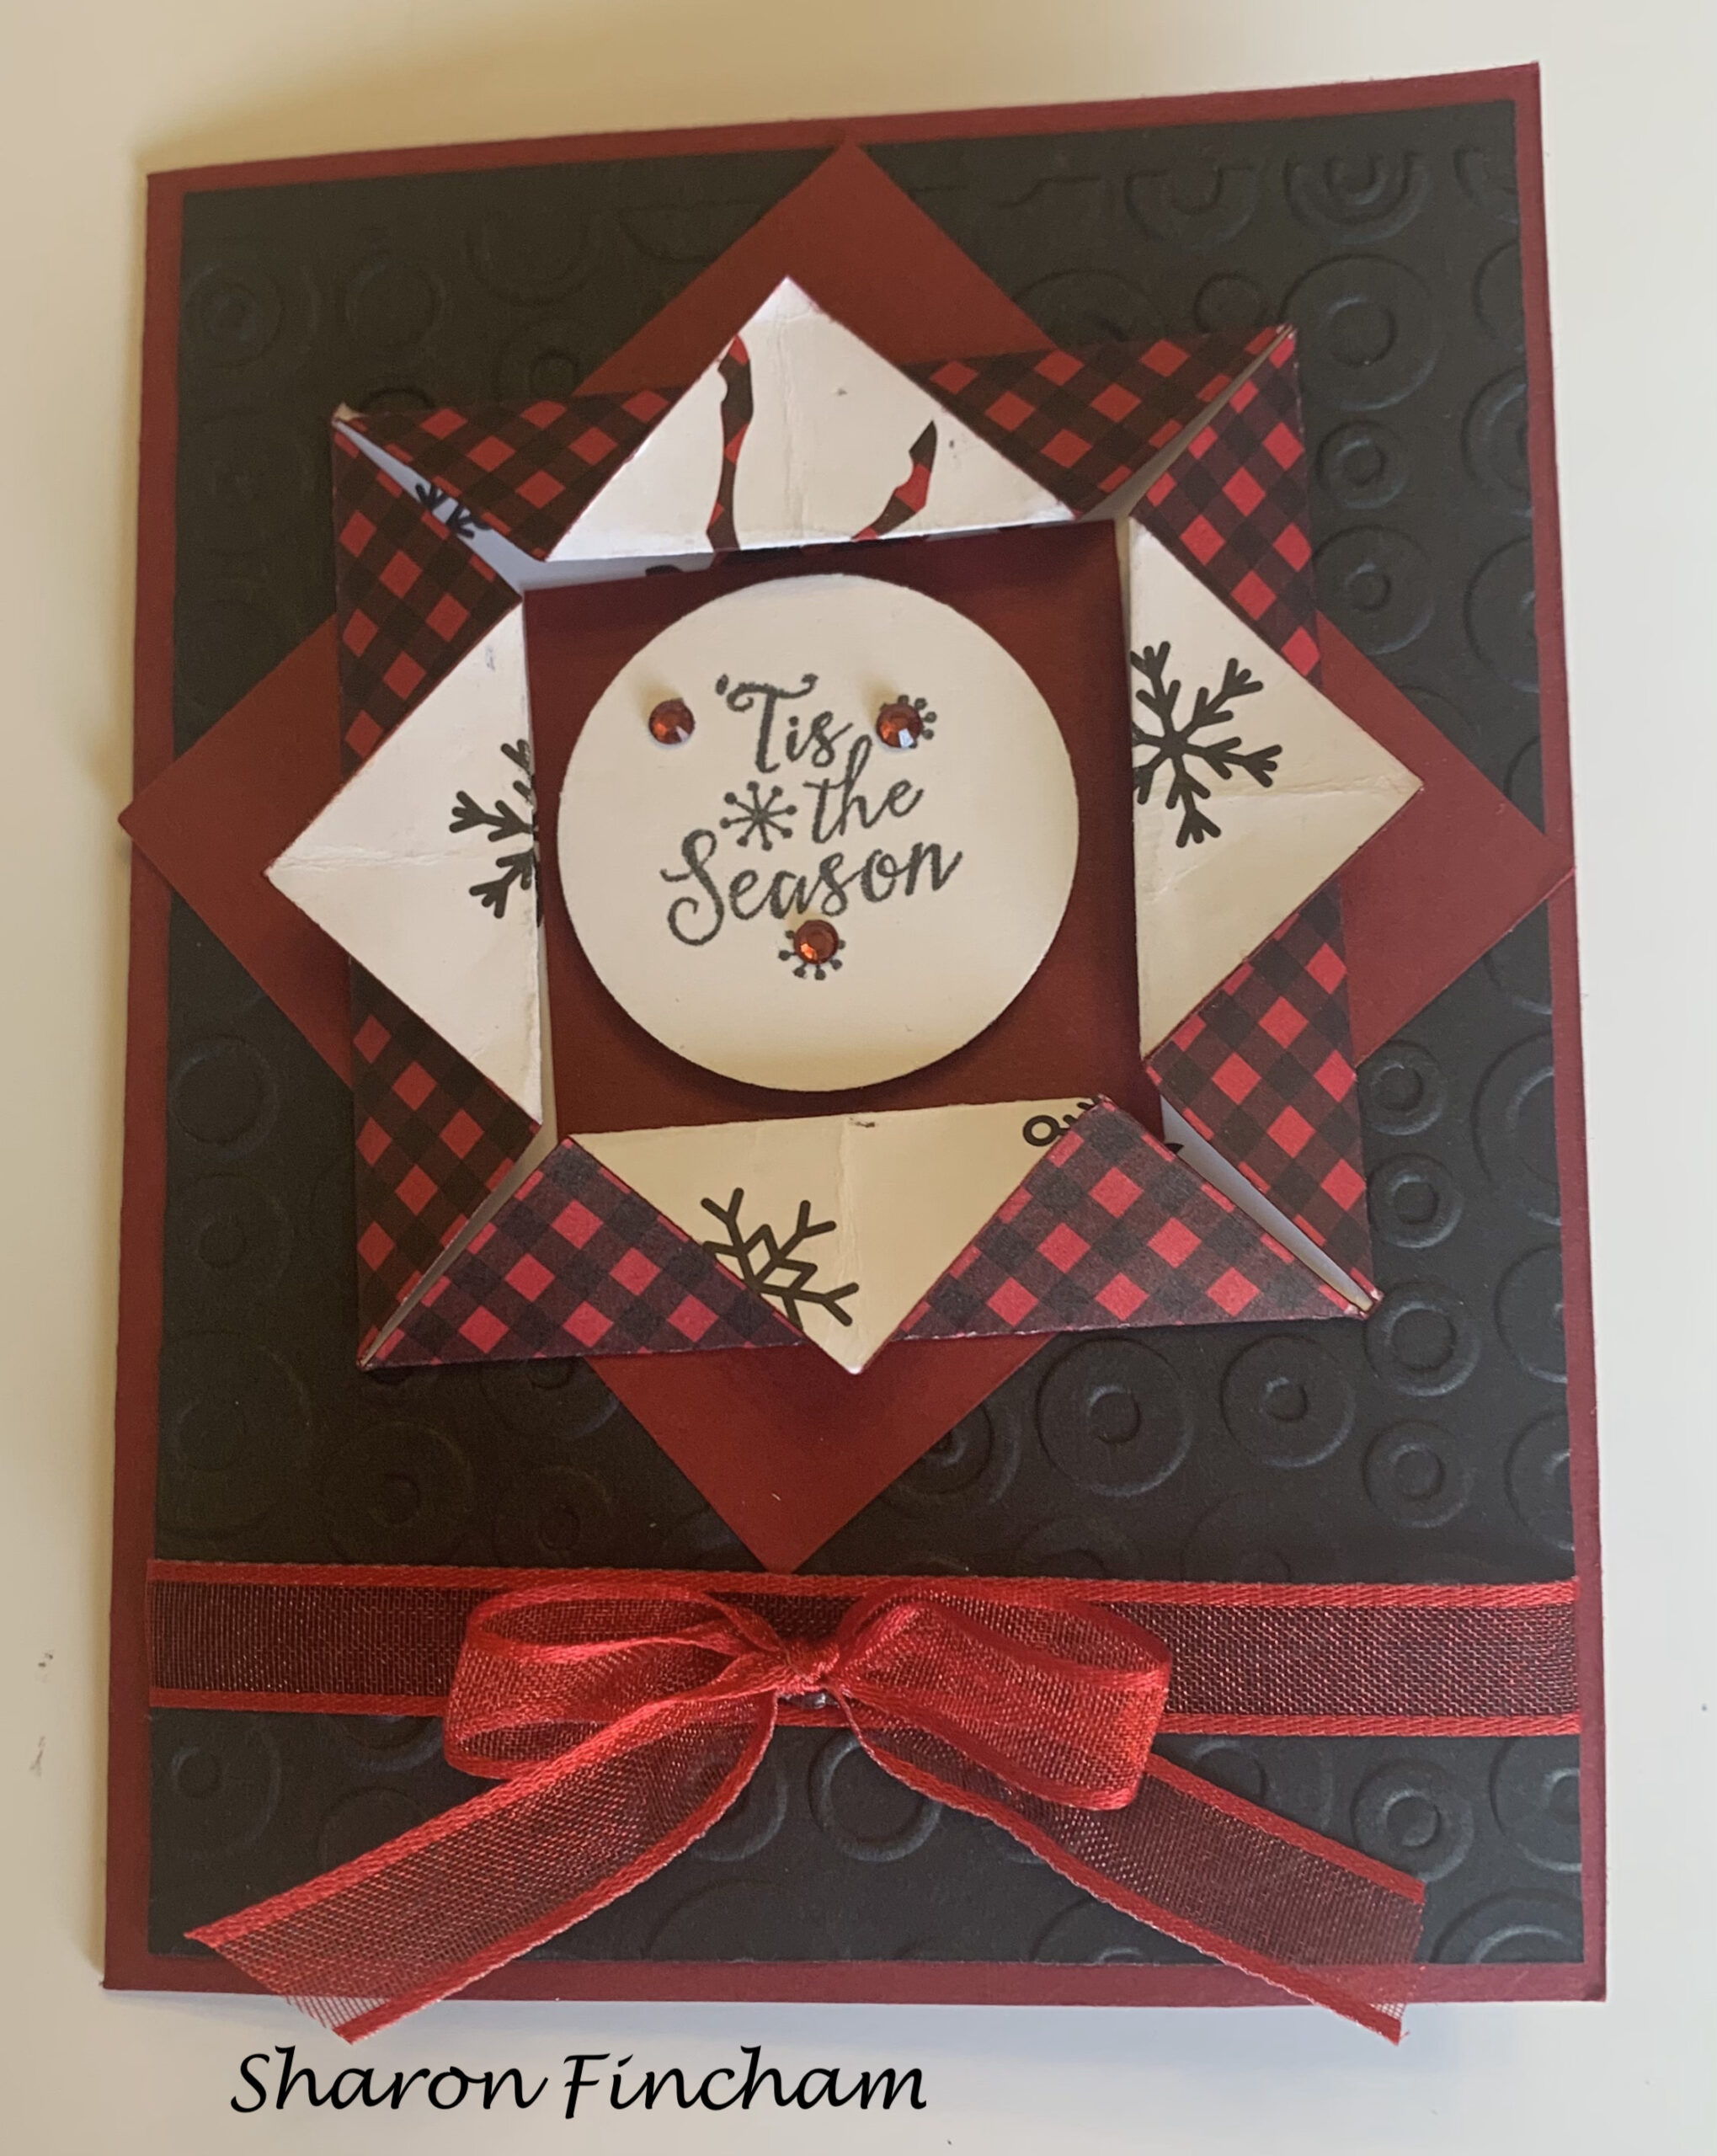
Sharon used the 3X3 for extra points and made a stunning card with the Sale A Bration Peaceful Prints DSP, Cherry Cobbler and Basic Black:
Joy’s card uses the Hand Penned DSP and Gorgeous Grape with the Timeworn Type 3D Embossing Folder:
 .
.
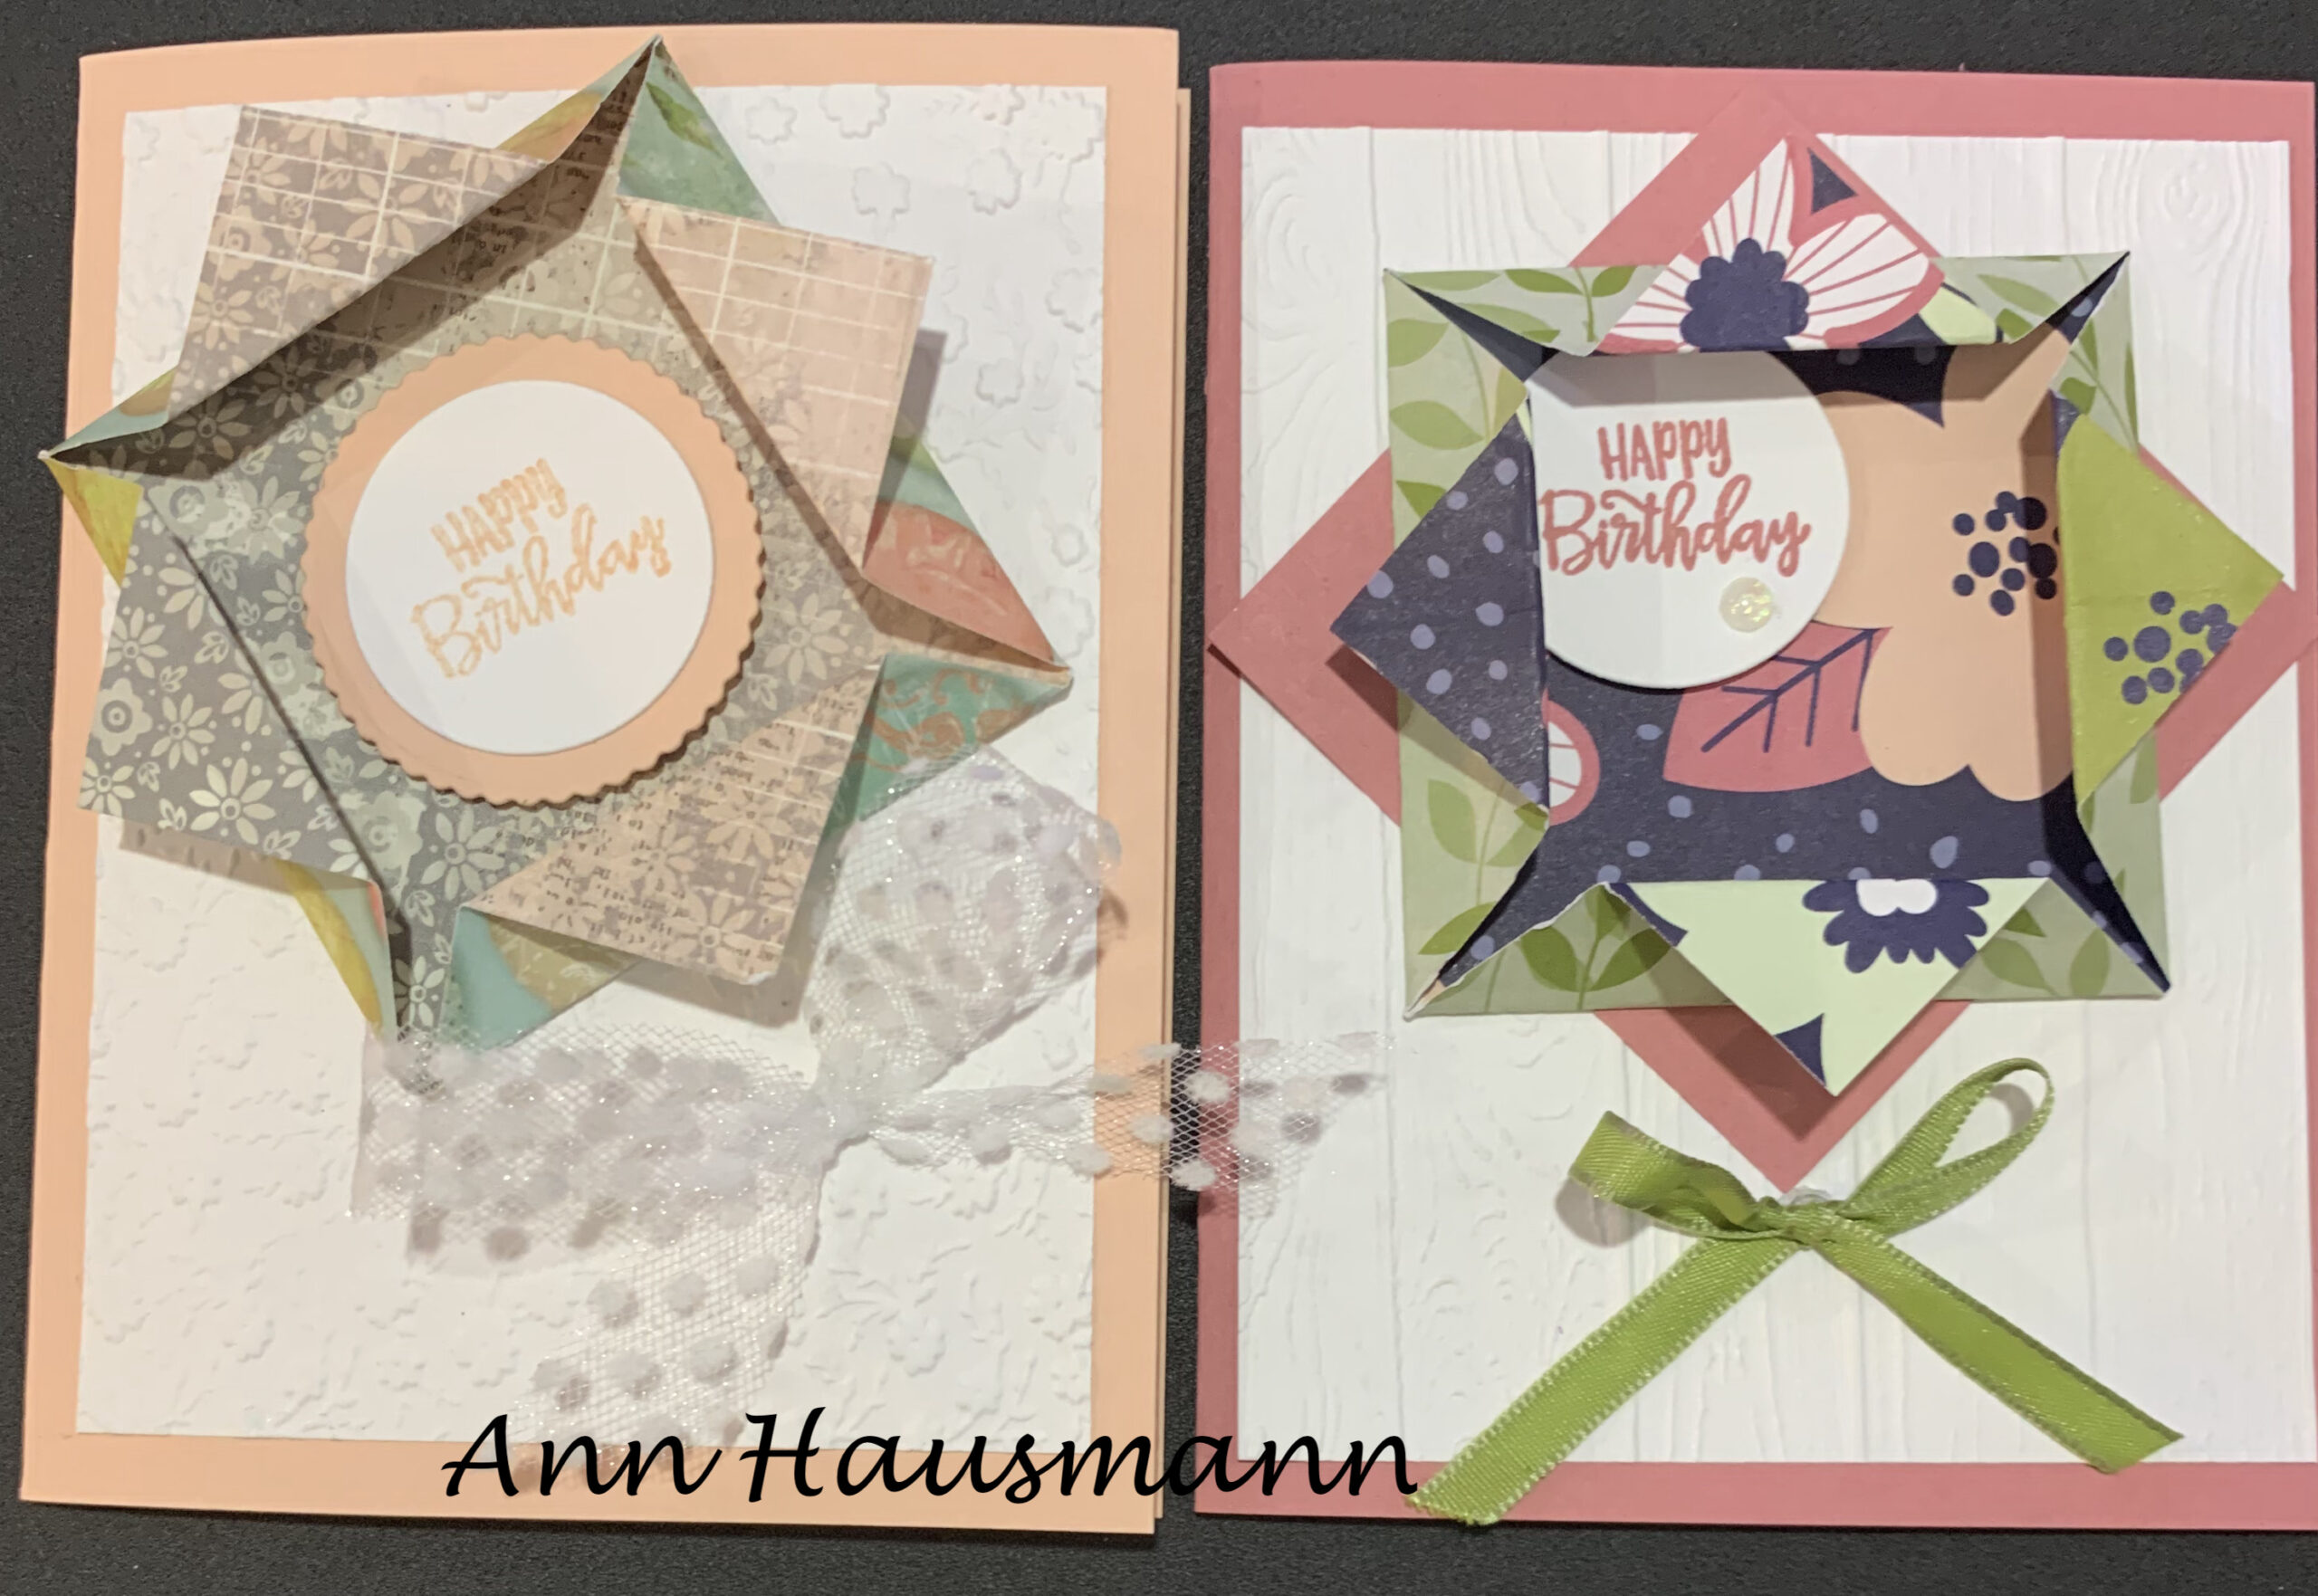
Ann made two cards in differing colors and two different embossing folders- the Ornate Floral 3D on the left and the Timber 3D on the right:
Thank you for participating in the Mystery Card Challenge and sharing your cards!
We Zoom on the 4th Tuesday of each month at 9:30 to share our swaps and do a Mystery Card Challenge. Hop on by some time, just send your email address to me at [email protected].
 Don’t go until you share those swap cards!
Oh dear, I almost did. This was my swap and if you click on the picture you can go to the blog post with all the directions and even a video:

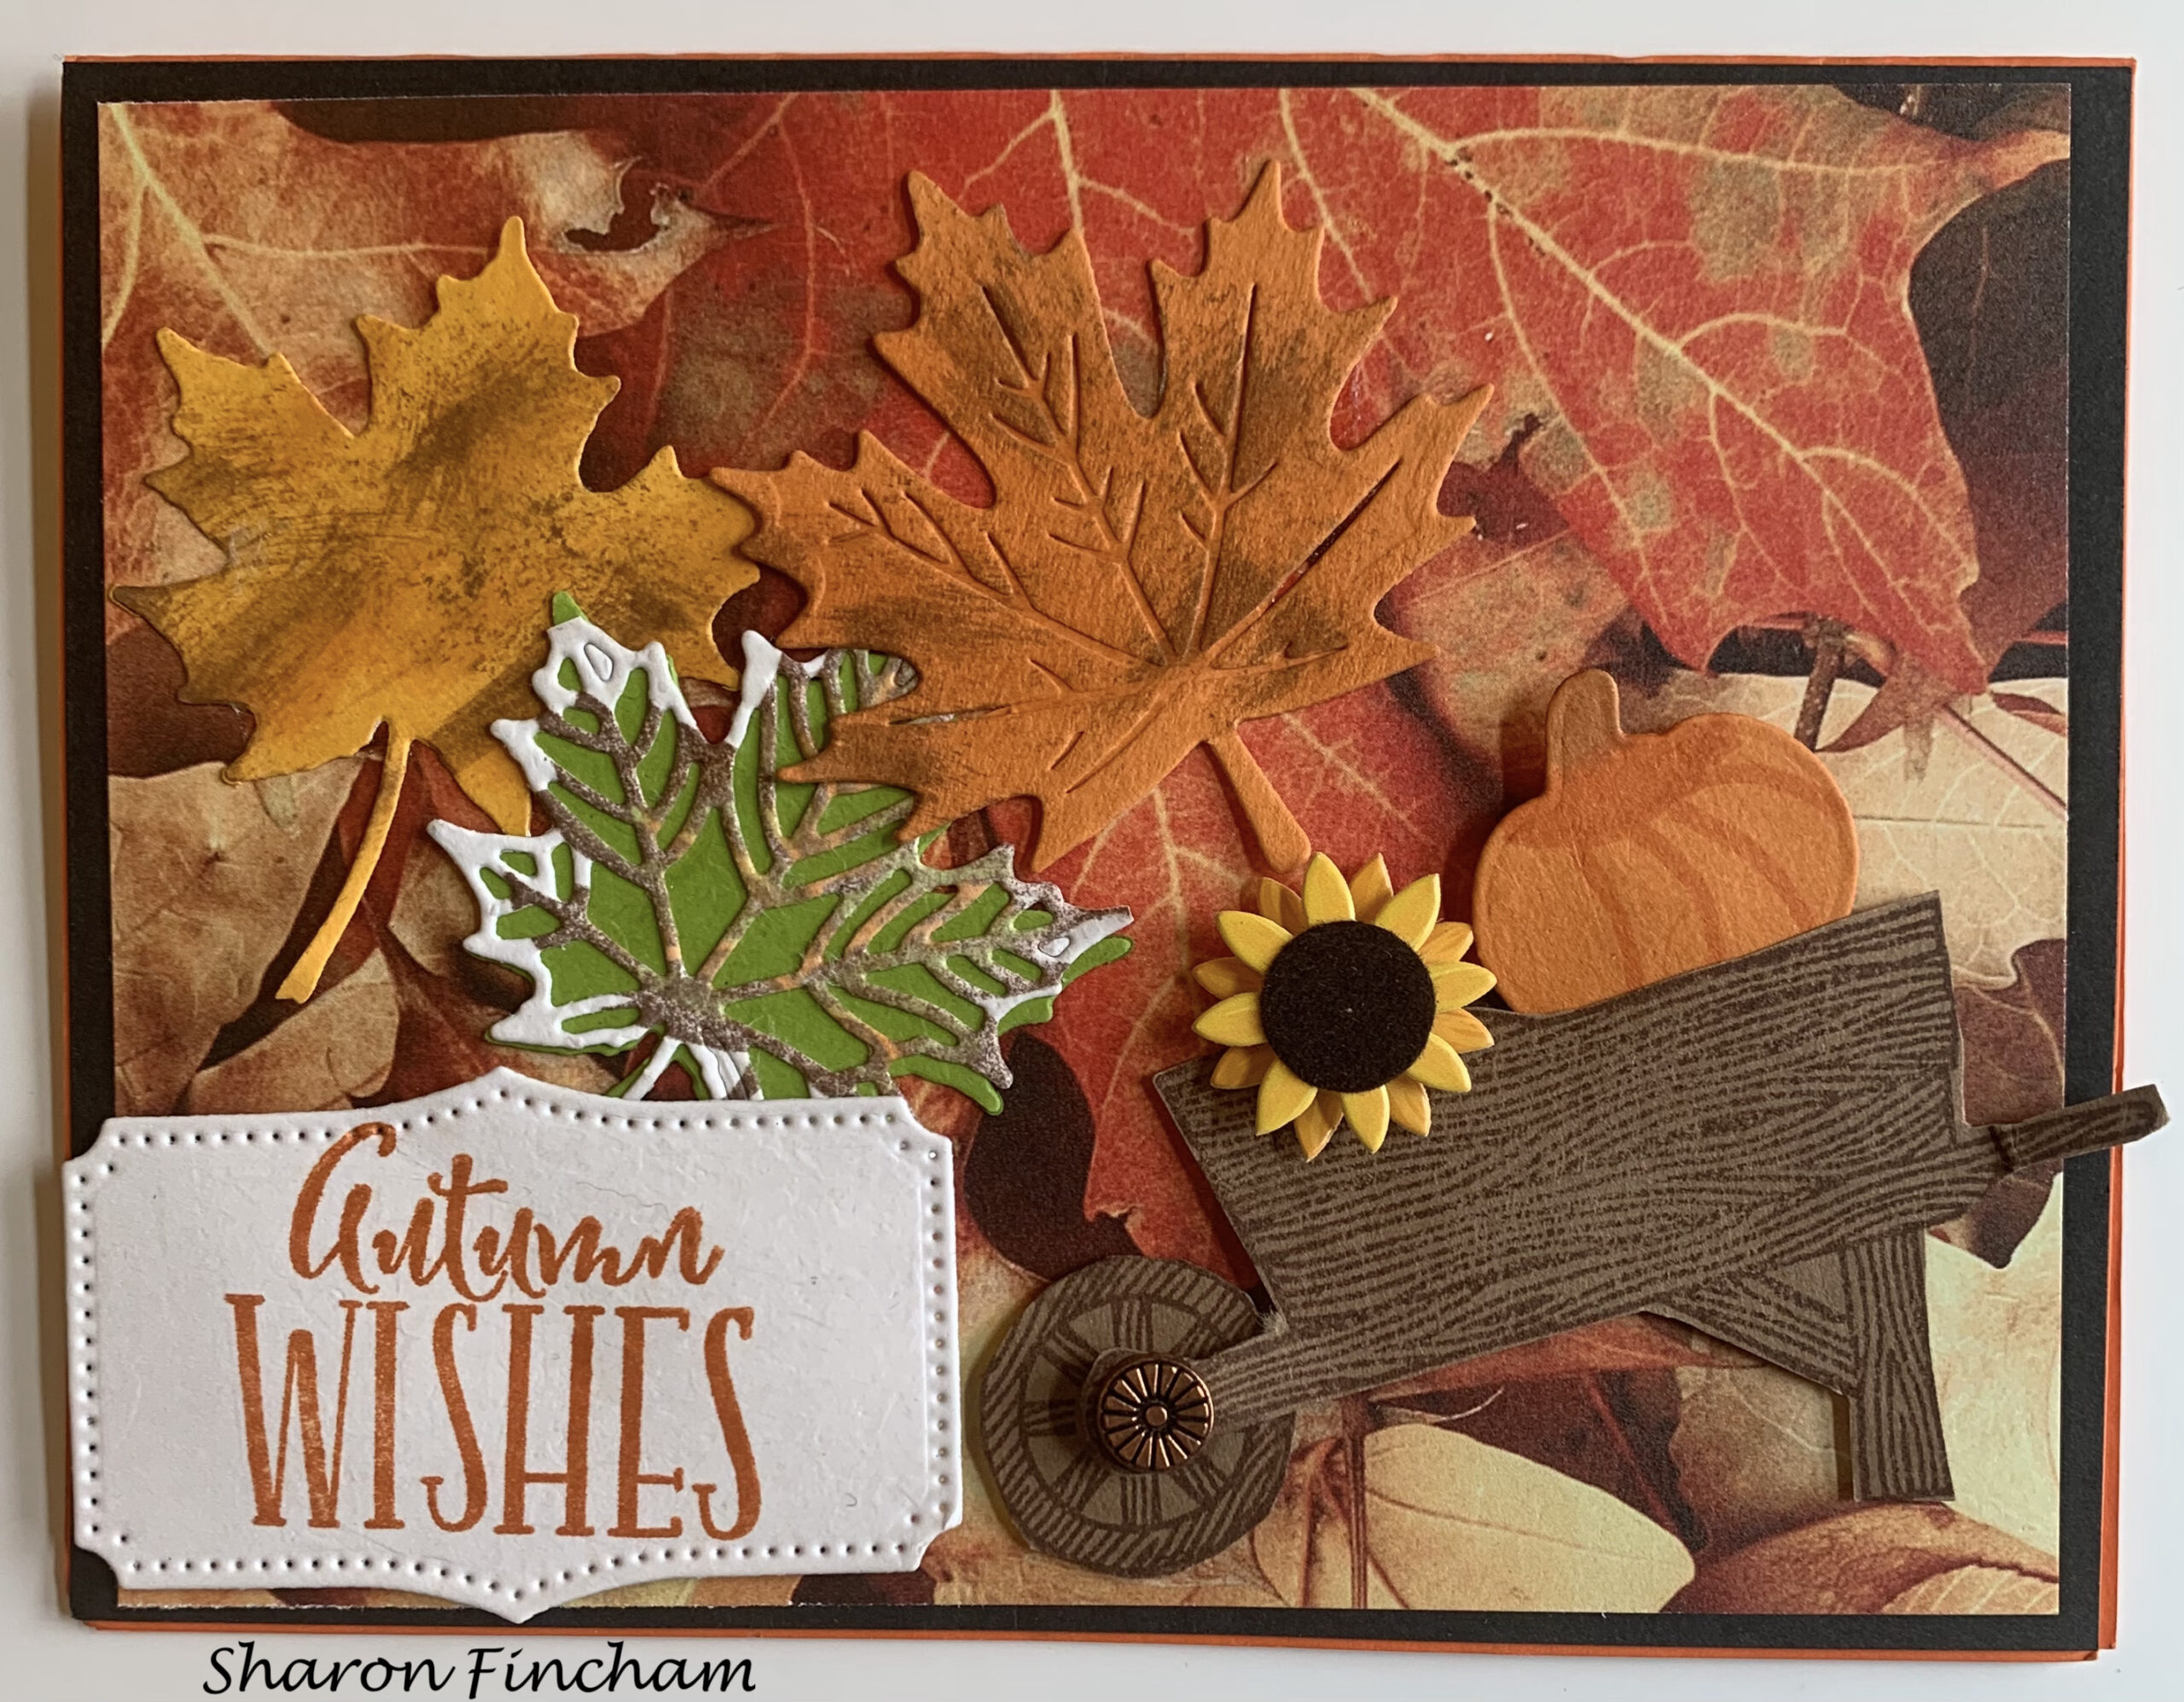
Sharon’s card celebrates the beauty of fall with gorgeous die cut leaves on fall DSP and she used the Autumn Wheelbarrow Dies from last year’s holiday mini, Pierced Blooms Dies, Seasonal Layers Dies, and Autumn Wishes from Close To My Heart.
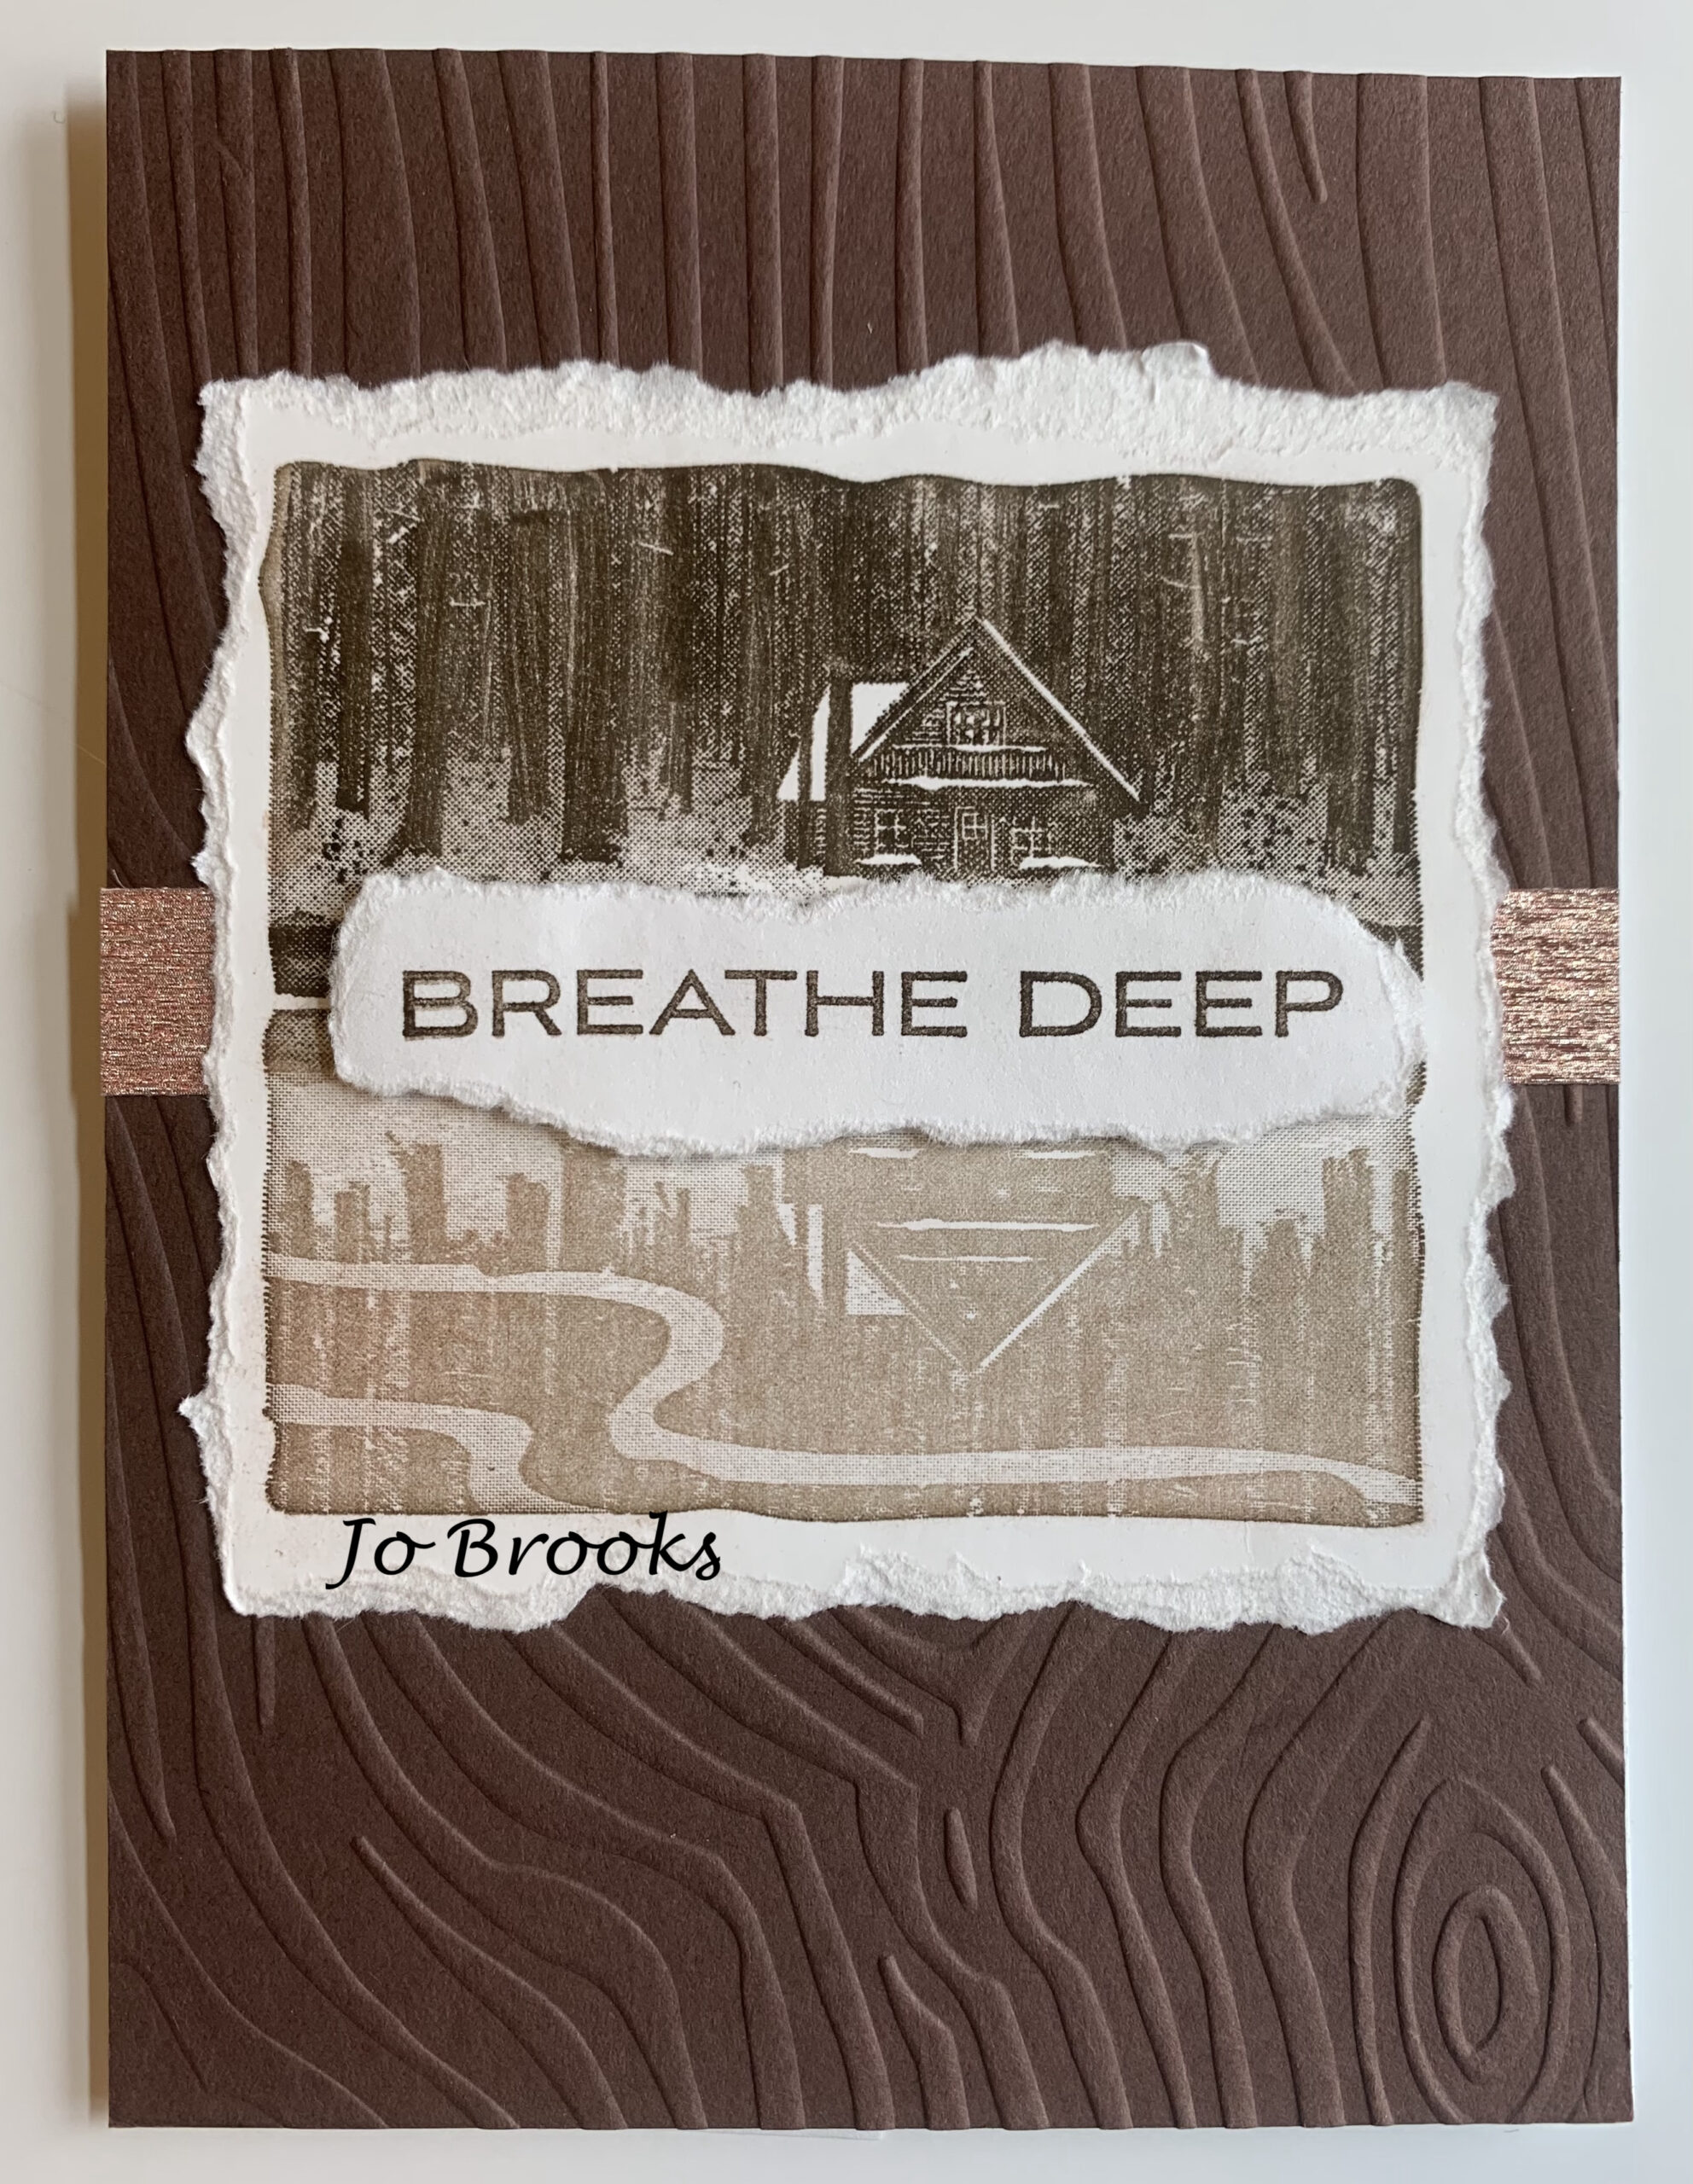
Jo’s Card uses Stampin’ Up! Reflected In Nature stamps on Thick Basic White with a full panel of brown embossed with the Wood Grain embossing folder. The shiny strip is Stampin’ Up! Rose Specialty Paper:
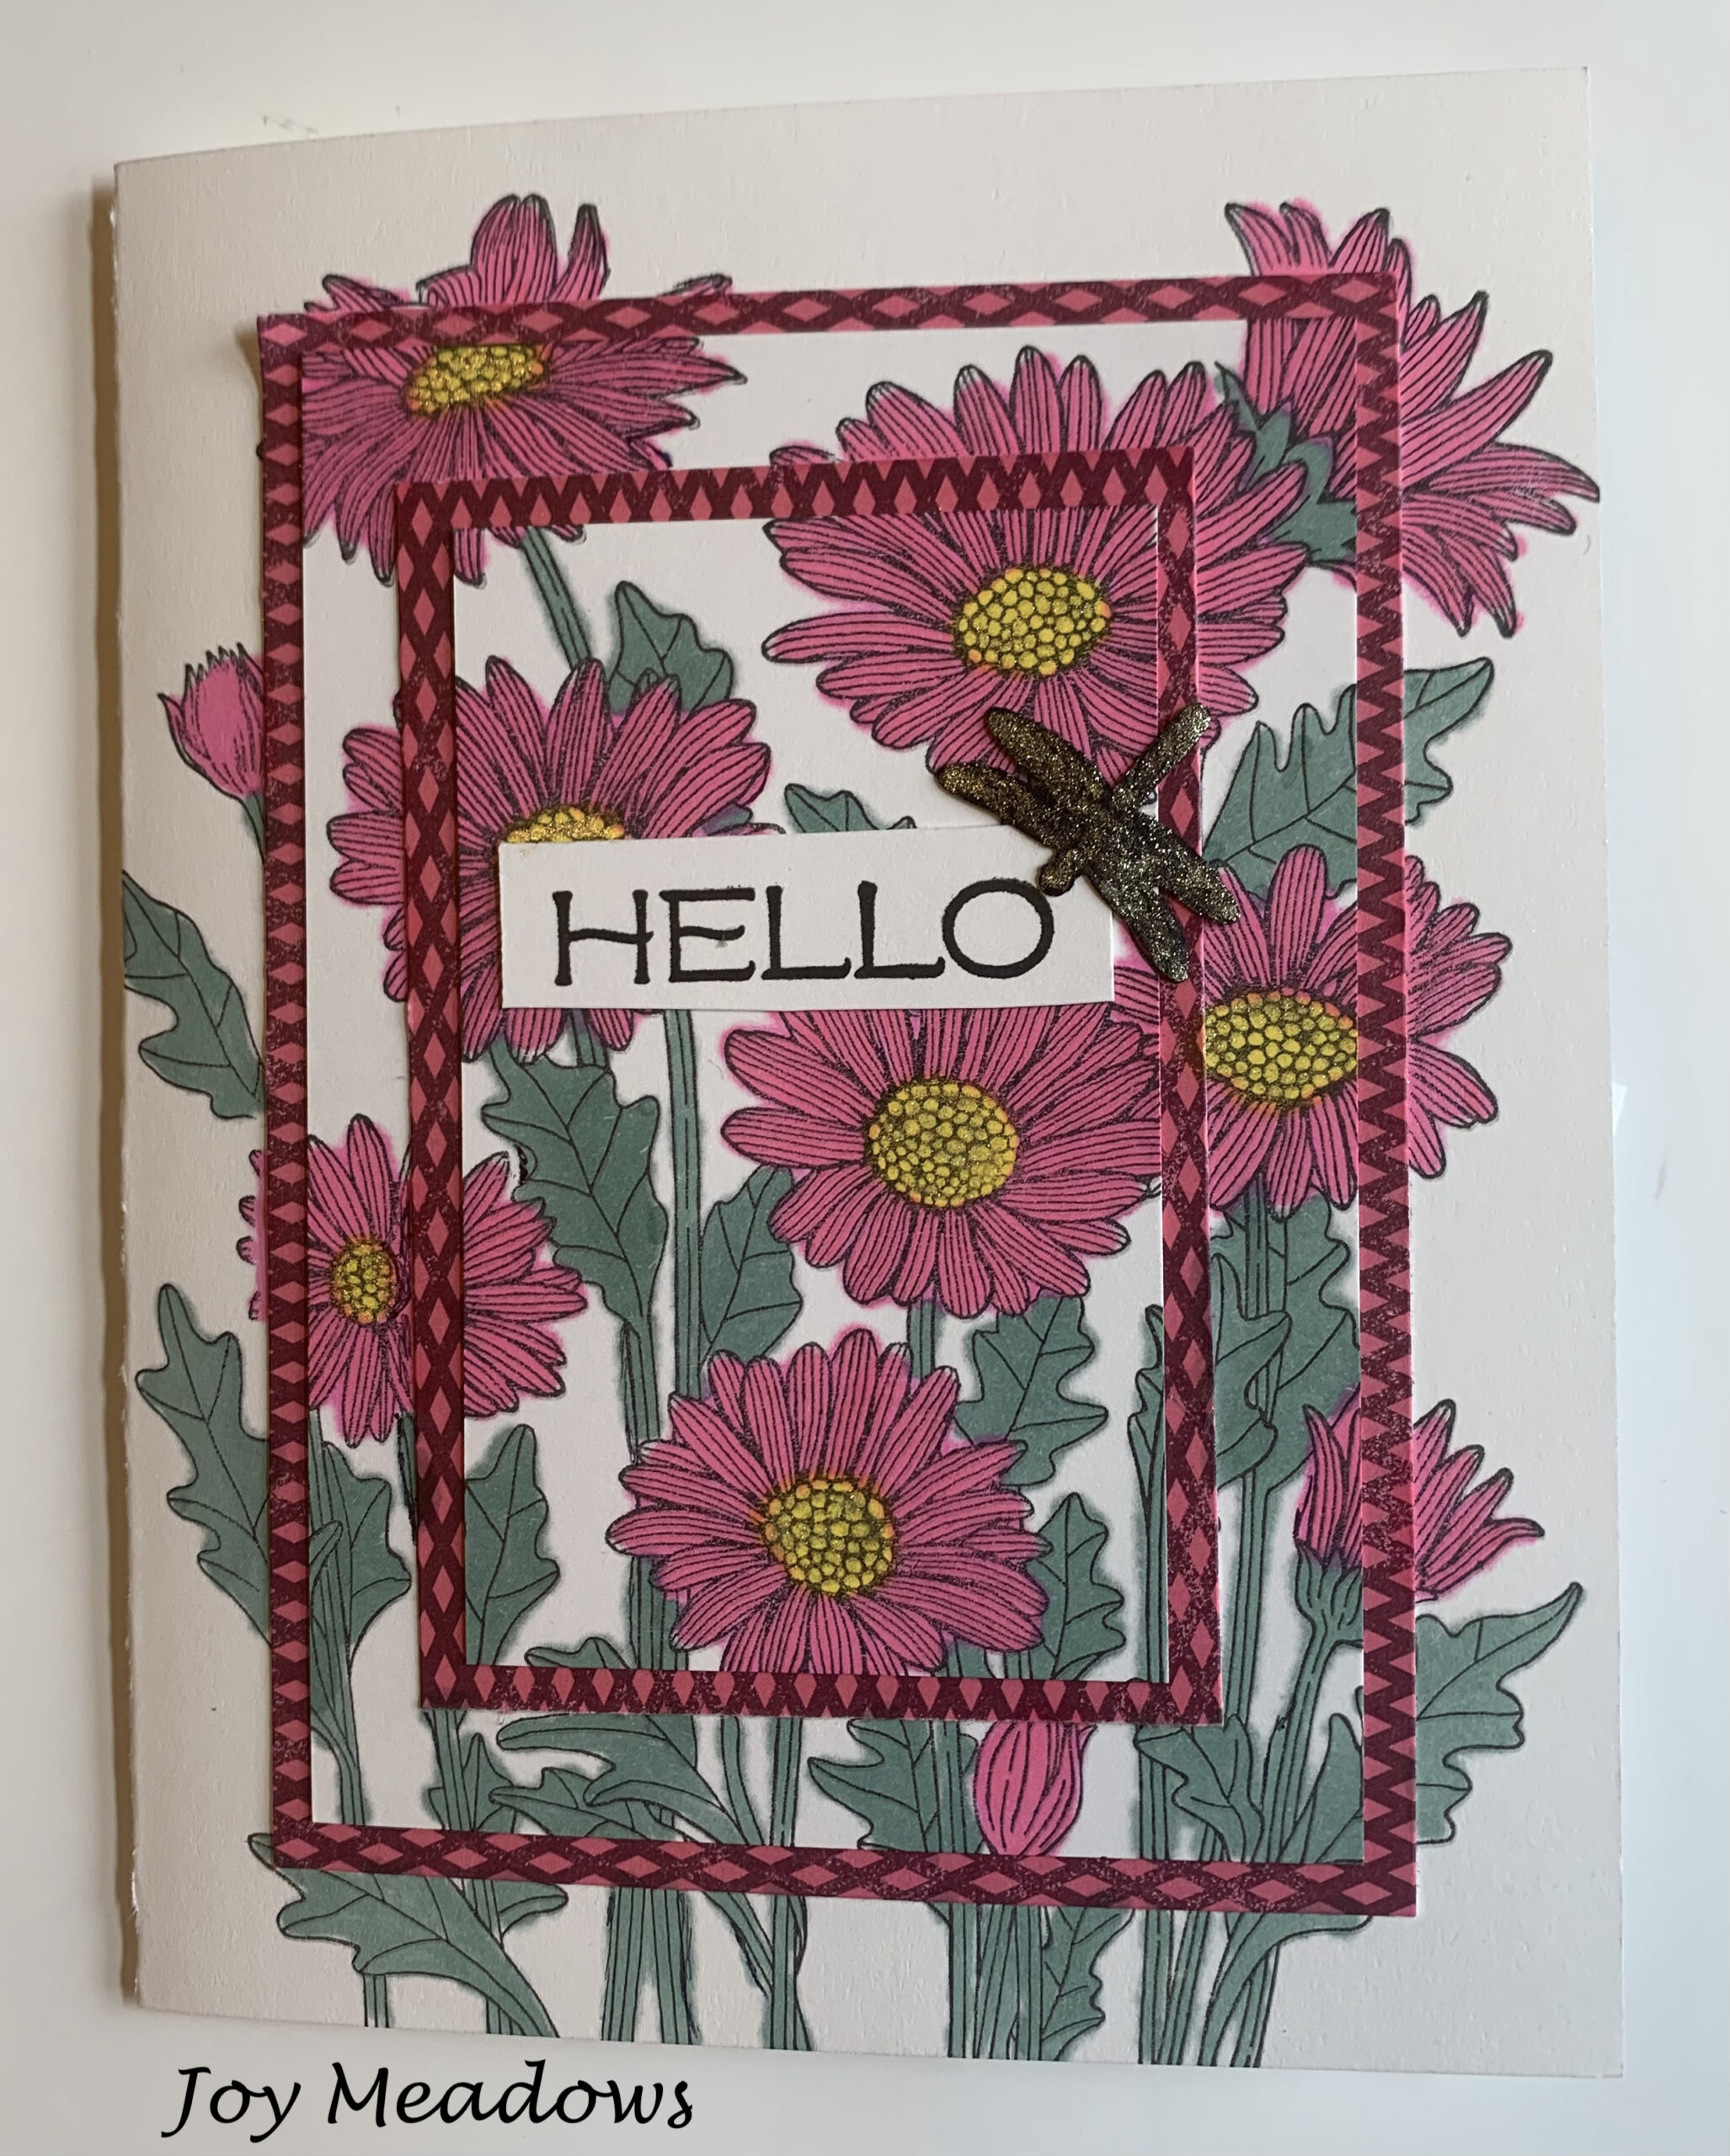
I wish you could see the sparkle on Joy’s card. She used the Triple Time Stamping Technique with the Stampin’ Up! Daisy Garden and Vine Design stamp sets with a border between her layers of Blackberry Beauty DSP. The little dragonfly is punched in black and then sparkled with the gold!
Ann’s card is a fun Halloween card using Pumpkin Pie and Basic Black. She sponged the edge of the Pumpkin Pie with black for a smoky look. She used Stampin’ Up!’s Frightfully Cute stamp set, the Scalloped Contour Dies, the Frightful Tag Dies, the Cute Halloween DSP, and Black Glitter Paper. The star sequins and black and white gingham ribbon are the perfect embellishment!
Your blog is like a virtual scrapbook of cards!
So true! And for you travelers and out of staters who missed the Mystery card, you can still make one and send me the picture and I can add it to the ‘virtual scrapbook’. I think it really helps everyone see the amazing things we can do with a bit of paper, stamps, tools and ink. An added benefit of our card scrapbook is to go back and see a card that we may have already mailed out but now want to make one like it. Well, here is your place to go to see those past cards. My cards are in the recipe box because they are linked to the full directions but you can always do a search by “swaps” and find the others.
And the ‘scrapbook’ brings a pinch of creativity to spice up their crafting worlds!
Mustn’t forget to say that, Sal, so they see where you come in!
SAL, Share A Love
Karen (Click on little Sal in the computer to go to the online store)

‘Sending You Thoughts’ and Kerchief Card Kit
Hello Stamping Friends,
The sun has returned in our beautiful Colorado after a very- windy -snowy- day yesterday! The clouds cleared and it was below zero last night but today looks to be gorgeous. I hope you are getting some sunshine. If not, better double up on those D vitamins! Even our little Ruger seeks out the sunshine!

 What he really wants is a nice long walk outdoors!
That is for sure! If we don’t start walking soon we will both just be waddling!
Let’s move on to the Sale A Bration products I have to show you today. First is the Kerchief Card Kit which many of you earned free with a $50 purchase. It was one of my first selections. The kit has preprinted greetings but you can change them up as I have done here. The kit version without changes is on the left. I turned over the label that was in the kit and stamped it with a greeting from ‘Flourishing Phrases’, sponged the edge with Poppy Parade and added Terracotta Tile Faceted Dots. Aren’t the matching envelopes great?

For the Balmy Blue version I used the same ‘Flourishing Phrases’ greeting, cut a label from the Retired Lily Framelits Dies, sponged the edge in Balmy Blue and added a Noble Peacock Blue Rhinestone. The Pretty Label punch works well for the greeting and is still available.

If you like kits I encourage you to subscribe to Paper Pumpkin. In March we celebrate 7 years of Paper Pumpkin and subscribers will receive a free stamp set in the kit so you will get two stamp sets. Click on the image to go to the Paper Pumpkin site or go to online ordering where you can purchase a prepaid subscription along with other products and get free Sale A Bration products.
 And how far away is spring?
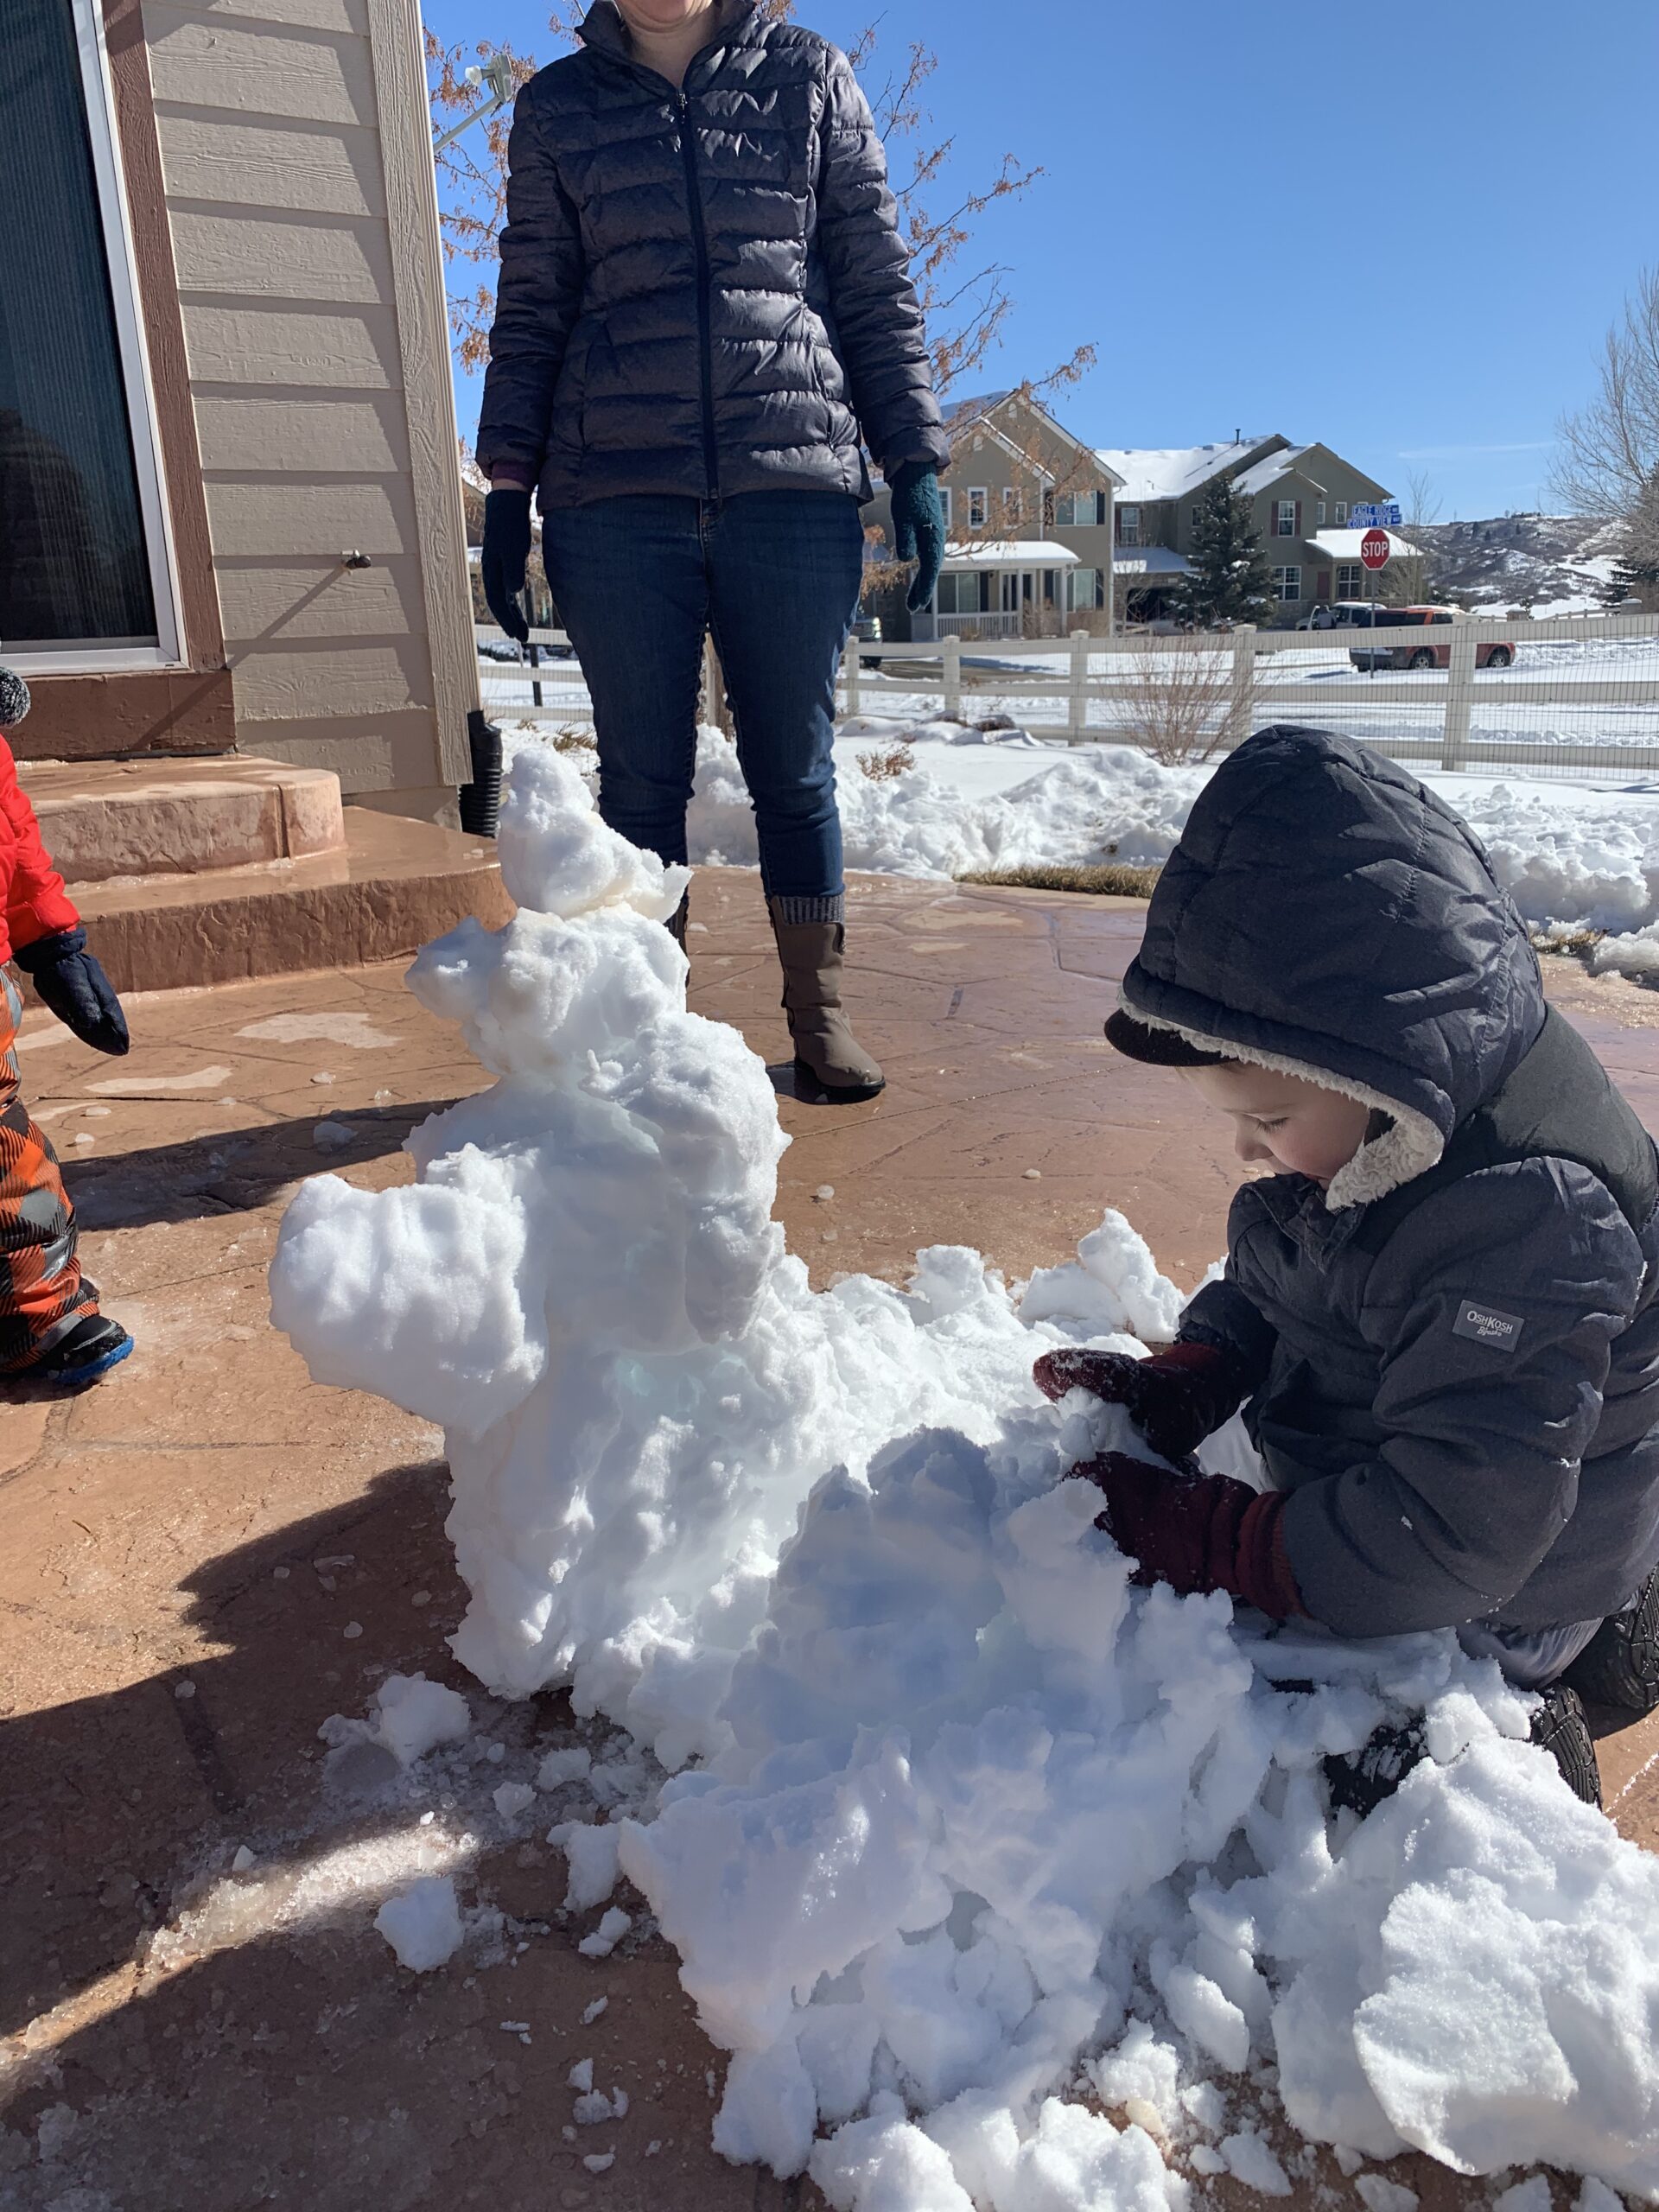
March 20th is the first day of spring, Sal, so 24 days; but remember March is generally one of Colorado’s snowiest months so get ready to build more snowmen. My grandsons were here with Amber and building a snowman:
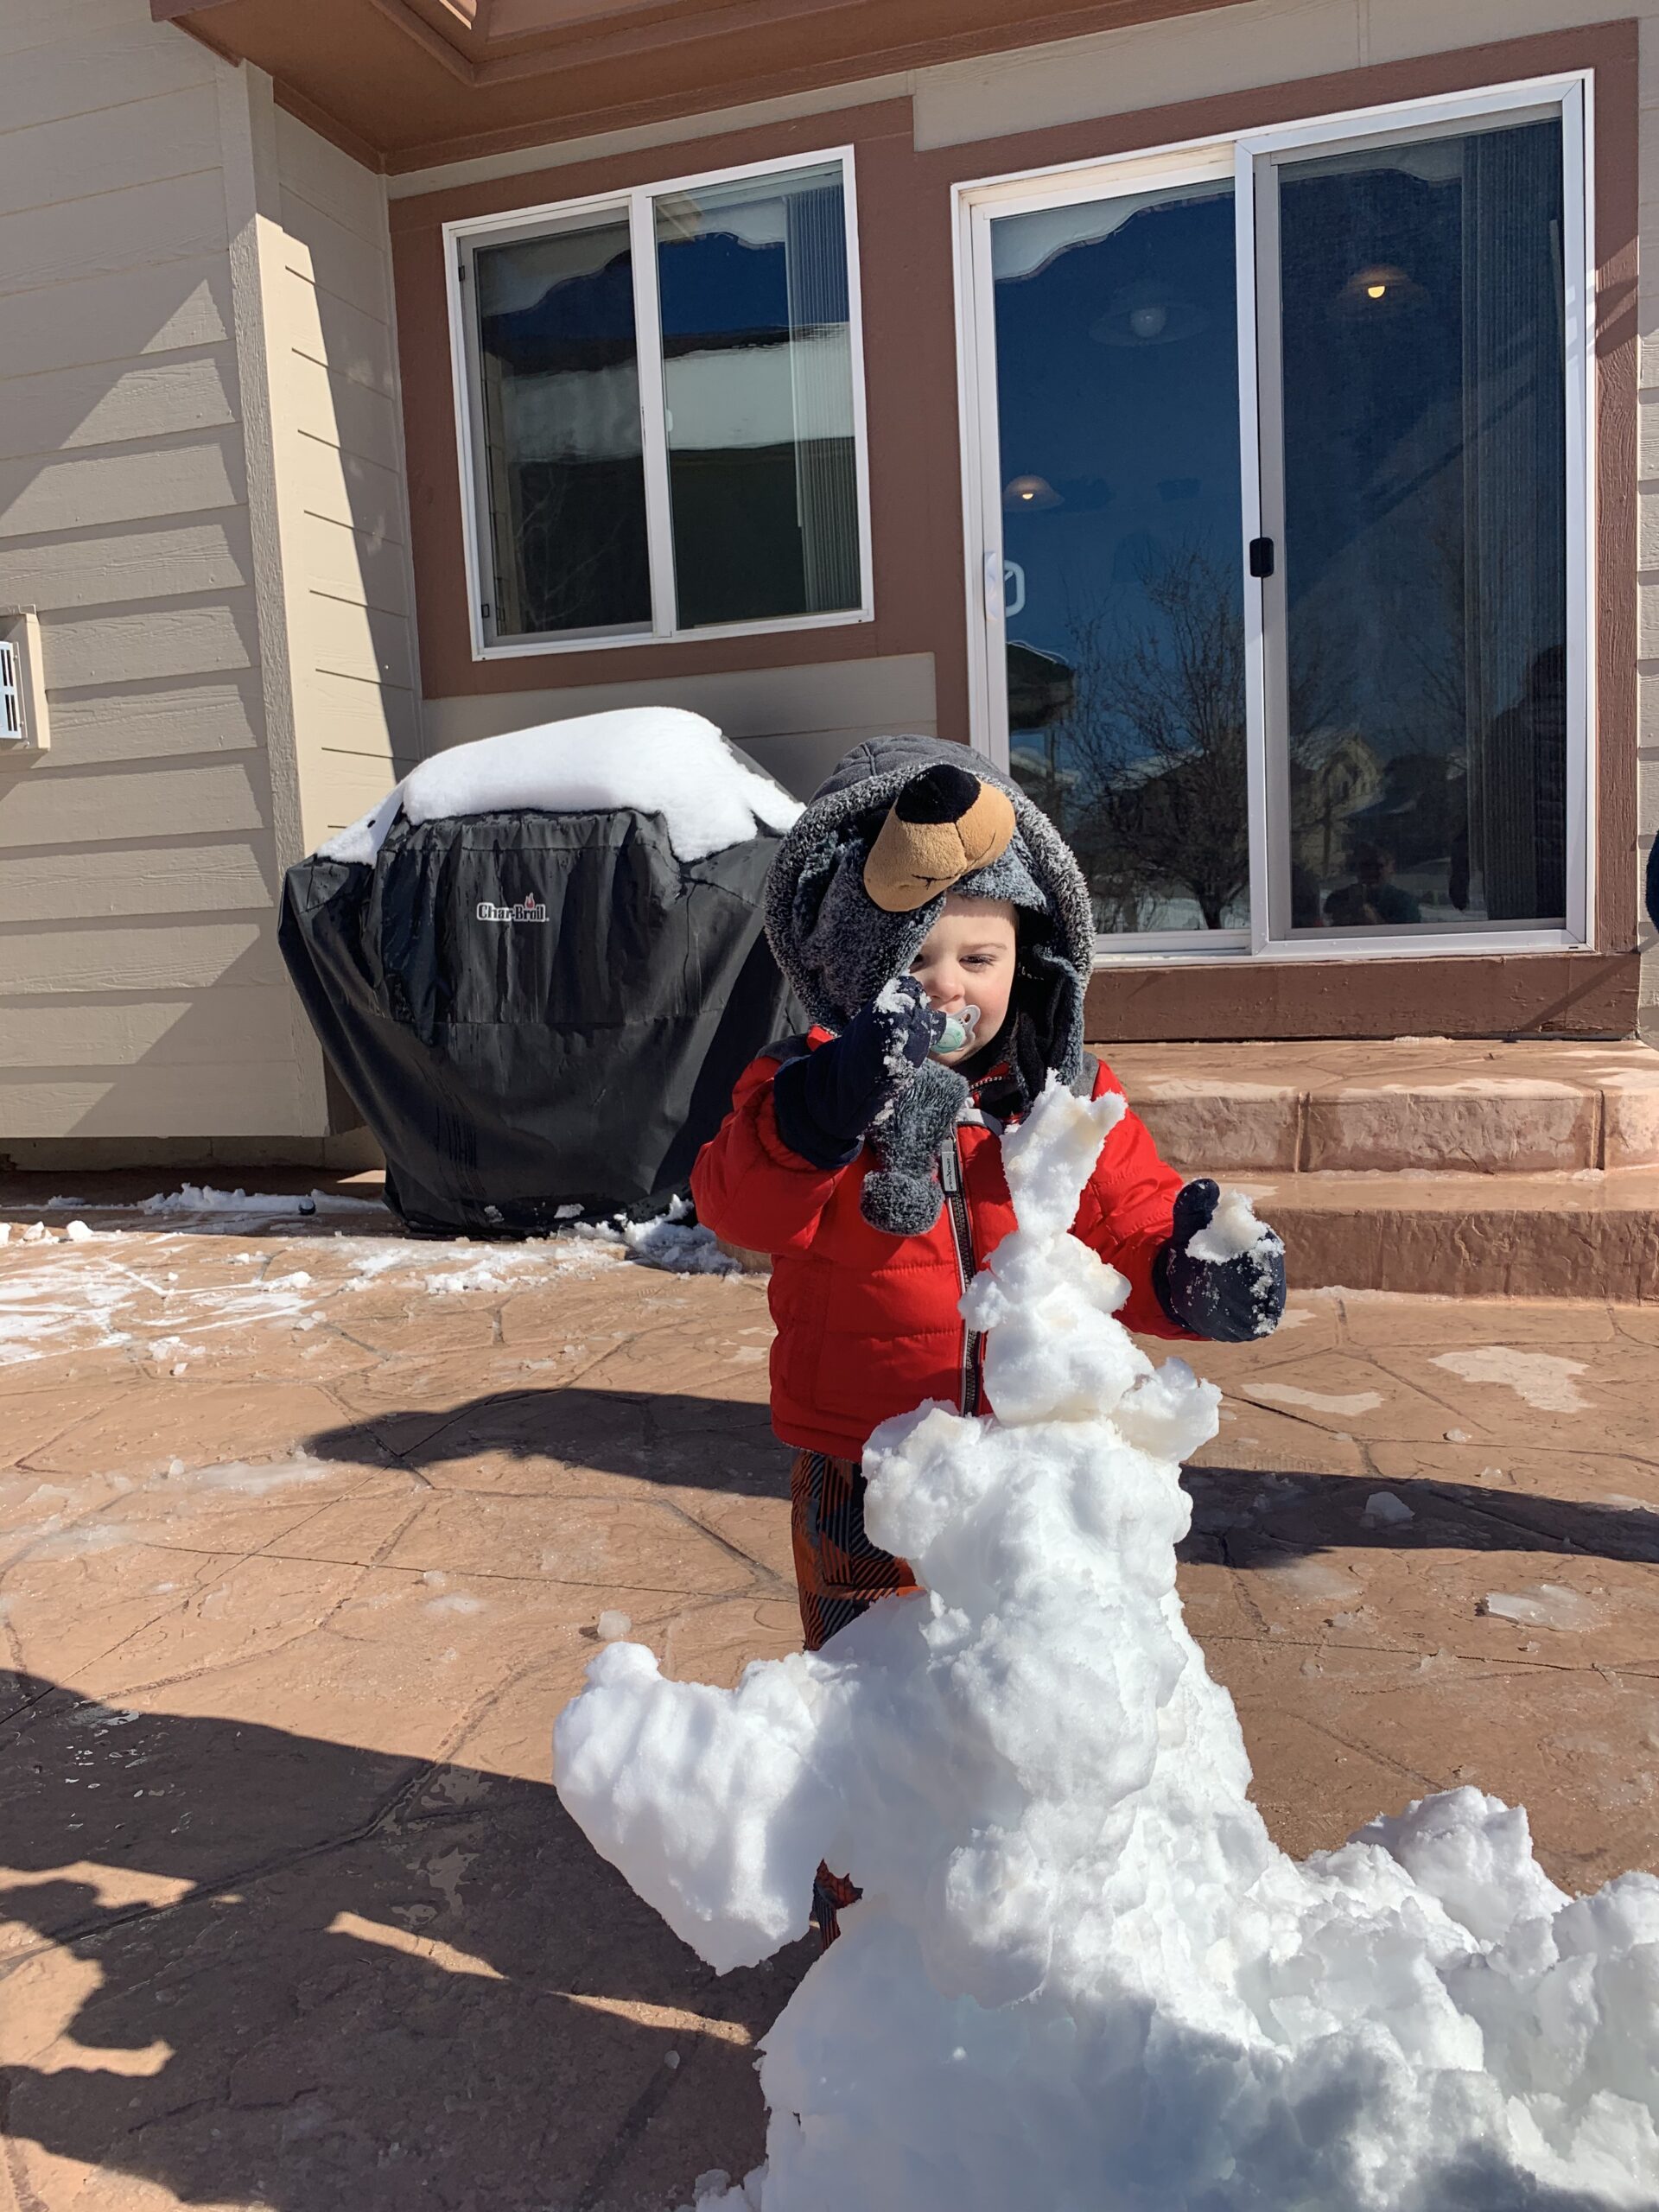
 Grab him quick! He is eating yellow snow!
Too late! Let’s look at the ‘Sending You Thoughts’ set and how I used it to make a get well card and a birthday card. The greeting “Another sensational year of you” is in the ‘Sending You Thoughts’ stamp set. The base is Grapefruit Grove with a layer of Tufted 3D embossing on Whisper White and a bottom layer of Gingham DSP. The flowers and vase are from the ‘Vibrant Vases’ stamp set and stamped on Whisper White then cut with the Pretty Label punch, The edge of the label is sponged and then popped up on a doily. Rhinestones were added to the birthday card and Happiness Blooms Enamel Dots are added to the get well card with a tiny little bow for each from twine.

I am sad to have to send a get well card but delighted with the greetings in this set. Take a look:


- Base – Grapefruit Grove, 5 1/2 X 8 1/2 scored at 4 1/4
- Gingham Layer – Grapefruit Grove Gingham DSP, 1 3/4 X 5 1/4
- Tufted Layer – Whisper White 2 1/4 X 5 1/4 embossed with 3D Embossing Folder
- Inside Layer – Whisper White 5 1/4 X 4
- Strips for under the ribbon and inside – make 3 – 3/4 X 5 1/4 – use the backside for contrast on one
- Pretty Label Punch – Whisper White 3 X 2
Stamp the vase in Memento black ink, mask the vase, then stamp the flowers. Vibrant Vases is a fun stamp set that has two step stamping so you can stamp the main images and then use a second stamp to color each image. I used Grapefruit Grove for the coloring of the vase and flowers and Call Me Clover for the leaves. I sponged a little light grey at the base of the vase with a make up brush, a Q-tip would work nicely, too.
 I wonder what it would look like with lots of different colored flowers and flowery DSP?
Lovely, I am sure, but I generally lean toward the monochromatic look.
Have a blessed day!
SAL, Spring’s A Lurking (just around the corner)
Karen

Get Well Soup, Bohemian Birthday, Bohemian Thank You, Beautiful Birthday, Thank You, Card Box
(Click on the little SAL PAL icon to go to the blog, this is just a post.)
Hello Stamping Friends,
Where did summer go? Paul can’t wait for hunting season and I am already thinking about all those Christmas cards we will make together!
Let me show you what we did at the August card buffet:
Get Well Soup-printable pdf instructions
Card #1: Bohemian Get Well:


Isn’t the Bohemian Designer Series Paper (DSP for short) just beautiful. The first card uses the left over Very Vanilla paper from cutting the oval to make an additional layer. My stampers at the card buffet made that creative change.
How did you make that soup bowl? I am so glad you asked.
 You start by stamping the Very Vanilla layer with the whole image.
Then mask the little heart on the soup bowl with a sticky note and ink up the bowl part of your stamp.
Remove the sticky note! (That was the hardest thing to remember) and then stamp your bowl on the DSP.
 Make a little cut at the right side of the bowl to cut out the soup section.
 When you glue the bowl on top of your full image it will blend perfectly. Be sure and use Tombow liquid glue so you can get it perfectly aligned.
Then color the soup section. I used the fine tip end of my Crushed Curry marker and it gave a nice “soupy” look. For the inside I used a strip of DSP and a stamp from the Thoughts and Prayers stamp set:

Full directions and all the sizing are on the printable pdf file at the top of the first picture.
Envelope Card Box printable pdf instructions
As a thank you gift for attending, each stamper received this Envelope Card Box. Three of the cards at the card buffet used the Bohemian DSP and the card box used the same DSP so the stampers could have a lovely gift for themselves or have a gift to give with matching Get Well, Happy Birthday, and Thank You cards.
 I love the new Lots of Labels Framelits with its straight sides used for the buckle of the belly band, and there are seven sizes so truly LOTS of labels. The greeting is from Watercolor Wings.
Card #2: Bohemian Happy Birthday:
 This was the Happy Birthday with the Bohemian Designer Paper on Blackberry Bliss with the new Boho Chic Embossing Folder. I used a framelit from the Project Life Cards and Labels framelits to punch out the middle of the DSP where I stamped the Happy Birthday from the Birthday Blossoms stamp set.
The Bohemian DSP measures 3 5/8″ X 2 7/8″ and is on a Very Vanilla layer that measures 3 3/4″ X 3″. Not much else tricky on this card. It takes 23″ of twine to go around twice. The embossed layer is the same color as the main card stock and a full size of 5 1/2″ X 4 1/4″. The DSP cut out makes a perfect border for the inside of the card which uses another greeting from the Birthday Blossoms stamp set:
 Card #3: Bohemian Thank You:
 This card comes straight from an example in the catalog. It is white embossing on the DSP with a base card stock of Rich Razzleberry and a Bermuda Bay Banner. The stamp set used is Another Thank You. For the inside, I stayed simple and used a greeting from the Crazy About You stamp set:

Card #4: Sprinkles of Life friend card
I couldn’t wait to play with the Sprinkles of Life stamp set inside the back cover of the catalog. It is this years Make A Difference stamp set. Stampin’ Up! donates $3 to the Ronald McDonald House Charities for each set they sell. But there’s more fun….. they have a punch that goes with the set! It is the Tree Builder Punch and punches out the clouds and tree leaves and the bird and the apple and the tree trunk! Here is my take on the set using Garden Green and Soft Suede:
 Kinda Eclectic is the stamp set with the sunshine and a Work of Art stamp makes quick work of adding green to the bottom. For the inside I broke my own rule and used a retired set from Sale A Bration called See Ya Later, it was just sooooo perfect for the card…..
 Nothing much you need help with on this card. The stamp sets do it all and the layers are the standard. What? You don’t have my Standard Layers worksheet? Let’s fix that:
Standard Layers-printable pdf file
Card #5: A Whole Lot of Lovely Thank You Card:
 This uses a hostess stamp set so now you really do want to have a party and earn this set – right?
There are only a couple tricky things to know on this card. The banner is the #4 banner framelit. Cut two of the same color and then cut 1/8″ off the top and the sides for a nice layered look. I used Versa Mark to add flowers to the top banner, glued it to the larger banner and then cut it in half, moved the halves 3/4″ apart, and glued the circle on top to lengthen the banner. You could also cut the paper exactly the width of the framelit, 1 7/8 “, and then run the banners only part way through the Big Shot to just cut the edges. We will do that with the next card but since this was behind a nice big circle I took the easy way. The stamped (colored with markers) Thank You is cut out with the Circle Framelit # 5 and the black border is punched with the 2 1/2 ” circle punch. This card was on Pinterest with Watermelon Wonder and Mint Macaron and looked great. This card uses Calypso Coral and last years In Color of Coastal Cabana. The inside used the same hostess stamp set:

Card #6: Birthday Blossoms:
 Hard as I tried to adjust the color this card looks blue but it is really a beautiful purple -Wisteria Wonder. It is also an example straight from the catalog with just a different card base and different ribbon and different twine. Okay, so it started out with an example from the catalog.
The tricky part is making the top layer longer than the largest framelit – easy peasy – if you remember to go through the Big Shot only part way to cut just the lovely curves and then back it out. You start with a Whisper White strip 2 13/16″ X 5 1/4″ to run just part way through the Big Shot using the largest of the new Lots of Labels framelits #7. The straight edges of this new set of framelits are perfect for adding ribbon. I put a strip of sticky tape on the back of each side of the label and used 4 1/2 ” White Organza ribbon which I trimmed after adhering. 12″ of Baker’s Twine gathered the ribbon nicely on the sides for a unique look. The stamps are all from the Birthday Blossoms stamp set, (we used two word stamps from that set on the Bohemian Happy Birthday) and the set is made for the pansy punch so no fussy cutting!

I won’t overwhelm you (or me) by listing every single item used in the six cards and the envelope box but please call or email me if there is something you can’t figure out. I would be glad to help, and if you don’t have a demonstrator I would love to earn your business!
As Always, SAL Stamp A Lot, Smile A Little, Share A Love
(and always be Salt And Light in your world!)
Karen

Welcome to my blog!

Sal Window to Products


