
Home » Congratulations
Category Archives: Congratulations
Graduation Card to celebrate Joshua
Congratulations to our grandson, Joshua Decker, on his High School Graduation!


 .
.
 .
.  .
.  .
.  .
. We are so proud of Joshua!
For his card, I used the colors on the graduation announcement to make the front of the card. There was just a touch of green on the Eaton Eagle so I bordered the circle with a little green. The banner is silver but to get the stamped images on the sides to show in the picture I had to turn it a bit sideways and the banner looks gold!
Recipe for Joshua’s graduation card:
The card uses several stamp sets:
- Clearly Whimsy Stamps Collection – Graduation- DA1173
- You Did It on the circle
- Diploma on the left
- Inside (one stamp)
- Vertical Greetings for Congrats on right side
- Reflected In Nature for the Eagle on the top left
- Day By Day Numbers for the 2023 on the bottom right
- Make A Difference for Joshua’s name
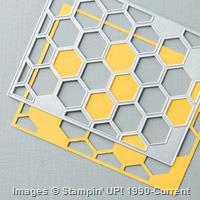
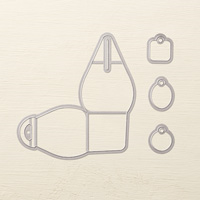
Heather taught us how to use the Tailored Tag Punch to make the graduation cap (mortarboard cap) by punching once and then hold the punched image with a sticky note and punch a second time. Punch just the side of the punch for the base of the cap.
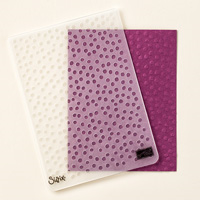
The circles are made with dies from the retired circle set with the 5th largest die in Granny Apple Green and the 4th largest die in Basic White embossed with the confetti embossing folder.
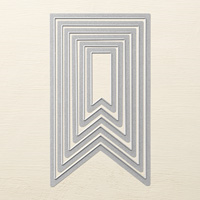
The Banner Die is the 5th in the retired banner die set.
- Base: Thick Basic White, 5 1/2 X 8 1/2, scored at 4 1/4
- Layer 1 (X2): Night of Navy, 4 X 5 1/4
- Banner: Silver Foil, 2 1/2 X 4 1/4 die cut then embossed with the Star embossing folder
- Granny Apple Green: Die cut for a border with 5th largest circle
- Basic White: 3 3/4 X 5, die cut with 4th largest circle and emboss with confetti embossing folder
- Cap: Black Foil, 2 X 3, cut with Tailored Tag Punch
- Inside Layer: Basic White, 3 3/4 X 5, stamp and color
- Embellishments: Navy Twine made into a tassel secured with a black brad, 3 Swarovski crystals
 Did you use Copic markers to color the inside?
Yes, Sal, but I failed to write down which colors I used. Next time.
The design inspiration comes from the card Heather Guitreau made at our shoebox event:
 .
.  .
.
Lovely cards, Heather!
Thank you for stopping by my blog for…
A pinch of creativity to spice up your crafting world!
Karen
Sending Smiles, Blossoming Happiness and New Horizons
Click a second time on the header to go to the blog.
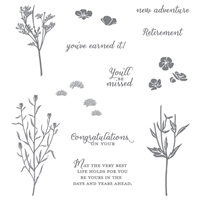
The Tea Boutique Cards & Envelopes in the annual catalog use all five of the new In Colors with cards and matching envelopes. I challenged myself to make a card that matched the envelope!
 .
.


I chose the smaller of the flowers in the Blessings of Home stamp set and the long stem flower and greenery from the Sending Smiles stamp set cut out with the Sending Dies which even have a die for that itty bitty flower. The envelope has a Starry Sky little flower on the flap so I replicated that look. The Flowers of Home Dies cut out the flower image and the die set has many other images to add greenery!
Recipe for Sending Smiles Tea Boutique Cards
- Base: Tea Boutique Card in Orchid Oasis, Measures 8 1/2 X 5 1/2 folded at 4 1/4
- Layer 1: Basic White, 3 3/4 X 5
- Layer 2: In Color Designer Series Paper in plaid, 3 5/8 X 4 7/8
- Top for die cut pieces: Basic White, 6 X 4 1/2
- stamp smaller flower in Blessings of Home stamp set with Orchid Oasis ink, color with Stampin’ Blends- Lt Fresh Freesia, Lt Granny Apple Green, Lt Call Me Clover and use a Blender pen & Orchid Oasis ink
- stamp in Fresh Freesia ink 2 long stem flowers from Sending Smiles stamp set (outside & inside flower) and use the blender pen and Orchid Oasis ink to add color on the flowers
- stamp one green leaf for outside in Granny Apple Green and one double green leaf for inside, die cut
- Cut ‘sending’ background from the Basic White
- Stamp ‘Love & Big Hugs’ in Orchid Oasis and cut with die in Sending Dies, cut off right edge even with the DSP layer and leave a little on the left edge for a gem when you line up the greeting die
- ‘Sending’ Top Layer: Use the In Color Designer Series Paper left over from layer 2, 1 5/8 X 3 5/8, and add backing of double back adhesive paper 1 1/2 X 3 1/2
- You should have enough of the In Color Designer Series Paper to make two 1 1/8 X 1 1/8 squares to cut diagonally for inside corners
- Greeting on inside of second picture: Basic White, 3 X 3 , Flowering Tulips stamp set, stamped in Starry Sky and cut with a retired Hippo & Friends Die
- Greeting Layer: Starry Sky, 3 X 3, die cut with retired Hippo & Friends Die, cut in half and glue to back of greeting
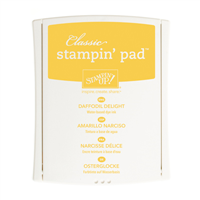
- Little Flowers (X2): Starry Sky, 1 X 1, die cut with Sending Dies and glue on a scrap of Daffodil Delight
- Embellishments: 5 In Color jewels, 4″ of Fresh Freesia ribbon tied in a knot
The top pieces are all adhered with Stampin’ Dimensionals, inside corners and flowers are glued directly down.
 I remember you used the Parakeet Party and the Tranquil Tide Cards and Envelopes for the catalog launch and now you have used the Orchid Oasis. What are you going to do with the Starry Sky and Sweet Sorbet?

The Tea Boutique Cards & Envelopes have 20 bases with matching envelopes so I have some left of all the colors. (Click for Catalog Launch details). I would love to do more of what I have done here in all the colors!
Recipe for Blossoming Happiness Card
 .
.  .
.
The front of this card is from a kit sent to me when I played Bunco online with Debra Harrison at Simply Sweet In Ink Designs. I created the inside using matching Hues of Happiness DSP and Blossoming Happiness Dies.
Base: Thick Basic White, 4 1/4 X 11, scored at 5 1/2
Layer 1: Hues of Happiness DSP, 4 X 5 1/4
Top Layer: Basic White, 4 X 4, Die cut with large Blossoming Happiness Die; Stamp sentiment from Pansy Patch stamp set in Granny Apple Green in upper right of die cut piece
Flower & 2 sets of Leaves: Hues of Happiness DSP die cut with Blossoming Happiness Dies.
Inside Layer: Hues of Happiness DSP with center cut out using retired Ornate Layers Die and stamped in Melon Mambo using the Limited Edition stamp set.
Recipe for New Horizons Card
 .
.  .
.
Base: Misty Moonlight, 8 1/2 X 5 1/2, Scored at 4 1/4
Layer 1 (X2): Soft Succulent, 5 3/8 X 4 1/8
Top Layer: New Horizons DSP, 5 1/4 X 4, and 5 1/4 by 2; I wanted the lake in the middle so I cut 3/4″ off the top of the 6″ DSP, then cut the 6″ width into two pieces – 4″ wide with the remaining 2″ wide for inside
Use the Oceanfront stamp set for grass in Evening Evergreen and Boulders in Basic Gray. Note: Stamp the boulders first, mask them, and then stamp the grass
On the Horizon stamp set is used for the birds but stamp lightly or they become blobs -practice makes perfect!
Horizon Dies are used for the fence with a scrap of Basic White and the grass with a scrap of soft succulent.
Thank you for your order is the retired You Always Deliver stamp set.
Embellishments are the retired Pebbles Enamel Shapes.
I hope I have brought you a “pinch of creativity to spice up your crafting world!”
Have a wonderful day!
SAL, Sending A Lovely set of cards to inspire you
Karen (click on little Sal in the computer to go to my online store)

Peek A Boo Card and Open Book Easel Card
Hello Stamping Friends,
Let’s look at this month’s club cards for those who have kits and need the instructions or those who want to recreate cards like them!
Peek A Boo Card

Here is the Youtube video: (Did you know you can go to the settings and increase the speed?)

Thanks to Dawn Griffith for these dimensions.
- Base: Basic White, 4 1/4 X 8 1/2 scored at 4 1/4
- Using the 2nd Largest Oval in the Stitched Shapes Framelits, fold the Basic White and cut ovals on the right hand side through both front and back. My ovals are 1/2″ down from the top to the top edge of the framelit, 3/4″ up from the bottom to the bottom edge of framelit and 2 1/4″ from the right side of the Basic White to the left hand side of the framelit.
- Front: Hydrangea Hill Designer Series Paper (DSP), 4 1/4 X 5 1/2
- Inside: Hydrangea Hill DSP, 4 1/4 X 4 1/4 (minus a hair on the horizontal side to take into account the score line)
- Using your Oval Framelit and a sticky note to hold the DSP in place on the Basic White, cut an oval in the front DSP and another oval on the inside DSP. SAVE the cutout from the inside to glue on the mechanism.
- Mechanism A: Highland Heather, 4 1/4 X 5 3/4, scored on the long side at 5 1/2
- Mechanism B: Highland Heather, 4 1/4 X 3, scored on the short side at 2 3/4
- Fold and burnish well the 1/2″ tabs on mechanisms A & B. Attach A to the left side of the front DSP with the tab to the inside and attach B to the inside DSP on the right hand side with the tab hidden on the inside. Note: I used tear and tape and rolled the tiny bit of excess tape back onto itself to prevent any glue from catching on the mechanism.
- Use a pencil to outline the oval on the Highland Heather and stamp your front greeting. I used Blackberry Bliss to give a darker purple color and the friendship greeting in ‘Grace’s Garden’ stamp set.
- Stamp the greeting on the oval cutout for the inside; I used the friend greeting from ‘Heartfelt’
- After attaching the mechanisms, glue your inside DSP to the Basic White and then the front DSP to the Basic White. Note: put the glue on the white not the front DSP because that piece is larger than the Basic White. The small mechanism should go into the middle with the large mechanism at the back.
- Use your pencil again to draw the oval for the inside on the mechanism that peeks in when you open the card. Glue the oval cut out in place
- Embellish with a little piece of ‘Gorgeous Grape Ribbon’ 2 X 1 1/2, two blackberry bliss punched butterflies, 3 pastel pearls and 1 butterfly gem (can you find it hiding on the left hand side?)
Open Book Easel Card
I was so delighted with how this card turned out and patting myself on the back but then had a humbling experience as I tried to do the Facebook Live and the sound echoed and the lighting didn’t work…… The silver lining to the mishaps was that I went to Youtube and learned how to edit a Youtube video so I could cut out the first eight minutes of echoing to make it a little easier for you to endure. Unfortunately, I couldn’t fix the lighting so it still has a bit of a glare – so sorry for that less than professional presentation. If you viewed the first video you see I had both lighting and sound corrected. I made better notes for set up next time.


Thank you to Tina Zinck of the Serene Stamper for teaching me how to make an Open Book Easel Card.
- Base: Misty Moonlight, 5 1/2 X 8 1/2 scored at 2 1/8 and 4 1/4. Fold in half and then Z fold the 2 1/8″ score line
- Bottom Layer at top of easel and the layer at the base of easel (X2): Brass Foil in the ‘World of Good’ DSP, 5 1/8 X 1 7/8, watch the direction of the words as you glue the pieces to the base
- Easel Stand: Misty Moonlight, 5 1/8 X 7/8 and a DSP strip of compasses, 4 7/8 X 5/8; Note the Misty Moonlight has no border but the compasses DSP does have a border
- Globe and Stand: Misty Moonlight, 2 1/4 X 2 1/4, Die cut circle with the circle in the World Map Dies, Use Brass Foil 2 1/4 X 3 1/4 to die cut the globe and the stand
- Book Layers:
- Cinnamon Cider: 5 1/8 X 3 7/8; score at 2 9/16 – one 16th mark past the half mark
- Designer Series Paper: (Beige with words) 4 7/8 X 3 5/8; score at 2 7/16, one 16th mark less than the half mark
- Cinnamon Cider: 4 5/8 X 3 3/8; score at 2 5/16, one 16th mark past the quarter mark
- Designer Series Paper: (Map) 4 3/8 X 3 1/8; score at 2 3/16, one 16th mark less than the quarter mark
- Banner: Cinnamon Cider, 1 X 3, Stamp with Memento Black and embellish with the Antiqued Corners
Curl each of your book layers. Break the fibers with the bone folder then wrap around the Take A Pick tool.
Place Tear and Tape on the middle of each book layer, burnish well, attach to its layer. Note: fold the layer in half to place so you can get it right on the score line of the next layer down.
Place glue dots on the edge of each layer and push the layer in toward the middle to maintain the curl before you push down on the glue dots. Hint: Use less curl if you are mailing and a little more if you are hand delivering.
Place Tear and Tape on the easel top base at 1/16 down from top and over 1/16 on the right and the same on the left and all the way down on the top easel layer to mount the book to your easel base. Mount your book recurling that last layer if needed.
Use glue dots to mount the globe to the bottom of the top page of the book checking placement so that the globe fits correctly on the base.
Stamp your greeting on the Cinnamon Cider strip, embellish with the antique corners and mount with glue dots.
I used white embossing and “Congratulations on this new beginning” on the inside.
That, my friends, is the second of our two club cards for April. May is the catalog launch and then we start a new club rotation in June so contact me if you are interested and I will answer any questions you may have. Text 303-815-0838.
Remember: the World of Good Suite and all its individual products (page 24-26 of the Annual Catalog) are retiring and most have a huge discount right now so head to the online store to purchase them. The Butterfly punch I used on the first card is also retiring (Butterfly Duet, pg. 165) and it is great for quick embellishments in the color of your choice. Butterflies are always good for those times when we get a shadow or smudge on our artwork!
Have a wonderful day!
SAL, Share A Love of stamping

Music From The Heart
Today I am sharing three cards with several of my favorites:
First Card with my favorite- Music From The Heart:

Dawn Olchefske achieved one million dollars in sales and designed this stamp set as one of her many rewards!
 When you reach one million will you design a set with me?
Of course if Toons4Biz will allow it.


This is Whisper White with a white background and natural light just like I researched would be best for picture taking and now I have a bluish white instead of yellow.
Better go back to the Youtube videos on that one.
Sigh….
The hearts have Wink of Stella to add some sparkle. I felt like Cinderella with the birds making the bow.
Recipe:
Base: Basic Black 5 1/2 X 8 1/2 Scored at 4 1/4
Top: Make 2 – 5 7/16 X 4 3/16 I know, crazy, but I wanted just a little black. Go to the 5 1/2 mark and move back 1/16 to get 5 7/16. For 4 3/16, go to 4 1/4 and move back 1/16. That is easier than counting 16ths.
Piano: Whisper White 2 1/8 X 2 3/4
Two Keyboard Pieces to layer at the bottom: 3 X 2 1/4, stamp twice and fussy cut. Adhere to bottom and then fussy cut around the bottom inside and out.
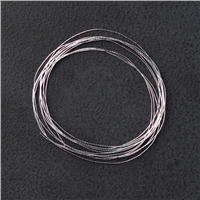
6 ” of twine
To cut your white top piece:
- place a pencil mark from the top right corner over 3/4″ and from the corner down 2 1/4″
- place two pencil marks from the bottom left corner up 1/4″ and up 1/2″
- cut diagonally from the 1/4″ mark at the bottom to the 2 1/4″ mark at the top right
- cut diagonally from the 1/2″ mark at the bottom to the 3/4″ mark at the top right
- shave off 1/16″ on each side of the middle piece
Okay, let me grab the sketch book.

Once they are cut remember to cut off just 1/16″ from each side of the middle piece so you have the black showing.
Second Card with two Favorites: Beautiful You and Special Celebrations:

I have used a stamp from this set on so many different cards. Today I used it on a graduation card that I am casing from Sharon Armstrong.


The Congratulations is from the retiring Special Celebrations set:

Recipe:
Base: Gorgeous Grape 8 1/2 X 5 1/2 Scored at 4 1/4
Layer 1: Smoky Slate 3 3/8 X 4 5/8
Layer 2: Gorgeous Grape 3 1/4 X 4 1/2
Top Layer Outside and Inside: Whisper White 3 X 4 1/4 – make 2
Inside Layer: Smoky Slate 3 3/8 X 4 5/8
Cap: Gorgeous Grape 1/2″ square
Diploma: Copy Paper 1/2″ X 5/8″ rolled up and tied with a double wrap of 2″ of colored twine
Tassle: 8″ colored with the Highland Heather Stampin’ Blend
- wrap twine 4 times around 1″ of cardstock
- cut the bottom ends and remove from cardstock
- slip the top ends on the end of your Take Your Pick tool
- tie another short piece of twine twice around 1/4″ from the top
- Use a glue dot to adhere the top to the middle of the cap
- punch a 1/16″ circle from Gorgeous Grape and put on top of the tassle
I used the Highland Heather Stampin’ Blend to color the dress and create sleeves then used a black journaler pen to color the edges of the sleeves. Ivory Stampin’ Blend was used for the legs and arms and Smoky Slate for the shadow. Wink of Stella was used to color the slip.
‘Congratulations’ was stamped in Versa Mark and then sprinkled with Silver Embossing Powder and heat set. The inside greeting is a retired Stampin’ Up! stamp.
Third Card with Two Favorite Retiring Items – Flourishing Phrases and the Pretty Label punch:

The Flourishing Phrases greeting set and the Special Celebrations set are excellent additions to your collection and you will use them over and over. I used Flourishing Phrases for a sympathy card in a Mystery Card Challenge. That is a challenge where you are given a specific list of supplies and measurements and you create a card with just those supplies.


Recipe:
- 1/2 sheet cardstock
- Designer Series Paper 3 X 5.5
- Coordinating Card Stock 3.25 X 5.5
- Stamp Set with words
- Punched Shape
- Ribbon
- Matching Ink
- Adhesive
I know, Sal, it was a fun challenge but I found out none of us avid crafters can make a card without blinging it up. I even had to add a few jewels.
Here is a card I made for my upline’s Mystery Card challenge that meets most of the criteria. I did use two ink pads, though.

SAL, Sharing A Love of stamping
Karen

LIft Me Up meets Wild West Balloon Adventures
Hello Stamping Friends,
Tomorrow starts a new sale from Stampin’ Up! Buy one Fast Fuse Adhesive and get two refills free. Fast fuse is stronger than our regular snail adhesive and the refills have 21.9 yards, about 67% more than a snail refill. Stampin’ Up! offered this sale last fall and sold out faster than anyone could imagine so they promised they would have the sale again, but it is only while supplies last and only for five days starting tomorrow, February 8, and ending February 12. So stock up now and save!
Use hostess code VJHRB73X if your order is under $150 and remember it is Sale A Bration days so every $50 order earns you a free product (and a special thank you gift from me)! Click to see the video:

Have you ever been on a hot air balloon ride? My Son In Law, Jonathan (Bud), gave Paul and I a ride for my birthday a couple of years ago and it was phenomenal! He has been a balloon pilot for Wild West Balloon Adventures in Steamboat Springs, Colorado for years.
With a balloon pilot in the family, the Lift Me Up stamp set with matching thinlits was a must have for me. It is on page 58 of the Annual Catalog; the matching Up & Away thinlits are on page 216 and have an extra-large balloon thinlit with smaller thinlits for the colors behind the main balloon so you can build your own balloon with no fussy cutting. My husband built this balloon birthday card for Jonathan casing one from Pinterest:

The birds are from the High Tide stamp set on page 140 of the Annual Catalog. The sun is from a retired set but we have a new stamp set in the Sale A Bration brochure which has the same type of sun image.

My daughter, Stacia, just announced that she and Jonathan are purchasing the Wild West Balloon Adventure Company of Steamboat Springs!! What a thrilling new chapter for them. Time for a celebration card!
I used the Amazing You free Sale A Bration stamp set shown above with the Lift Me Up stamps and Up & Away Thinlits to make a Double Z fold congratulations card for them:


I took a screen shot of one of the balloons shown on their website and then printed it on card stock to make the card personal. Julie Davison has a great video tutorial for this card at http://juliedavison.blogspot.com/search?q=Lift+Me+Up
Is going for a ride in a hot air balloon something you have dreamed of doing? Visit Steamboat Springs, Colorado, and Jonathan and Stacia will make the experience a wonderful one for you! Click on the picture to visit their website:

Don’t forget that Fast Fuse Five day sale!
SAL, Sail ALong – together you and I – for we can fly!
Karen

Dragonfly Congrats, Butterfly Flip Flop, Watermelon Curvy Keepsake
Hello Stamping Friends,
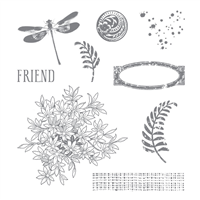
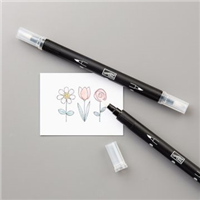
Dragonfly Congrats Card– Printable PDF File


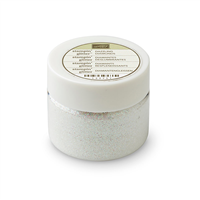
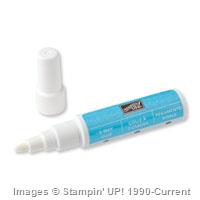
Spritzer Recipe: 3/4 spritz bottle of alcohol with 20 drops of ink. To dry faster get a higher alcohol content %, for example 91%.
Blender Pen Solution: In a one ounce eyedropper bottle, combine 1/3 parts Glycerin (found in cake decorating section), 2/3 parts distilled water, 1/4 teaspoon alcohol. 1) Remove pen tip (pull and twist gently) and lay the tips flat overnight in fluid. Next day: 2) Fill the pen barrel with the solution. 3)Place the pen tip back in the hollow by pushing gently- do not push the tip but glide it in holding on the sides.
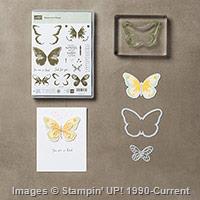
Thank you, Deb, for those instructions!! Here are the supplies, click on any image to go directly to the store.


Built for Free Using:My Stampin Blog
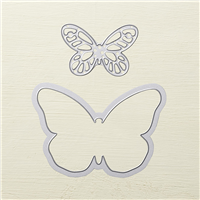
Butterfly Flip Flop Card – Printable PDF file
The outside:


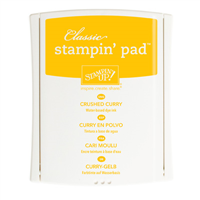
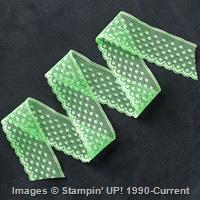
 Finally all the way over. Okay, so it really just took seconds but without a video I thought I’d better show the flip flop! The fun part was using almost every one of the Watercolor Wishes stamps as we did the three part stamping. We used Daffodil Delight – stamped off once for the first step, Crushed Curry for the second step, and Memento Black for step 3. Pinterest is full of charts of all different color combinations that you can use for gorgeous butterflies, just search on Watercolor Wings. The black satin ribbon (retired) was stamped with white craft ink for the greeting. The pictures don’t do it justice. Here are the supplies:
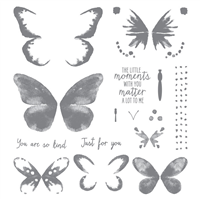


Built for Free Using:My Stampin Blog


 For extra detail, again with a 3″ piece of Whisper White, cut two parts with the slotted part of the Thinlit to be the watermelon rind. Glue them on the inside of the green.


Built for Free Using:My Stampin Blog

Welcome to my blog!

Sal Window to Products


