
 .
. 
 .
. April Shoebox Event with Lisa Christensen
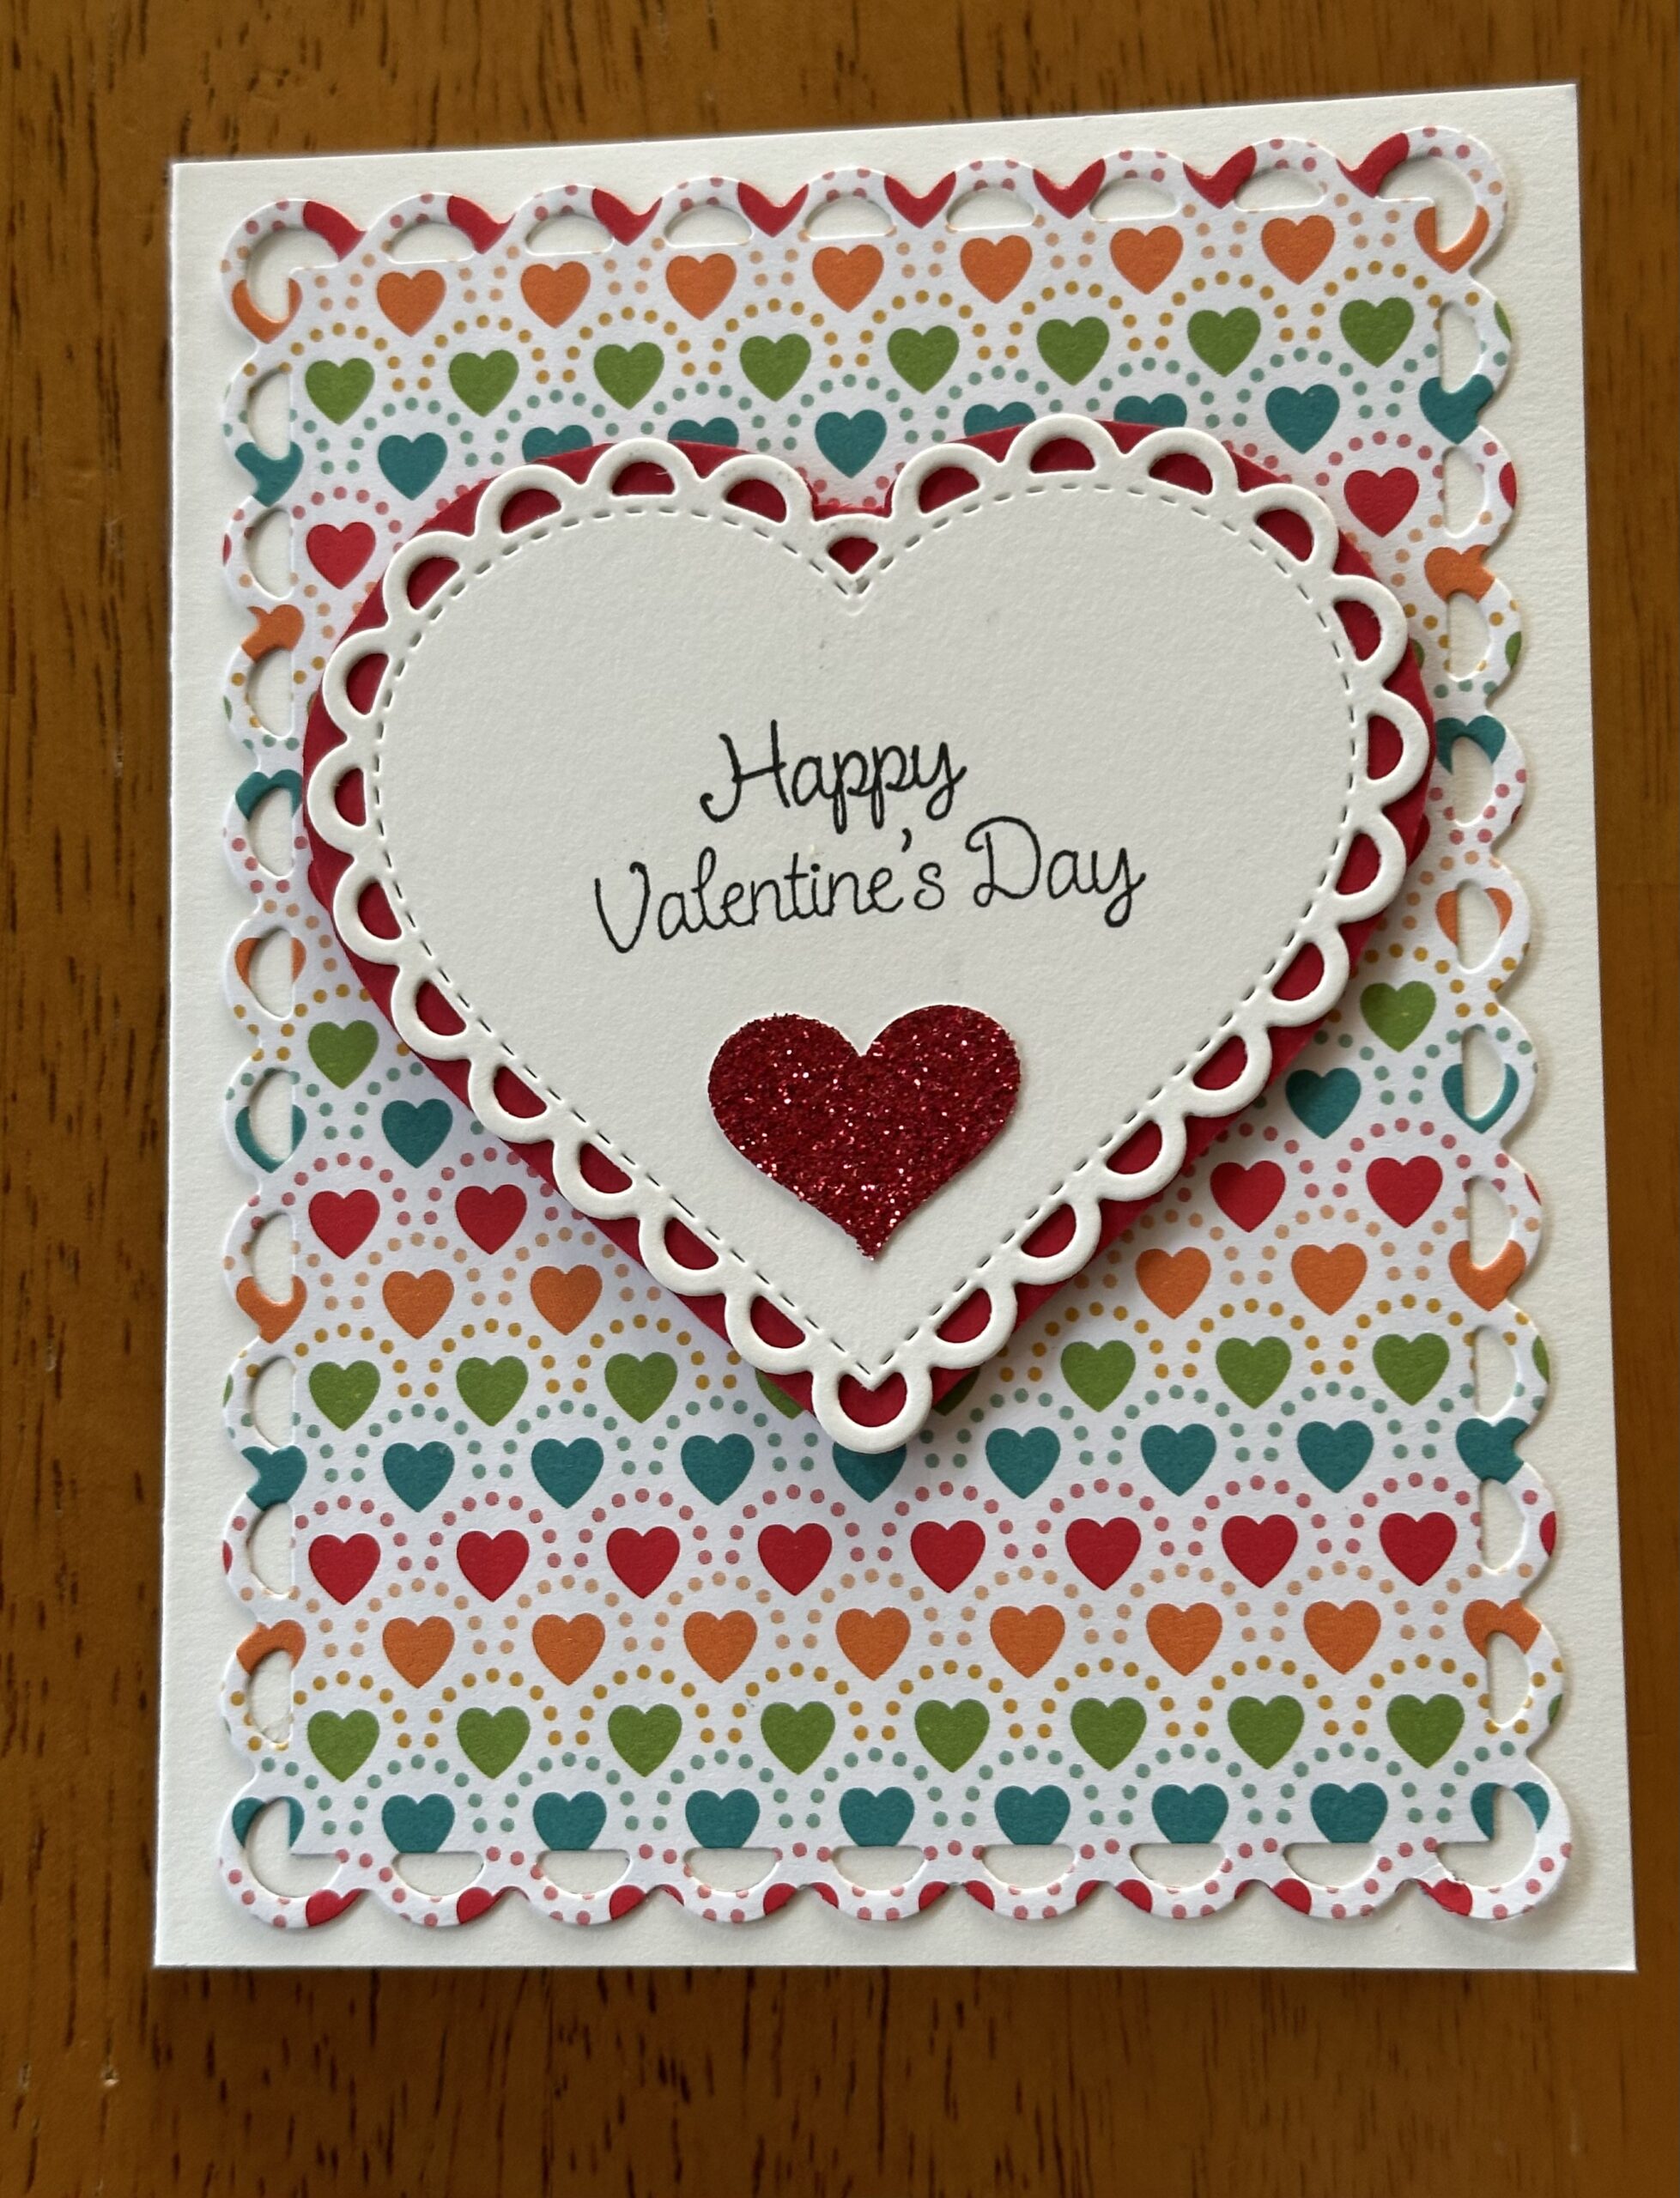
It is always a delight to meet with friends to create beautiful cards. This month Lisa Christensen was our hostess and her cards were lovely. This first one uses the Stampin’ Up! ‘Berry Blessings’ stamp set and the Stampin’ Up! ‘Sweet Strawberry’ stamp set and punch.

 . Oooh….can we look at it berry close?
Why sure, Sal!

My flowers were supposed to come off of the branch but the branch reminded me of all the little runners the strawberry plant puts out so I did it a bit different.
This set was available on Ebay if you missed it before it was retired by Stampin’ Up!:


The last cards I sent, I didn’t stamp a greeting on the inside so I could write a short letter. I enjoyed having more room for more words.
I do, Sal, and hopefully others like to read them!
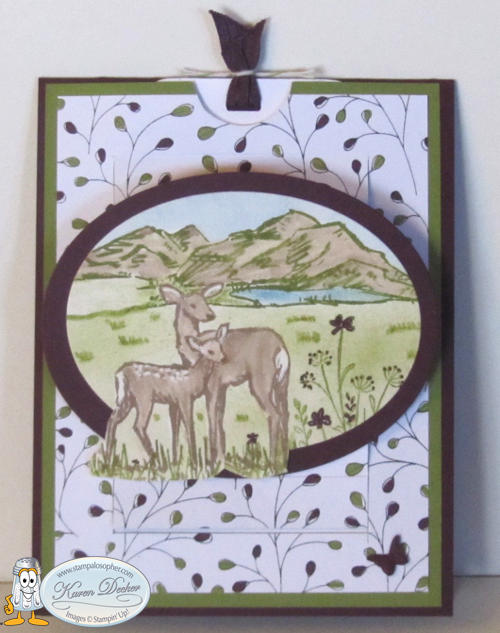
Lisa’s second card was an interesting and beautiful Z fold easel card! We could stamp with Happy Birthday or Happy Mother’s Day or….

Lisa used a die from the ‘Hand Penned Petal’ set for the flower and a die from the ‘Delicate Lace Edgelits Dies’ for the bottom. The greeting is a Close To My Heart greeting.

It’s like an upside down easel card.
True, we usually have the stop at the bottom but how wonderfully unique is this?!
Fancy front and room to write on the back (with a cute little fox in the DSP).

Is that one of those double bows you make wrapping it around your fingers?
It is, Sal. Following is a link to the Facebook Live where I showed crafters how to make the bow. I like that both tails come out from the back. Drag the minute line at the bottom to 28:20 to see the instructions.
I assume you have all those sets from your 15 years as a Stampin’ Up! demonstrator?!
No, Sal, and that is what makes shoebox events so fun. Everyone has different tastes and different sets for crafting.
Colorado’s Scrapbook Expo is happening next month, May 17 & 18th. Registration begins April 16 at 9:00 a.m.


Have a wonderful day!
SAL, See you At Lunch at the Expo on Friday
Karen
Riddle for the day:
Question: The more you take, the more you leave behind. What am I?
Answer: Footsteps!
Easter Basket Card and 3D
In my last post you saw all the cool cards I made with the Divinity Designs Alleluia die and stamp combo. I also purchased from them a basket die set, a pastel egg paper/die duo and a pastel prints 6X6 paper pad. With all these wonderful products I made these cards with different crosses and different eggs:
 .
.
And this one:
 .
.
With pastels you can even stamp on the paper as I did here for the inside of the cards:

I had Easter baskets sitting out with paper grass so I used that grass in the paper baskets.
A picture of the products might help you save words.
Good idea, Sal! And I will link Divinity Designs down below with little Sal in the computer.


That fourth screen shot is one of the pastel print papers. I used the Stampin’ Up! ‘Cross of Hope’ die and put the heart of the paper right in the middle of the ornate cross die. When I die cut the cross, I left the middle intact and put scotch tape on the back so the pieces wouldn’t come out in hopes the little heart would show. You’ll see more of that cross in the 3D baskets I made for the grandchildren. The greeting on the front comes from:

The layer on the front is the Stampin’ Up! Ornate Layers die and the inside greetings are from Stampin’ Up! ‘His Grace’. Check out my previous post ‘Easter Celebration’ to see the Alleluia die at work. There’s not much you need for a recipe on this card. It uses a standard base and layer. Here is a pdf you can print out with the standard layers.
Standard Layers.pdf printable doc
Let’s look at the little 3D baskets Paul and I made for the grandchildren:
 I added a little heart to the middle of these crosses since the paper heart didn’t stand out.
On the opposite side of the baskets I used the dove in ‘HIs Grace’ punched out with a circle punch and layered on a slightly larger circle in the same cardstock as the basket:
 .
. 
I cut out numerous eggs and glued matching ones back to back and added them to the basket before the candy. The boys baskets were purple and blue:
 .
. 
3D Basket Recipe
- Base: Cardstock of desired color, 6 X 6
- Score at 2 and 4
- Turn 90 degrees and score at 2 and 4
- Crease all score lines
- Adhere DSP squares to the four corner squares – measurements below
- Cut on the score lines to the middle score line twice on opposite sides
- The middle uncut part is the part to attach the handle
- Fold the sides up to meet each other
- Handle: cardstock of choice, 8 1/2 X 1/2
- Decorative Layer (X4): Divinity Designs Pastel DSP, 1 3/4 X 1 3/4, adhere before gluing basket together
- Ribbon: 12″ tied to handle
- Adhere cross on one side and dove on opposite side- see above for paper used for cross

It was a wonderful Easter with Tyler, Amber and the boys, Jaxson & Emmitt!
The boys had matching shirts!

We died eggs but then made deviled eggs out of them so a bit pointless but tradition is tradition!


The boys hunted Easter eggs in their lovely yard on a wonderful sunny day! (It snowed again on Monday!)

All hostess’ need a hostess gift and I found this cute rabbit holding a carrot around a vase of flowers. I couldn’t resist!
Jonathan & Stacia spent the day on the slopes with Emma, Joey and a friend!

You can’t always have both families and, you know, ski season is almost over!
I know, Sal. At least we got pictures.
Thanks for spending time with me today friends! Hopefully you have ideas for next year’s Easter cards.
SAL, SingALleuia
Karen

Riddle for the day:
Question: What 5 letter word typed in all capital letters can be read the same upside down?
Answer: SWIMS


March Shoebox with Joy Meadows as our Hostess
“Stack, Slice & Shuffle” is a fun technique that Joy taught us at our last shoebox event. It is like a quilt card, and with a stack of three designer series papers you can have three different looking cards in no time at all.


Joy used the Butterfly Kisses Designer Series Paper (DSP) on a black layer with a white base.
Recipe
- Base: White, 5 1/2 X 8 1/2, scored at 4 1/4
- Border: Black, 5 3/8 X 4 1/8 for a 1/16 reveal
- Stack of 3 different DSPs: 5 1/4 X 4
- Slice: Cut through all 3 at the same time at a diagonal about 1/2″ over on bottom and about 1″ down on right; set aside the smaller pile of 3
- Slice again: Cut through the other pile of 3 at a diagonal about 1/2″ over and to about the middle
- Note: The 1/2″ over and 1″ down are not necessarily perfect measurements, diagonals can be random
- Shuffle: You should now have three separate piles.
- Leave one pile as is
- Remove the top piece of the second pile and put it on the bottom
- Remove two pieces of the third pile and put them on the bottom
- Base of your shuffled cards (X3): white, 5 1/4 X 4
- Adhere your three separate patterns to the bases
- Embellish with a die cut mounted to cover where all three DSPs meet; Joy used Stampin’ Up! Deckled Circles with the largest being 1 3/4 and the smaller is 1 3/8 popped up on the larger
- Stamp ‘Hello’ in Memento Black; Hello is from SU Irresistable Blooms
- Inside Strip: DSP, 3/4 X 4
- Butterflies: Black to match the border; SU Butterfly Gala Punch for one large and one small for inside; use a black marker to make antennae
- Brass Butterflies around the greeting and a sparkly gem on butterfly complete the embellishments
Time to make a stack of Christmas cards to get ahead of the December push
That would be good, Sal! If I did two sets each month I would be ahead of the game.
Thank you, Joy, for a fun new technique!
Joy had an additional card for us to make at the event!

The picture doesn’t do it justice. The base is soft succulent with a very vanilla layer embossed with a cobblestone looking embossing folder. The dies for the circles and the greeting are the Stampin’ Up! Everyday Details Dies. The large circle is 3 1/4 and the top circle is 2 1/2. The bird is from the Flight & Airy DSP from Stampin’ Up. The glittery gem exactly matches the soft succulent. The happy birthday greeting is Stampin’ Up!’s Birthday Blossoms stamp set on a 2 3/4 X 1 3/8 rectangle in the Everyday Details Dies.
Another beautiful design by Joy Meadows!
Thank you for stopping by today!
SAL, Sharing A Love
Karen
Riddle for the day:
Q= How do you spell COW in thirteen letters?
A= SEE O DOUBLE YOU
Paul’s Birthday Celebration
Time for birthday cards! I really can make simple cards! This one wasn’t a fun fold just a simple one, but I think the monochromatic look gives it a wow factor.

For our friend Dan!
 .
.
For Paul!
 .
.
Recipe
- Base: Starry Sky, 5 1/2 X 8 1/2, Scored at 4 1/4
- Strips on Front (3): DSP, 1/2″ each, mount with 1/8″ borders between
- White Layer on Front: Basic White, 2 1/8 X 5 1/4
- White Layer Inside: Basic White, 4 X 5 1/4
- Side Strip on Inside: DSP, 1 X 5 1/4
- Stamp Sets:
- Just Believe Stampin’ Up! for greenery stamped in Blueberry Bushel
- Outside ‘Happy Birthday’ is from Go To Greetings Stampin’ Up!
- Inside ‘May Good Things Grow’ – Dragonfly Garden
- Inside ‘No One Deserves…’, ‘Love you so much’, – Flowering Tulips
- Embellishments
- 3 Brass Butterflies
- 3 Buttons with 3 navy blue gems for centers (attach with glue dots- the little glue dots on the gems won’t hold)
Christine’s valentine card for the shoebox event must have given you a bug for buttons!
Yes, Sal! Before her card – see it here – I hadn’t used a button for years but I have a huge stash of them so I experimented and really liked the result.
Paul received a card from Jo and Dan and it was so fun! He is looking forward to fishing trips this summer and Jo capitalized on his love of fishing. The pole has a layer of gold foil and the hooks on the outside and inside are silver foil but the camera didn’t ‘catch’ those details.


For Paul’s birthday we spent the weekend in Breckenridge, CO. It was spring break for many so the town was crowded but still fun to ride a gondola from where we were staying up on the mountain to the downtown restaurant. Stacia, Jonathan, Emma and Joey met us for supper Friday night. They live in Steamboat so they could have supper and then drive home. We had an evening meal here before we left with Amber, Tyler, Jaxson & Emmitt since it was too far for them to drive.

Swiss Haven fondue supper!

Dessert time!

Paul’s birthday was well celebrated and I know he felt loved!
Thanks for stopping by!
SAL, Scrapbooking A Little (digitally)
Karen
Riddle for the day:
Q= What goes up but never comes down?
A= Your Age
Jaxson Has The ‘Card’ Bug
My grandsons came to spend the night and Jaxson’s first words were – “Can we make a card?” You can’t say no to that unless supper is burning! I went to the blog and showed him cards from the Recipe Box to get his creative juices flowing. He saw the turtle cards I made for their birthdays a couple years ago and he wanted to make a Ninja turtle card. I have two turtle sets in my Stampin’ Up! stash – ‘Turtle Friends’ and ‘Back On Your Feet’. My heart soared as he said “I want to make it for my brother, I want to say “Best Brother Ever”. So I pulled out ‘Family Reunion’, ‘A Grand Kid’, and ‘Skating By’. Jaxson is seven years old, Emmitt is six.

I cut him a base of real red with a layer of black.

He stamped the boy from ‘Skating By’ (thank goodness for a stamparatus) adding the trophy.
He wanted the turtle on the skate board but facing left. (your guess is as good as mine as to why). While I read my own technique sheet on reversing an image, he said he needed to make sewer pipes for the turtles. (To make the reverse image, you stamp 3 times on a silicon pad using the stamparatus, and then place your card stock on the silicon pad and rub with your chuckie!) Jaxson followed instructions so well!
That is a tool, Sal, that we use to rub the image on the stamparatus to get even pressure.
While I fussy cut the turtle image – now in reverse – he colored the boy image and cut out the pipes he had made on copy paper. Then he wanted the turtle to be riding the skate board. So he stamped and I cut out a skate board.

Jaxson knew the names and colors of their bandanas, though the markers were drying up and giving him grief:
- Michelangelo – orange
- Raphael – red
- Leonardo – blue
- Donatello – purple
I guided him in using the blue marker to color the back of the stamp that said “Best grandkid ever”, coloring only the ‘best’ and the ‘ever’. He stamped that and then added ‘brother’, from the Family Reunion stamp set, in the middle. He stamped the little turtles and colored them and then lastly stamped the big turtle on his back. Patience was wearing thin as he wanted to be done and Emmitt was growing impatient with playing by himself so as Jaxson stamped the last turtle – he inked it and then—-dropped it on the words! Panic! He grabbed a marker and just started coloring over everything. I reassured him all errors are fixable and removed the right hand layer and the turtle and skateboard and he redid that side and reattached the skateboard and turtle.

Emmitt finally got his card! Now Jaxson was sad because there wasn’t time for him to make his football card.
I cut a white card base and he stamped a football inside a flourish from the ‘Great Sport’ stamp set so he had something before he ran to play. They came again this last weekend and he made many cards with his football heroes but he just hand drew what he wanted and didn’t ask to use stamps. Hmmm…..might have been a bit overwhelming for him to stamp!
 .
.
He ‘learned’ to ink and stamp with blocks and the stamparatus, he learned to do a reverse image, he learned to do a partial image by coloring only part of the words and he learned to fix your mistakes. I was just obliging his wishes for the words he wanted and an image going the other way!
So you want us to feel sorry for you trying to meet his demands?!
I did have to say we didn’t have room for the earpods on a phone image he wanted to add to the turtle.
When Papa got home, he ran to show him the card and the first thing he said was, “Grandma made me do the side all over.” So I guess I did traumatize him. I used to encourage redos in classes as well. I would hurry to cut a new layer when someone messed up their card. I wanted them to go home with one that they were proud of making. I don’t want them to drop it in the trashcan when they get home.
I thought your new year’s resolution was to quit being a perfectionist?!
It’s March, it went away with the exercise routine!
Thank you for visiting! Have a wonderful week.
SAL, Such Amazing Little ones
Karen
Riddle For The Day:
Q – Why did the teddy bear say no to dessert?
A – Because he was stuffed.
Sympathy & Get Well with Eden’s Garden
Oh how sad it makes us to need to prepare a sympathy card; but remember that as you craft your card you can pray for their family and friends. I am using the Eden’s Garden Suite from my Stampin’ Up! stash. I also had the Forever Gold Specialty Laser cut paper to use on the card and Lovely Words dies for the inside. Take a look:

SU Delicate Dahlias stamp set had the greeting I used.

I made a get well card at the same time:

The greeting is from SU Speedy Recovery.
How did you get gold foil on the little leaves?
Well, Sal, it was the DSP itself that had gold foil. I didn’t use the Minc machine to foil, that would be a challenge! I do have a pen that I could use to color part of a DSP and then run it through the machine with gold foil but that is a challenge for another day.
Recipe
- Base: Soft Succulent, 4 1/4 X 11, Scored at 5 1/2
- Top: Ever Eden Foil Designer Series Paper (DSP), 3 1/2 X 4
- Top Middle: Ever Eden Cotton Paper, 3/4 X 4 1/4, gives the look of a belly band
- Top Bottom: Ever Eden plain DSP, 3/4 X 4
- Gold Flourish: Forever Gold Specialty Paper, already laser cut so just punch out
- Greeting: Soft Succulent, 2 1/2 X 2 1/2 stamp then cut with #4 circle die (4th from smallest)
- Stamp greeting in Evening Evergreen using stamparatus so you can stamp twice for darker greeting
- Sympathy: Delicate Dahlias stamp set; Get Well: Speedy Recovery stamp set
- Inside Layer 1: Cotton Paper, 4 X 5 1/4
- Inside Layer 2: Ever Eden plain DSP matching front bottom DSP, 3 3/4 X 5
- Inside Layer 3: Ever Eden Foil Side of DSP, 3 1/2 X 4 3/4, die cut ‘Hugs’ from Lovely Words die
- Hugs Layer: Gold Foil, 2 1/2 X 1 1/2, die cut the ‘Hugs’ only to layer on the DSP of layer 3
- Bow: Evening Evergreen, 8″
Easy Peasy! Especially if you have the measurements. Getting those correct took a bit of time.
Imagine what you could do with other DSPs!
Exactly, Sal, with two coordinating DSPs and two coordinating card stocks for the base and the band you could do a lot.
So you’re going to add to your stash of ready to go cards by making several?
Well, I really don’t have much of a stash, and I have a friend who thinks its bad luck to make sympathy cards, and you pray a lot longer when you aren’t just pulling from the stash, and….. So, the short answer is ‘no’, I need to move on to the next needed cards.
Thank you for spending a bit of time with me today as we…
bring a pinch of creativity to spice up your crafting world!
SAL, Sending A Little prayer with each card
Karen
Riddle for the day:
Q=What do you call a bear with no teeth?
A=A gummy bear!
Valentine Fun
I have one more valentine entry before we start thinking about Easter cards! This time I am using a Kokorosa Custom cutting die called a ‘Big Love Heart Background Die. I am calling it a heart collage die! I purchased a similar collage die a while back and I cut it apart to die cut the pieces. See that card HERE. This time I left all the die pieces connected and just ran it through that way. It worked much better and I had main pieces for two cards.
 If you look closely, you can see that the left one has the dotted designer series paper (DSP) on the outside border with the real red on the inside which frames the pieces. The card on the right has the real red on the outside with the dotted designer series paper on the inside.
To keep the card from being too busy, I used only three different DSP designs. I could run the diagonal paper all at once but I selectively added the three hearts and the three ‘love’ letters. The DSP is from……
Let me guess…… Teaspoon of Fun?!
Right O’! And made by Pixie Dust Designs.

It is a 6 X 6 Pad with 24 double sided sheets in 12 designs. I wish it said what card weight it is because it is much thicker than my other DSP sheets. It made the mini mailbox project shown below much easier since I didn’t need to add layers for sturdiness. Can you pick out which sheets I used on the cards? Here they are again:
 .
. 
For the inside of the valentines, I used the Lovely Words Thinlits Dies from Stampin’ Up! The die cuts out the circle leaving the word ‘hugs’.
 .
. 
I used the ‘Embrace Each Moment’ Stampin’ Up! set for the greetings on both cards. The Stampin’ Up! ‘Lakeside Framelits Die cut out the ‘wishing you joy & blessings’ and I stamped the holding hands in grey, stamping off and then stamping on white so it was very light and I could stamp the ‘you will always be my forever’ in red on top of the grey. I cut out the three circles with the Layering Circles Dies rather than try to write over the DSP.
 .
.  .
.  .
.
For my other valentine project, I made a mini mailbox! They are all over pinterest and I wanted to try my hand at creating one. I wrote down directions for three different ones and then took ideas from each and made my own design with a few extras- I called it ‘Paul’s Mailbox’!
 .
.
 .
.

It holds two Hershey Nuggets. I didn’t glue the nuggets to the little box so you could eat your chocolates and not ruin the little box. The two sided DSP was great for having a fun inside and for creating a flag by centering a heart from the pink background side to punch with the Mini Banner Punch. The other side then matches the box. You do need to be careful because the DSP is so thick. I am used to breaking the fibers to get a curve with the bone folder but that ruined the paper, so just carefully fold your base with your fingers if you have stiff DSP.
How true – and several others that I really should keep since I do use them. I just hoped to make room by selling all the wooden ones but it would be better to make room by taking them off the blocks and putting them in CD cases.
Recipe
- Base: DSP, 1 1/2″ X 4 1/2″, score at 1″ and 3 7/8″, Burnish the score lines and form a gentle curve, adhere at bottom
- Back and the Door: DSP, 1″ X 3 7/8″, score each end at 1 1/4 before rounding the ends.
- I made a template out of white cardstock to fussy cut a rounded end; you could also use the 2nd smallest circle framelit to get a nice rounded cut but I was making multiples and either cut the end too much or too little with the framelit so I just fussy cut from a template. It took a couple tries to get the size correct on the template because I wanted the back to fit snugly and not need glued. You can make a strip 1 1/2 X 1/4, scored at 3/4, to glue the back in place but if it fits snugly you can actually use it to push the chocolates out the front! Adhere this strip to the bottom of the mailbox coming in 1/16″ from the back. I adhered so the opposite side of the DSP with the pink background was facing up.

 Looks like a large bandaid!
- Flag & Flagpole: DSP strip, 3 1/4 X 3/16, score at 1 5/8. The diagonal striped paper in the DSP was perfect for cutting a dark red strip that would have the same sheen as the mailbox pieces. I used the Mini Banner Punch for the flag centering a heart from the DSP. Manually, you could use a 3/4 long by 5/8 high square and cut one side to be a banner. Fold the flag pole in half and glue the flag between the front and back close to the fold. On the side of the mailbox punch a small hole 5/8″ up from the bottom and 1/2″ over from the front. Punch a hole 1/4″ up on the flagpole ( I used a paper piercer tool for the holes) and use a tiny brad to attach the flagpole to the mailbox. Your flag moves!! When you put in the chocolates, turn the mailbox upside down and put in the top nugget first, then the second nugget to avoid getting stuck on the brad on the inside.
- Handle: DSP with pink background, the handle in the ‘Sliding Door Framelits Dies’ fit perfectly over the heart. It made the handle look like it was a die cut heart but it is really a circle. Fold the handle right at the circle , punch a hole 1/2″ down and 1/2″ over on the front flap of the mailbox, punch a hole in the handle and adhere with a brad. Put a bit of glue on the backside of the handle since you don’t want it to move.
- Heart: Basic White scrap, I found a perfect sized heart in the Circle Card Thinlits die set. Stamp the greeting from ‘Love & Happiness’ stamp set with Real Red ink and then die cut. Sign then mount with glue dots over the brad.
- Envelope: Scrap of white cut 1″ X 5/8″ and scrap of red for a tiny heart. Score the front diagonally corner to corner for an envelope look or use the Kokorosa cutting die which has three sizes of envelopes and three little hearts to die cut. I purchased through InLoveArts but it came in Kokorosa packaging.


I thought you were trying to make more room in your craft closet.
Yes, I am beginning to think it is more about having new things to craft with than creating a stash to use. Wait ’til you see my Easter cards!
Let me show you the valentine gift/cards I received:
Joy Meadows made a beautiful valentine card:
 .
. 
The little red heart was a gift from Sharon Fincham last year!
Lisa Christensen had a cute bag of gummies for me:
 .
.  .
.
I love-love-love the heart on the back with the letters from ‘Valentine’ in red on the scripture John 3:16!
I want to make some Easter gifts like this so I measured out the cuts and score lines:
Lisa’s was 12 3/4 X 3 1/2 scored at 4 7/8, 6 1/4, 11 1/4 with the 1 1/2 edge punched with a scallop punch. The front cutout is a 2 1/8″ square. The heart is 3 3/4″. The greeting is a die cut 2 X 1 3/8 with a to/from tag that is 1 3/4 X 5/8. She stapled a clear bag with goodies to the back of the bag, added tiny velcro under the flap and made a red bow for the top.
That is a problem so I adjusted the measurements for a 12″ piece of paper:
- 12 X 3 1/2, scored at 4 1/2, 5 7/8, 10 1/2 still leaving 1 1/2 for the flap.
But you just purchased 6 X 6 Easter paper pads.
Another problem for sure, so I adjusted again only this time added glue tabs since I need three cuts of paper.
- Front: DSP, 6 X 3 1/2, scored at 4 1/2 leaving 1 1/2 for the base tab. Die cut a square in the front 3/4″ from bottom and sides.
- Back: DSP, 6 X 3 1/2, scored at 4 5/8 leaving a 1 3/8 for the base tab. The extra length in the back makes the front curve out nicely.
- Flap: Matching card stock 2″ X 3 1/2′ scored at 1/2″
I haven’t made them yet but now I have instructions that fit my paper!
And Jaxson made a card for Papa and Grandma and a card for Ruger. Both had treats inside:

 Can you see the wings & arrow on cupid?
 .
. 
Jaxson is in first grade and loves to draw!
Paul took me to Gabriels in Sedalia and we had a table by the fireplace!
 .
.  .
.
Next up is Paul’s birthday in Breckenridge! I had better get busy on his card!
Thanks for stopping by!
for a pinch of creativity to spice up your crafting world!
SAL, Such A Lot of words today
Karen
Riddle for the day:
Q= How are diarrhea and electric cars alike?
A= With both you hope to get home in time!
Valentine’s Day Pop Up Card
Would you like to see what I made for the grandchildren’s valentines? Do you ever see a card creation and say -“That is perfect”- what do I need to buy to make it? That was me when I opened a post of Deb Valder’s at Teaspoon of Fun. She had a pop up card with teddy bears! Yep – had to have the stamp, and the dies! Check it out:

 .
.


You pull the little heart to pull up the inside of the card. When it is flat it fits in an A2 envelope. The ‘Always In My Heart’ Stampin’ Up! set was the pull out greeting.
I will link the Stole My Heart stamp set at Teaspoon of Fun at the end with little Sal in the computer. The dies are available as well at Teaspoon of Fun.
We made these pop up cards years ago in club with the cutting and scoring done manually. I found the instructions carefully documented at Splitcoaststampers. If you would like those instructions click HERE.
 .
. 
 .
. 


To see the products I used on these cards, click HERE.
Do those cards open up sideways as well?
No, Sal, those cards are a vertical card with a full base that opens up. On the children’s valentines, I didn’t make a full base like those, I left enough space before the “Hi there, Valentine”, to write their name with a white gel pen. These are the products I used that I purchased from Teaspoon of Fun:

 .
.  .
. 
And here is a video from Deb Valder of Teasoon of Fun.
Recipe
- Base: Real Red, 4 1/4 X 5 1/2, Diecut with the large rectangle die in the ArtZy die set
- Stamp Greeting in lower section
- Pop Up Feature: 4 1/4 X 5 1/2, Diecut with the large rectangle die in the ArtZy die set
- Pull Out Panel: Basic White, 3 X 4 3/8
- Stamp greeting before adhering
- Top Layer: Basic White, 4 X 5, Diecut with the smaller rectangular die of the set -burnish score lines
- Flip this over and adhere the small rectangle cut out of Basic White to the 1/2″ bottom of the flap
- Place foam strips around the sides and bottom of the pop up feature and adhere to card base
- Embellish:
- Scraps of red and white, Cut two circles & heart pieces and adhere to both sides of the pull out panel
- Love Designer series Paper (X2), 2 1/2 X 1 1/2 , Diecut with larger recrtangle; make two
- Love Designer series Paper, 2 1/2 X 1/2, Diecut with smallest rectangle
- Bears: Stole My Heart Stamp Set & Die, Basic White 3 1/2 X 3 1/2
- Stamp in Memento Black Ink, Die cut with die in set
- Copic Markers, cheeks- RV11, Bears-E31, E33, E13, Heart-R24, R27, R59
- Love Flourish: Love Designer Series Paper, 2 1/4 X 1 1/2 (I used the same DSP as the small rectangle)
- Cut two additional flourishes in real red and layer the three
- Heart: Many Hearts Dies
- Outside Heart, Real Red, 2 1/2 X 2 1/2
- Inside Heart, Basic White, 2 3/4 X 2 1/2 with this set of dies you can glue the red directly to the white
That’s not so complicated when you show a video and your dimensions and all the products you used.
Well, Sal, I list those so I have a good start when I make another. My card journaling so to speak.
I hope my journal is useful to some of my followers!
SAL, Send A Love letter
Karen
Sal will take you to Teaspoon of Fun!
Welcome to my blog!

Sal Window to Products


